Configuring bins
Aloha Kitchen can display bulk production item counts, such as fries. You can set up a bin to track individual items or you can track like items using the Quick Count tracking item feature, both of which are defined in the POS. For example, if you have fries set up as a single item, you would simply count fries at the item level. If you have multiple items for the same item, such as fries with no charge and fries with an associated price, or if fries are included with many items, such as ala carte and fries with a burger, then you need to use tracking items to form a relationship between those multiple item IDs.
A bin can either be defined to display a single count of items needing to be prepared or display a quantitative number. For a quantitative number, the first number is the total count of items ordered but not yet prepared, that are needed in the next n minutes. The second number is the remaining count of items ordered, but not yet prepared.
You can configure three types of bins: simple, production, and forecast. Once you configure your bins, you must assign the bin to a kitchen screen, either as a metric on the Metrics bar, or to a bin area as part of the kitchen screen itself.
Reference: Refer to the Forecast Bins Feature Focus Guide - HKS359 for more information on configuring and using bins.
Configuring a simple Bin
A simple bin displays on the metrics bar, or can be used in the bin area of a kitchen screen. Aloha Kitchen automatically updates the simple bin state from pending to cooking and require no interaction.
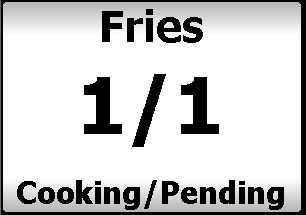
Simple bins go through the following states:
- Pending — A bin item count appears with the defined 'Pending label' from when an item is ordered until the system calculates the item should be cooking. This alerts you to stage or prepare a bin item for cooking.
- Cooking — The system changes a simple bin from pending to cooking based on the course target time for an order and the 'Cook time threshold in seconds' value. A simple bin appears in the cooking state for the duration of the 'Cook time threshold in seconds' defined for each bin. At the completion of the 'Cook time,' the cooking bin count is removed from the cooking state and are considered prepared.
To configure a simple bin:
- With Kitchen selected in the product panel, select Maintenance > Kitchen Configuration > Bin.
- Click the New drop-down arrow, select either Item or Tracking Item as the type, and click OK.
- Type a name for the bin that identifies it with the tracking item.
.png)
- Select an item from the drop-down list. If you selected 'Item' as the Item type, then the system displays an Item drop-down list. If you selected 'Tracking item,' then the system displays a Tracking item drop-down list.
- Select Simple bin from the 'Bin type' drop-down list.
- Type the number of seconds, from 0-99999 seconds, in 'Cook time threshold in seconds' to define the cook time for the bin.
- Type the number of decimal points, from 0 to 3, from the 'Precision' option to display for the bin. For example, select 2 is you want to the count to display as 0.00.
- Click Save.
- Repeat this procedure for each simple bin you want to configure.
- Click Close to exit the Bin function.
Add a simple bin to the metric bar
You can add a simple bin to the Metrics bar of a kitchen screen. Production bins are not supported on the Metrics bar. You must first configure a metric for the bin, then attach the bin to the kitchen screen.

To configure a metric for a simple bin:
- With Kitchen selected in the product panel, select Maintenance > Kitchen Configuration > Metrics > Metric tab.
- Click the New drop-down arrow, select Bin, and click OK.
- Type a name for the metric that identifies it with the bin item. In most cases, this should match the bin name.
- Select the bin from the 'Bin' drop-down list. Only simple bins that are not already assigned to the bin area of a kitchen screen appear for selection.
- Click Save.
- Repeat this procedure for other bins you want to appear on the metrics bar.
- Click Close to exit the Metrics function.
To attach a bin metric to appear on the Metrics bar:
- With Kitchen selected in the product panel, select Maintenance > Hardware > Kitchen Screen.
- Select a kitchen screen from the 'Kitchen Screen' drop-down list.
- Select the Design tab.
- Select the Metrics subtab.
- Click Add. The system adds a blank row under the 'Metrics' group bar.
- Under 'Metric,' select a bin you configured as a metric from the 'Metric' drop-down list.
- Repeat steps 5 and 6 to add other metrics to the Metrics bar.
- Click Save.
- Repeat this procedure if you have other kitchen screens to which you want to attach a bin metric.
- Click Close to exit the Kitchen Screens function.
Configuring a production bin
A production bin offers quantitative measurements for items and require interaction from the production employee in the same way as you start items using a production screen. These bins affect individual item status and give more detailed information than a simple bin.
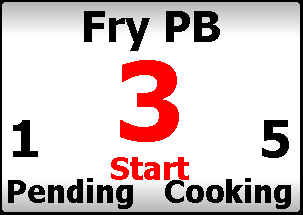
Production bins go through the following states:
- Pending — A bin item count appears with the defined 'Pending label' for the duration of the 'Bin pending threshold.' This alerts production employees to stage or prepare a bin item for cooking.
- Start — A bin item count appears in the start bin area to alert a production employee to start cooking the indicated number of bin items. The start number includes any bin items within the 'Cook time threshold' plus any bin items within the defined 'Combine time.' An alert appears if a production employee has not started a bin within the 'Unstarted alert time' seconds.
- Cooking — A production employee selects the bin and touches 'Start' on a touch-screen or bump bar to inform the system the bin items, up to the defined 'Maximum start quantity,' are cooking. A bin item appears in the cooking state for the duration of the 'Cook time' defined for each bin. At the completion of the 'Cook time,' the cooking bin count is removed from the cooking state and are considered prepared.
Production bin timing

- The target time of an item in a production bin is based on coursing rules, other items on the course, etc. In this timing example, we will use 8:00 minutes as the target time.
- The system calculates when a bin item appears in the 'Start' portion based on the target time, less the 'Cook time threshold'.
- The system calculates when a bin item appears in the 'Pending' portion based on the target time, less the 'Cook time threshold,' less the 'Bin pending threshold.'
- If you select zero as the 'Bin pending threshold,' items show as pending immediately when a course is active.
To configure a production bin:
- With Kitchen selected in the product panel, select Maintenance > Kitchen Configuration > Bins.
- Click the New drop-down arrow, select either Item or Tracking Item as the type, and click OK.
- Type a name for the bin.
.png)
- Select an item from the drop-down list. If you selected 'Item' as the Item type, then the system displays an Item drop-down list. If you selected 'Tracking item,' then the system displays a Tracking item drop-down list.
- Select Production bin from the 'Bin' drop-down list. The system adds additional fields to complete.
- Type the number of seconds, from 0 - 99999, in 'Cook time threshold in seconds' to define the threshold to use as the cook time for the bin. The 'Cook time threshold' value should be greater than the 'Cook time' value to account for finishing other tasks, counting out the bin items, and placing them in kitchen equipment for cooking.
- Type the text to display for the pending total for the bin cell, in 'Pending label.' The default text is "Pending."
- Type the text to display for the start total for the bin cell, in 'Start label.' The default text is "Start."
- Type the text to display for the cooking total for the bin cell, in 'Cooking label.' The default text is "Cooking."
- Type the number of seconds, from 0 - 9999, in 'Unstarted alert time,' to alert a production employee when a bin has not been started.
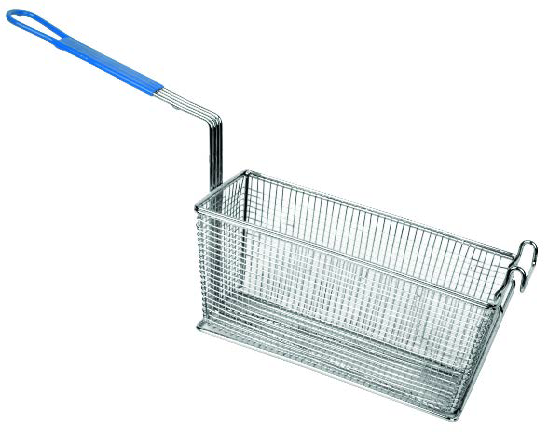
- Type the number of orders, from 0 - 9999, in 'Maximum start quantity,' that you can cook each time you touch the start action. This should equal the number of items you can fit and cook in a piece of kitchen equipment at one time. For example, if you can cook six orders of fries in a a fry basket at once, type '6' in 'Maximum start quantity.'
- Type the number of seconds, from 0 - 9999, beyond the target time for which you want to include additional bin items in the start count in 'Combine item time.' This improves the efficiency of any station by cooking the maximum number of bin items currently needed or needed in the near future. We recommend you base this time on the post-cooking hold time for each bin item. For example, if fries hold their temperature for 60 seconds after cooking, set the 'Combine item time' value to 60.
- Type the cook time, from 0 - 9999 seconds, in 'Cook time,' to display the item in the cooking area before marking the item as prepared and having the item disappear from the bin.
- Click Save.
- Repeat this procedure for any other production bin you want to configure.
- Click Close to exit the Bin function.
Adding a simple or production bin to a bin area
You can add a simple or production bin to a bin area configured on a kitchen screen; however, it is most used for production bins. You must first enable the bin area to show on a kitchen screen, then attach the bin to the kitchen screen, using the Design tab.
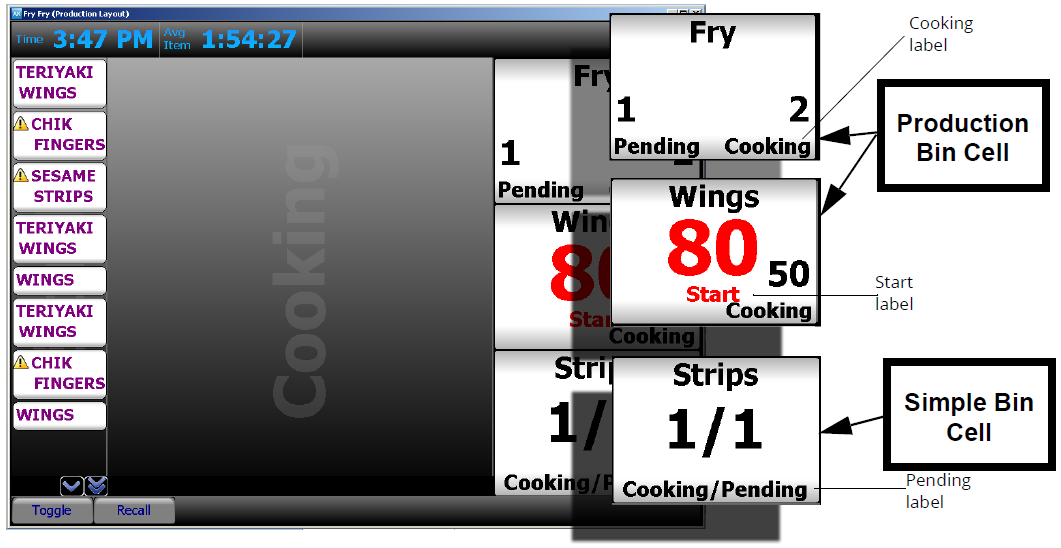
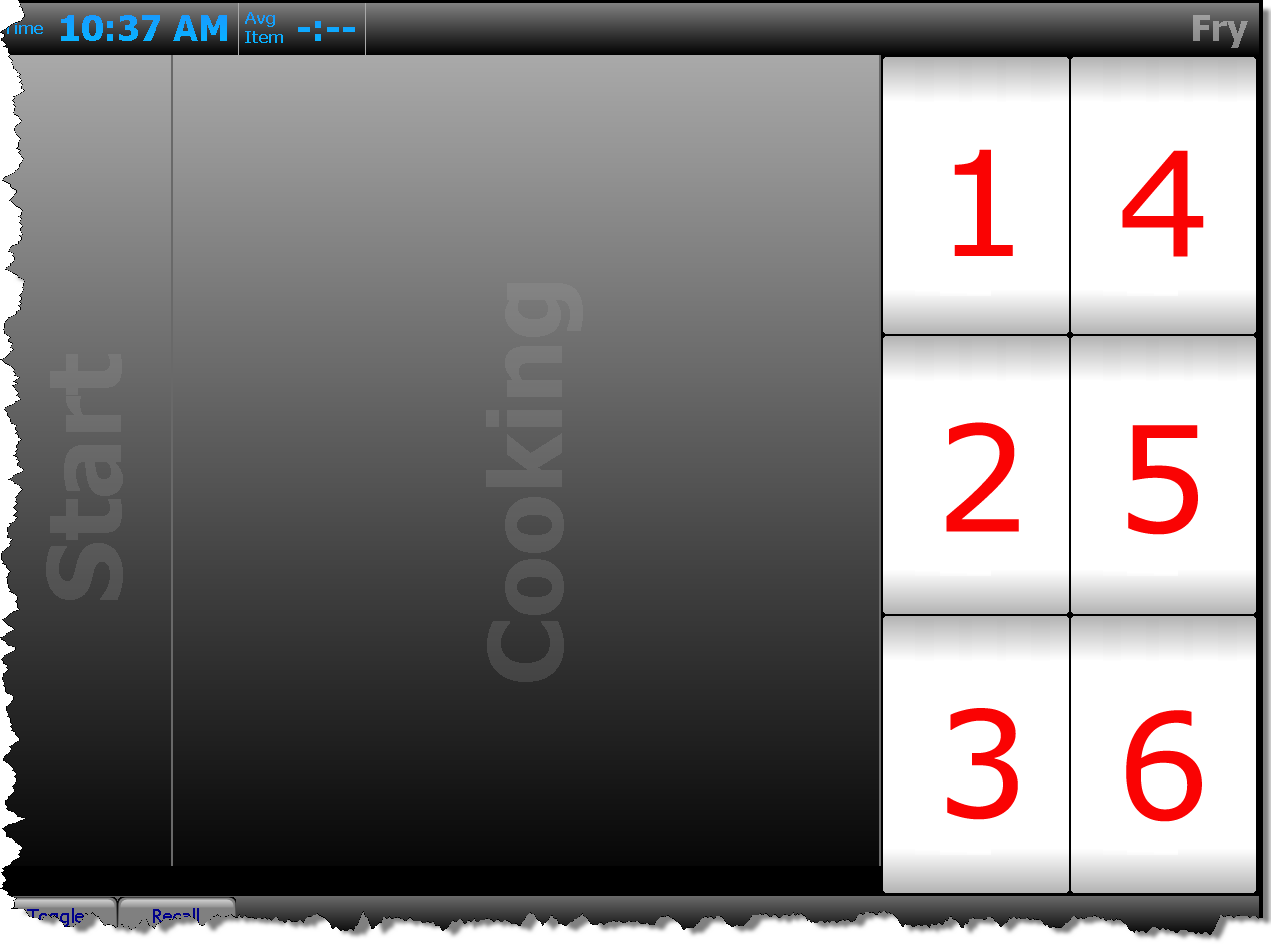
The illustration of the bin area at 30 percent of the right side of the kitchen screen and shows the behavior of both a simple bin and a production bin.
The bottom magnified cell, a simple bin, displays a simple visual count of pending and cooking items. A simple bin requires no interaction. The pending label indicates upcoming bin items to allow you to prepare the items for cooking. The simple bin changes the status to cooking based on the cook time of the bin item and the target time of the course. The simple bin automatically decreases the cooking count at the end of the cook time for each bin item.
The top and middle magnified cells, production bins, display three counts. The pending count indicates the number of bin items you need in the foreseeable future, including items that are delayed and not yet started. The production bin changes the status to start, based on the cook time of the bin item, the cook time threshold, the combine time, and the course target time. A production bin requires you to interact with the bin, using the bump bar or touch screen. Select the production bin and press 'Start bin.' The 'Maximum start quantity' of items appears as 'Cooking' each time you press start.
To add a simple or production bin to a bin area:
- With Kitchen selected in the product panel, select Maintenance > Hardware > Kitchen Screen.
- Select a kitchen screen from the 'Kitchen Screen' drop-down list.
- Under the 'Display options' group bar, configure the following:
- Select Show Bin to display the bin area on the kitchen screen.
- Select the position of the screen from the 'Bin position' drop-down list to define where you want the bin area to display.
- Type the percentage of the screen to use for the bin area.
- Type the number of rows you want to display for the bin area.
- Type the number of columns you want to display for the bin area.
- Select the Design tab.
- Select the Bins subtab.
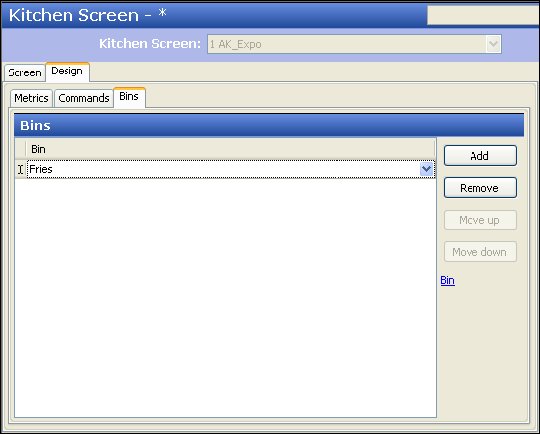
- Click Add. The system adds a blank row under the 'Bins' group bar.
- Select a bin from the 'Bin' drop-down list.
- Repeat steps 5 and 6 until you add each bin to the bin area of the kitchen screen.
- Click Move up or Move down to organize your bins from top to bottom, left to right in the bin area.
- Click Save.
- Repeat this procedure for other kitchen screens you want to display a bin area.
- Click Close to exit the Kitchen Screens function. Once you configure the bin area, and add a bin, the bin area displays in the location you configured for the kitchen screen.
Providing the ability to select a bin on a kitchen screen
If you are using a touch screen terminal, you need only to touch a bin from the bin area; however, if you using a bump bar, you must add the appropriate commands to your bump bar layout. Refer to "Configuring Bump Bars" for more information on a bump bar layout.
To provide the ability to select a bin on a kitchen screen:
- With Kitchen selected in the product panel, select Maintenance > Hardware > Bump bar Layout.
- Select a bump bar layout associated with a station that contains bins from the 'Bumpbar Layout' drop-down list.
- Select the Design tab.
- Select a command box from the design and select StartBin1.
- Repeat step 4 until you add the remaining StartBin commands, as needed.
- Click Save.
- Repeat this procedure for other bump bar layouts associated with kitchen stations that contain bins.
- Click Close to exit the Bumpbar Layout function.
Configuring a forecast bin
A forecast bin displays and uses default quantities based on the ordering history of up to four weeks of previous day-of-businesses and allows you to take a more proactive approach to bins, rather than being reactive.
When Aloha Kitchen calculates the bin quantities, you can override these numbers by setting a minimum for any given time interval. The system also provides a visible forecast bin drop adjustment tool to allow you to change the bin quantities, on demand.
Forecast bins allow you to:
- Populate bin quantities based on historical sales data, instead of the current sales from the FOH.
- Define the text to appear on the label of each cooking stage of the bin.
- Display the forecast report to gauge upcoming bin quantities and analyze waste data, by variance.
- Establish minimum bin quantities for cases when the projected total might fall below the amount necessary to run the bin.
How forecast bins works
Forecast bins read the sales information inside GndItem.dbf from four weeks of sub-directories. If you have less than four weeks, the numbers may not calculate correctly. Each week is 25% of the total forecasted bin quantity. The totals always round down.
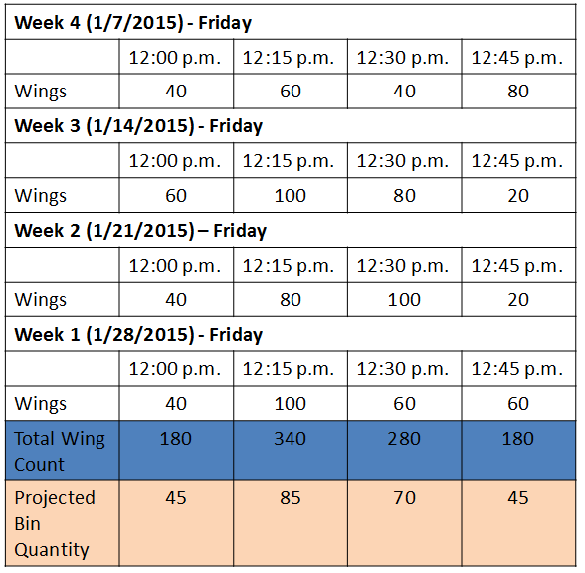
In the example given, the forecast bin queries the historical item sales of 'wings' from the last four Fridays, and for the each given 15 minute time interval. During the interval of 12:00 p.m. to 12:15, you are expected to need 45 wings for the kitchen station, 85 wings between 12:15 p.m. to 12:30 p.m., and so on. When the time for each interval arrives, the system populates the bin with the calculated bin quantity. If the quantity does not match the current day's business you can adjust the bin quantity using a tool called forecast bin drop adjustment bar. When the next interval arrives the bin quantity starts over.
Reference: Refer to the Forecast Bins Feature Focus Guide - HKS359 for information on configuring and using a forecast bin.