Configuring load balancing
Load balancing is a way for kitchens to operate two or more identical stations, or groups of stations, during high volume times. Aloha Kitchen uses new configuration to route items between two or more stations depending on the item load on the stations, or decides to route groups of items on an order depending on the order load on kitchen stations.
Load balancing is associated with routing rulebooks. A load balancing scheme may be enabled by the default routing rulebook. An active load balancing scheme may be adjusted at any time by using the staffing level function on a kitchen station based on it's associated routing rulebook.
Load balancing requires:
- Creating a load balancing scheme by order or by item.
- Assigning the balancing percentage breakout to 2 or more groups.
- Assigning kitchen stations to each group.
- Assign the load balancing scheme to a routing rulebook.
- Assigning the routing rulebook to a staff level.
There are two load balancing types. In this section, we will go through the steps to create basic load balancing using the two load balancing types.
- Load balance by order — Performs load balancing by the number of open and delayed orders for a station.
- Load balance by item — Performs load balancing depending on the item balance method: All items (started, unstarted, and delayed), Unstarted items, or Cooking items.
Load balancing by order
SCENARIO: On Friday and Saturday nights you have an additional expeditor to manage, tray, and assemble items coming out of the kitchen. You split the orders 50/50 on those nights, between the two expo stations to delivery orders faster.*
In this scenario, it is necessary to configure load balancing between two expo stations (QS Expo Station and QS 2nd Expo Station). First, it is necessary to create a load balance group with the load balance type, 'by order.' In this scenario, assign Group A 50% and Group B 50%. The sum total of the group percentages must equal 100%. The group percentages enable the system to determine what group to route an order, depending on the volume of the particular station. Group percentages are usually based on the staffing and equipment at a station compared to another load balancing station.
To use load balancing by order:
-
With Kitchen selected in the product panel, select Maintenance > Kitchen Configuration > Load Balancing > Settings tab.
-
Click New.
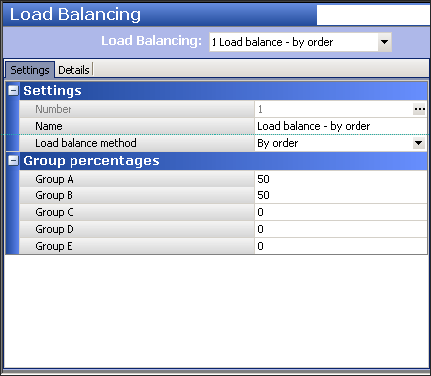
-
Type a name for the Load Balancing record.
-
Select By order from the 'Load balance method' drop-down list.
-
Type a percentage to use for Group A, such as '50.'
-
Type a percentage to use for Group B, such as '50.'
-
Select the Details tab.
-
Click Add. The system adds a blank row under the 'Rows' group bar.
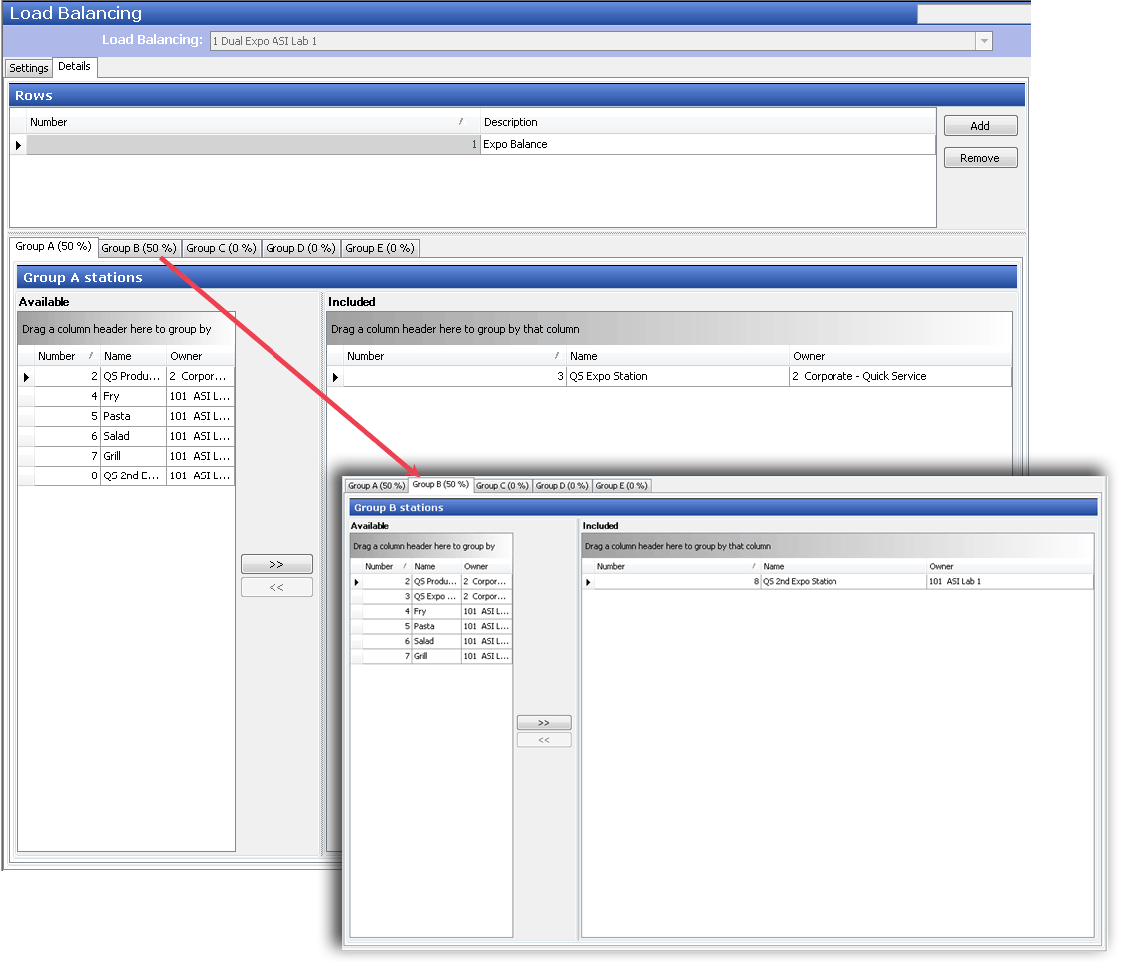
-
Type a description for the row, such as 'Expo Balance.'
-
Select the Group A subtab, if it is not already displayed. Note that each subtab indicates the percentage you configured on the Settings tab.
-
Select a station, such as 'QS Expo Station' from the 'Available' list box and click the right arrow to move the station to the 'Included' list box.
-
Select the Group B tab.
-
Select a station, such as 'QS 2nd Expo Station' from the 'Available' list box and click the right arrow to move the station to the 'Included' list box. If you want to include another row, repeat steps 8 to 14. In this example, only an Expo Balance row is used.
Reference: You may add additional rows to a load balancing ID if the 'Load balance method' and 'Group percentages' are the same. For example, you could also balance orders 50/50 for dual grill stations.
-
Click Save in the command panel.
-
Repeat this procedure for other load balancing records you want to create.
-
Click Close and exit the Load Balancing function.
Load balancing by item
SCENARIO: During lunch and dinner rush you open the back line with an additional grill. The grill is smaller than the front line grill. You determine you can send 60% of grill items to the front line grill and 40% of grill items to the back line grill to address the additional grill items during those times. At the beginning of lunch and dinner, you select the staff level associated with the dual grill load balancing during those times. After lunch and dinner, you select the default staff level to return the routing to normal.*
In this scenario, it is necessary to configure order load balancing between two grill stations (Grill and Grill Back Line). First, create a load balance group with the load balance type, 'by item,' then specify the 'item balance method.' In this scenario, assign Group A 60% and Group B 40%. The sum total of the group percentages must equal 100%. The group percentages enable the system to determine what group to route an order, depending on the volume of the particular station. Group percentages are usually based on the staffing and equipment at a station compared to another load balancing station.
To use load balancing by item:
-
With Kitchen selected in the product panel, select Maintenance > Kitchen Configuration > Load Balancing > Settings tab.
-
Click New.
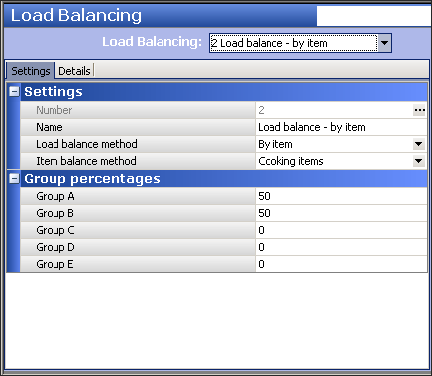
-
Type a name for the Load Balancing record.
-
Select By item from the 'Load balance method' drop-down list. The system adds the item balance method option.
-
Select an Item balance method to determine when to send an item to one station verses another.
-
Select 'Unstarted items' to load balance based only on the number of unstarted items in a load balancing group. Aloha Kitchen distributes new items routed to a station based on the ratio of unstarted items. For example, if there are six unstarted items in group A, and three unstarted items in group B, the next item would go to group B, since it is less than 40 percent.
-
Select 'Cooking items' to load balance based only on the number of items currently cooking and bumped for each station in a load balancing group. Aloha Kitchen distributes new items to the group with the lowest ration to it's percentage. For example, if there are three items cooking in group A, and four cooking items in group B, the next item would route to group A, since it is less than 60%.
-
Select 'All items' to load balance based on the number of unstarted, cooking, and bumped items in a load balancing group. For example, if group A has six unstarted items and three cooking items, and group B has three unstarted items and four cooking items, the next item would route to group A since it is less that 60%.
Target % Unstarted items Cooking items Total items Group A 60% 6 67% 3 43% 9 56% Group B 40% 3 33% 4 57% 7 44% Total 9 7 16
-
-
Type a percentage to use for Group A, such as '60.'
-
Type a percentage to use for Group B, such as '40.'
-
Select the Details tab.
Reference: When you select 'Cooking items' or 'All items,' as the item balance method, all items route to the new station when you change the routing level until the number of bumped items balances. For example, if you run lunch with only group A, then change the routing to include group B, group B receives all the items until the items bumped on group A through the day are reached on group B. The 'Unstarted items' item balance method does not include bumped items in the load balancing calculation. We recommend you select 'Unstarted items' if your business changes routing levels, as in this scenario.
-
Click Add. The system adds a blank row under the 'Rows' group bar.
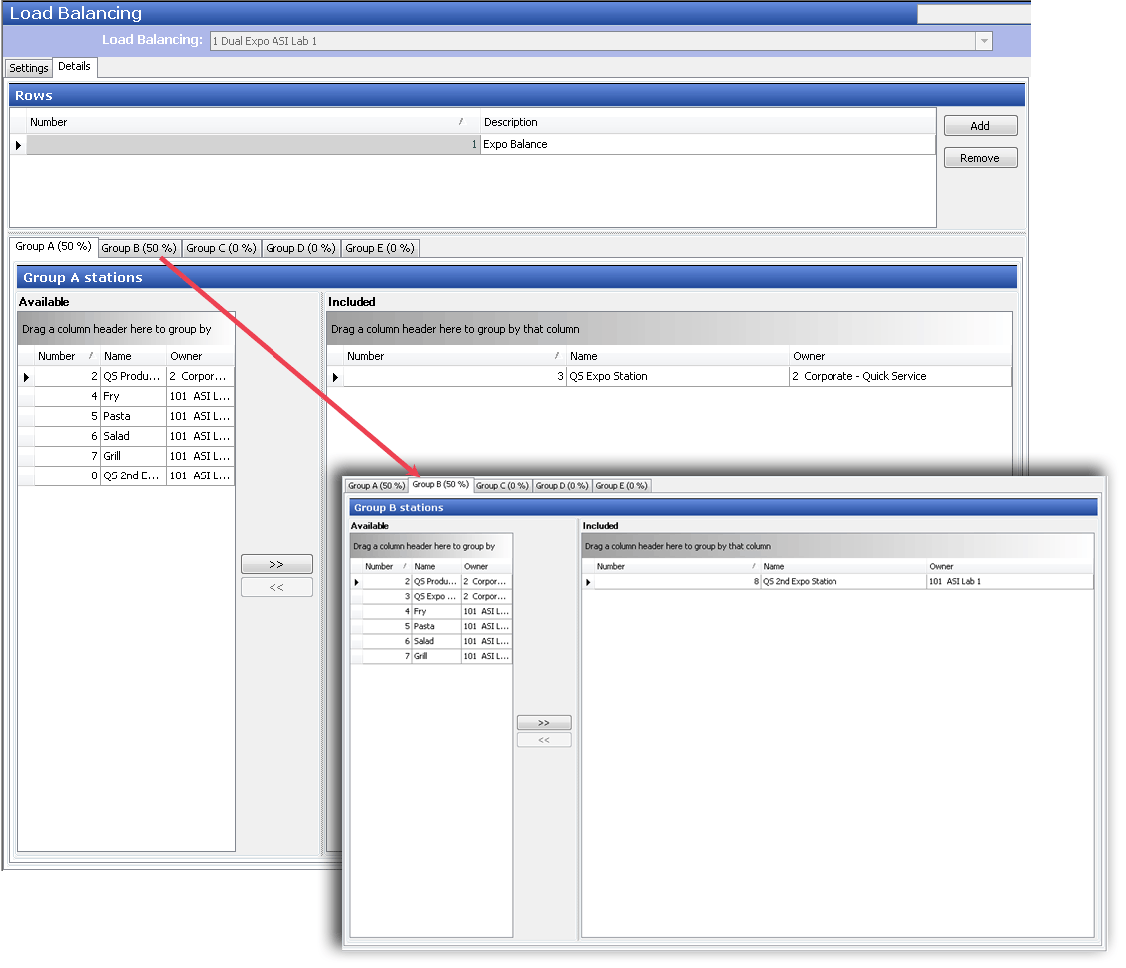
-
Type a description for the row, such as 'Grill Balance.'
-
Select the Group A tab, if it is not already displayed. Note that each group indicates the percentage you configured on the Settings tab.
-
Select a station, such as 'Grill' from the 'Available' list box and click the right arrow to move the station to the 'Included' list box.
-
Select the Group B tab.
-
Select a station, such as 'Grill Back Line' from the 'Available' list box and click the right arrow to move the station to the 'Included' list box. If you want to include another row, repeat steps 8 to 14. In this example, only an Expo Balance row is used.
Reference: You may add additional rows to a load balancing ID if the 'Load balance method' and 'Group percentages' are the same; otherwise, create another load balancing grid. For example, you could also balance orders 60/40 for dual fry stations.
-
Click Save in the command panel.
-
Repeat this procedure for other load balancing records you want to create.
-
Click Close and exit the Load Balancing function.
Adding load balancing to routing rules
It is necessary to add load balancing to routing rules. You can have one (default) routing rulebook if you plan on using load balancing all the time. But, as in the previous scenarios, where using load balancing only at specific times, it is necessary to create a different routing rulebook and staff level, one with regular routing and the other with load balancing.
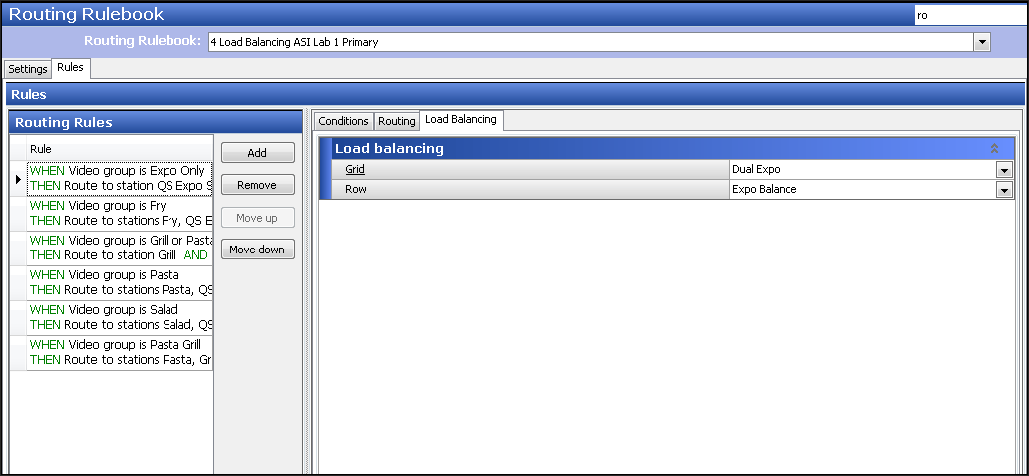
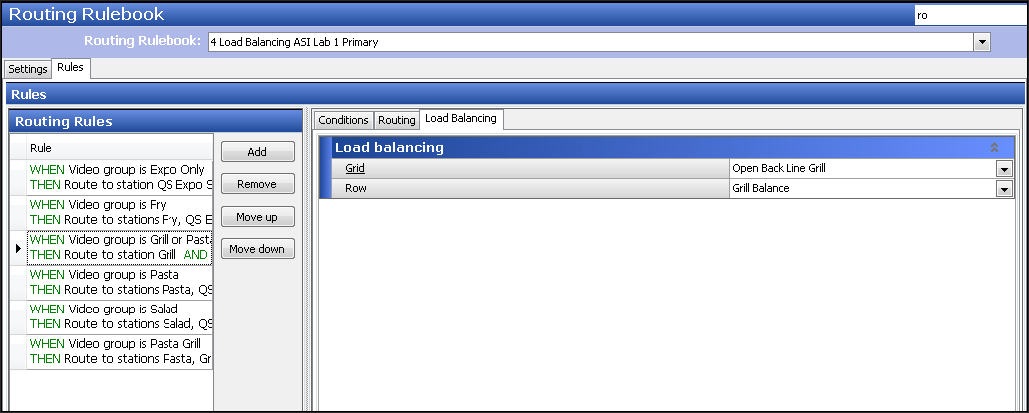
To add load balancing to routing rules:
- With Kitchen selected in the product panel, select Maintenance > Kitchen Configuration > Routing Rulebook > Settings tab.

- Select the default routing rulebook from the 'Routing Rulebook' drop-down list.
- Click Copy in the command panel on the right side of the screen to duplicate the default routing rulebook. This copies all the rules in the default routing rule book to a new rulebook.
- Click OK. The system creates a new routing rulebook.
- Accept the default number or click the ellipsis (...) to select another number.
- Type a name for the load balancing routing rulebook.
- Select the Rules tab.
- Under the 'Routing Rules,' group bar, select a rule for which you want to apply load balancing.
- Select the Load Balancing tab.
- Select a Load Balancing rule from the 'Grid' drop-down list.
- Click the Row drop-down list and select a row from the load balancing rule selected in the previous step. This row should align with the routing rule currently selected. For example, select the Expo grid and row when the Expo routing rule is selected.
- Repeat steps 7 - 11 for additional routing and load balancing rules. Example, select the grill routing rule and apply the grill load balancing grid and row.
- Click Save.
Activating load balancing
In order to activate load balancing, you will need to associated a load balancing rulebook with a staff level and manually select the staff level when business and staffing dictate. When the lunch or dinner rush is over and you close the load balancing stations, you will once again access staff levels and set a staff level to one not associated with load balancing. See "To use staff levels to change item routing".