Configuring zoning
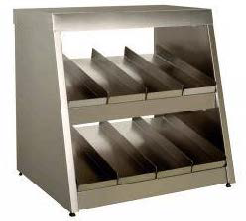
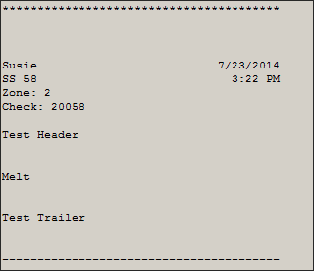
The use of zones in the restaurant industry is a way to control in which prep area you allocate items to help with the coordination of orders. Often times, these zoning areas are marked off to assist the expediter in organizing and quickly plating orders on trays. In a quick service environment, a 'burger shoot' would be an example of a zone. When activated, the system assigns each order to a zone, which appears in the cell on the kitchen screen. The zone element appears on the item cell on a kitchen screen; however, if you are using a custom header or footer, you must add the zone element to the custom header.


You enable zoning in Kitchen Settings for the whole kitchen to use; however, it can be overridden by a zone group configuration.
To enable the default zoning:
-
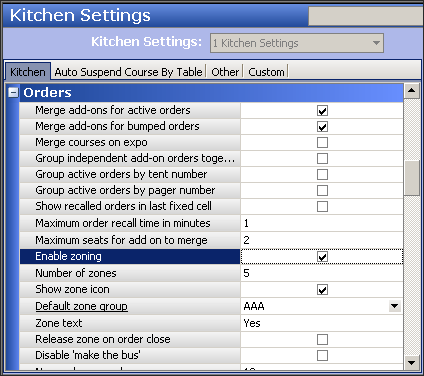
With Kitchen selected in the product panel, select Maintenance > Kitchen Configuration > Kitchen Settings.

-
Under the 'Orders' group bar, select Enable Zoning to activate the zoning feature.
-
Type the number of zones you have in your kitchen. For example, if your prep area has five zones, type 5. After the fifth order, the system starts the numbering over. Zone numbers do not display on bins.
-
Select Show zone icon to display the default 'zone' image on top of the zone number. If you want to replace the default zone icon, you must name the file Zone.xxx where xxx is the supported media file format.
Tip: A Zone icon image must be imported into the media files as an Aloha Kitchen type before it appears in the browse list.
-
Type the text, such as 'ZN,' to display for the zone in 'Zone text.'
-
Select Release zone on order close to make a zone spot available when you bump the order. For example, if you configure your zones as 1-4, and you bump the order from zone 2, then zone 2 becomes available for the next zone assignment.
-
Click Save exit the Kitchen Settings function.
To create a zone group: You can override the zoning defined in Kitchen Settings with individual zone groups. You can also configure a zone group to use for the default in Kitchen Settings.
-
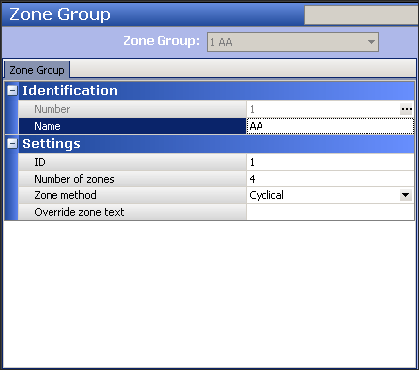
With Kitchen selected in the product panel, select Maintenance > Kitchen Configuration > Zone Group.
-
Click New.

-
Type a name for the zone group.
-
Type the number of zones you want in the zone group.
-
Select one of the following methods to determine the zone assignment method to use for this zone:
- Alpha-numeric cyclical assigns a zone number in sequential order, based on the value in 'Number of zones.' For example, if the number of zones is four, the sequence is 1, 2, 3, 4, 1, 2, 3, 4. This is equivalent to the global method defined in Kitchen Settings.
- Cyclical assigns a zone number and alphabetical letter in sequential order, based on the value in 'Number of zones.' For example, if the number of zones is four, the sequence is 1a to 1z, 2a to 2z, 3a to 3z, and 4a to 4z.
- First available assigns a zone number in sequential order, based on the value in 'Number of zones.' When you bump an order, the system uses the first available missing number. For example, if the number of zones is four and the sequence is 1, 2, 3, 4, when you bump the order assigned to number 3, the system assigns the next order to zone number 3.
-
Type the zone text in 'Override zone text' to use for this zone to override the zone text defined in Kitchen Settings.
-
Click Save.
-
Repeat this procedure for each zone group you want to define.
-
Click Close to exit the Zone Group function.
To add the zone element to a custom header or footer:
If you want the zone to appear on the order cell, you must add the 'Zone' element to a header or footer in use.

- With Kitchen selected in the product panel, select Maintenance > Kitchen Configuration > Header and Footer Layout.
- Select a header or footer layout from the drop-down list.
- Select the Design tab.
- Click the Add drop-down list, select the Zone element, and then click OK.
- Under 'Line number,' type the line number in which you want the zone element to display.
- Under 'Location,' select the justification in which you want the zone element to display.
- Under 'Style,' select the style to use for the zone element.
- Click Save.
- Repeat this procedure for other header or footer layouts in which you want to add the zone element.
- Click Close to exit the Header and Footer Layout function.