Customizing your kitchen skins
A skin refers to the look and feel of the user interface, such as backgrounds, title bars, buttons, and other graphical displays. Each kitchen screen supports a Light view and Super-gradient skin in the Kitchen Screens function; however, you can configure your own skin for purposes such as branding your screens to the colors of your restaurant, and more.
To customize your kitchen skins:
- With Kitchen selected in the product panel, select Maintenance > Kitchen Configuration > Kitchen Skin.
- Click the New drop-down arrow.
- Type a name for the skin.
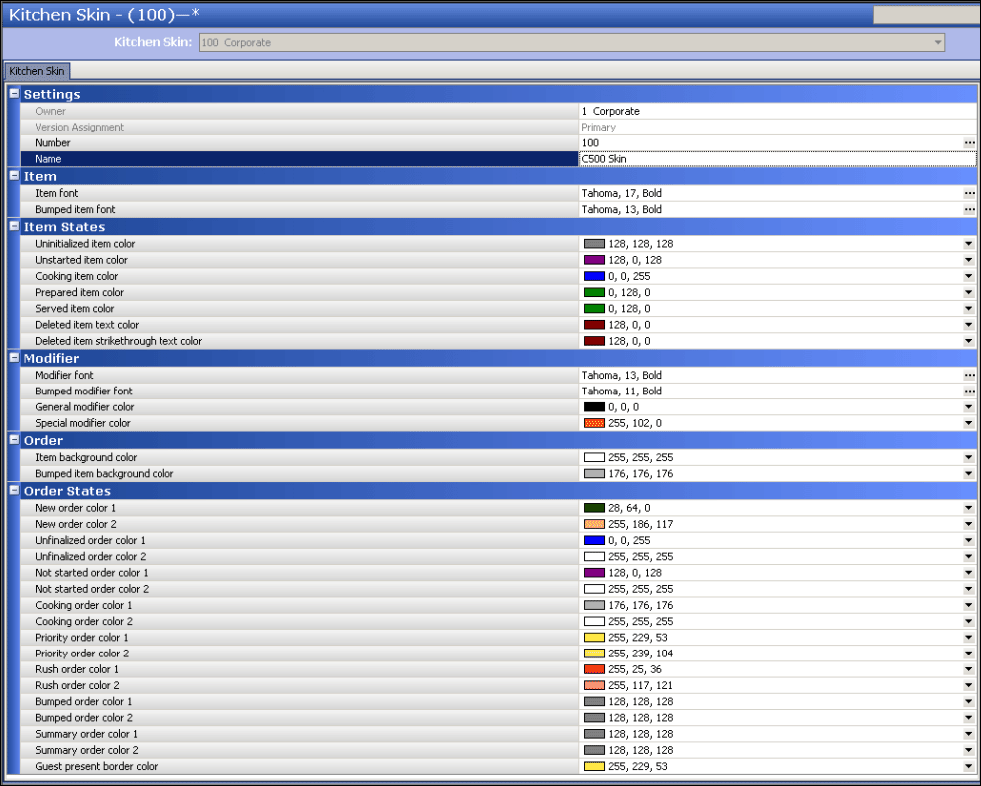
- Make the changes, as appropriate.
- Click Save in the Command panel.
- Repeat this procedure for other skins you want to create.
- Click Close in the Command panel to exit the Kitchen Skin function.
Customizing the display of your order and item cells
You can customize the attributes that display on your order and item cells. Some options allow you to add individual elements, or for full control of the display of your order and item cells, you can design a header footer layout.
Configure the display for order cells
These are some of the things you can display on the order cell.
| Description | Screenshot |
|---|---|
| Show Item Line Numbers You can display the items within an order on the order cell. Select 'Show item line numbers' in Maintenance > Hardware > Kitchen Screens to enable this option. | 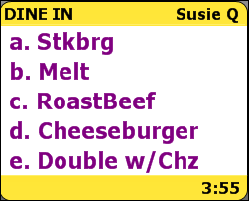 |
| Show Terminal Number You can display the terminal number from where the order was ordered on the order cell. Select 'Show term number' in Maintenance > Hardware > Kitchen Screens to enable this option. | 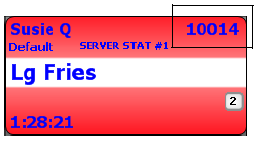 |
| Show Paid Indicator You can display a dollar sign on the order cell to indicate the order has been paid. Select 'Show paid indicator' in Maintenance > Hardware > Kitchen Screens to enable this option. | 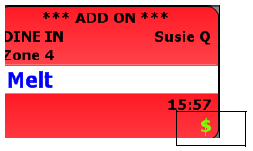 |
| Show Course Text You can display the name of the present course on the order cell. Select 'Show course text' in Maintenance > Hardware > Kitchen Screens to enable this option. | 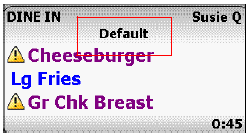 |
| Collapsible Order You can enable an item cell to expand and collapse on demand when you select the up or down arrow. 1. In the Kitchen Screens function, select Enable collapsible order. 2. Select 'Hide all items; or 'Hide only items not yet prepared.' 3. Select or clear 'Default to collapse.' | 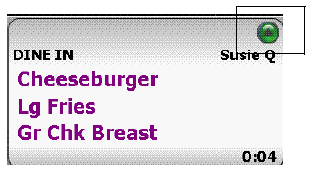 |
Configuring the display for item cells
These are some of the things you can display on the item cell.
| Description | Screenshot |
|---|---|
| Show Order Name You can show the tab name or the name you call the order on the item cell. Select 'Show order name' in Maintenance > Hardware > Kitchen Screens to enable this option. |  |
| Show Timer Text You can show the timer text on the item cell. Select 'Show timer text' in Maintenance > Hardware > Kitchen Screens to enable this option. |  |
| Show Cell Number You can show the number of cell as it relates to the order display at the present time the item cell. Select 'Show cell number' in Maintenance > Hardware > Kitchen Screens to enable this option. |  |
Configuring a custom header or footer layout for cells
Use the Header Footer Layout function to customize the design of your headers and footers that displays for your item or order cells on a kitchen screen. If you include an element that you are not using, the system allows you add the element, but does not display any output on the cell.
The system has four default header and footer layouts that are equipped with all common elements for the respective layout. Use these default layouts to copy and simply add or remove the elements you do not use. The default header and footer layouts are:
- 9996 Default Order Header
- 9997 Default Order Footer
- 9998 Default Item Header
- 9999 Default Item Footer
Once you create a layout, you must attach the order header or footer to an expo kitchen screen and the item header or footer to a production kitchen screen.
Tip: Many of the elements you can configure on a custom header or footer layout are dependent on the activation of other options in Kitchen Screen Maintenance. For example, if you add Order Mode to your header or footer layout, you must select 'Show Order Mode;' otherwise, the system does not display the order mode.
Configuring a header or footer layout
You must configure a layout for a header or footer to apply to an order or an item cell.
To configure a header or footer layout:
- With Kitchen selected in the product panel, select Maintenance > Kitchen Configuration > Header and Footer Layout.
- Select one of the default designs from the 'Header Footer Layout' drop-down list.
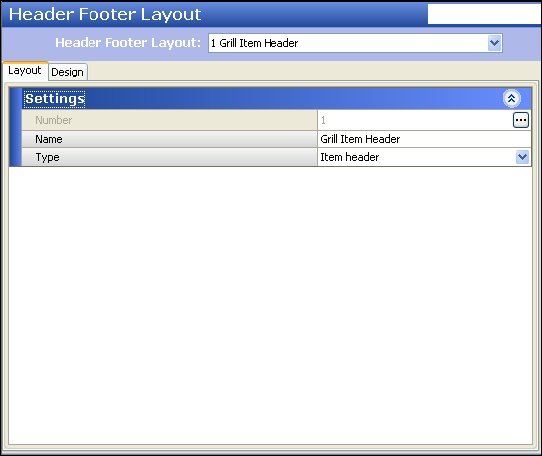
- Click Copy on the right side of the screen to duplicate the selected header or footer. The Copy Options screen appears.
- Accept the default number or click the ellipsis (...) button to select another number, and click OK.
- Type a name for the header or footer design.
- Select Order header, Order footer, Item header, or Item footer from the 'Type' drop-down list to indicate the area and the type of cell you are designing.
- Select the Design tab.
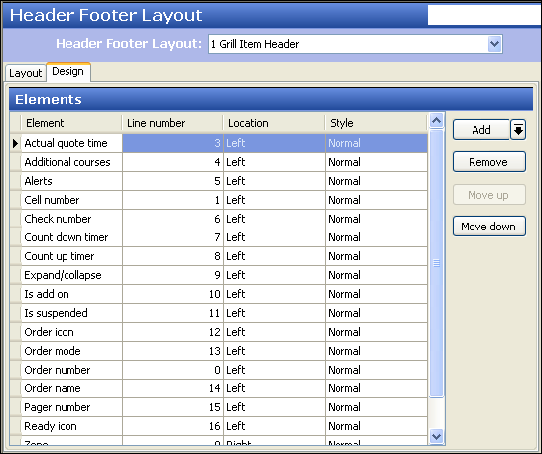
- Click the Add drop-down arrow, select an element, and click OK.
- Under 'Line number,' type the line number in which you want the element to appear on the cell.
- Under 'Location,' select Left, Center, or Right to indicate the justification of the element to appear on the cell.
- Under 'Style,' select Normal, Bigger, or Smaller to indicate the font size, in relation to the default font, for the element to appear on the cell.
- Click Save in the Command panel.
- Repeat this procedure for other header footer layout designs you want to create.
- Click Close in the Command panel to exit the Header Footer Layout function.
Attaching a header and footer lyout to a kitchen screen
You must attach a header or footer to a kitchen screen. You can only add an order header or footer to an 'Expo Order View' or 'Production Order View' kitchen screen and you can only add an item header or footer to one of the production kitchen screens.
To attach a header and footer layout to a kitchen screen:
- With Kitchen selected in the product panel, select Maintenance > Hardware > Kitchen Screen.
- Select a kitchen screen from the 'Kitchen Screen' drop-down list.
- For an Expo Order View or Production Order View kitchen screen, select the following under the 'Headers and footers' group bar:
- Select an order header from the 'Order header layout' drop-down list.
- Select an order footer from the 'Order footer layout' drop-down list.
- For a Production kitchen screen, configure the following from the 'Headers and footers' group bar:
- Select an item header from the 'Item header layout' drop-down list.
- Select an item footer from the 'Item footer layout' drop-down list.
- Click Save in the Command panel.
- Repeat this procedure for any other kitchen screen you want to use a custom header or footer layout.
- Click Close in the Command panel to exit the Kitchen Screens function.