Defining a forecast bin
You must define a forecast bin to show the bin quantity on a kitchen screen in a reserved area of the screen called a 'bin area.' You must first create the forecast bin in Bin Maintenance and then add the forecast bin to a kitchen screen in use.
You operate a forecast bin with a forecast bin drop adjustment bar that allows you to add or subtract the calculated count, start and cancel the bin, and assign a bin quantity to waste. The bar uses either a screen with touch capability or a bump bar. When you operate from a bump bar and start a bin, the bump bar layout changes to the layout of the forecast bin drop adjustment bar until you finish using the forecast bin.

After you create a forecast bin, you must attach each one to a kitchen screen, so it appears in a bin area. A bin area is a section of the screen reserved for bins. You controlled bins with either a screen touch or a bump bar. Unlike other bin types, a forecast bin has four progression states for the quantity in the bin area; therefore, a forecast bin usually requires more real estate on the kitchen screen. Typically, you add a bin area containing a forecast bin at the bottom of the screen to utilize the most space. You must first enable the bin area to show on a kitchen screen, then attach the bin to the kitchen screen using the Design tab.
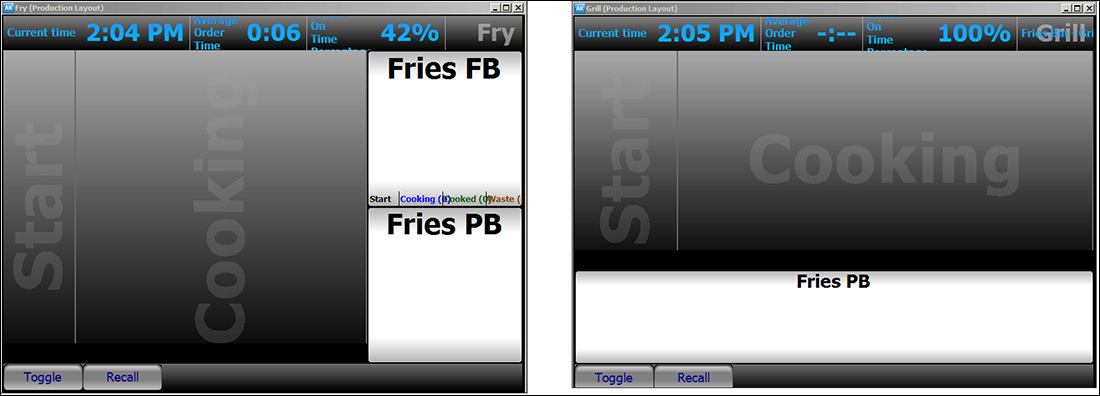
To create a forecast bin:
- With Kitchen selected in the product panel, select Maintenance > Kitchen Configuration > Bin.
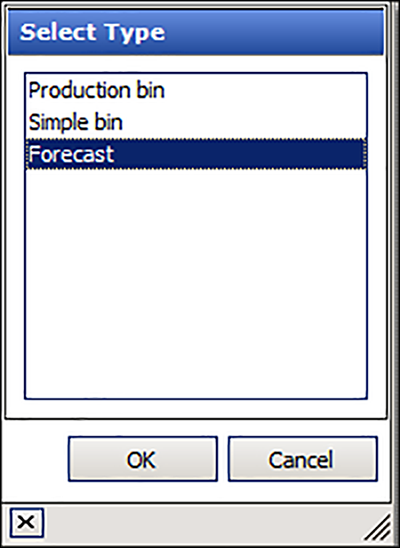
- Click the New drop-down arrow, select Forecast as the type, and click OK.
- Accept the system assigned number or click the ellipses (...) next to 'Number' to display the Number Assignment dialog box, from which you can choose an alternate number.
- Type a descriptive name for the bin, such as 'Wings.'
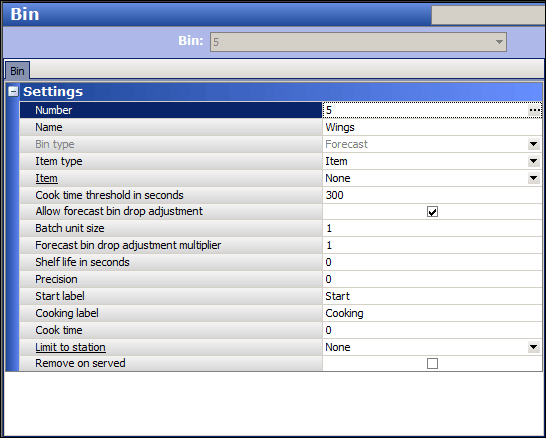
- Select Item or Tracking Item from the 'Item type' drop-down list.
- If you select Item as the 'Item type,' select the item you wish to track using this bin from the 'Item' drop-down list.
- If you select Tracking Item from the 'Item type' drop-down list, select the tracking item you wish to track using this bin from the 'Tracking Item' drop-down list.
- Type the number of seconds, from 0 - 99999, to use as the cook time threshold for the bin, in 'Cook time threshold in seconds.' The 'Cook time threshold' value should be greater than the 'Cook time' value on the same tab, to account for finishing other tasks, such as counting out the bin items, and placing them in the physical kitchen equipment for cooking.
- Select Allow forecast bin drop adjustment to display the forecast bin drop adjustment bar for adjusting bin quantities on demand from a touch screen terminal. If you are using a bump bar, the controls of the forecast bin adjustment bar overlay the bump bar layout.
- Type the quantity to use, per bin drop, in 'Batch unit size.' For example, if you typically drop five orders of fries at a time, then the batch unit size is five. The default is one.
- Type the incremental number to use when you adjust the quantity of the forecast bin drop adjustment, in 'Forecast bin drop adjustment multiplier.' For example, if you type 2, then each time you adjust the quantity, the amount increases or decreases by 2. The default is one.
- Type the number of seconds you want items to remain in the 'Cooked' section of the forecast bin before the system automatically moves them to the 'Waste' section, in 'Shelf life in seconds.' Use this for items you keep heated under a heat lamp until ordered by a guest.
- Type the number of decimal points, from 0 to 3, for displaying the quantity for the bin, in 'Precision.' For example, select 2 if you want the quantity to display as 0.00.
- Type the text to appear for the start label in the forecast bin. The default text is "Start."
- Type the text to appear for the cooking label in the forecast bin. The default text is "Cooking."
- Type the number of seconds, from 0 - 9999 seconds, for the bin quantity to appear in the cooking area before removing it from the bin, in 'Cook time.'
- Select a station from the 'Limit to station' drop-down list, if you want the bin to total items from a specific station only.
- Select Remove on served, if you want the system to adjust the bin count when you bump the item.
- Click Save.
- Repeat this procedure for each forecast bin you want to configure.
- Click Close and exit the Bin function.
To attach a forecast bin to a kitchen screen:
- With Kitchen selected in the product panel, select Maintenance > Hardware > Kitchen Screen.
- Select a kitchen screen from the 'Kitchen Screen' drop-down list.
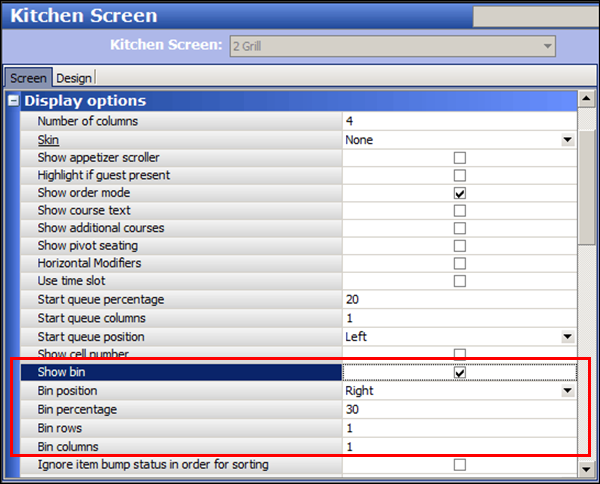
- Under the 'Display options' group bar, select Show Bin to reserve an area on the kitchen screen for bins.
- Select the area of the screen to reserve for bins from the 'Bin position' drop-down list. Choose from Top, Left, Bottom, and Right.
- Type the percentage of the kitchen screen to use for the bin area.
- Type the number of rows to appear in the bin area.
- Type the number of columns to appear in the bin area.
- Select the Design tab.
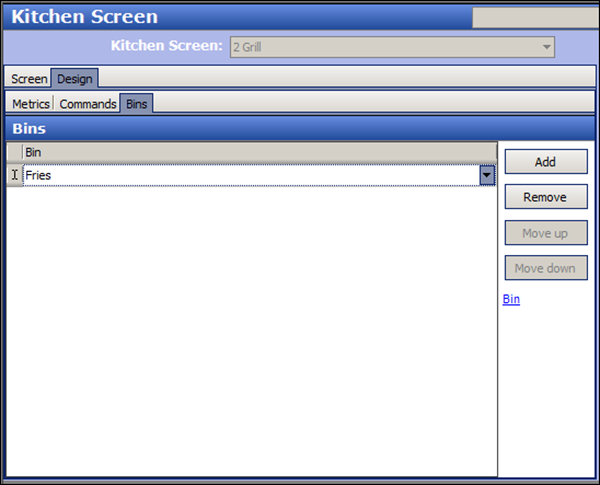
- Select the Bins tab.
- Click Add. The system adds a blank row under the 'Bins' group bar.
- Select a forecast bin from the 'Bin' drop-down list.
- Repeat steps 10 and 11 until you add each bin to the bin area of the kitchen screen.
- Click Move up or Move down to organize your bins from top to bottom, left to right in the bin area.
- Click Save.
- Repeat this procedure for any other kitchen screens for which you want to display a bin area.
- Click Close to exit the Kitchen Screen function. Once you configure the bin area, and add a bin, the bin area appears in the location you configured for the kitchen screen.