Using the Aloha Kitchen Configuration Wizard
This section discusses the basic requirements to quickly get Aloha Kitchen up and running, mainly through the Aloha Kitchen Wizard. This allows you to see items appear on the various controllers and screens, and helps you visualize additional configuration needed to accommodate your site.
Identifying your kitchen areas
Before you begin, we highly recommend you first determine where you will place each piece of hardware (terminals, kitchen screen, kitchen station, bump bars, and printers) in the kitchen area. Do not proceed until you complete this analysis. Determine device names, hardware types, and station roles for each area.
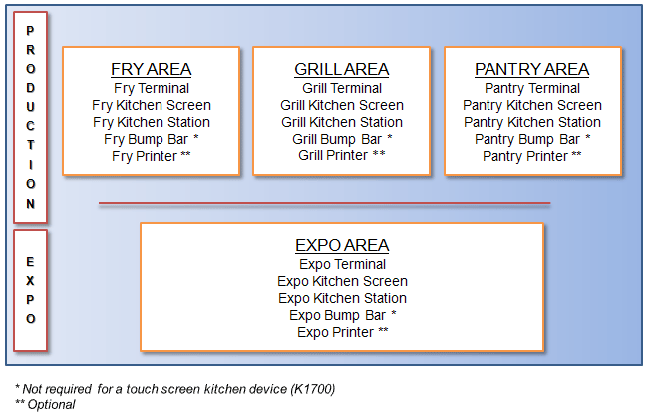
In general, the configuration of your Aloha Kitchen devices uses a one-to-one relationship, meaning each device in your kitchen has a dedicated terminal, kitchen screen, kitchen station, bump bar, and printer, with the last two devices as being optional depending on your needs. For example, the grill area would have a grill terminal, a grill kitchen screen, a grill kitchen station, a grill bump bar, and a grill printer. In some cases, you can reuse configuration elements such as bump bar layouts and screens.
You configure each of these hardware elements in the configuration management tool (Aloha Configuration Center or Aloha Manager); however, you cannot share a device for Aloha Kitchen that you use for the POS, such as terminals. You must define unique terminals and printers for use with each application.
Historically, Aloha Kitchen has used the numbering range of IDs 81-90 for Aloha Kitchen terminals and printers. As noted, terminals and printers are used by both Aloha Kitchen and Aloha POS; however, they must be used exclusively. You cannot use the same terminal or printer for both Aloha Kitchen and Aloha POS. This also eases the burden of troubleshooting by locating your Aloha Kitchen terminals and printers. You will be instructed to use the Aloha Kitchen wizard which uses the same numbering convention of IDs 81-90, where possible. If you already have POS devices that use the range of 81-90, use a different numbering range.
Running the Aloha Kitchen Configuration Wizard
Before you begin ANY configuration, we highly recommend you start your implementation using the Aloha Kitchen Configuration Wizard, which lays the foundation and creates initial ID records for your configuration.
Warning: You run the Aloha Kitchen Wizard only one time and on a fresh install. You cannot run the wizard again unless you individually delete the records and the associations it creates.
Before you run the Aloha Kitchen Configuration Wizard, you must know and answer the following questions:
- Is the site a fast food (quick service) or casual dining (table service) site?
- How many kitchen areas will you have, and the name of each area, such as an Expo station, Fry station, Grill station, and others?
- Are you ordering by designed courses, such as Appetizers, Entrees, and others? If the answer is yes, you must know the name of each course and the correct order in which the courses occur.
Courses in Aloha Kitchen are driven by categories. You must have a category for each corresponding course you are using.
If you use courses, you must have an item modifier created in POS, such as 'AsApp.'
When you run the Aloha Kitchen Configuration Wizard, the application creates records based on the following:
-
A bump bar layout record in Bumpbar Layout Maintenance for each of the following:
Bump bar Layout Attached to... A single generic expediter bump bar layout, populated with three bump bar commands. ...each applicable expediter terminal you enter into the wizard. A single generic production bump bar layout with three bump bar commands. ...each applicable production terminal you enter into the wizard. A bump bar layout for each kitchen area you enter into the wizard, with no commands. You can use these instead of the generic expediter and production bump bar layouts. ...none.
Reference: For more information on bump bar layouts, refer to Configuring Bump Bar Layouts.
- A course record in Courses Maintenance for each course you enter into the wizard. If you do not use coursing, the system still creates a default course, which is required for Aloha Kitchen to run.
- A kitchen screen record in Kitchen Screen Maintenance for each kitchen area you enter into the wizard. You attach each kitchen screen to the applicable terminal in Terminal Maintenance.
Reference: For more information on kitchen screens, refer to Configuring Kitchen Screens.
- A single kitchen setting record in Kitchen Setting Maintenance.
- A kitchen station record in Kitchen Station Maintenance for each kitchen area you enter into the wizard. You attach each kitchen station to the applicable terminal in Terminal Maintenance.
Reference: For more information on kitchen stations, refer to Configuring Kitchen Stations.
-
A metric record in Metrics Maintenance for each of the following:
Metric For each... Attached to... Current time ...expediter and production area you enter into the wizard. ...each expediter and production kitchen screen. Average order time ...expediter and production area you enter into the wizard. ...each expediter and production kitchen screen. Orders on time percentage ...expediter and production area you enter into the wizard. ...each expediter and production kitchen screen. Maximum order time ...expediter and production area you enter into the wizard. ...none. Total active orders ...expediter and production area you enter into the wizard. ...none. Total delayed orders ...expediter area you enter into the wizard. ...none. Total suspended orders ...expediter area you enter into the wizard. ...none. Total active items ...production area you enter into the wizard. ...none. 📖 For more information on metrics, refer to the Customizing Aloha Kitchen Guide.
-
A single routing rulebook record in Routing Rulebook Maintenance. The rulebook uses a video group condition, and routes to each, and combination of, expediter and production station you enter into the wizard.
Reference: For more information on routing rulebooks, refer to the Customizing Aloha Kitchen Guide.
- A terminal record for each kitchen area you enter into the wizard. Each terminal has the applicable kitchen station and kitchen screen attached. Additionally, each expediter terminal has the generic expediter bumpbar layout attached and each production terminal has the generic production bumpbar layout attached.
Reference: For more information on terminals, refer to Configuring Terminals.
- A video group record in Video Group Maintenance for each kitchen area you enter into the wizard. Additionally, a record for all combinations of a kitchen area. Each video group has the single video queue record, 'Kitchen <store name>' attached, which is created in Video Queue Maintenance.
- A single video queue record in Video Queue Maintenance named 'Kitchen <store name>.' The video queue has each video group attached, which is created by the wizard.
Reference: For more information on video groups and video queues, refer to Assigning Video Groups to Items.
To run the Aloha Kitchen Configuration Wizard:
-
With Kitchen selected in the product panel, select Utilities > Kitchen > Run Wizard.
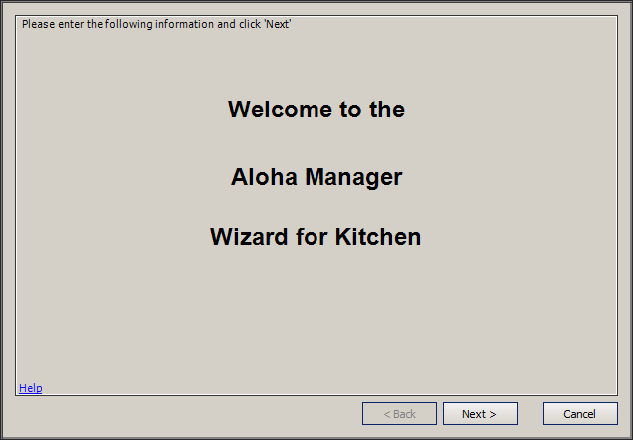
The Welcome screen appears.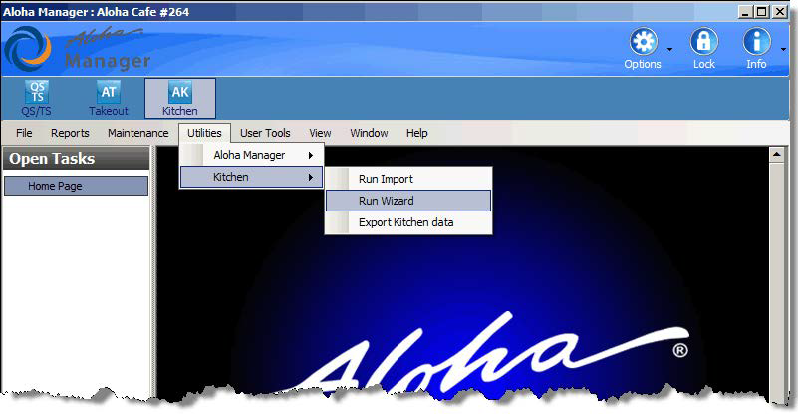
-
Click Next.
-
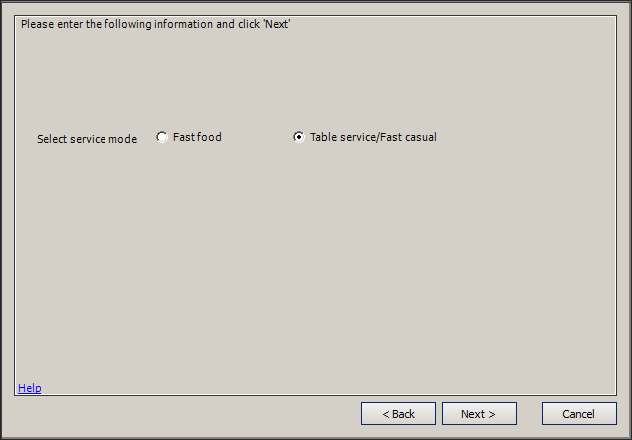
Select whether the site is a Fast food or Table service/Fast casual environment and click Next.
-
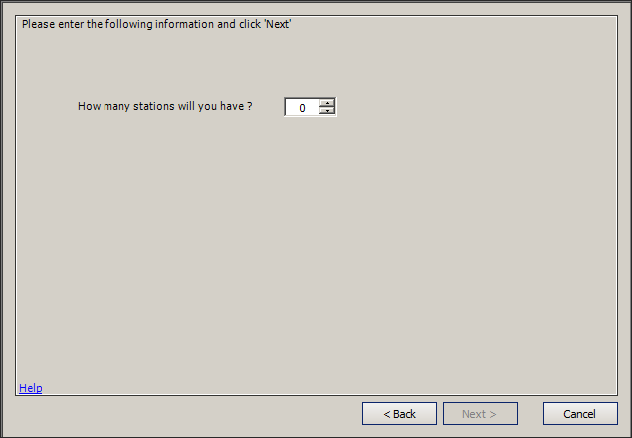
Enter the number of stations you will use in the kitchen and click Next.
-
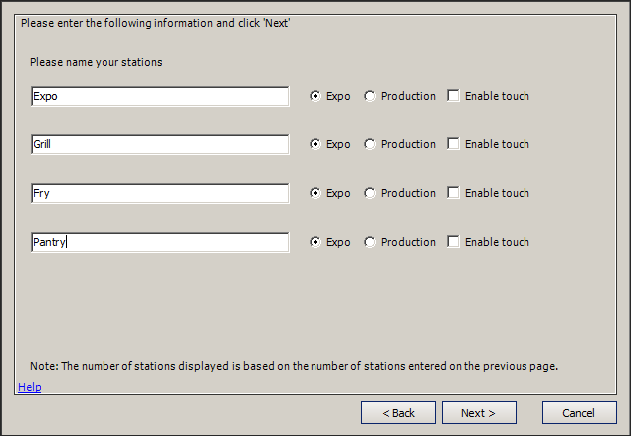
Type the name you want for each station, whether the station is for an expo or production station, and if the station will have touch screen capability. The number of stations you select on the previous screen determines the number of stations listed. When you are finished, click Next.
-
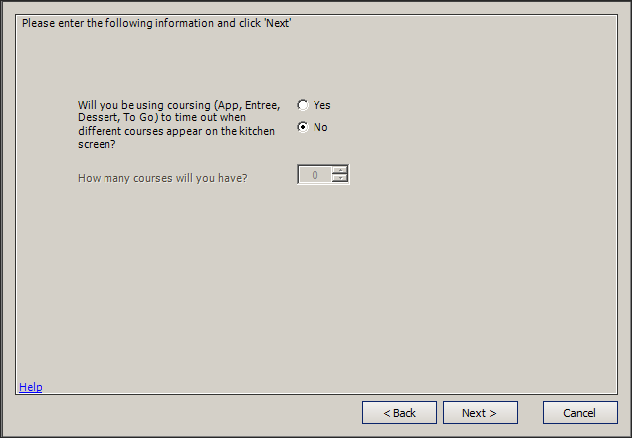
You must determine if you are using courses, such as Appetizers, Entrees, Desserts, and more, in your installation. If you are not using courses, select No and click Next to advance to the next screen and bypass the course configuration.
-
If you are using courses, select Yes and click Next.
-
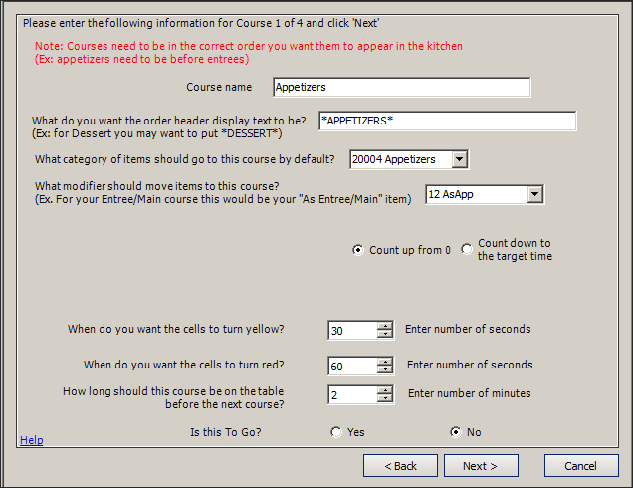
Type the name of the first course, such as Appetizers.
-
Type the name of the first course as you want it to appear on the order header display. Include any asterisks or other distinguishing characters to alert the employee, such as DESSERT.
-
Select the category of items to which items should go to by default, from the drop-down list.
-
Select the modifier that, when ordered, moves the item to the respective course. For example, for your Entree/Main course, this would be your 'As Entree/Main' item.
-
Select Count up from 0 or Count down to the target time to determine the direction you want items to count.
-
Enter the number of seconds you want an item to remain unfinalized before the cell turns yellow.
-
Enter the number of seconds you want an item to remain unfinalized before the cell turns red.
-
Enter the number of minutes you want this course to remain at the table before starting the next sequential course.
-
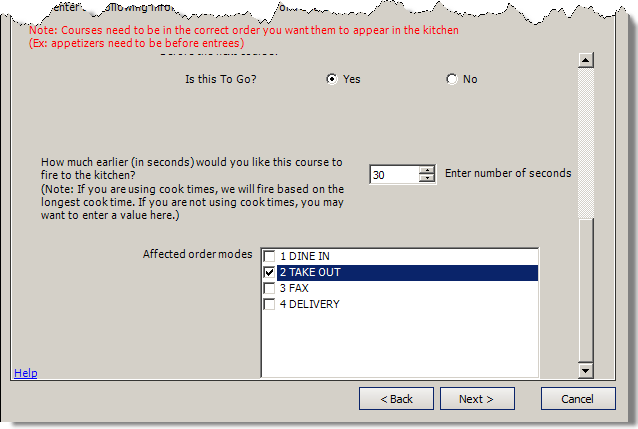
Select Yes or No if this course is dedicated for 'to go' orders.
-
If you select Yes, additional options appear.
-
Enter how much earlier (in seconds) you would like this course to send to the kitchen.
Note: If you are using cook times, the system sends the order based on the longest cook time. If you are not using cook times, you may want to enter a value here.
-
Select each order mode affected by the course from the list of order modes. When all information is in place, the confirmation screen appears.
-
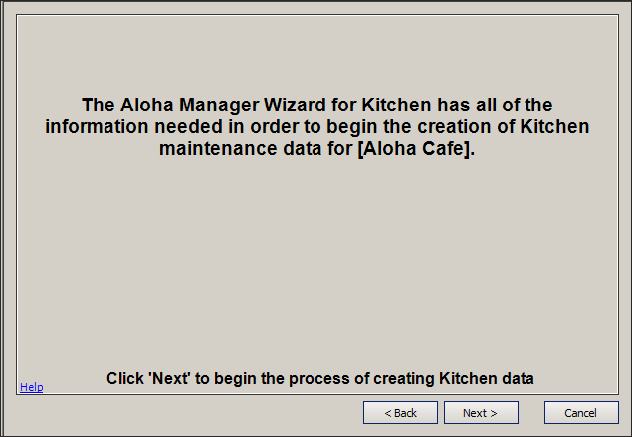
Click Next to process the kitchen data.
-
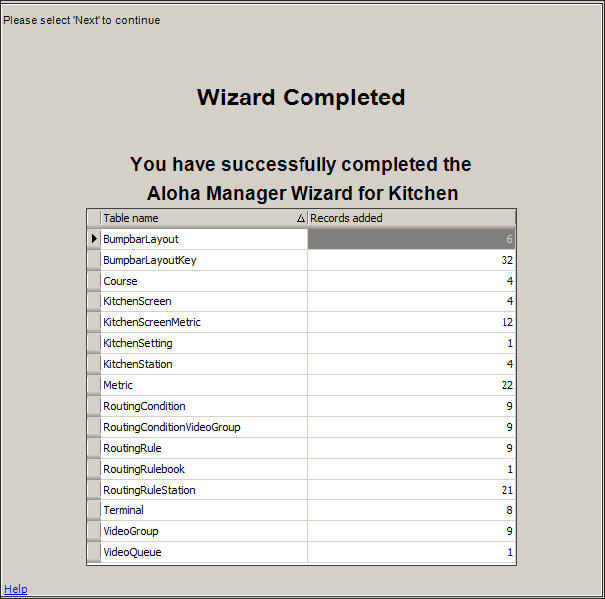
When the Aloha Kitchen Configuration Wizard completes, a screen appears listing the new records added to the database.
-
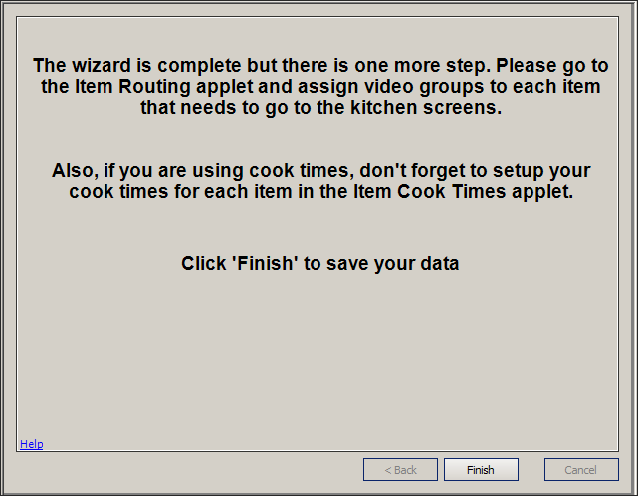
Click Next. A screen with additional information appears, instructing you to perform extra steps.
-
Click Finish. The Aloha Kitchen Wizard exits.
Assigning video groups to items for routing
Item routing determines on which kitchen station items appear, when ordered. Several methods for item routing are available; however, the Aloha Kitchen Configuration Wizard sets you up with the most common: item routing by video group. The video group method is also carried into the Routing Rulebook, also set up by the Aloha Kitchen Configuration Wizard.
To properly configure item routing by video group, the system uses the following configuration:
- Configure video groups and video queues (accomplished by the Aloha Kitchen Configuration Wizard).
- Assign video groups to items.
Configuring video groups and video queues
The Aloha Kitchen Configuration Wizard sets you up with a video group record for each kitchen area you enter into the wizard, as well as a record for a combination of areas. The wizard also configures a single video queue record with all of the system-generated video groups attached. Aloha Kitchen requires at least one video queue record to communicate order information to Aloha Kitchen.
You can define additional video groups to account for combination items, where components of an item are prepared at different stations. For example, create a 'PantryGrill' video group to allow a grilled chicken salad to route to both the Pantry and Grill stations.
Use this section if you want to add more video groups or video queues. Keep in mind, Aloha Kitchen only uses the video queue ID, and its associated video groups, for communication. If you enter any values for the video group or video queues, they are overridden by values you establish in Aloha Kitchen. Aloha Kitchen uses the COM interface to pass this information between products. To simplify the configuration, we recommend you assign all video groups to a single video queue.
Note: You must select 'Display video' in Maintenance > Business > Additional Features > Options to display Video Groups and Video Queues in Maintenance > Hardware.
To configure a video group:
- With Kitchen selected in the product panel, select Maintenance > Hardware > Video Groups.
- Click New.
- Type a name for the video group, such as "Grill."
- Select the Video Queues tab.
- Select a video queue from the 'Available' list and click >> to move the video queue to the 'Included' list.
- Click Save.
- Repeat this procedure for each video group you need to create.
- Click Close and exit the Video Groups function.
To configure a video queue:
- With Kitchen selected in the product panel, select Maintenance > Hardware > Video Queues.
- Click the New drop-down arrow, select Standard from the drop-down list, and click OK.
- Type a name for the video queue, such as 'Kitchen.'
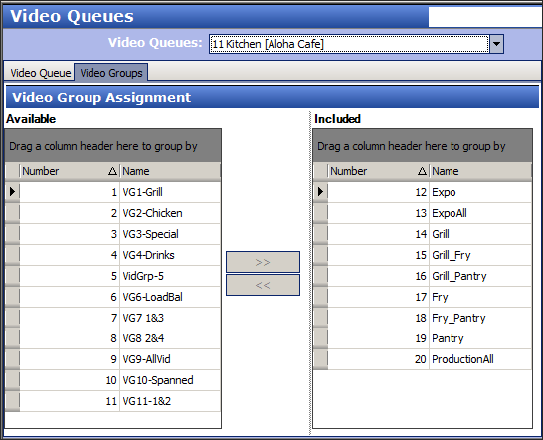
- Select the Video Groups tab.
- Select all video groups from the 'Available' list box (left-click the mouse on the first item, hold down the Shift key, and left-click the last item) and click the right arrow to move the video queue to the 'Included' list box.
- Click Save.
- Click Close and exit the Video Queues function.
Assigning a video group to an item
The Aloha Kitchen Configuration Wizard does not assign a video group to an item. You must designate the video group to which you want an item to route when the item is added to an order, using the Item Routing function. If you have items you do not want to route to the kitchen, such as beverages, do not assign a video group to the item.
To assign a video group to an item:
- With Kitchen selected in the product panel, select Maintenance > Menu > Item Routing > Item Routing tab. The Item Routing function contains only one record to use.
- Maximize the screen so you can access all columns in the Item Routing function.
- Select an item from the 'Available' list box and click the right arrow to move the item to the 'Included' list box.
- Select the video group to which to route the item from the drop-down list.
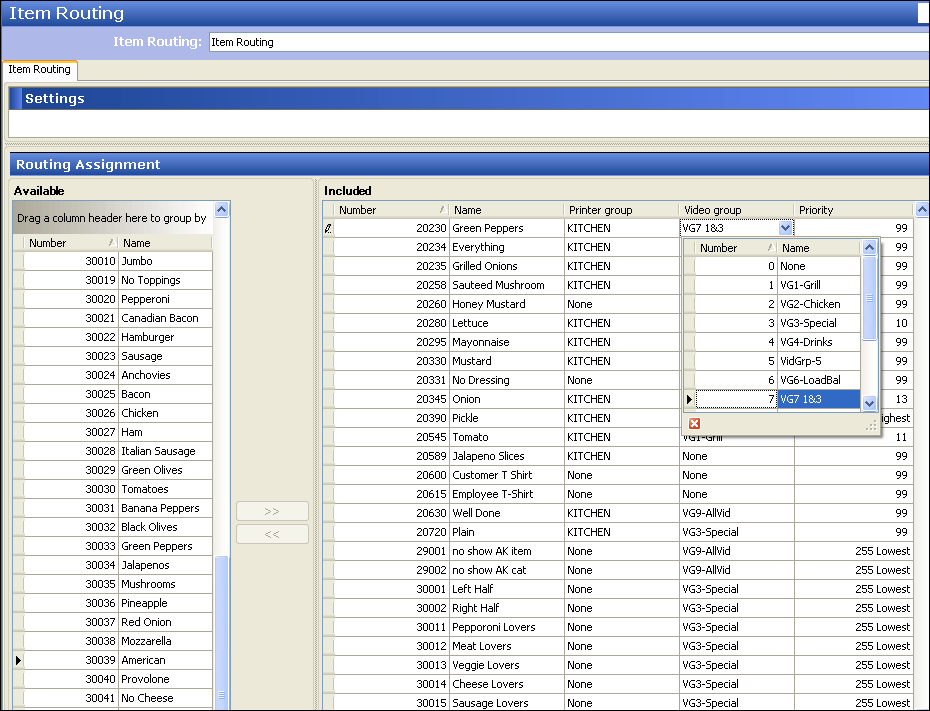
- Repeat steps 3 and 4 for each item requiring a video group.
- Click Save and exit the Item Routing function.