Configuring text to pay
Aloha Mobile Pay offers a feature that allows guests to pay for their guest check using a text message you send to their mobile phone. The check code, along with a URL used for submitting payment, is embedded in the text message. The guest touches the embedded URL and then follows the prompts to complete the payment process.
The configuration of Text to Pay requires configuration in Aloha Configuration Center or Aloha Manager.
Creating the text to pay button in CFC/AM
To capture a phone number with the guest check requires you to add a custom button to the front-of-house that allows operators to request and enter the phone number to which to send the text message. If using Quick Service, choose an existing panel on which to place the Text to Pay button; however, Table Service uses hard-coded screens to maintain familiarity and a consistent screen flow.
To add the Text to Pay button to a Table Service screen requires creation of a custom order entry panel to replace the area located in the lower right portion of the order entry screen, if you have not already done so. Refer to the Custom TS Order Entry Screen Feature Focus Guide for detailed instructions.
-
Launch Aloha Configuration Center or Aloha Manager.
-
Select Maintenance > Screen Designer > Quick Service Screen Designer -or- Table Service Screen Designer.
-
Select Work with Panels.
-
(QS only) Select Panel > Open Panel, select a panel, and click OK.
-OR-
(TS only) Select Panel > Open Panel, select the replacement custom Order Entry panel or Close panel on which to add the Text to Pay button, and click OK.
-
Select an available button or right-click the panel and select New Button. The Properties dialog box appears.
-
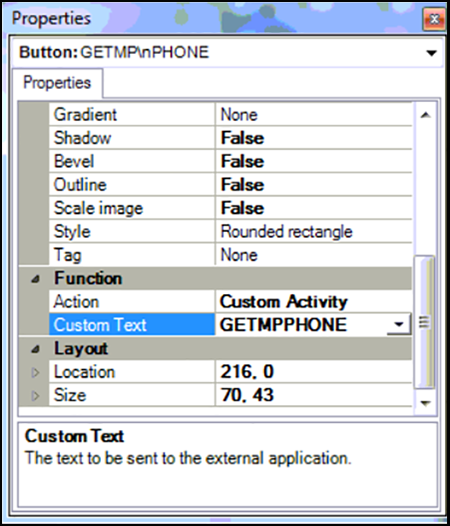
Under the 'Function' group bar, select Custom Activity from the 'Action' drop-down list.

-
Type GETMPPHONE in 'Custom Text.'
-
Under the 'Appearance' group bar, type the text to appear on the button, Text to Pay. To display the text on multiple lines, insert '\n' without spaces for line breaks.
-
Configure the remaining options as you would for any other button function.
-
Select Panel > Save Panel.
-
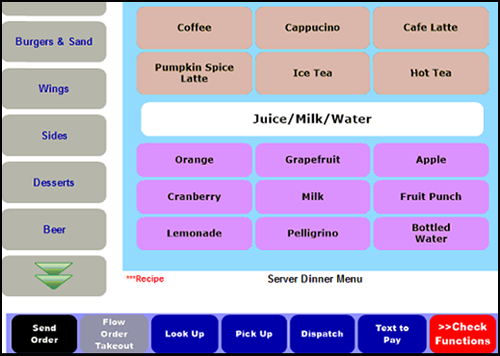
Select File > Exit to exit Panel Editor. Once the configuration is complete, a button named Text to Pay appears at the bottom of the screen.

-
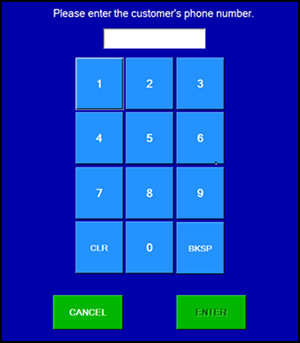
Touch the Text to Pay function button to display the following screen.

Modifying MPAgent to use text to pay
Before configuring Text to Pay in Aloha Configuration Center or Aloha Manager, modify the MPAgent.exe.setting.config file with access token values provided by support@alohaenterprise.com.