Using the operator dashboard
To view the NCR Mobile Pay activity for your restaurant, visit https://ncrpay.com/Dash/Account/Login and log in with your operator credentials. If you have not yet received your operator credentials, contact Support@AlohaEnterprise.com.
When you log in to the NCR Mobile Pay Operator Dashboard, by default the 'Payments' screen appears.
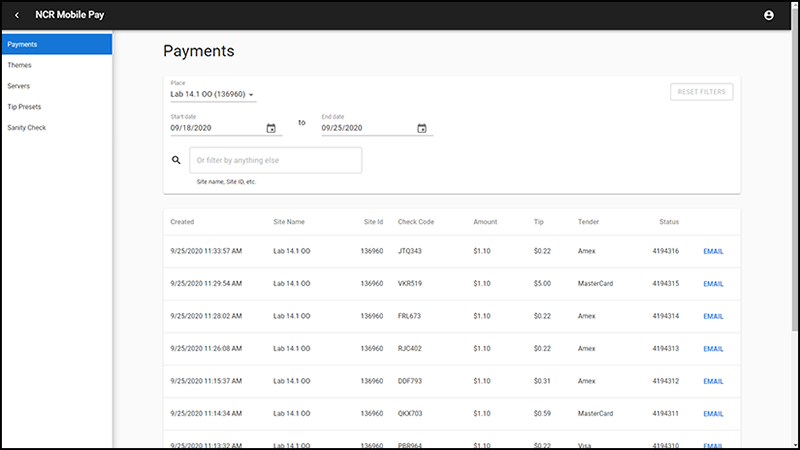
The Operator Dashboard screen is divided into two panes, the left pane and the right pane. The left pane shows the functions available to you. You can select the required function to view and/or edit the records for each function. The right pane shows the details for the selected function in the left pane.
Through the Operator Dashboard screens, where applicable, you can select and/or specify the following parameters to view or edit the records:
- Select the Place (Site name and Site Id combined).
- Specify a date range for which to view a set of records.
- Perform a search to view a specific record or a set of record(s).
- Sort rows in ascending or descending order. To sort rows in ascending order, click a column heading until an up arrow appears. To sort rows in descending order, click a column heading until a down arrow appears.
- Choose to display (5, 10, or 25) rows per page. By default, 10 rows per page are shown.
Payments
Click Payments in the left pane to view transaction detail for all payments made using Mobile Pay for the specified date range.
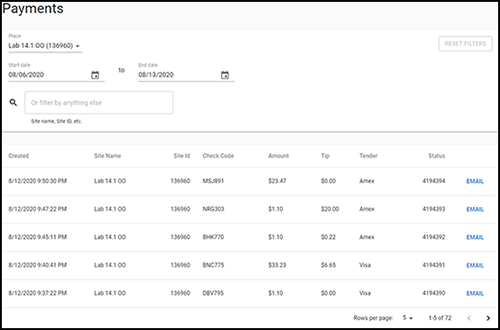
The table in the Payments screen shows the transaction details, such as, transaction time stamp, site name, site identification number, check code used to make the payment, amount paid for the transaction, tip amount, tender type used, and transaction status as received from the POS terminal.
The Status column displays a unique transaction identifier, if the transaction is successful (for example, 4194332); otherwise, it displays an error code that lines up with a Mobile Pay error message (for example, -408).
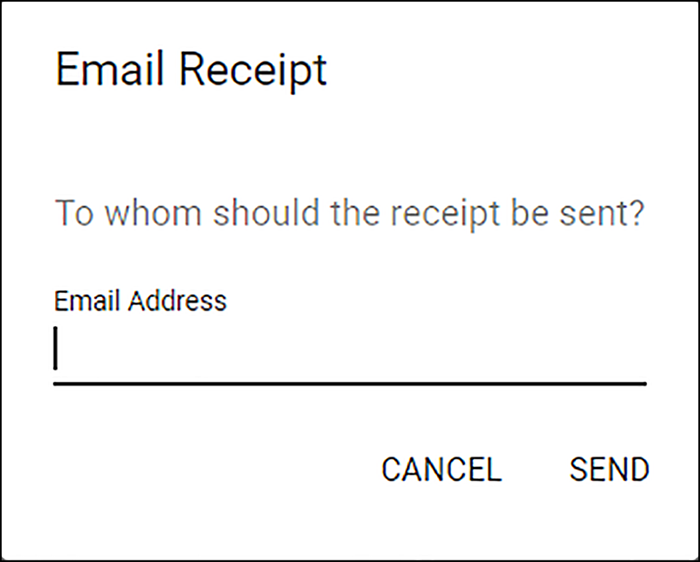
You can click the EMAIL link to the right of a transaction to enter an email address and send a copy of the receipt to a guest, upon request.
Themes
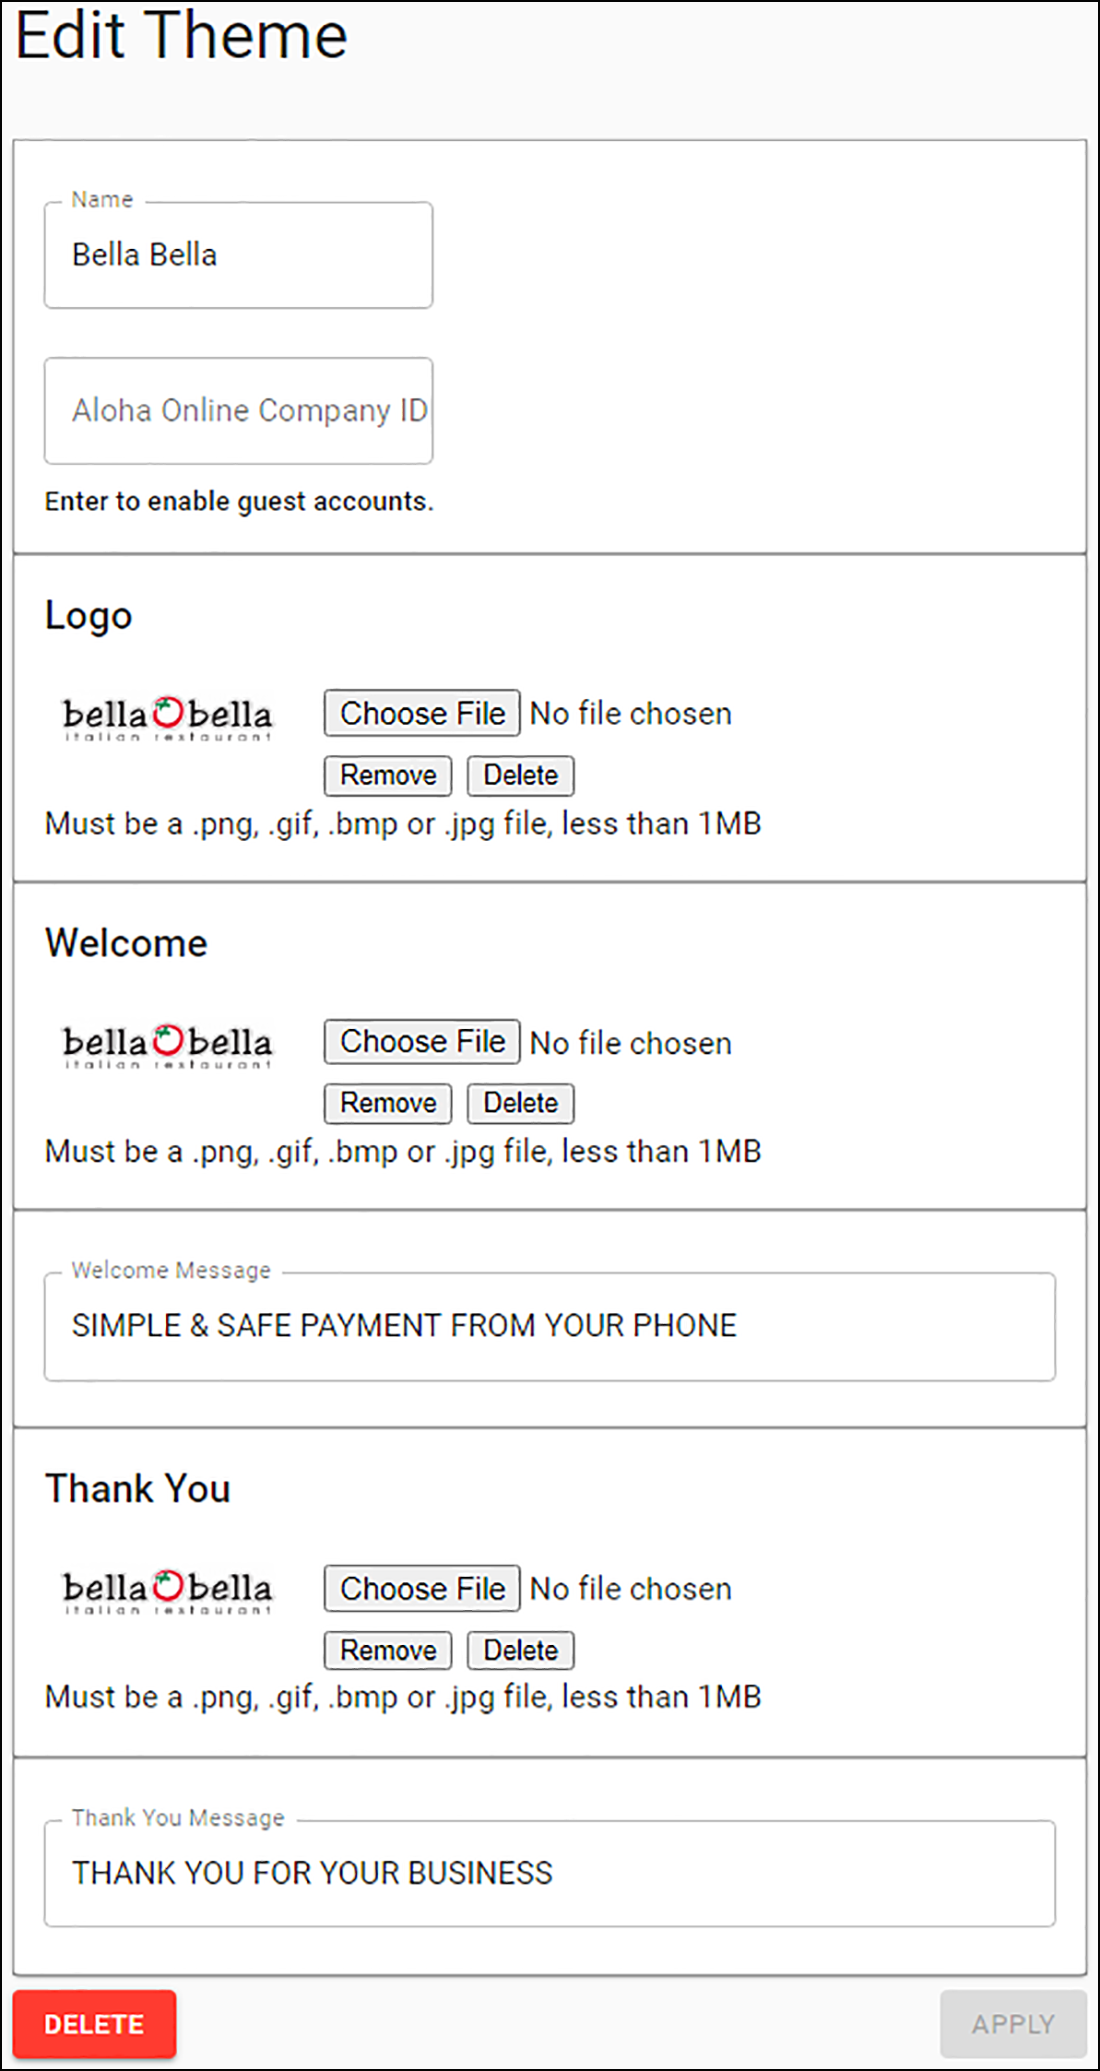
Click Themes in the left pane to view the configured themes for the company. Themes allow companies/owners to brand Mobile Pay with their colors and logos so that it looks similar to their company branding; however, it is still tied to Mobile Pay so that NCR can send updates.
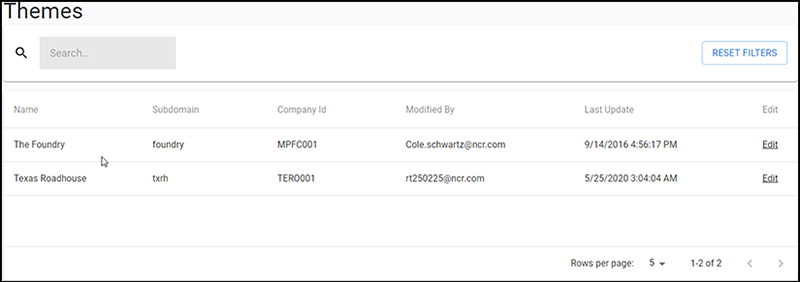
The table in the Themes screen shows the company name, company sub-domain, company identification number, person who modified the theme, and the modification time stamp.
Click Edit to the right of the theme to modify. Use the theme editor to select the Logo, Welcome and Thank you images, enter a Welcome message, and a Thank you message. Click Apply to save the changes.
Servers
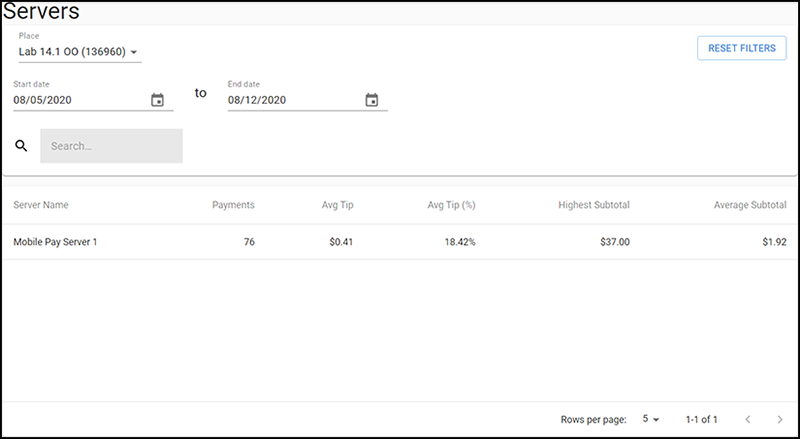
Click Servers to view the Mobile Pay transaction details by server, for the selected date range.
Tip Presets
Click Tip Presets in the left pane to view and/or edit the tip percentages.
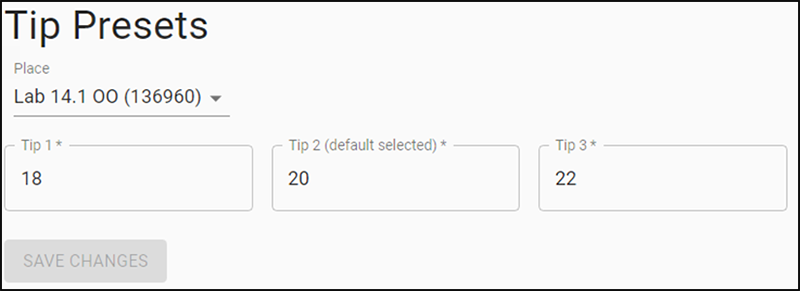
To change the default tip percentages (18%, 20%, and 22%) that appear for Mobile Pay transactions, you can type the new percentages to use, and click SAVE CHANGES. Once the changes are saved, the 'Presets updated successfully!' message appears.
When a guest makes a payment, the percentage in Tip 2 is used by default; however, a guest can select a different percentage.
Sanity Check
Sanity Check is a configuration verification and troubleshooting utility that you can access using the NCR Mobile Pay dashboard.
To use the utility, you must use the Site ID associated with the site in Command Center (CMC).
If there is a problem with the CMC connection to the site, Sanity Check returns a Site Down message. If the site is in a CMC tree that does not have the AOO Gateway provisioned for the company, it returns a Company Not Found message.
When the Sanity Check is successful, a request is made to the site associated with the Site ID to verify the configuration. This verification process is logged in the Debout.MPAgent.DATE.log file on the Back-of-House (BOH) system.
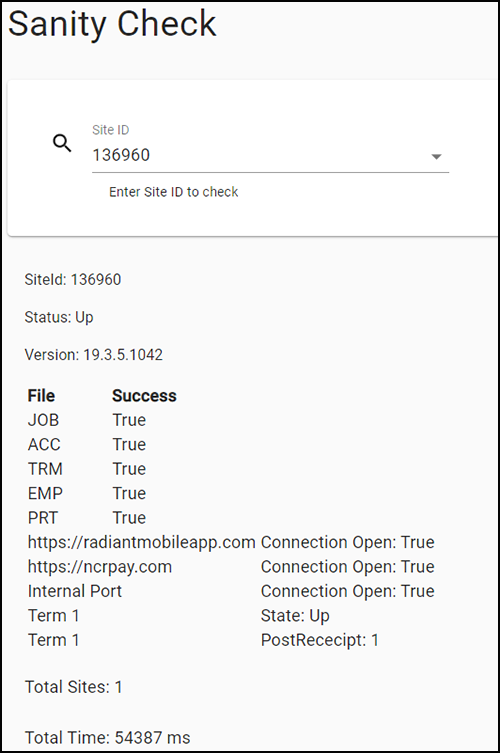
If configured properly, the following components appear on the Sanity Check screen with the Success status set to True:
JOB — References the job code configuration.
ACC — References the POS access levels configuration.
TRM — References the terminal configuration. This can also return a False for terminals that are configured in CFC/NAM, but offline or turned off.
EMP — References the employee configuration and verifies if a uCheck employee exists for each terminal.
PRT — References the printer and terminal configuration to verify that the printer that is on the host terminal(s), and matches the printer(s) on the interface terminal(s).
https://ncrpay.com and https://radiantmobileapp.com — References the external communication to hosted Mobile Pay servers; required to get check codes and communicate with the site from a customer device.
Internal Port — References the communication between the FOH MPAgent and the BOH Mobile Pay service. If this returns a false, verify the task is running on the FOH and firewall configuration.
Terminals — References the terminals that are configured in TRM.dbf appear here and their status with the BOH.
Any failed Sanity Check parameters for the SiteID are set to False.
Adjusting Transactions in Mobile Pay with NCR Payment Gateway
With NCR Payment Gateway and Mobile Pay, a generic tender is sent to Aloha, and the transactional data is completed host to host, and not sent to the site. In this situation, adjustments, refunds, or voids to the tender cannot be done in store. These adjustments to the tender must be done on the NCR Payment Gateway portal. You can do the following adjustments using NCR Payment Gateway:
- Void a transaction (same day)
- Refund of a transaction (after settlement)
- Increase approved amount
- Decrease approved amount
To adjust transactions in Mobile Pay with NCR Payment Gateway, log in to the ServerEPS application using the User Name, Company, and Password.

Click the Transaction Search option.
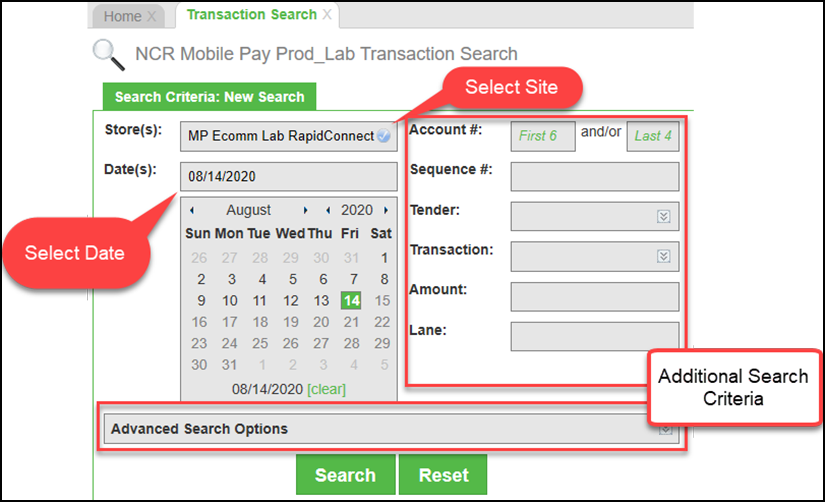
From the Transaction Search tab, select the required store and the date(s) to search for transactions. Optionally, you can add additional criteria to search specific cards or transaction types.
The following screen shows the results generated by the criteria set in the Transaction Search screen.

Select a record with the transaction type as Pre Auth Comp to modify. The Pre Auth Comp transaction type is a transaction that is not yet settled, and the only transaction type for which adjustments are allowed.
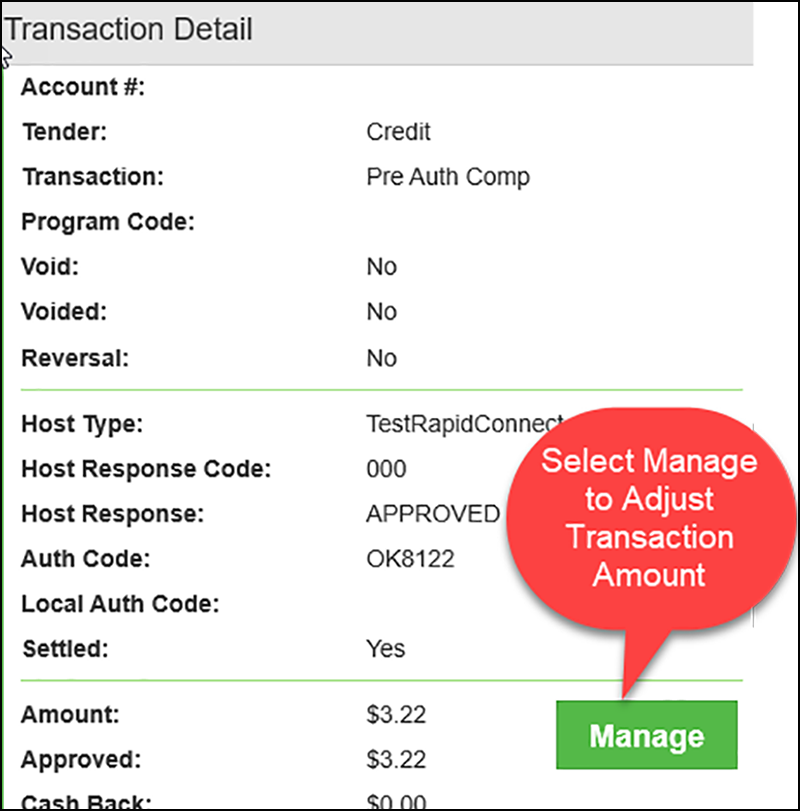
Click Manage to adjust the transaction amount.
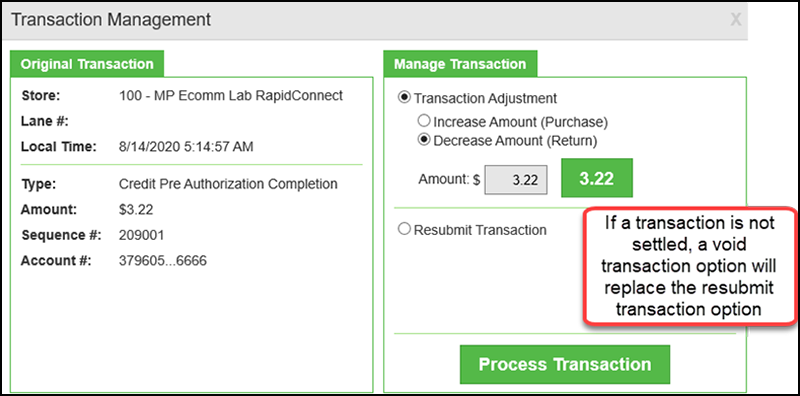
In the Manage Transaction section, select the Increase Amount or the Decrease Amount option, and enter the amount in the Amount (pre-filled) box (for example, $3.22 in Figure 19) to populate the amount to match the transaction. Click Process Transaction. The transaction type updates to reflect either Pre Auth or CardVerification.