Using sites
Use the Sites function to create and edit new store sites to assign to Mobile Pay companies.
Creating a new site
-
Click Sites in the left pane to display the Sites screen.
-
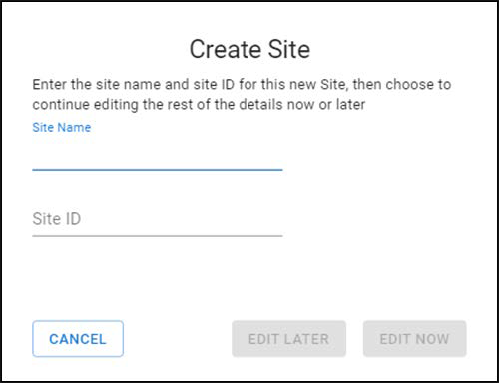
Click ADD NEW SITE to display the Create Site screen.

-
Enter the Site Name and Site ID. Site ID is the CMC ID assigned to the site you are adding.
-
Click Edit Later or Edit Now.
- Clicking the Edit Later option creates a new record in the Users screen (to be edited later).
- Clicking the Edit Now option opens up the Edit User screen.
-
Type the name to appear for the restaurant on receipts and reports.
-
Click Create.
Making a new site appear in analytic reports
-
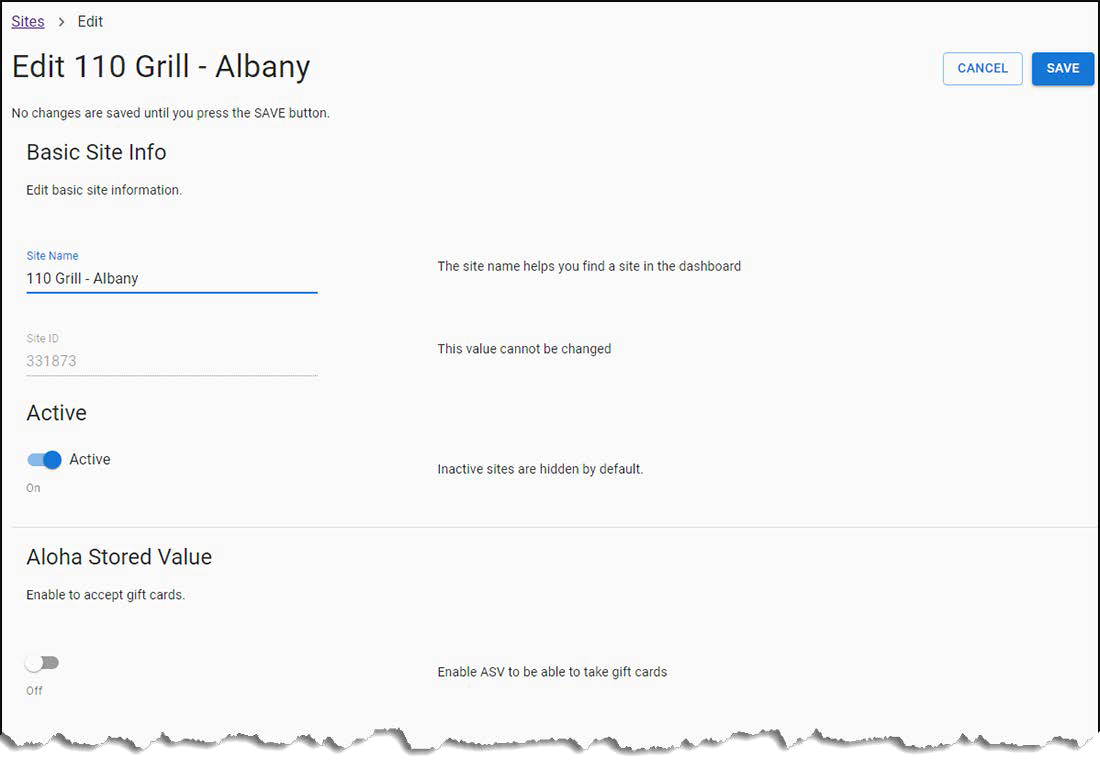
In the Sites screen, select the check box for the site you want to edit and click EDIT.

-
Type a new name to change the name of the site in Mobile Pay, if desired.
-
Click the Active toggle button to designate the site is to appear in the appear in the analytic reports that are emailed daily/weekly. Clearing Active does not prevent Mobile Pay working at the site.
-
Toggle the ASV button to “On” to enable the site to accept gift cards. Select the ASV company you created previously from the ASV Company drop-down list.
-
Do not activate the NCR Secure Payment toggle bar (cleared by default) to process payments using EDC.
- Click the NCR Payment Gateway toggle button to process payments using the NCR Payment Gateway (Connected Payments). Select the CP company from the CP Company drop-down list and specify the CP Store Number.
-
Optionally, click the Enable tips toggle button to enable or disable tips. By default, tips are disabled.
-
Type the three tip percentages to appear in Mobile Pay when closing a check. By default, the PERCENT option is selected and the default tip percentage values are set to 18, 20, and 22. You can select DOLLARS if you wish the tips to calculate and appear as dollar amounts.
-
Click Save.
-
Click Back to exit and return to the Mobile Pay Dashboard home screen.