Managing Menu Items
Menu Configurator enables you to add, edit, rename, hide, and delete menu items from the web menu. You can also move existing menu items from one submenu to another, combine like items, and even offer menu items by the day of the week.
To add a menu item:
You can add a menu item, not yet displayed, to your online menu, as long as the item exists in a sales category and on a panel or subpanel in the POS.

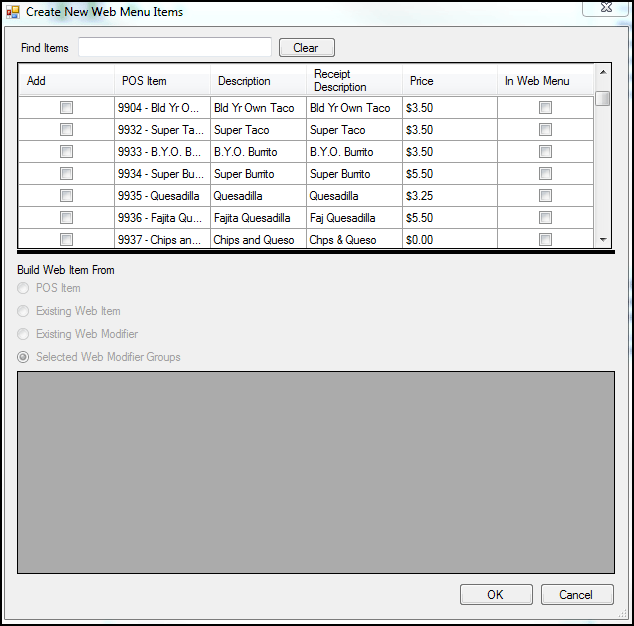
- In the menu tree, right-click the submenu on which to list the item and select Create New Web Menu Items from the menu that appears. The Create New Web Menu Items screen appears.
- Type the item name or the POS code in ‘Find Items’ to search for the menu item. As you enter the name or POS code, the matching search results appear.
- Select the item to add to your submenu.
- Select the method by which to build out the information for the menu item:
- POS Item – Builds the item directly from the POS data, or as the servers see it in-store. You may need to edit the menu item, sales item, and modifier groups.
- Existing Web Item – Constructs the item using an existing item modifier group. It is necessary to manually edit the sales and menu items.
- Existing Web Modifier –
- Selected Web Modifier Groups – Builds the item using already edited modifier groups. This can be useful for items that share the same groups, like steak temperature and entree sides.
- Click OK.
- Publish the change.
To hide a menu item:
In some cases, it may be necessary to temporarily remove an item from the online menu. Using the Visible flag, you can remove an item from the web menu, but not from the menu tree. This allows you to retain all customization of the item. You can also hide modifiers, modifier groups, and submenus.
- In the menu tree, right-click the item to hide and select Visible from the menu that appears. Visible items contain a blue check mark next to Visible, and hidden items do not. When you clear Visible, the item appears in gray italic text on the menu tree, indicating it is invisible.
- Publish the change.
To delete a menu item:
You can also delete an item to prevent it from appearing on the web menu. Deleting an item does not permanently remove the item from the database; however, deleting an item removes any customization you have made to the item. If you add the item back to the web menu, you must build out and customize the item again.
- In the menu tree, right-click the item to delete and select Delete from the menu that appears. Use caution in deleting items as the system does not provide a prompt after you click Delete.
- Publish the change.
To rename a menu item:
You can change the menu item name to match your paper menu, rather than displaying the POS text your employees see. For example, you can rename the menu item ‘BACON CHZBURG’ to ‘Bacon Cheeseburger.
📝 Review all naming changes before publishing as Menu Configurator does not contain a spell check utility.
-
In the menu tree, select the item to edit.
-
In Item Properties, type the name to appear for the item on the web menu.
-
(Optional), Type the description for the item to match the paper menu. For example, the description for a bacon cheeseburger could be, ‘Two thick bacon strips, cheddar cheese, and ketchup on an all-beef patty cooked to your liking. Served with your choice of side.'
📝 For the description to be visible on the web menu, you should add the description at the folder level.
-
Publish the change.
To move an existing menu item to a different submenu:
You can move existing menu items to a different submenu that may make it easier for consumers to navigate your web menu. For example, you may move salads out of an existing appetizer submenu and into a separate salads submenu. When you move a menu item to a different submenu, all configuration, such as descriptions and modifier groups, moves with the menu item.
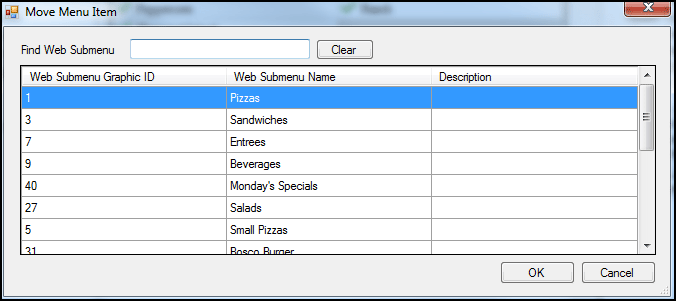
- In the menu tree, right-click the item to move, and select Change Submenu. The Move Menu Item screen appears.

- Type the submenu name in Find Web Submenu to locate the target submenu for the item. The matching search results appear on the screen.
-OR-
Use the scroll bar to locate the target submenu. New submenus appear at the bottom of the list. - Select the target submenu.
- Click OK.
- Publish the change.
To offer a menu item by day of the week:
You can restrict the offering of items on your web menu to certain days of the week. For example, you may have particular menu items available only on certain days of the week. You can only restrict menu items, not modifier items.
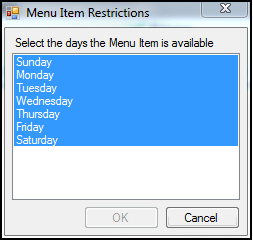
- In the menu tree, right-click the menu item to restrict by days of the week, and select Day of Week Restrictions from the drop-down list. The Menu Item Restrictions screen appears.

- Select the days of the week the menu is available. For example, if a menu item is available on Sunday, select Sunday. To select multiple days, click the first day the item is available, hold down the Ctrl key and click the next the day the item is available.
- Click OK.
- Publish the changes.
To combine like items:
You can combine like menu items to simplify the ordering process for your consumers. For example, for items such as Chicken Wings, which can come in different sizes and quantities, you can combine them into a single menu item. You can then add a size or quantity for the item.
- In the menu tree, select one of the menu items you want to combine. The menu item you select will be the default size for the web menu item. You can later change the default item by changing the default item ID.
- In Item Properties, type the new item name for the menu item. Choose a generic name that encompasses all the items included.
- Type the description for the new item. Include information about the sizes and options available.
- Right-click the item and select Create New Web Items from the menu that appears. The Create New Web items screen appears.
- Select the items to add, and click OK.
- Rename each sales item to accurately reflect the size.
- For each item you rename, if it appears elsewhere on the web menu, delete those instances.
- In Item Properties, type an item selection label to appear on the web menu.
- Publish the changes.