Managing Submenus
Submenus control the menu headings that appear to your consumers on your web menu. You may want to rename an existing menu to make it more consumer-friendly, and you can add additional submenus with fewer items to better organize your web menu. You can also restrict the time of day, and days of the week, for when a submenu is available.
To add a submenu:

-
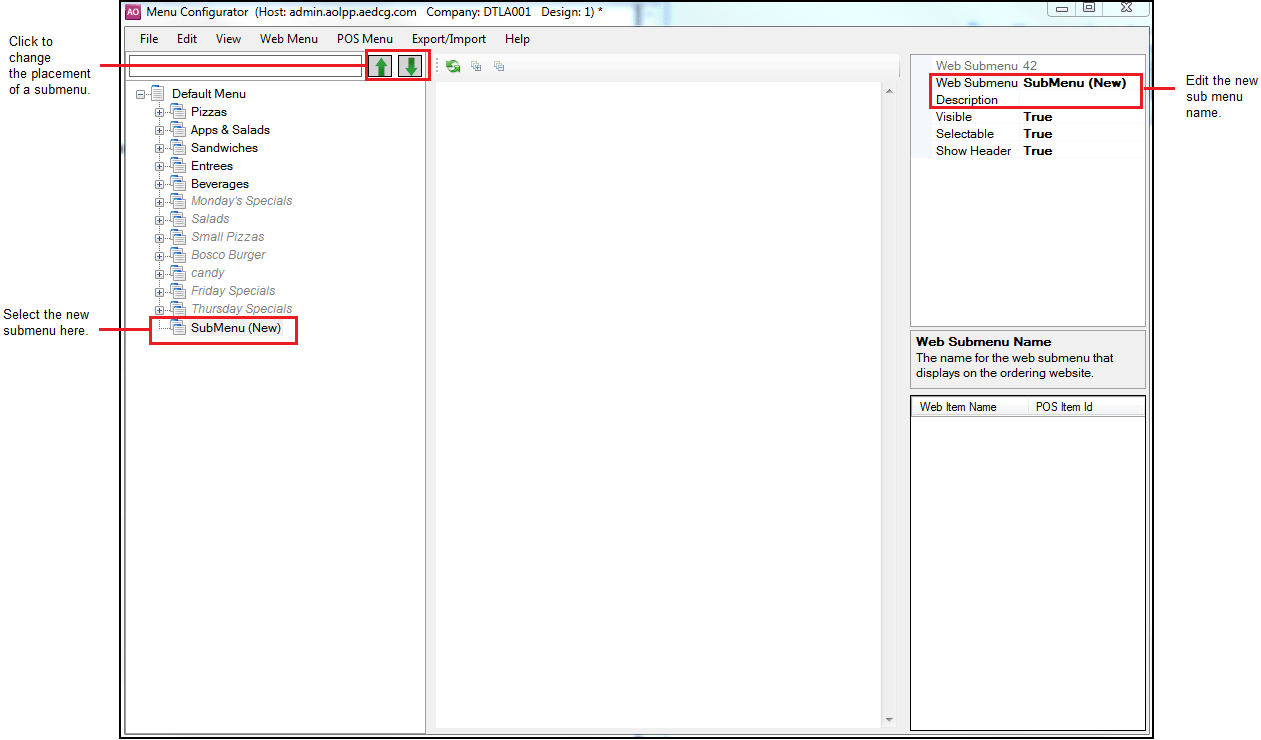
Right-click the menu name, usually named Default Menu and select Create New Submenu from the menu that appears. The new submenu appears at the bottom of the list.
-
Select SubMenu (New).
-
In Item Properties, type the submenu name to appear on the website.
📝 To change the placement of the submenu, select the submenu and use the green up and down arrows to move the submenu to the desired location.
-
Publish the change.
To rename a submenu:
- Select the submenu for which to change the name.
- In Item Properties, type the submenu name to appear on the website.
- Publish the change.
To create a time of day restriction:
When you create a time of day restriction, you are selecting the days and times during which the submenu is available.

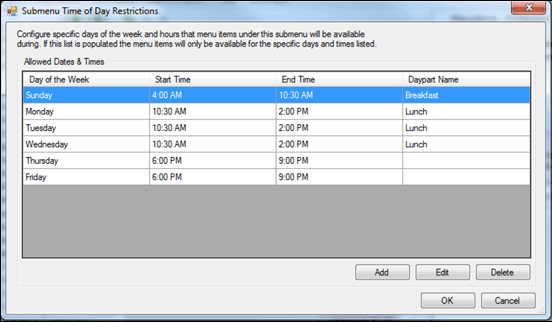
- In the menu tree, right-click the submenu and select Time of Day Restrictions from the menu that appears. The Submenu Time of Day Restrictions window appears.
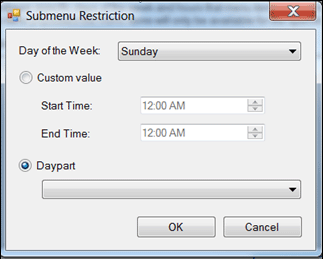
- Click Add. The Submenu Restriction Window appears.

-
Select the day of the week for which to make the submenu available from the ‘Day of the Week’ drop-down list.
-
Select the start time at which the submenu is to become available.
📝 It is not necessary for the available times to match the store hours. For example, to create a Monday special, select Monday as the day, and set the time from 12:00 a.m. to 12:00 a.m., even though the store opens at 5:00 a.m. The system prevents consumers from ordering the item until the store opens.
-
Select the end time at which the submenu is no longer available.
-
Click OK to exit the submenu restriction window.
-
Click OK to return to Menu Configurator.
-
Publish the change.