Working with Menu Configurator
Updating your online menu with Menu Configurator works as follows:
- Check out the menu data from the Aloha Online Ordering data server.
- Make the desired menu changes.
- Publish the new menu to the online ordering website. The system checks your design back in upon publishing your changes.
To check out the menu:
To edit your web menu, you must first check out the menu. Only one user at a time can check out the menu, preventing menu change conflicts.
- Launch Menu Configurator.
- Select File > Check Out Design. The login screen appears.
- Type your Login. This is the same login you use to access Web Admin.
- Type your password. This is the same password you use to access Web Admin.
- Click OK. The Select Company Design screen appears.
- Select the company name. Most users see only one company name.
- Click OK. Menu Configurator downloads and opens your most recent menu data.
To publish the menu:
Once you make a change to your menu, publish the changes to your online ordering website.
Recommendation: Publish often, such as after each menu change. Computer crashes and lost Internet connections, along with other problems, can eradicate any work you have completed. Additionally, if you make an error, such as adding an existing duplicate modifier to a modifier group, the system prevents you from completing the publication process. If you make multiple changes prior to publishing, locating the error can be a cumbersome process.
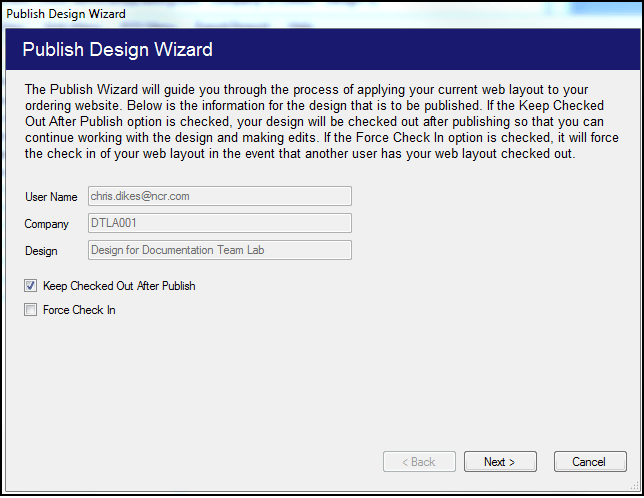
- Select File > Publish.The Publish Design Wizard screen appears.

- Select Keep Checked Out After Publish if you plan to keep editing the menu.
-OR-
Select Force Check In if you are done editing the menu. - Click Next. The system reviews your menu changes for errors. If the system finds errors, you can still publish the menu; however, consumers may experience problems when attempting to place an online order. To print the list of errors for review, click Print.
- Click Next. The wizard publishes your menu changes.
- Click Finish.