Supporting Group Ordering
Group ordering enables a registered consumer, referred to as the Event Organizer, to create an order and invite others to submit their order as part of one group order. The system sends an email message to the invitees, who can then add their items for order to the ticket. When all invitees complete their order, or the time limit set by the Event Organizer arrives, the Event Organizer submits the items for order as one order with a single payment. A consumer can also create an address book to use on their next order.
Configuring Group Ordering
You enable group ordering by editing the AvailableOrderTypes company setting. Additionally, group ordering adds two new graphic files, which you can customize:
- Page_grouporder_thankyou.png – Displays the thank you page for the invitee. The system uses the same image and dimensions as the page_thankyou.png.
- background_ordertypeXsection.png – You can place images behind both the standard and group order modes on the time.aspx page. The names of those files are: standard mode (first position) background_ordertype1section.png, and group order (second position) background_ordertype2section.png.
To configure group ordering:
- In Web Admin, select Configuration > Company Settings Setup.
- Select the appropriate set from the ‘Choose Settings Set’ drop-down list.
- Select AvailableOrderTypes.
- Click Edit Setting.
- Add GroupByInvitation to the value with a semi-colon separating it and ‘standard,’ which the value already contains. The new value appears as ‘standard; GroupByInvitation.’
- Click Update.
Using Group Ordering
The consumer handles the details of a group order; however, they may require assistance or have questions regarding the group ordering process.
Understanding the Flow of a Group Order
The following provides an overview of the flow of a group order:

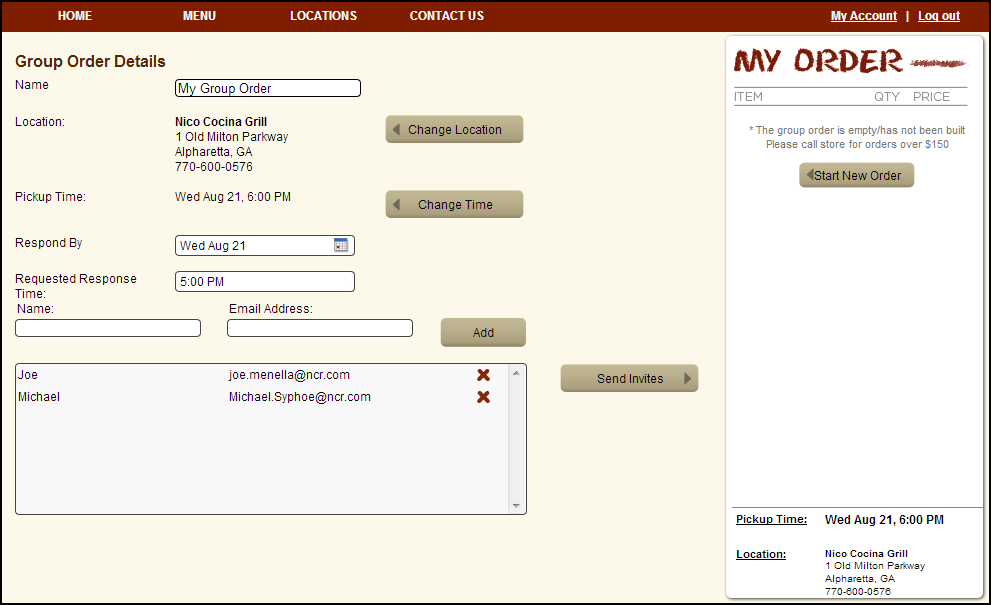
- The event organizer accesses your online ordering site, logs in, and selects Group Order By Invitation. The system displays the Group Order Details page.
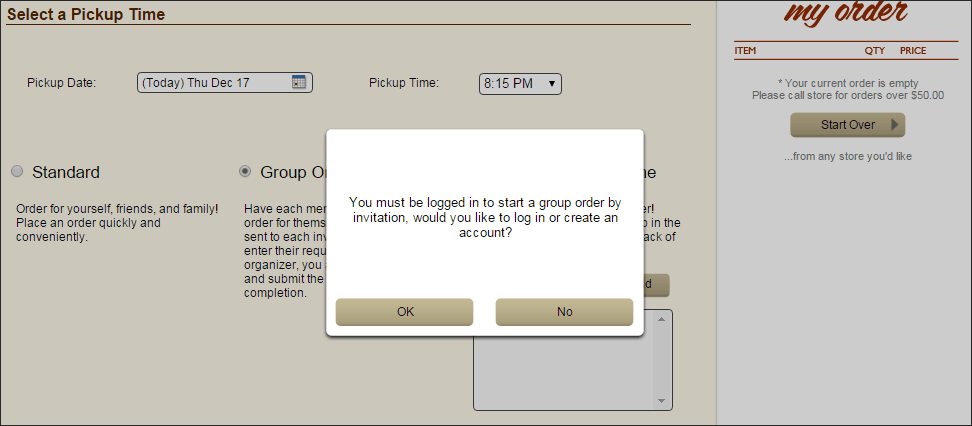
When the group organizer chooses Group Order by Invitation and they are not logged in, the message, “You must be logged in to start a group order by invitation. Would you like to log in or create an account?” appears. If the group organizer clicks OK, the system directs them to the Sign In page. If the group organizer clicks No, the system treats the order as a standard order.
- The event organizer selects the following:
- The store location
- The target time for the order.
- The deadline for response by the invitees.
- The invitees for the group order.
- The event organizer clicks Send Invites.
- The system sends an email message to the invitees with details about the order and a link to start their order.
- Each invitee clicks the link, selects their items for order, and clicks Submit.
- The event organizer can review the group order at the Account Dashboard page to see which invittees have responded to the Group Order.
- The event organizer must build and complete the order for submission. Prior to building the order, the event organizer can send a reminder email message to the invitees. When the event organizer clicks Build Order, the invitees can no longer edit or submit items for order.
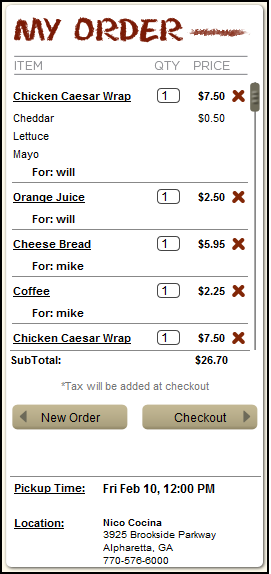
- The event organizer can review the items for order, add or remove items, and then click Checkout. The system lists the items and identifies the person ordering the item.
Creating a Group Address Book
A consumer can create an address book for group ordering for online orders. A consumer can create the address book at the customer profile page or on the group order details page.
To create an address book at the customer profile page:
- The consumer logs in to their online ordering account.
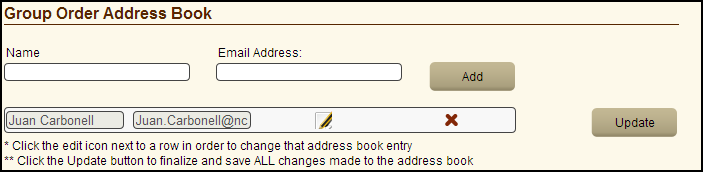
- The consumer selects My Account > My Profile. The Group Order Address Book appears at the bottom of the page.
-
The consumer types the name and email address of the person and clicks Add.
-
Repeat for each additional person to add to the address book.
-
The consumer clicks Update.
📝 Note: To delete a name from the address book, the consumer selects the name and the red ‘X’ to the right of the name. To edit a name, the consumer selects a name and the pencil icon to the right of the name. Make the necessary changes and click Update.
To create an address book while creating an order:
- The consumer must first start a group order.
- At the Invite Others page, the consumer clicks Open Address Book.
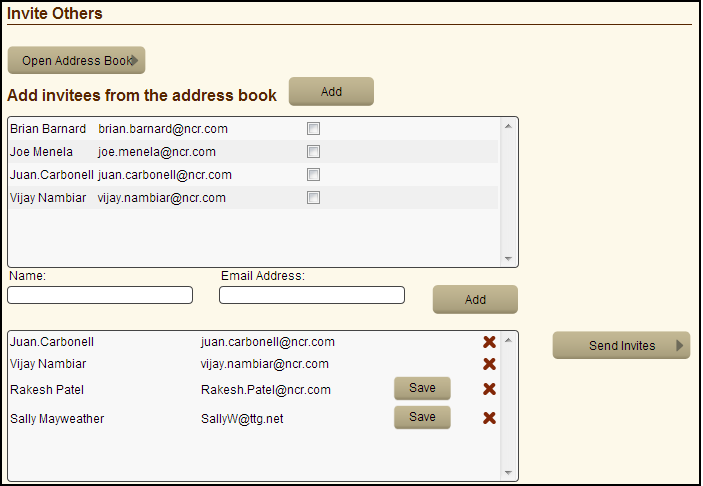
- The consumer types the name and email address of the person and clicks Add.
- The consumer clicks Save to the right of the name and address of the person to add them to the address book.