Printing a thank you message on the guest check (optional)
To print a 'thank you' message in the footer of the guest check when guests make a charitable contribution, create a custom guest check message. Use the Set Guest Check Footer Message by Category event type to stipulate the charitable donations category as the category from which the guest must make a ‘purchase’ before the message prints.
To create a ‘thank you’ guest check message:
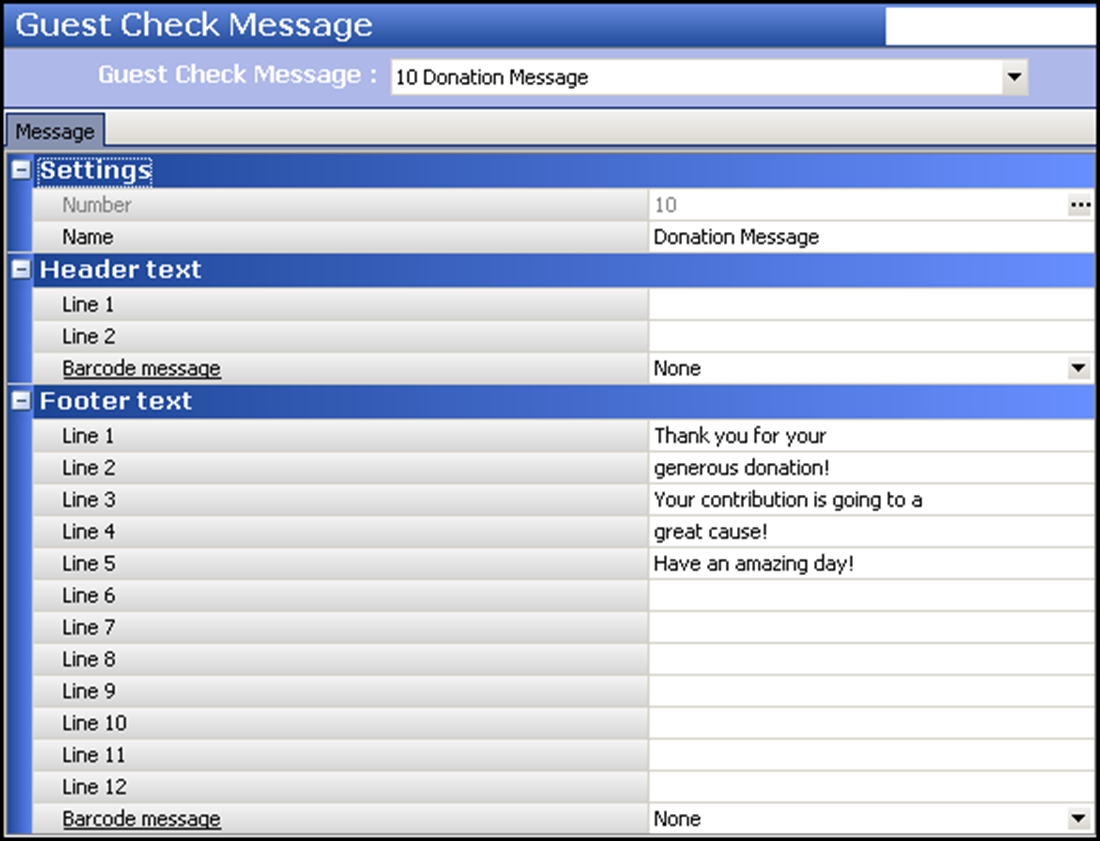
- Select Maintenance > Messaging > Guest Check Message.
- Click New and accept the system assigned number or click the ellipses (...) next to ‘Number’ to display the Number Assignment dialog box from which you can choose an alternate number.

- Under the ‘Settings’ group bar, type a name to identify the guest check footer message.
- Under the ‘Footer text’ group bar, type the text to appear at the bottom of the guest check in ‘Line 1’ through ‘Line 12.’ For example, ‘Thank you for your generous donation! Your contribution is going to a great cause! Have an amazing day!’
- Click Save and exit the Guest Check Message function.
To activate the ‘thank you’ guest check message:
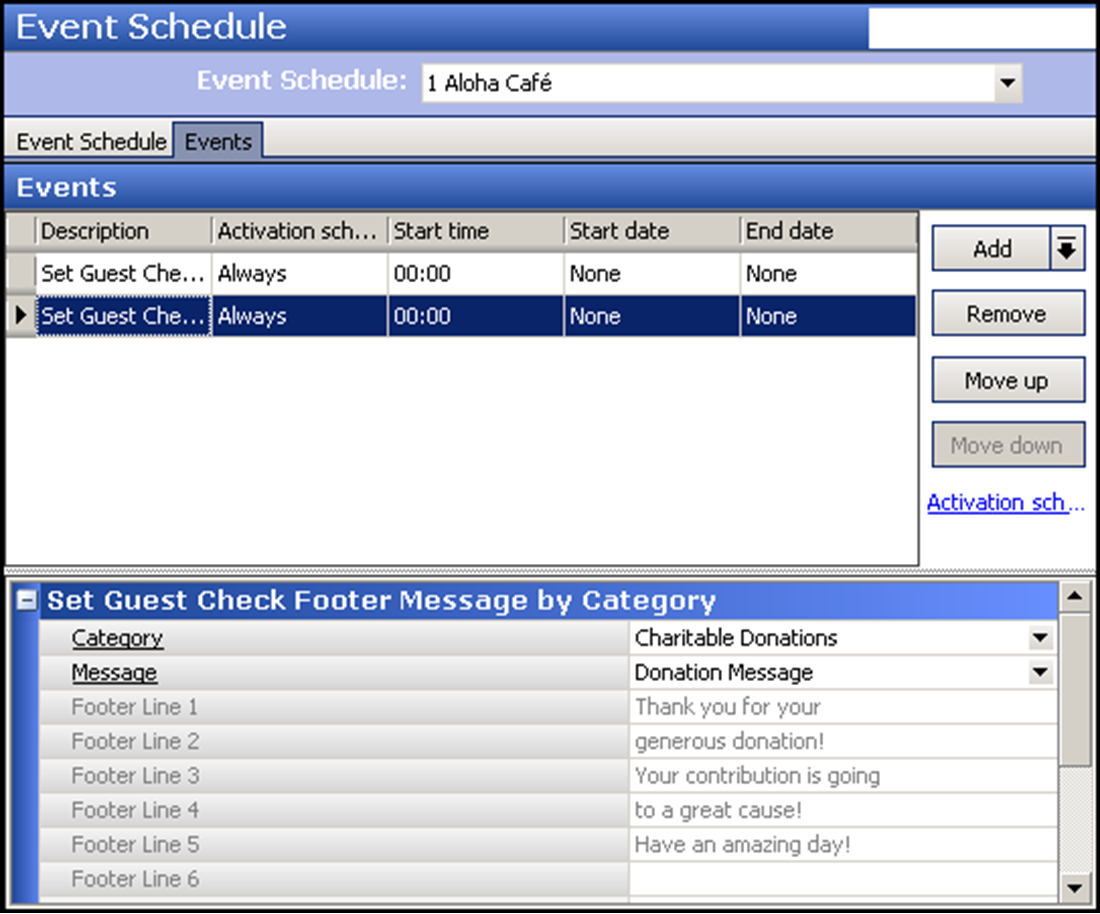
- Select Maintenance > System Settings > Event Schedule.
- Click the Add drop-down arrow, select Set Guest Check Footer Message by Category from the ‘Type’ list box, and click OK.

- Select Always from the ‘Activation Schedule’ drop-down list.
- Select the date on which to make the event active at the store in ‘Start date.’
- Select the date on which you no longer want the event active at the store in ‘End date.’ To print the guest check footer message long term, select a date well into the future.
- Under the ‘Set Guest Check Footer Message by Category’ group bar, select the general category created specifically for charitable donations, such as ‘Charitable Donations.’
- Select the thank you message specifically created for charitable donations from the drop-down list.
- Click Save and exit the Event Schedule function.
Continue to "Providing the ability to enter open amount donations."