Creating the configuration file
Whether you insert data into, or completely replace, the standard checkout report, use a text editor, such as MSNotepad®, to create Checkout.cfg and place the file in the Data directory. You can customize Checkout.cfg to contain as many sections as necessary.
Understanding Checkout.cfg variables and rules
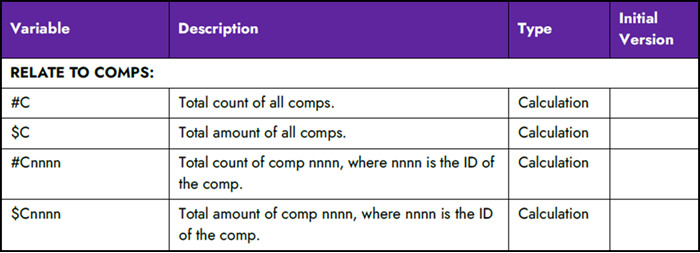
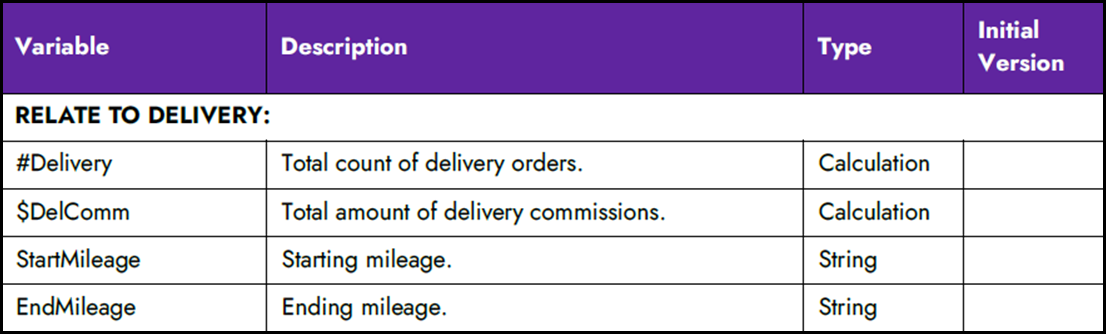
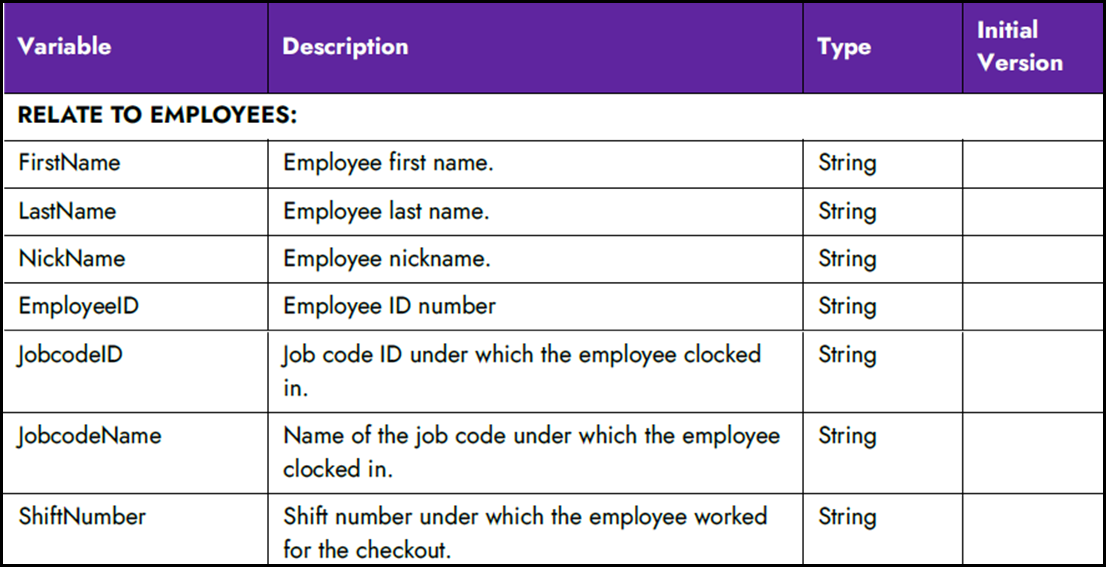
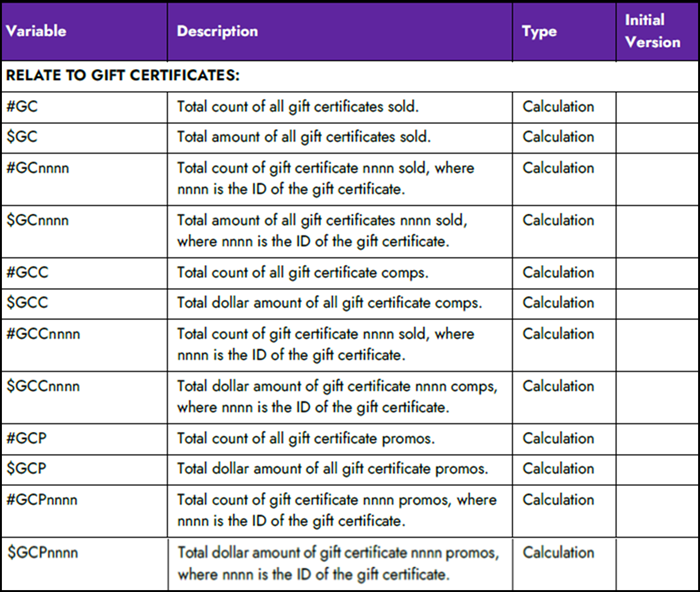
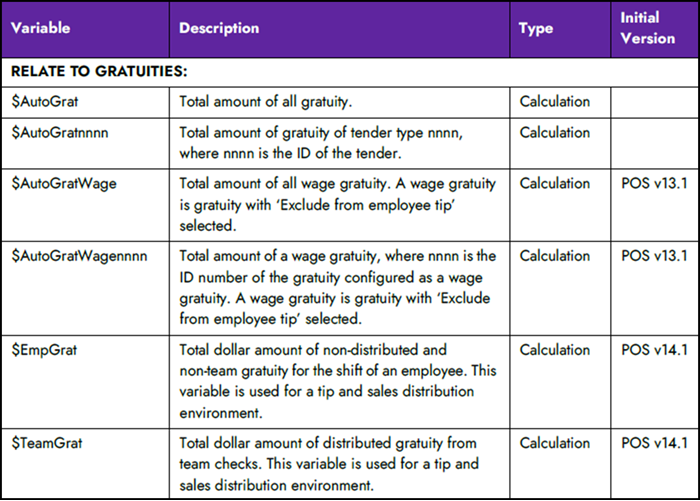
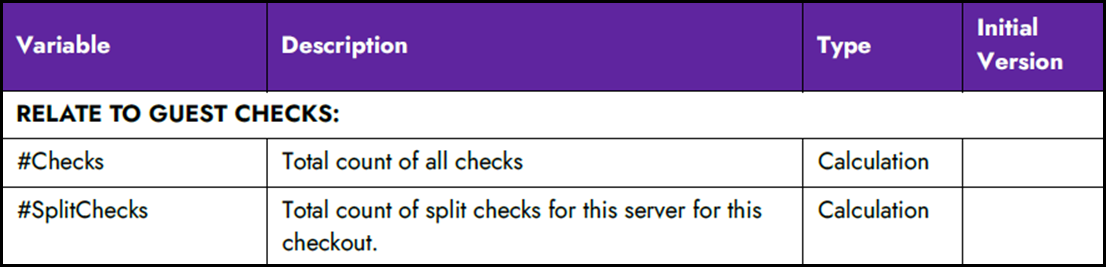
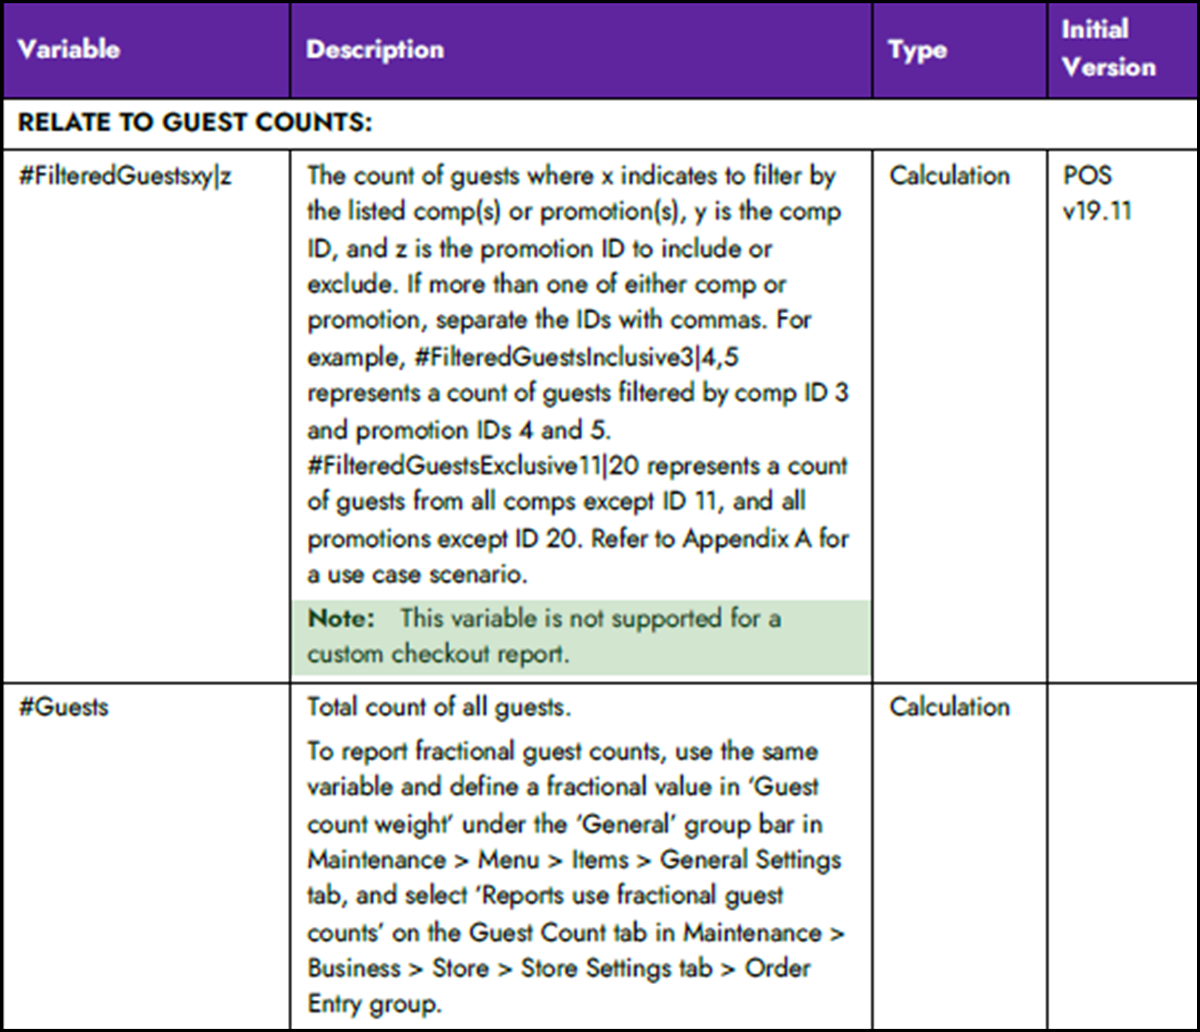
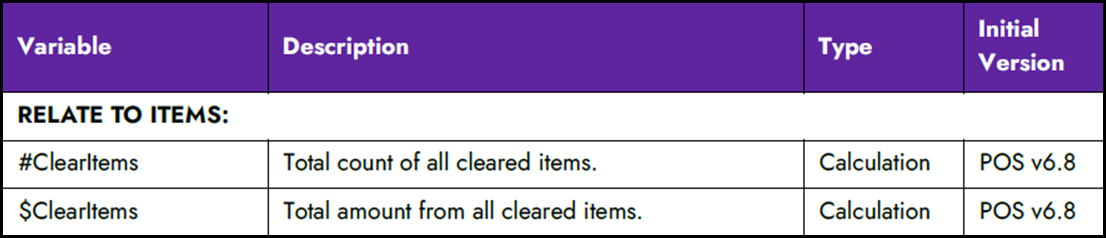
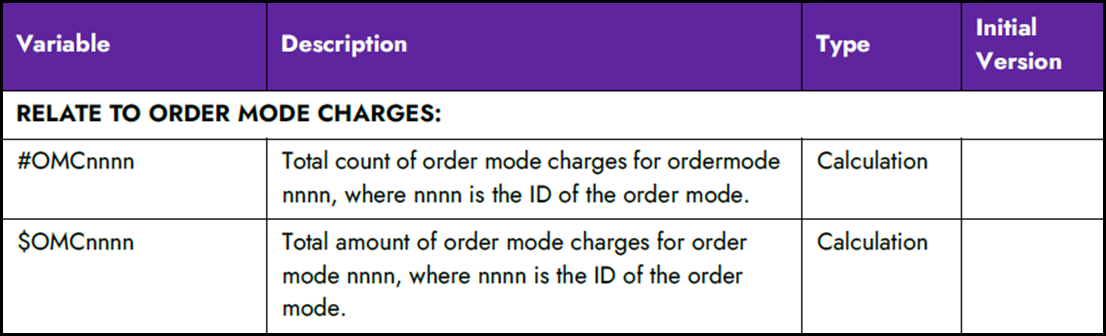
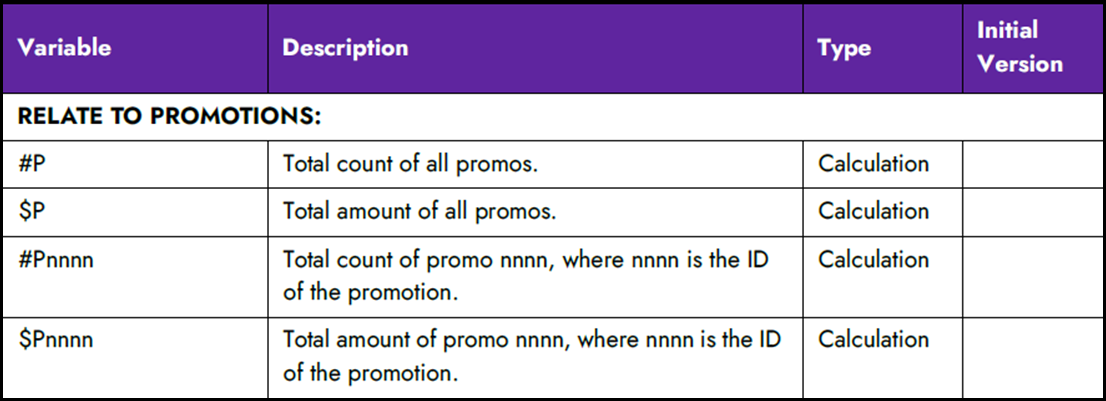
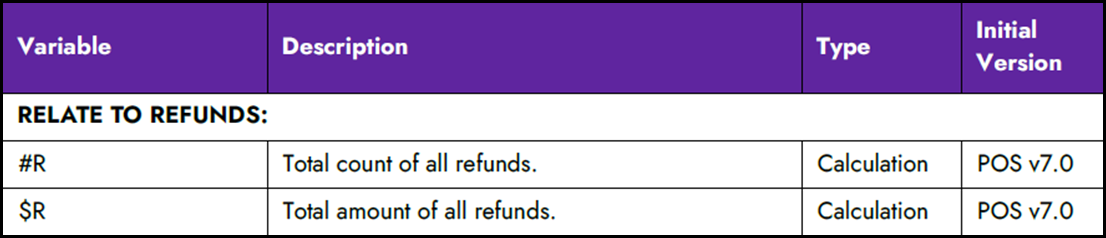
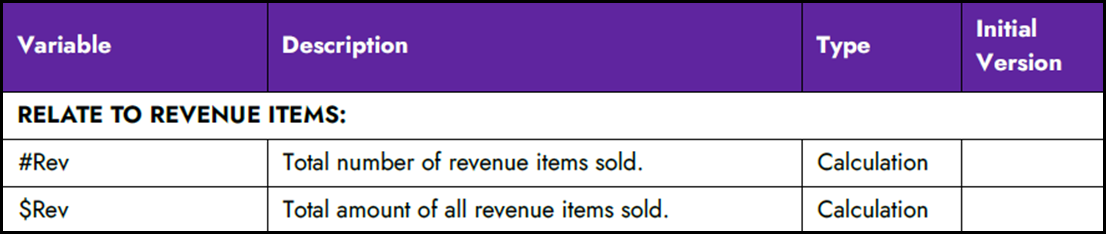
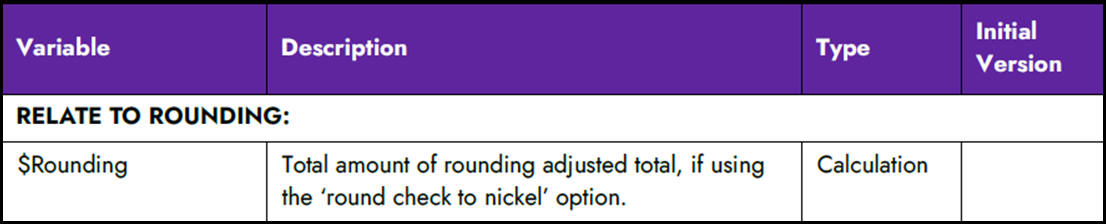
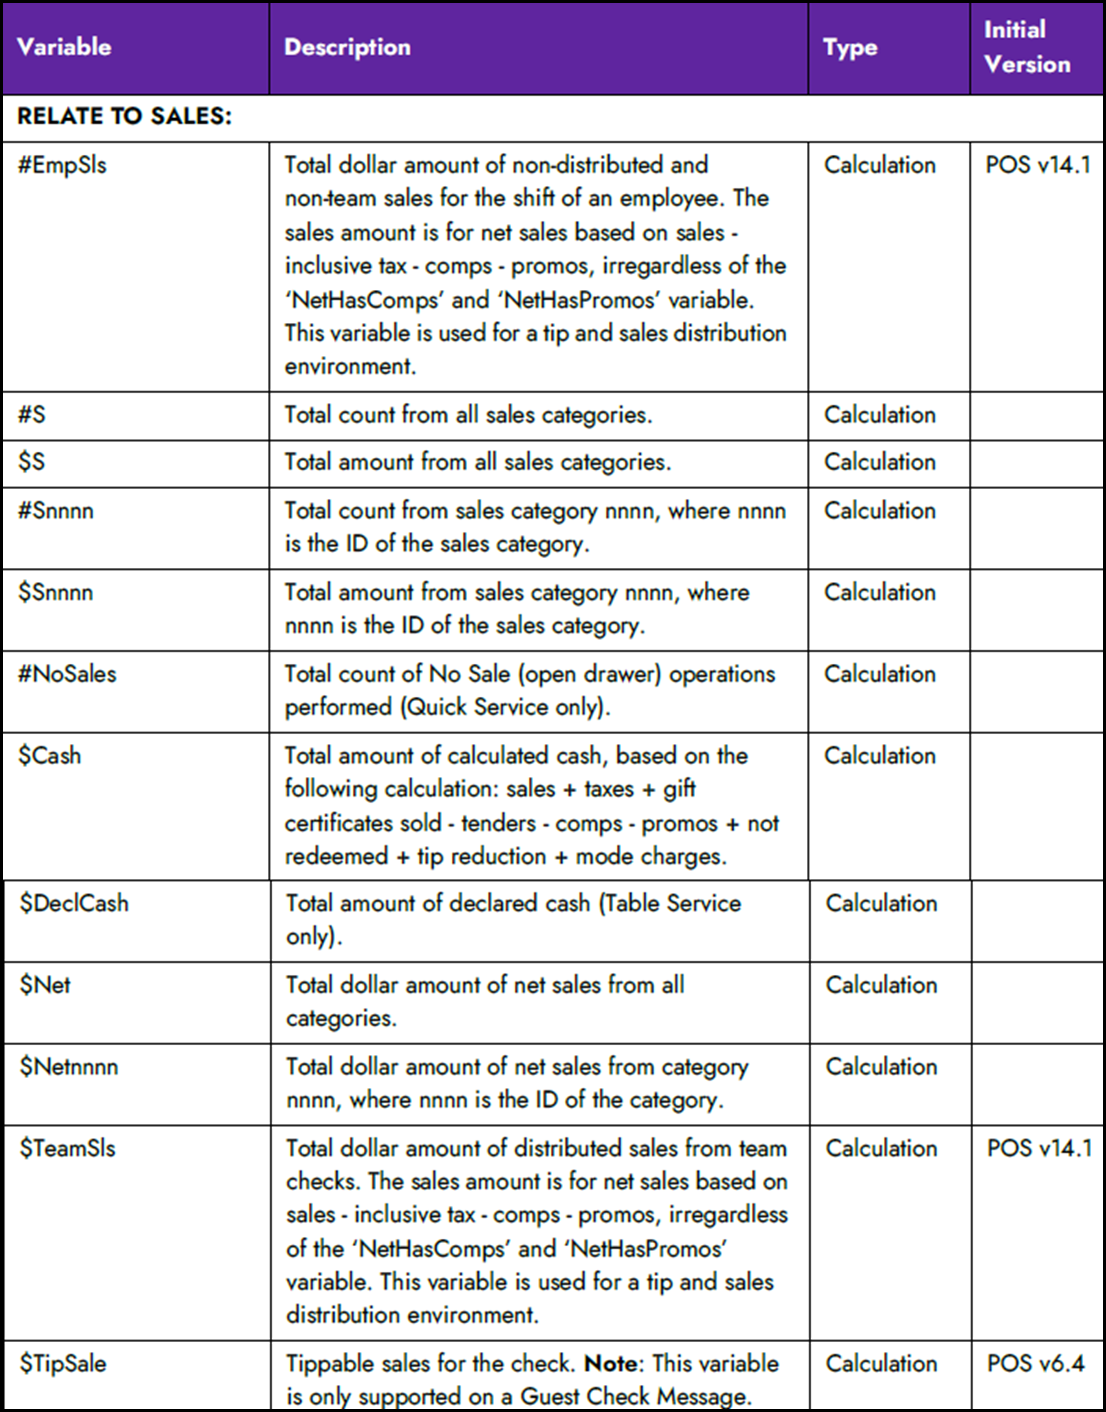
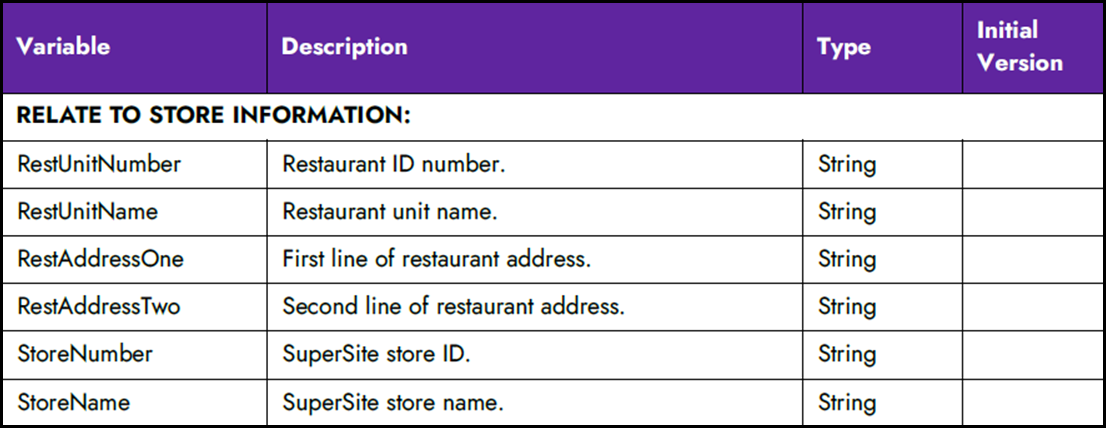
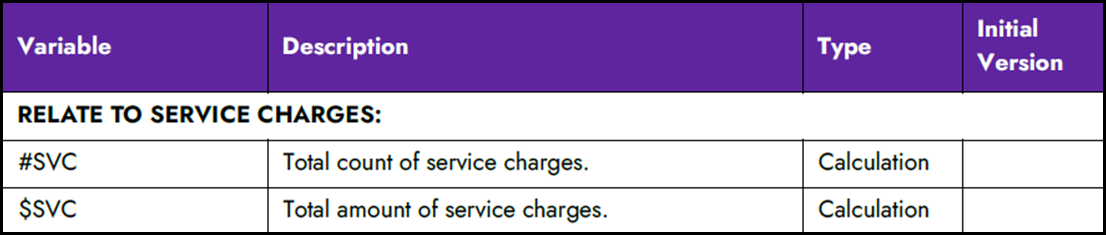
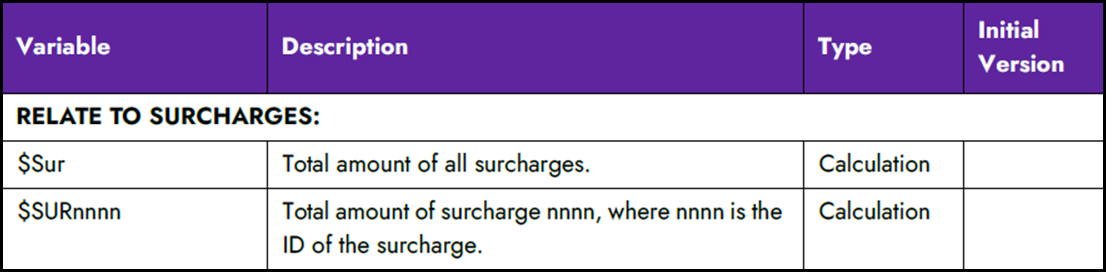
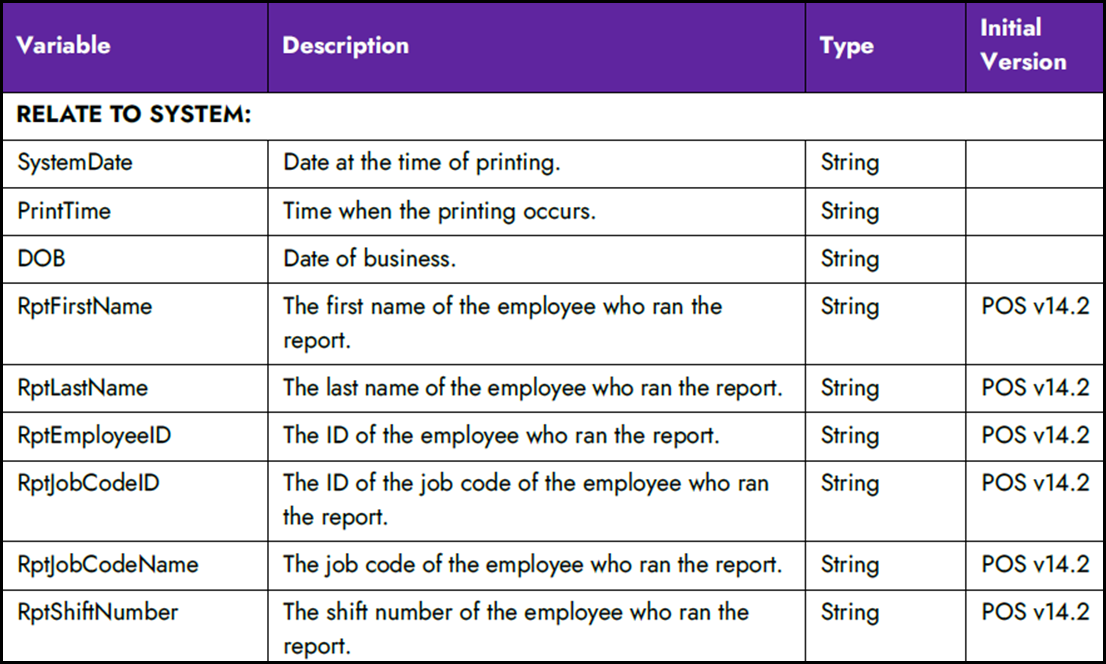
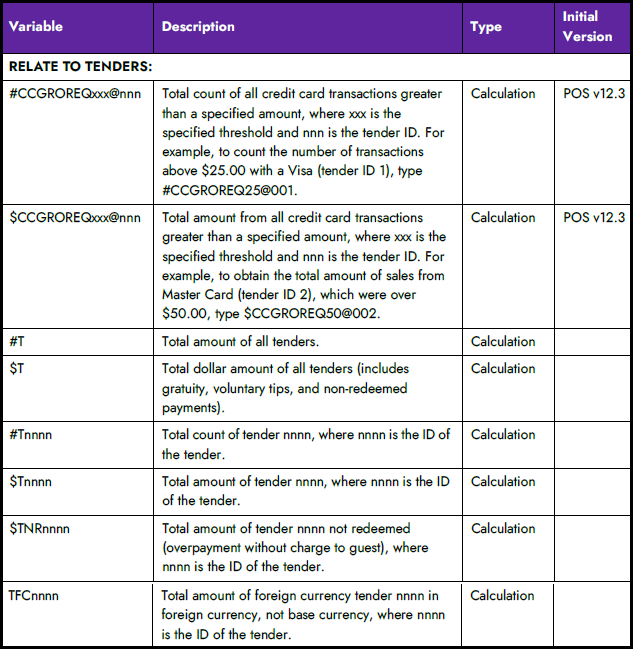
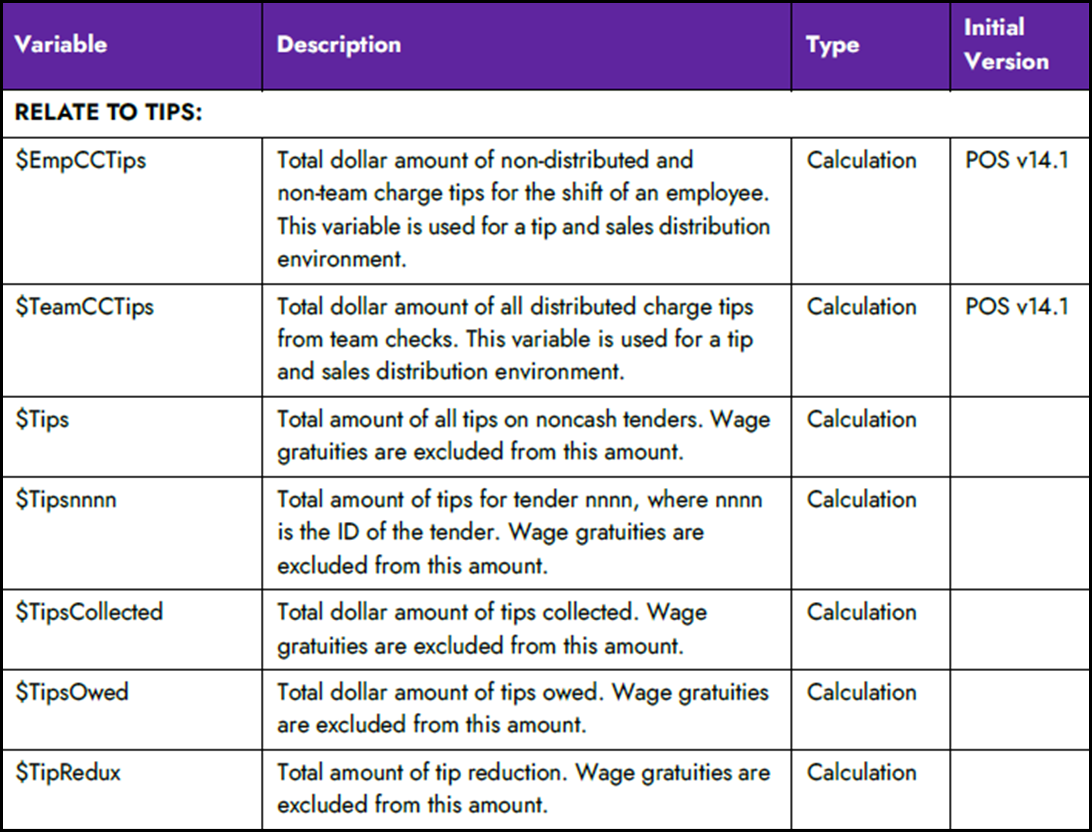
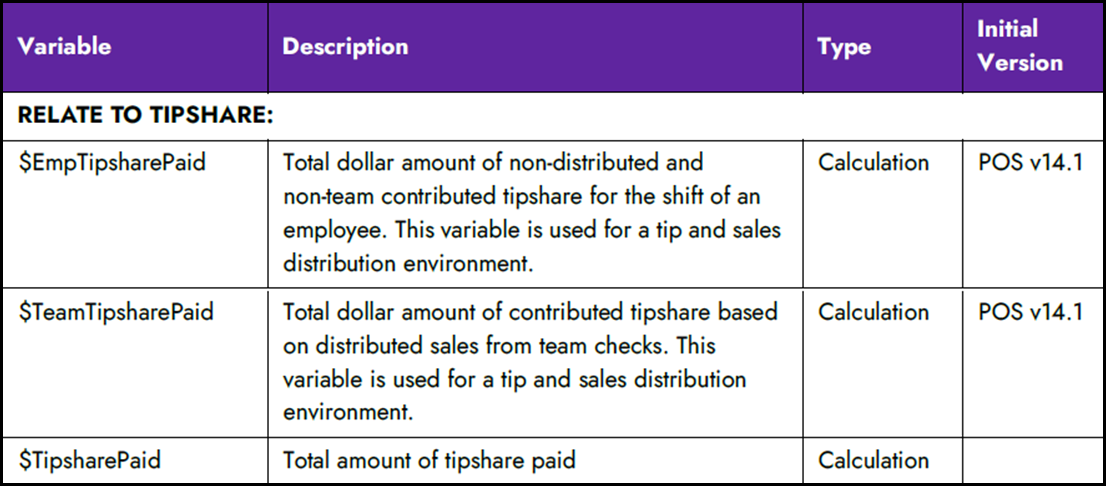
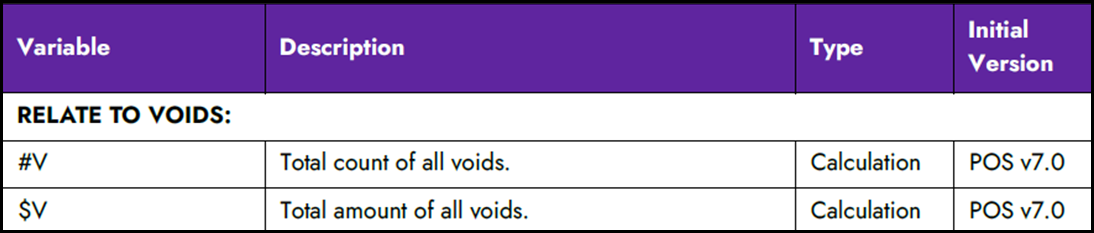
The following tables contain the variables you can use.


Understanding configuration rules
It is necessary to follow certain rules when creating your configuration file.
Print for all employee or by job code
Use a header to tell the system to print the custom information. You must dedicate the first line to a header; otherwise, anything placed before the header does not print. If the custom information is to print for all employees, use Default, as shown below. If the custom information is to print for a specific job code, or job codes, use a ‘jobcode’ header. The information prints until you insert another header to tell the system to print differently.
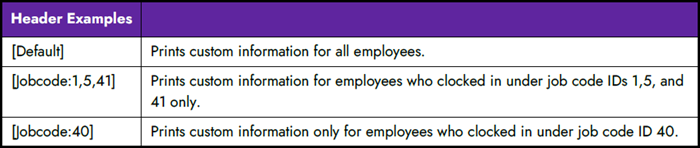
Tip: The first line of your custom information must be a header.
Fill a line with a single character
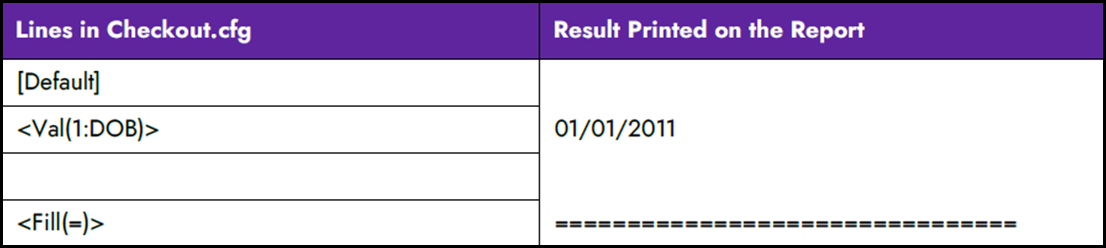
For readability and dividing sections, you can insert a line composed entirely of a single character. You must use the ‘Fill’ command, enclosed inside greater and less than brackets. Common characters are -, *, or =.

Insert free text
You can insert free text for such things as section headings, labels for calculations, and more. Do not use closing and ending greater and less than brackets (<>) around any free text. These characters are reserved for a dynamic calculation or string.

Insert blank lines
Each line in the custom configuration file equals to a line printed for your custom information. If you want a blank line to print, insert a blank line in the configuration file. A line for a header is ignored.
Insert dynamic calculations and strings
Dynamic calculations and strings are the main components of your custom information. A calculation is a count or equation of a value on which you want to report, such as the number of all comps, or the calculated total of all comp amounts. A string is the name of a supported variable pulled from within the system, such as the last name of an employee, or the date of business.
To configure, you must include three required elements, all inside of beginning and closing greater and less than brackets, as shown in the following:
<Val(width:formula)>
Val – Indicates the result will be a dynamic calculation or string.
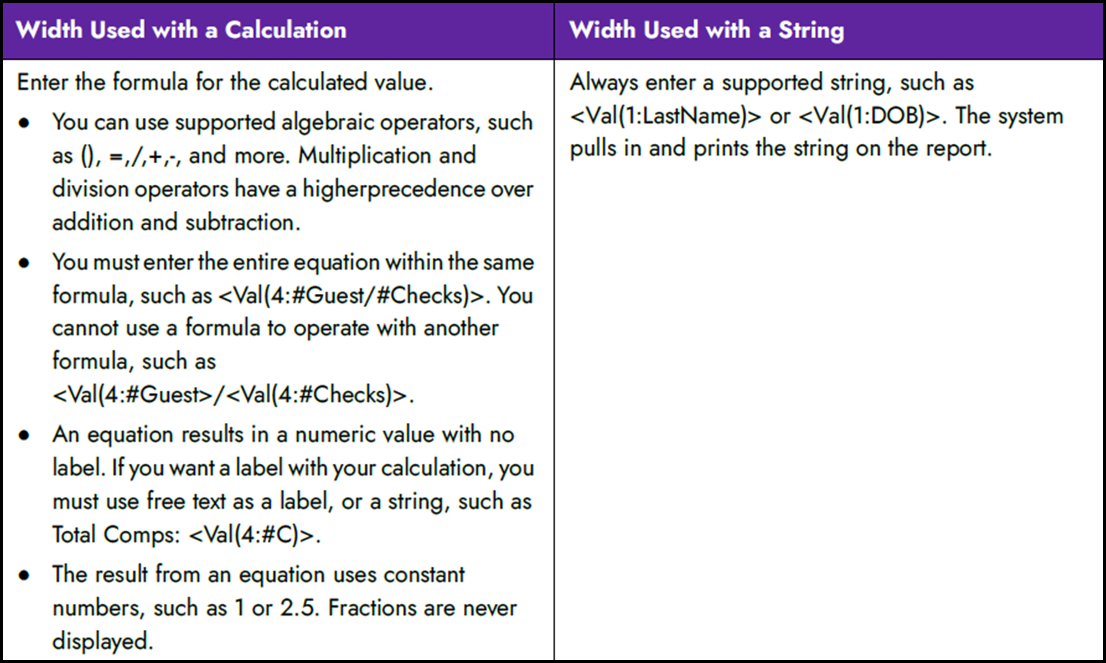
Width - Specifies the number of spaces to use for the value, depending on if you are inserting a dynamic calculation or a string.
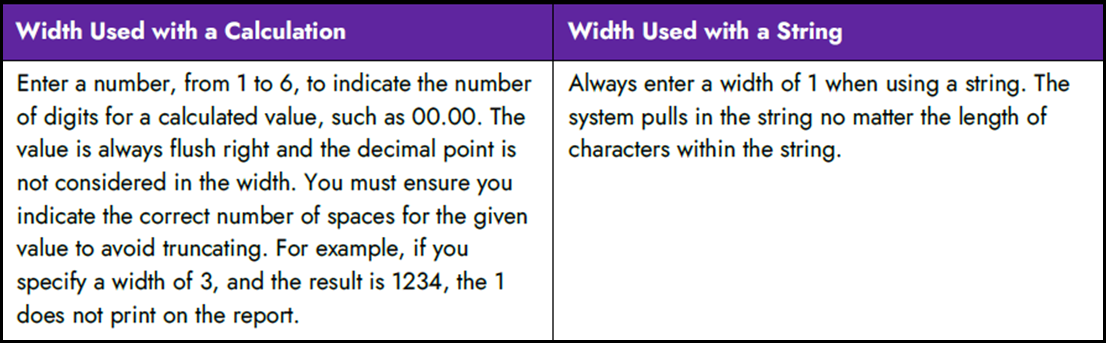
Formula – Specifies the equation of the calculation or the name of the string.
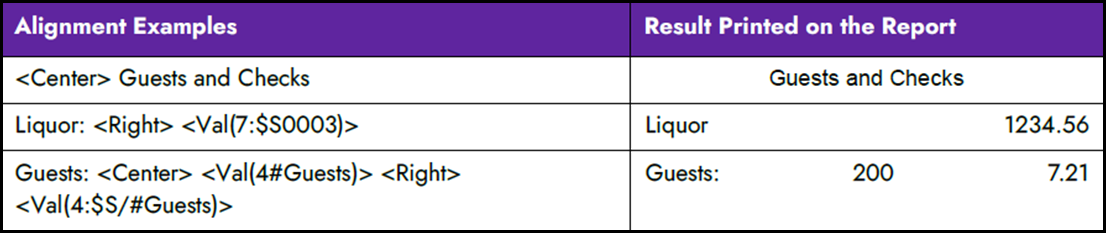
Align text and values on a line
Whether you use free text, a dynamic calculation, or a string, you can align all or individual attributes on a line. Each line is left aligned, by default, but you can change the positioning with the Center and Right commands, as shown below. Given this, there is no need to use a Left command for a line. The attributes start left aligned again on the following line.
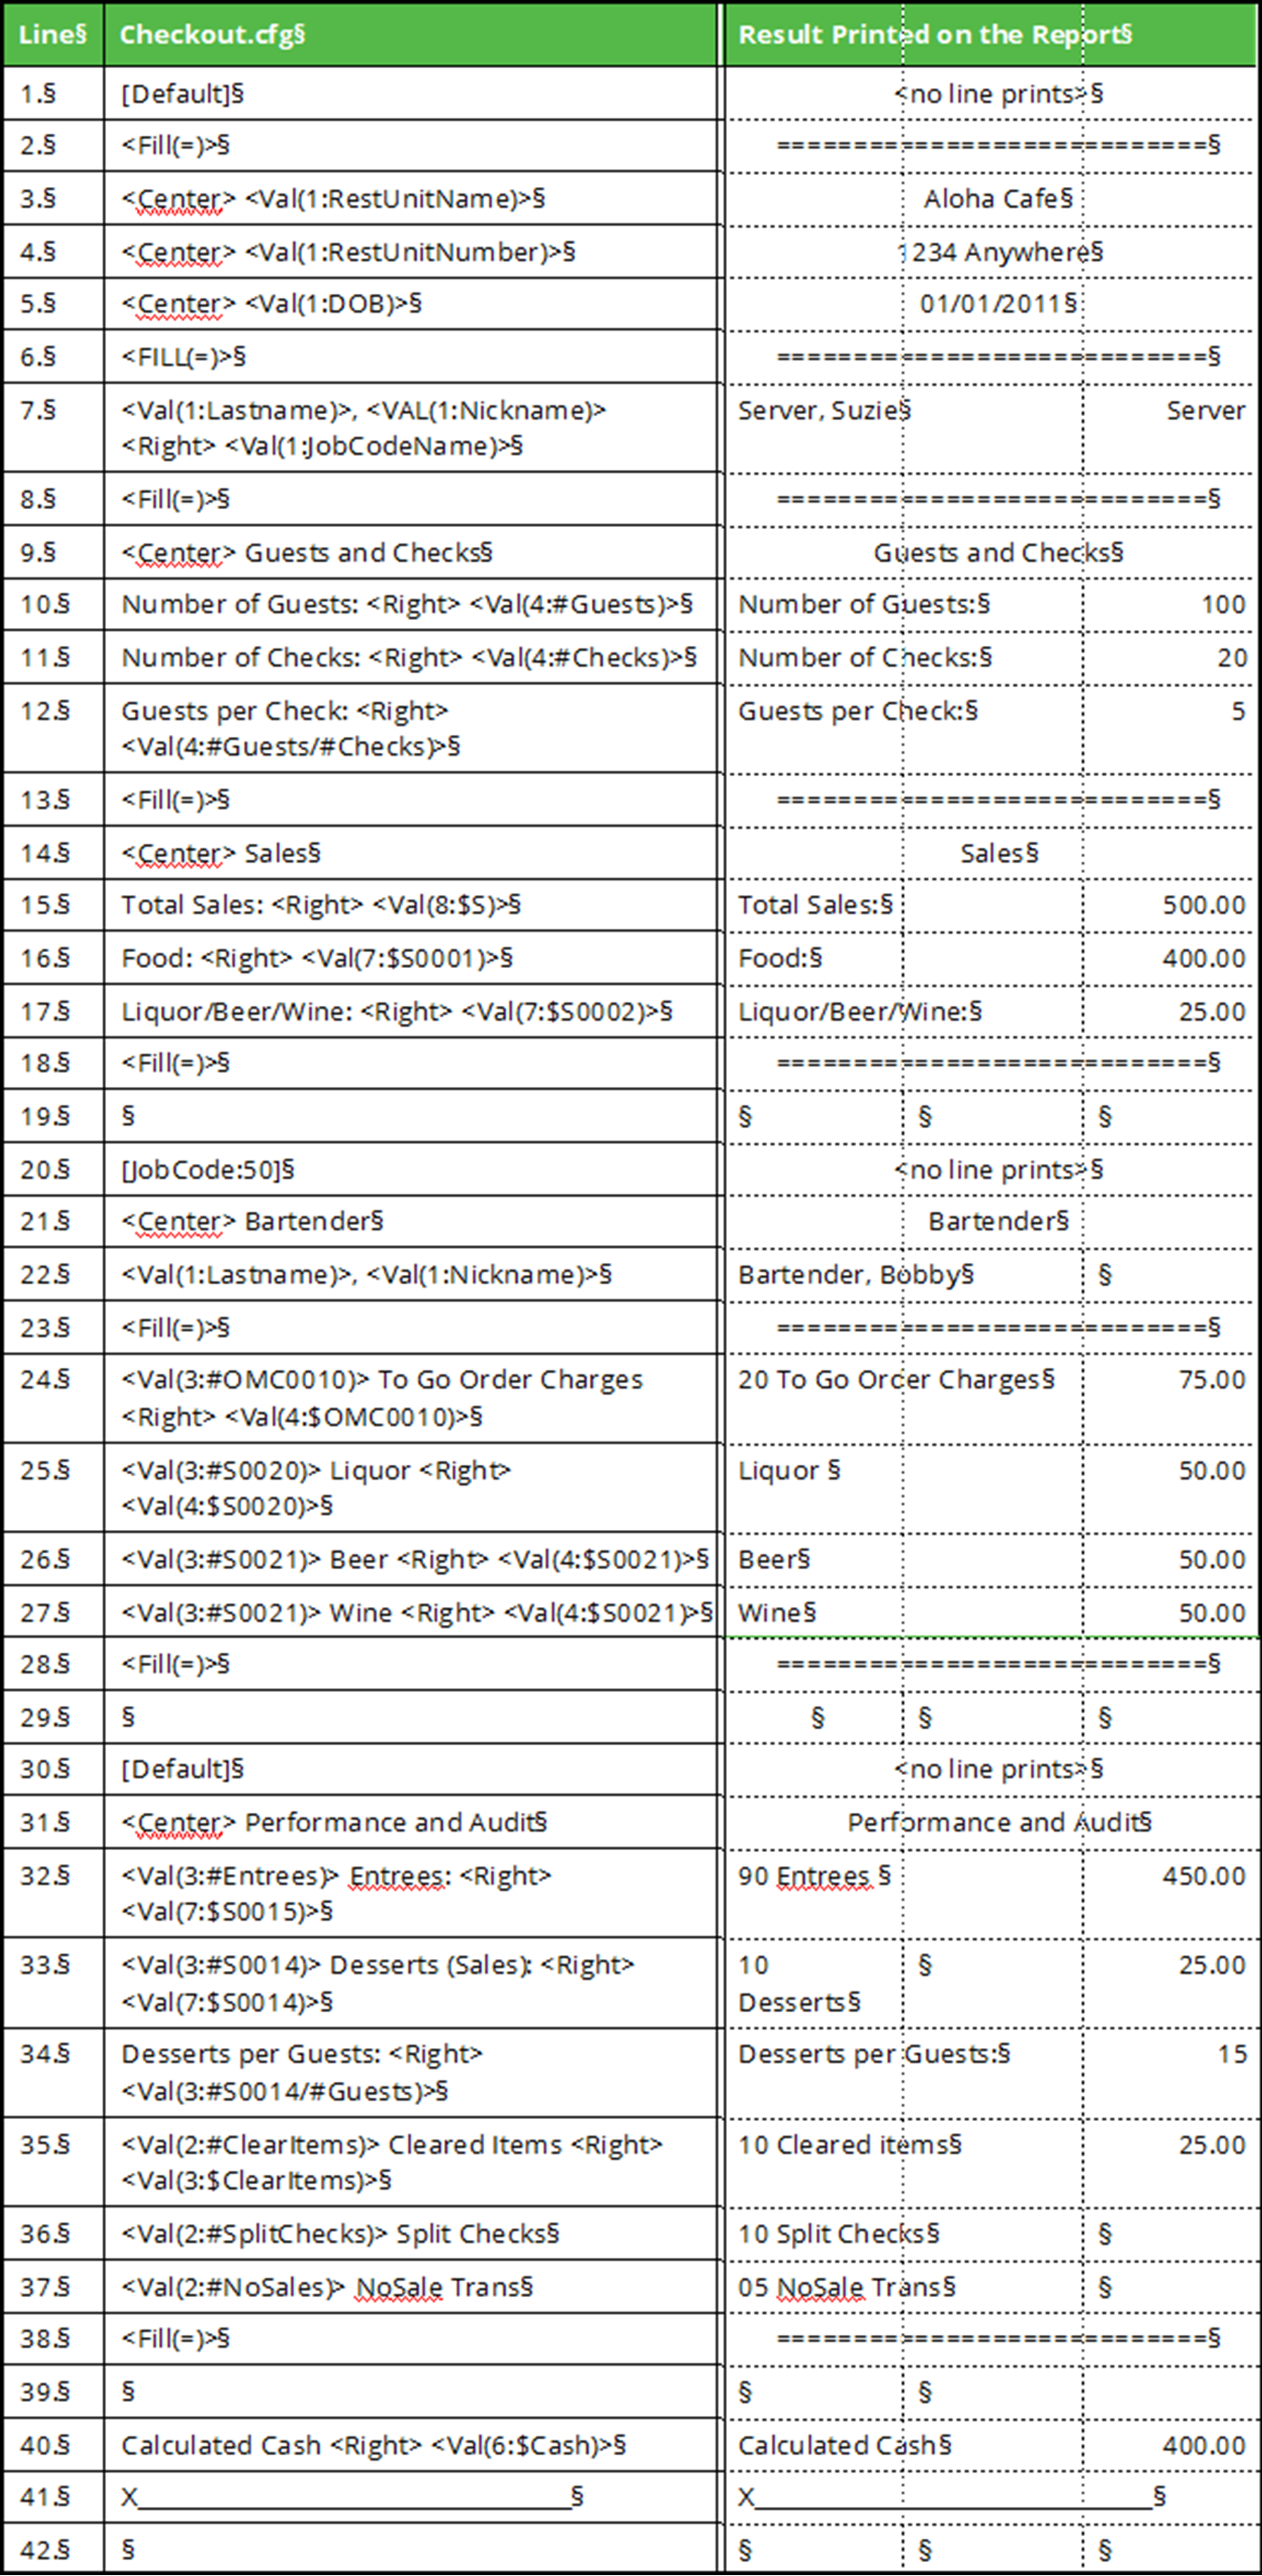
A Sample Checkout.cfg file and the resulting print is as follows:
Continue to "Refreshing POS data."
After running a refresh data, return to the main "Custom Checkout Report" page.