Adding the Dashboard panel to a dashboard
Once you create a Dashboard panel, you must add the new Dashboard panel to a dashboard. This step is necessary when you want to replace the floating logo with a dashboard or for accessing a dashboard on demand using a button. It is not necessary if you wish to reserve an area of a screen for displaying a dashboard.
To add a Dashboard panel to a dashboard:
-
Select Maintenance > Screen Designer > Table Service Screen Designer or Quick Service Screen Designer.
-
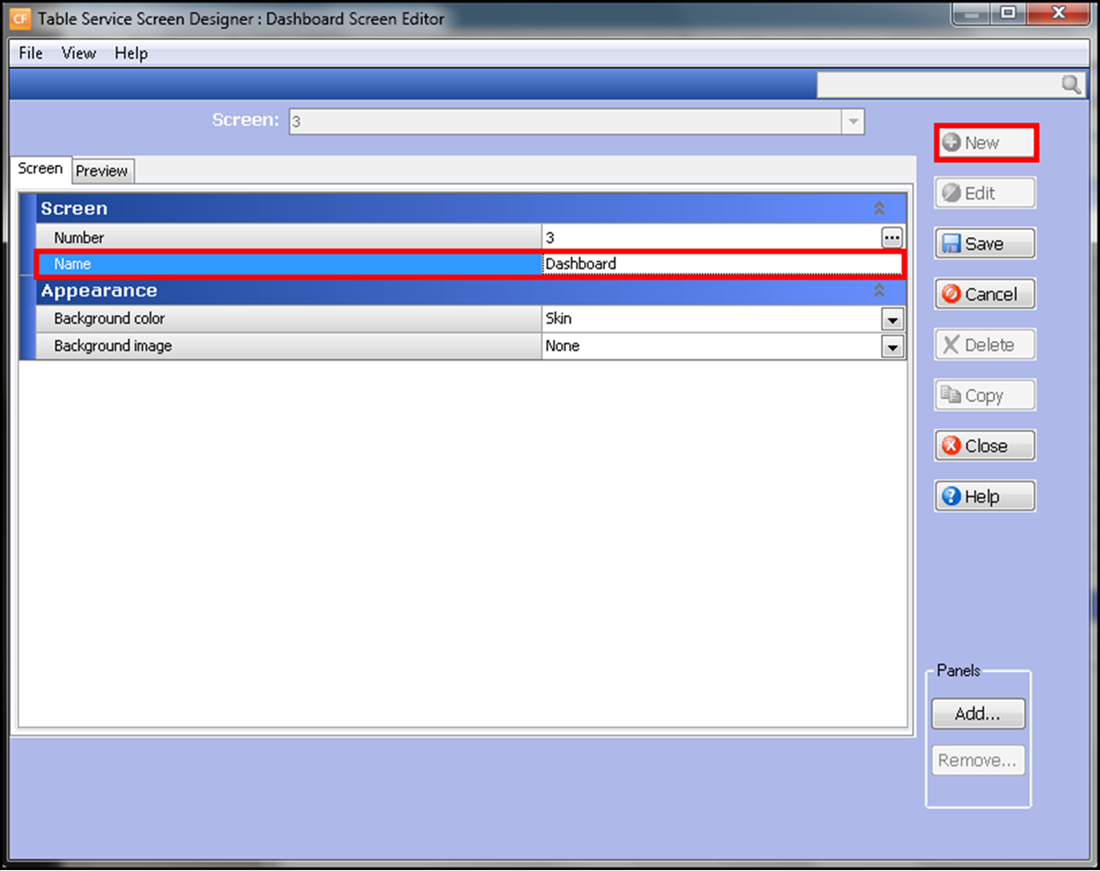
Select Work with Dashboard Screens. The Dashboard Screen Editor dialog box appears.

-
Click New.
-
Type a name to identify the Dashboard. For example, 'Dashboard 1.'
-
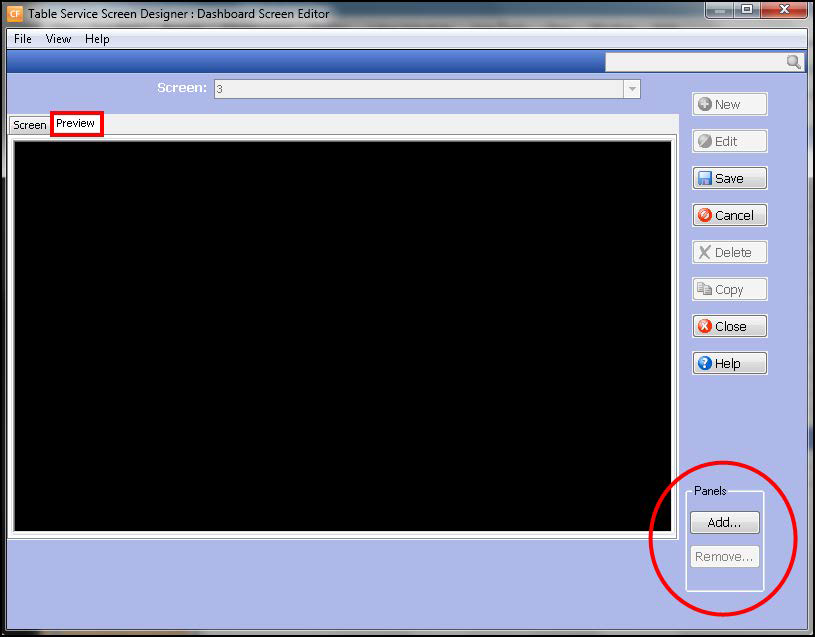
Select the Preview tab.

-
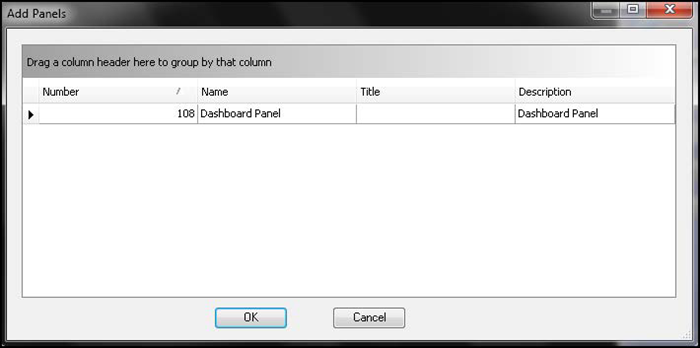
Under the 'Panels' box, click Add. The Add Panels dialog box appears.

-
Select a Dashboard panel created earlier and click OK. The Dashboard panel appears in the preview pane.
Tip: You cannot make changes to a Dashboard panel on the preview pane. Return to Table Service Screen Designer or Quick Service Screen Designer > Work with Panels and select your Dashboard panel to make changes, such as resizing a widget.
-
Click Save.
-
Repeat this procedure for any other Dashboard panels you need to add to a dashboard.
-
Click Close to exit the Dashboard Screen Editor function.
-
Exit the Screen Designer function.
-
Continue to the procedure specific to the method you want to use for presenting your dashboard.
Continue to "Replacing the floating logo with a dashboard."