Configuring a group of Included Modifiers
Some operations have a standard set of included modifiers called build groups that are used to build an item.
SCENARIO: Gene's Sub Shop offers Italian Sub, Grilled Chicken Sub, and Gene's Special Sub. The Italian Sub has lettuce, red onions, and oil and vinegar sauce on flat bread. Grilled Chicken Sub has lettuce, tomatoes, red onions, and mayonnaise on sourdough bread. Gene’s Special Sub has mayo, deli mustard, lettuce, tomatoes, jalapeños, and onions. The consumer orders a Grilled Chicken Sub, but wants the Italian Sub modifiers instead of the Grilled Chicken modifiers. Creating build groups allows you to use a one-touch substitution to easily switch out one group of modifiers for another. If further modifications are needed, the employee can remove or add modifiers based on the active build.
You can use a mixture of Standard and Build item types to create a Build modifier group that allows you to easily accomplish the task of swapping out a group of modifiers with one button touch. Without a Build modifier group, you have to remove and add each modifier one at a time. If further modification is needed, you can add or remove a modifier from the active build modifier group.
The visual indicators continue to appear and change as you switch from one Build item in a Build modifier group to another Build item. For example, when you select the Burger Build item, the visual indicators for the included modifiers appear as normal and update when you select the Chicken Build item,
Tip: For the best result, use zero-priced included modifiers in the build modifier group with the min/max requirement set to zero for the modifier group.
Configuring build groups of included modifiers
Configuring a Build modifier group requires you to toggle back and forth between Item Maintenance and Modifier Group Maintenance, due to the dependencies that exist between items and modifier groups. It also requires the use of the Build item type and Build modifier group types.
- The Build item type represents a grouping of included, zero-priced modifiers that you can use as a base to prepare one or more menu items. For example, you could group oil and vinegar sauce, lettuce, red onions, and flat bread into one Build item, group lettuce, tomato, red onions, mayonnaise, and sourdough bread into another, and so on.
- The Build modifier group type represents a grouping of the Build item types from which a consumer can choose to modify a menu item.
Configuring a build item type
The first step is to create each group of included modifiers using the Build item type in Item Maintenance.
- Select Maintenance > Menu > Items.
- Click the New drop-down arrow, select Build from the Type list box, and click OK.
- Type a name for the Build item, such as 'Chicken Build,' 'Burger Build,' and others.
- Select the Modifier tab.
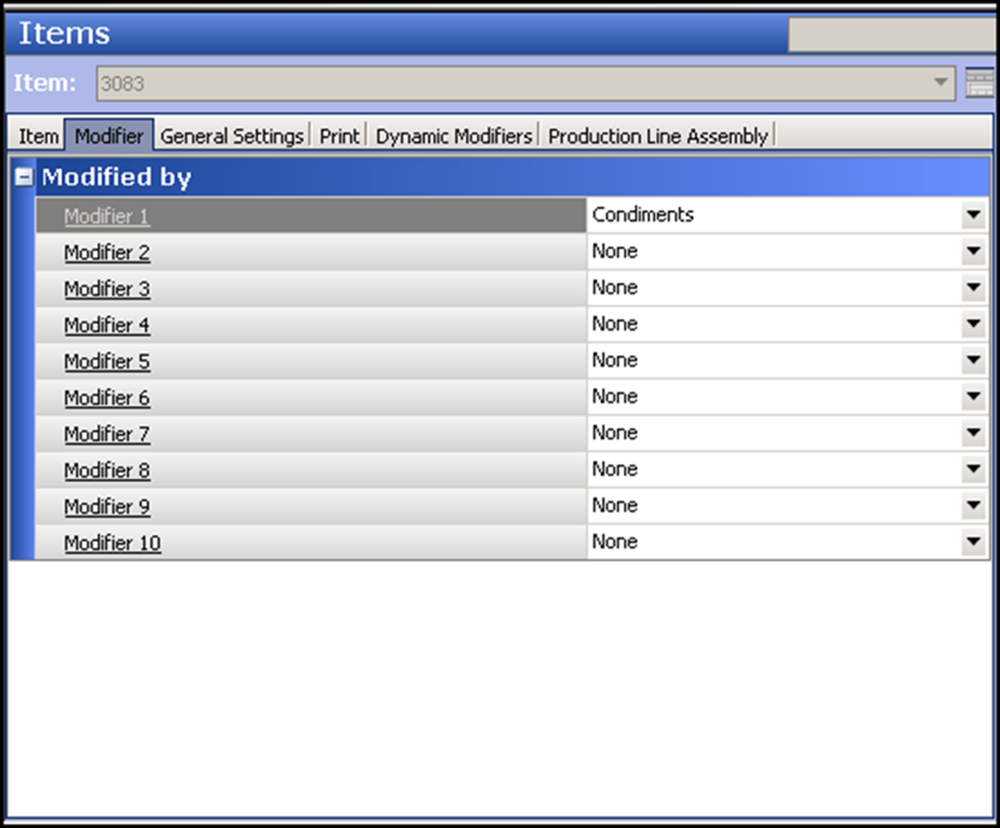
- Under the 'Modified by' group bar, select a modifier group, such as 'Condiments,' from one of the 'Modifier' drop-down lists.
- Select the Dynamic Modifiers tab.
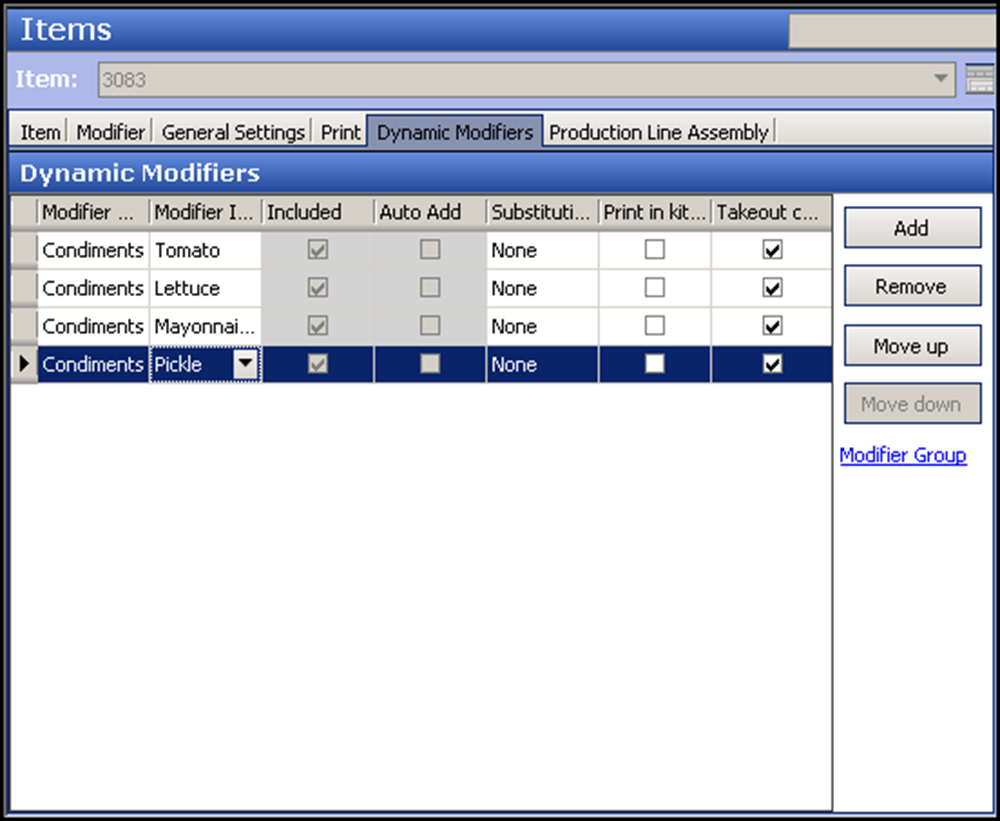
- Under the 'Dynamic Modifiers' group bar, click Add.
- Select the modifier group that contains the items, such as condiments, from the 'Modifier Group' drop-down list.
- Select a modifier to include in the Build from the 'Modifier Item' drop-down list.
- Repeat steps 7 through 9 for each modifier that makes up the Build.
- Click Save.
- Repeat this procedure for each Build item you want to create.
- Exit the Items function.
Configuring a build modifier group
You then create a Build modifier group and attach the Build items to the group. Attach each Build item you can use for modifying an item assigned to this modifier group. Generally, if you are switching builds across like menu items, only one Build modifier group is needed.
- Select Maintenance > Menu > Modifier Groups.
- Click the New drop-down arrow, select Build from the 'New modifier group' list box, andclick OK.
- Type a name, such as 'Build,' for the Build modifier group.
- Select the Layout tab.
- Select a button from the grid. Additional options appear under the 'Modifier item' groupbar.
- Select a Build item from the 'Item' drop-down list, such as 'Chicken Build.'
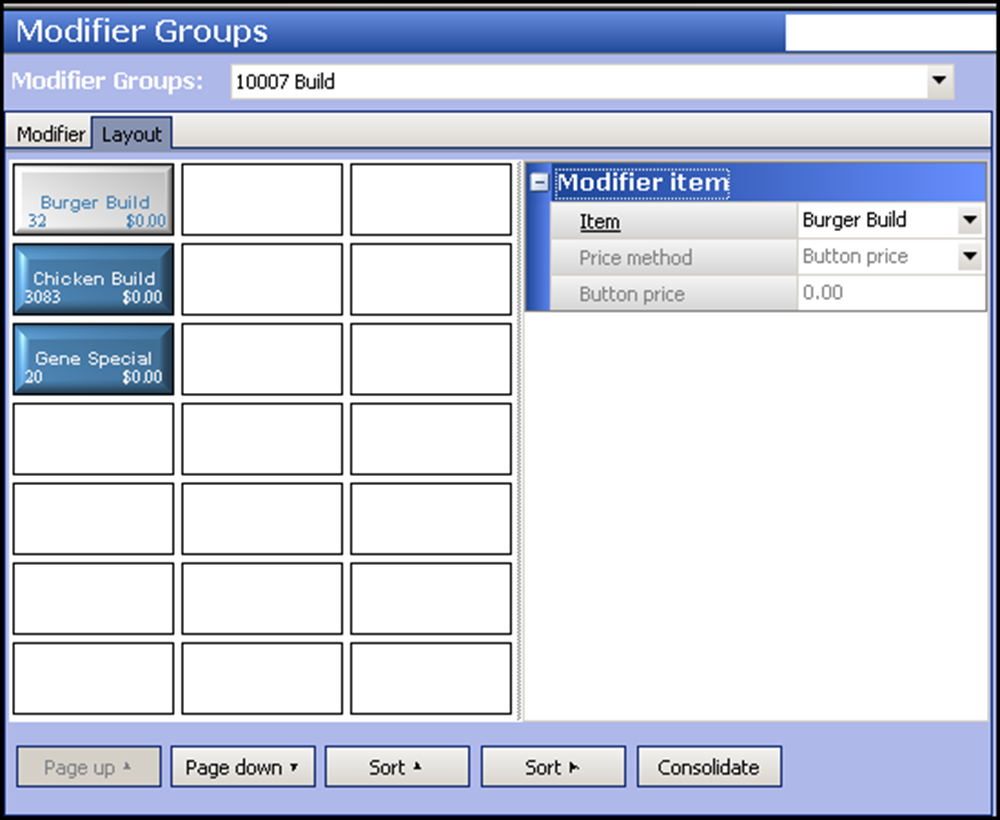
- Repeat steps 5 through 6 to add other Build items to the Build modifier group.
- Click Save.
- Repeat this procedure to create other Build modifier groups.
- Exit the Modifier Groups function.
Attaching a build modifier group to a menu item
As with any modifier group, you attach the Build modifier group to the necessary menu item and configure it as an included modifier.
- Select Maintenance > Menu > Items.
- Select the menu item from the drop-down list to which you want to attach a Build modifier group, such as 'Burger,' 'Chicken Sandwich,' and more.
- Select the Modifier tab.
- Attach the Build modifier group to one of the 'Modifier' drop-down lists.
- Select the Dynamic Modifiers tab.
- Under the 'Dynamic Modifiers' group bar, click Add.
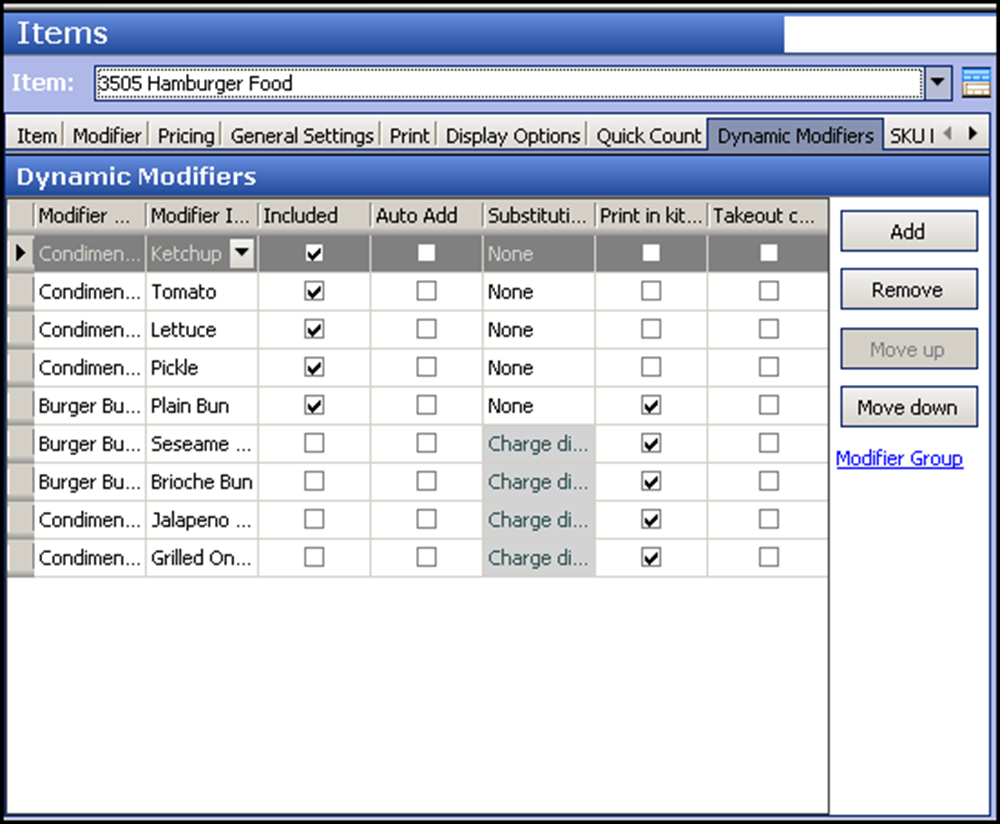
- Select the Build modifier group from the 'Modifier Group' drop-down list.
- Select the Build modifier from the 'Modifier Item' drop-down list.
- Select Included.
- Repeat steps 6 through 9 for each modifier that makes up the Build.
- Click Save.
- Repeat this procedure for each item to which you want to attach a Build modifier group.
- Exit the Items function.
Adding build items and Undo Modifications button to a panel
Once all the Build associations between items and modifiers are in place, you add the Build items to the necessary context panels for order entry. Also, you add the Undo Modifications button function to the same panel or to a non-context panel containing your function buttons. The Undo Modifications button allows you to dismiss all changes you made to included modifiers associated with the build item you are modifying and reset them to their original state.
Note: The Undo Modifications button function only applies to an item configured as a Build item type.
- Select Maintenance > Screen Designer > Quick Service Screen Designer.
- Select Work with Panels.
- Select Panel > Open Panel, and select a context panel containing your modifier buttons.
- Select Panel > New Button.
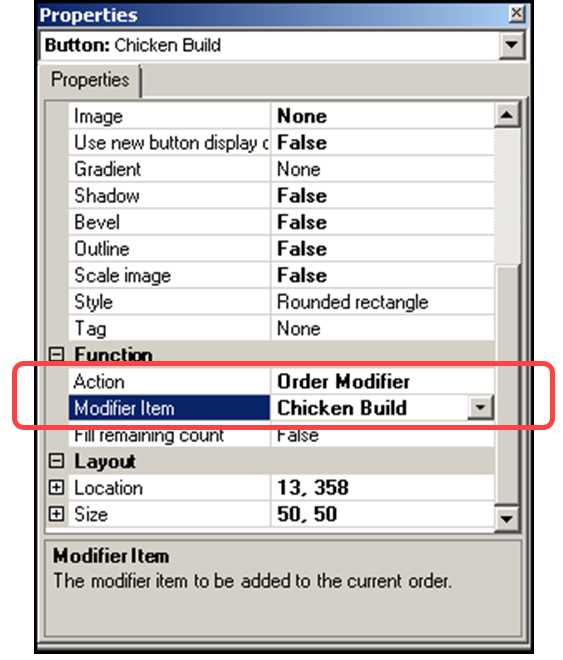
- In the Properties window and under the 'Function' group bar, select Order Modifier from the 'Action' drop-down list.
- Select the Build item from the 'Modifier Item' drop-down list, such as 'Burger Build.'
- Under the 'Appearance' group bar, type a name for the button, such as 'Burger Build.' To display text on multiple lines, insert '\n' without spaces for line breaks, such as 'Burger\nBuild.'
- Configure the remaining options as you would for any other button function.
- Repeat steps 4 through 8 to add other Build items to the panel.
- Select Panel > Save Panel.
- While still in Panel Editor, select Panel > Open Panel, and select a panel to which you want to add the 'Undo Modifications' button.
- Select Panel > New Button.
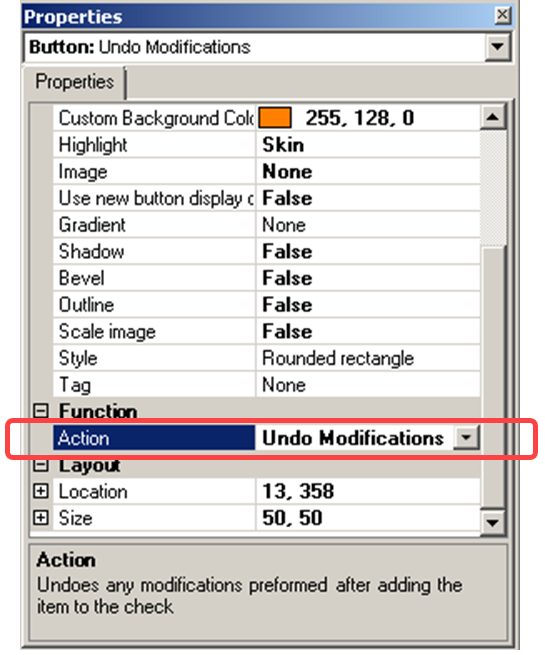
- In the Properties window and under the 'Function' group bar, select Undo Modifications from the 'Action' drop-down list to allow you to remove any modifications made to a Build item, before the item is ordered and revert back to it original state.
- Under the 'Appearance' group bar, type a name for the button, such as 'Undo Mods.' To display text on multiple lines, insert '\n' without spaces for line breaks, such as 'Undo\nMods.'
- Configure the remaining options as you would for any other button function.
- Select Panel > Save Panel.
- Select File > Exit to exit Quick Service Screen Designer.
Using build modifier groups
Use Build modifier groups to switch out a complete group of included modifiers for an item, such as a hamburger with a Burger build to a hamburger with a Chicken build. Once the included modifiers are switched, and the consumer wants additional modifications, you can further alter the included modifiers individually. For example, if you switch from a Burger build to a Chicken build, and the consumer wants the tomatoes from a Burger build, you caneasily add tomatoes to the menu item with the new Chicken build.
Veteran employees who know the restaurant menu well could also determine if switching a build is more efficient to enter the order instead of adding and deleting individual included modifiers.
If you perform major modifications to the Build item, and make a mistake or decide to start over, press the Undo Modifications button to undo all changes and return the Build item to its original state.
Continue to "Configuring a visual indicators on chain buttons."