Changing the price of a quick combo
You can manually enter component prices on the 'Components QS' tab of the Promotions function; however, to easily change the price of component or the quick combo itself, you have the option to use the Price Changes function. You can send the price change to the FOH, for certain days and for higher or lower prices, by scheduling price change events for both item and size surcharges, and quick combos.
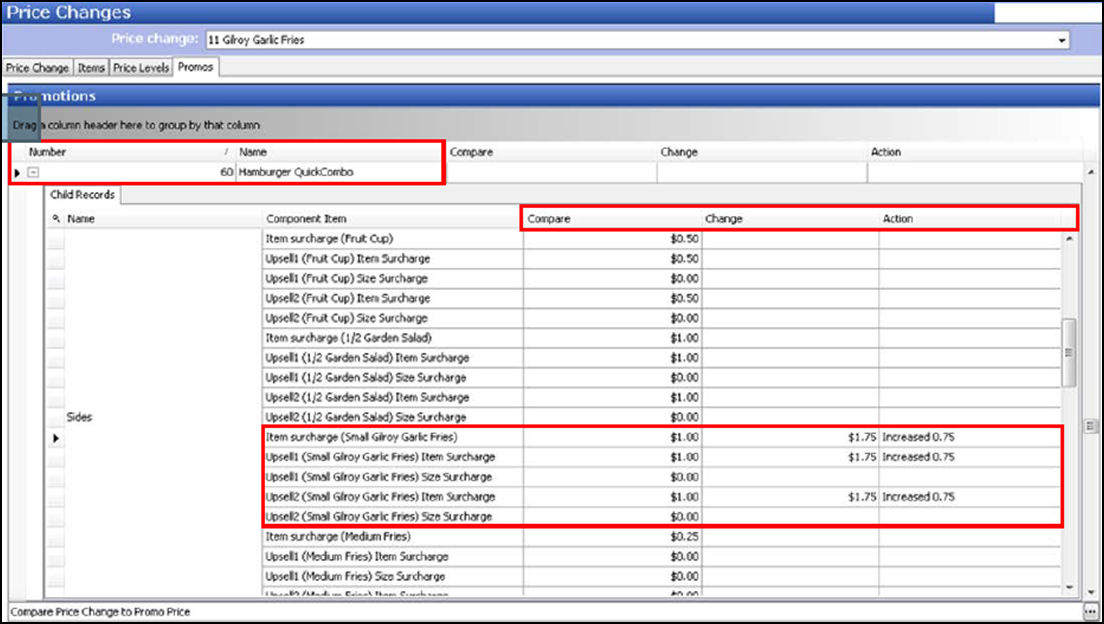
SCENARIO: You offer small Gilroy Garlic Fries in your hamburger quick combo. Due to unforeseen circumstances, the supply chain from Gilroy, California, is disrupted and prices go up. To counter this price surge, you increase the price of your small Gilroy Garlic Fries by $0.75. The total is now $1.75.
To configure a price change for a quick combo component:
- Select Maintenance > Pricing > Price Changes.
- Click New and accept the system assigned number or click the ellipsis button (...) next to 'Number' to display the Number Assignment dialog box, from which you can choose an alternate number.
- Type a descriptive name to identify the price change. For example, 'Gilroy Garlic Fries.'
- Select the date on which to start the price change at the store in 'POS activation start date.'
- Select the date on which you no longer want the event to be active at the store in 'POS activation end date.'
- Select the Promos tab.

- Select the quick combo component to modify under the 'Component Item' list. For example, 'Item surcharge (Small Gilroy Garlic Fries).'
- Type the change amount for Item Surcharge, Size Surcharge, or both, in the 'Change' text box. For example, '$1.75' in 'Item Surcharge. After entering this amount, the Increased/Decreased amount appears in the 'Action' text box. For example, 'Increased 0.75.'
- Repeat this procedure for any other menu items for which to change the price.
- Click Save.
- Repeat this procedure for any other quick combos that require price changes.
- Exit the Price Changes function.
- Continue to the next procedure.
To add the 'Activate Price Change' event type to an existing event schedule:
- Select Maintenance > System Settings > Event Schedule.
- Select the event schedule to edit from the drop-down list.
- Select the Events tab.

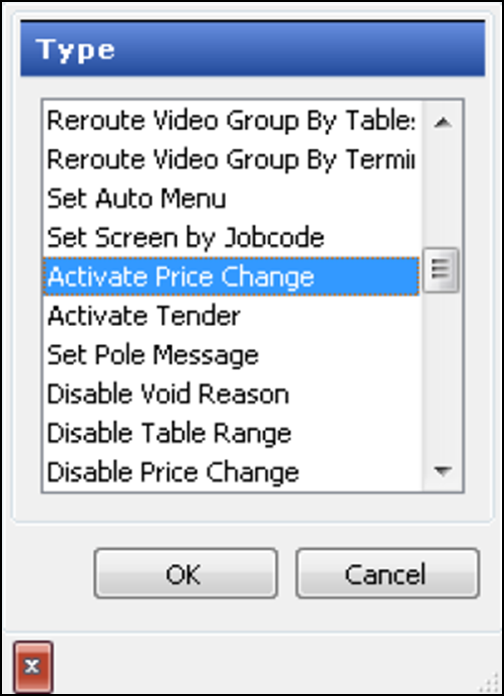
- Click the Add drop-down arrow, select Activate Price Change as the event type, and click OK.

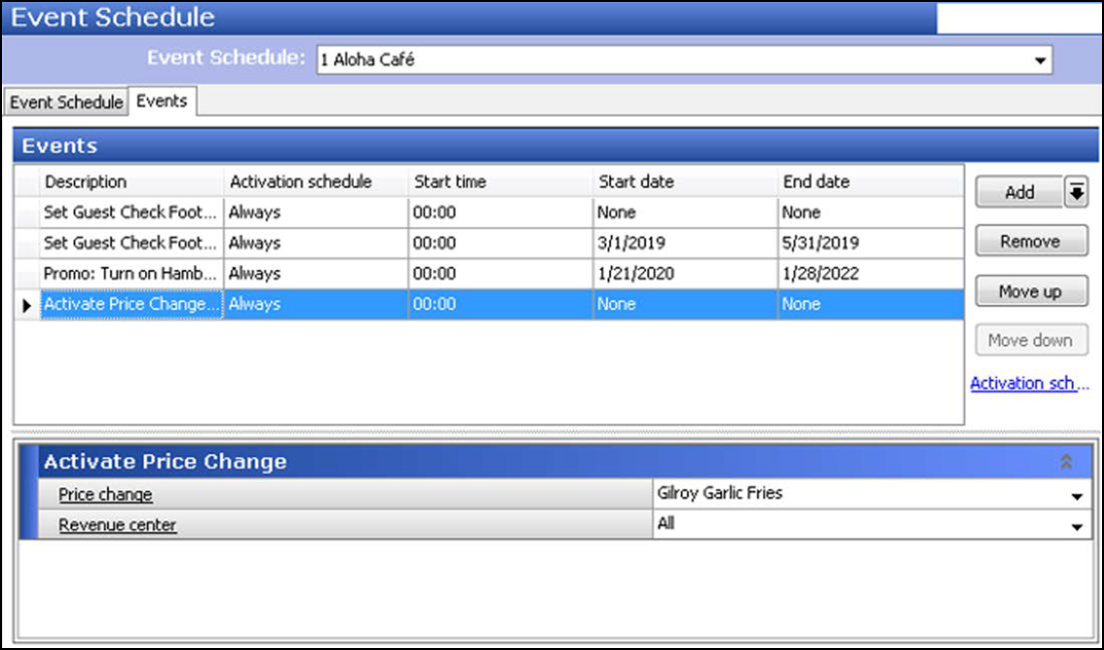
- Under the 'Events' group bar, select Always from the 'Activation Schedule' drop-down list. Because the Always activation schedule stipulates to begin at 'start of day,' you cannot edit the 'Start time' in the event definition. This information is read only.
- Select the date on which to make the event active at the store in 'Start date.' This date must be equal to or later than the 'Start date' defined for the price change in the Price Change function.
- Select the date on which you no longer want the event to be active at the store in 'End date.' This date must be equal to or earlier than the 'End date' defined for the price change in the Price Change function.
- Under the 'Activate Price Change' group bar, select the price change event from the drop-down list. For example, 'Gilroy Garlic Fries.'
- Click Save.
- Repeat this procedure for any other quick combo price changes to schedule.
- Exit the Event Schedule function.
Continue to "Refreshing POS data."