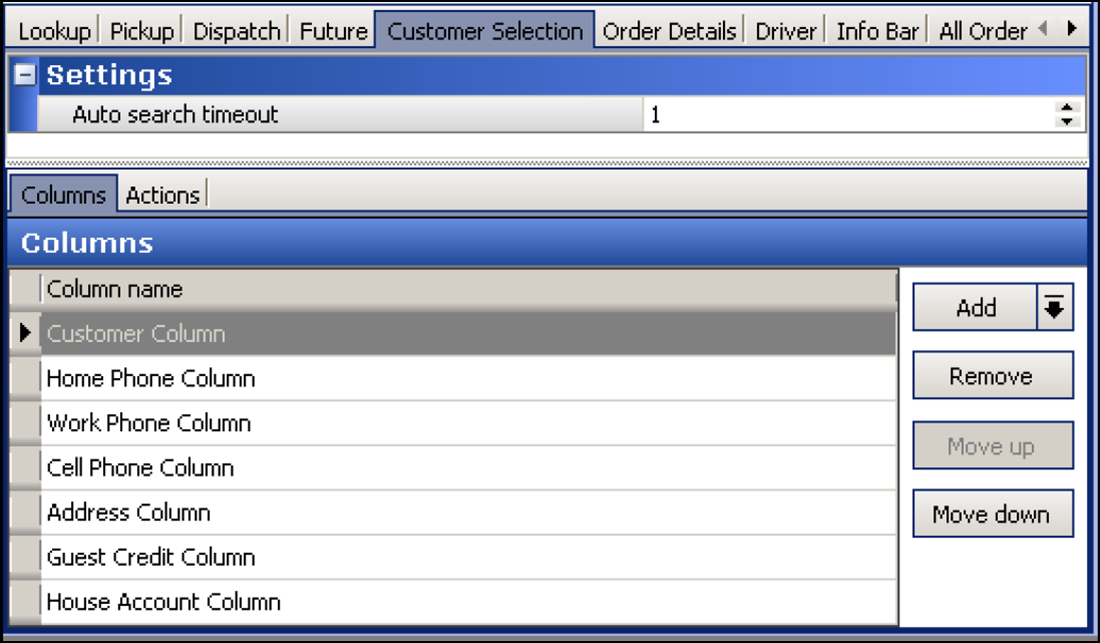
Configuring Panel Options: Customer Selection tab
The options on the Customer Selection tab apply only to the appearance and behavior of the Customer Selection screen. The Customer Selection screen appears when using FLOW_ORDER_TO_TAKEOUT and when scheduling a future order.

Type the number of seconds after you stop typing characters in the search box that the system waits before automatically performing a search of customers that meet the search criteria, in 'Auto search timeout.' Recommended: 1 second.
To add columns to the Customer Selection screen:
Determine which columns appear on the Customer Selection screen, and the order in which the columns appear, from left to right.
- With Takeout selected in the product panel, select Maintenance > Takeout Configuration > Takeout Settings > Panel Options tab > Change Order Modes tab.
- Click Add, select a column type of column from the drop-down list, and click OK to add the column to the active list.
- Click Move up and Move down to organize the columns from left to right as they appear on the Customer Selection screen.
- Repeat this procedure for each column to appear on the Customer Selection screen.
- Click Save.
Reference: See the Aloha Takeout Reference Guide for definitions of columns.
To add actions to the Customer Selection screen:
Select actions that best apply to your operational needs to appear on the right side of the Customer Selection screen.
- Click Add, select an action from the 'Type' drop-down, and click OK to move the action to the active list.
- Click Move up and Move down to organize the actions from top to bottom on the screen.
- Repeat this procedure for each action to appear on the Customer Selection screen.
- Click Save.
Reference: See the Aloha Takeout Reference Guide for definitions of actions.