Configuring the map screen
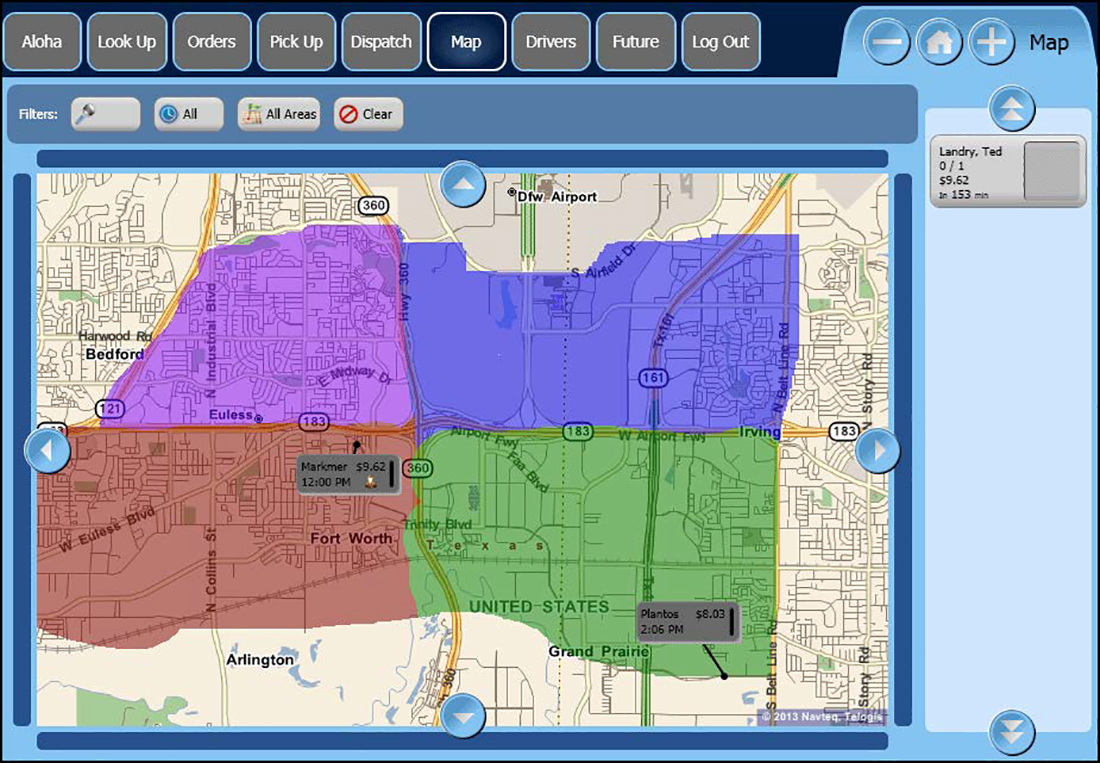
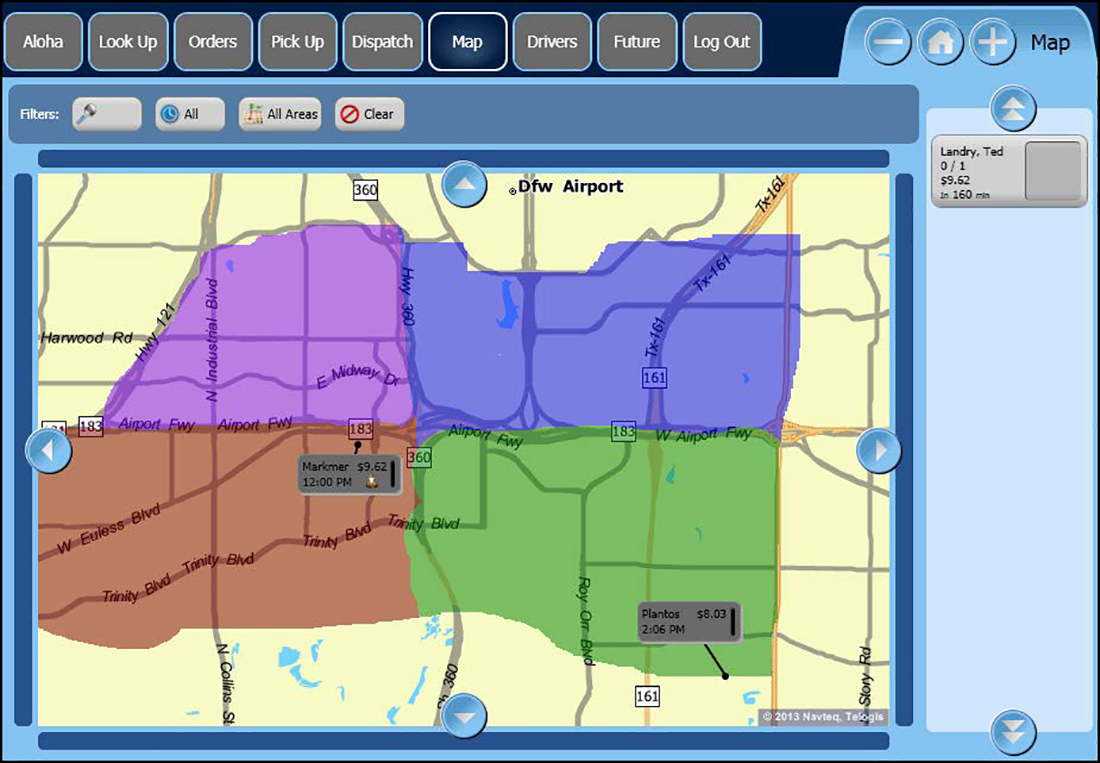
The ATO FOH has a Map screen that allows you to visualize the location of your delivery orders and dispatch your drivers with delivery orders in closer geographic proximity. The Map screen is a terminal by terminal configuration and requires .NET 4.0 on the terminal. Prior to beginning configuration for the Map screen, determine from which terminals you want to access the Map screen.
To use the Map screen, you must configure a delivery area using the MapPack data and the delivery area configuration tool. If you did not use the delivery area configuration tool or you do not plan to use the Map screen, you can skip this section. You need only configure the Map screen if you used MapPack data and the delivery area configuration tool to define your delivery area.
Enabling the map screen
For employees to view the Map screen on the ATO FOH, you must enable mapping.
- With Takeout selected in the product panel, select Maintenance > Takeout Configuration > Takeout Settings > Options tab.
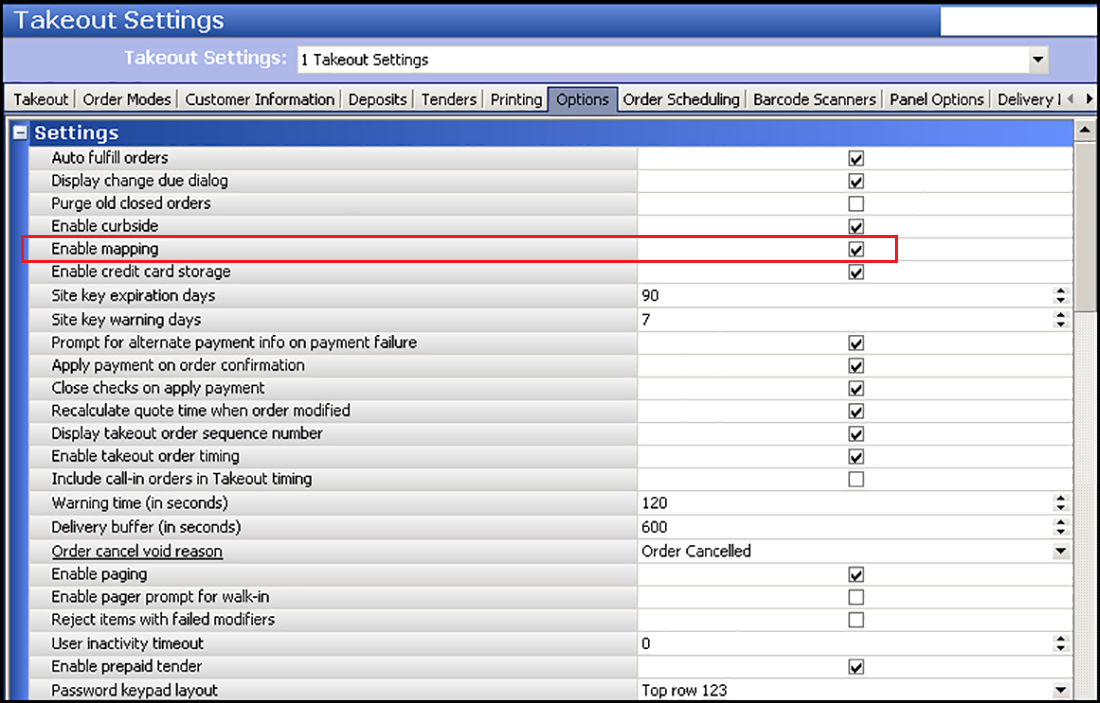
- Under the 'Settings' group bar, select Enable mapping.
- Click Save.
Enabling advanced mapping on the interface terminal
You must identify which terminal from which you want to access the Map screen. You only enable Advanced Mapping on the interface terminal, not the physical terminal.
Warning: You must install Microsoft .NET framework 4.0 on the interface terminal for the Map screen to appear.
To enable Advanced Mapping on the interface terminal:
- With Takeout selected in the product panel, select Maintenance > Hardware > Terminals.
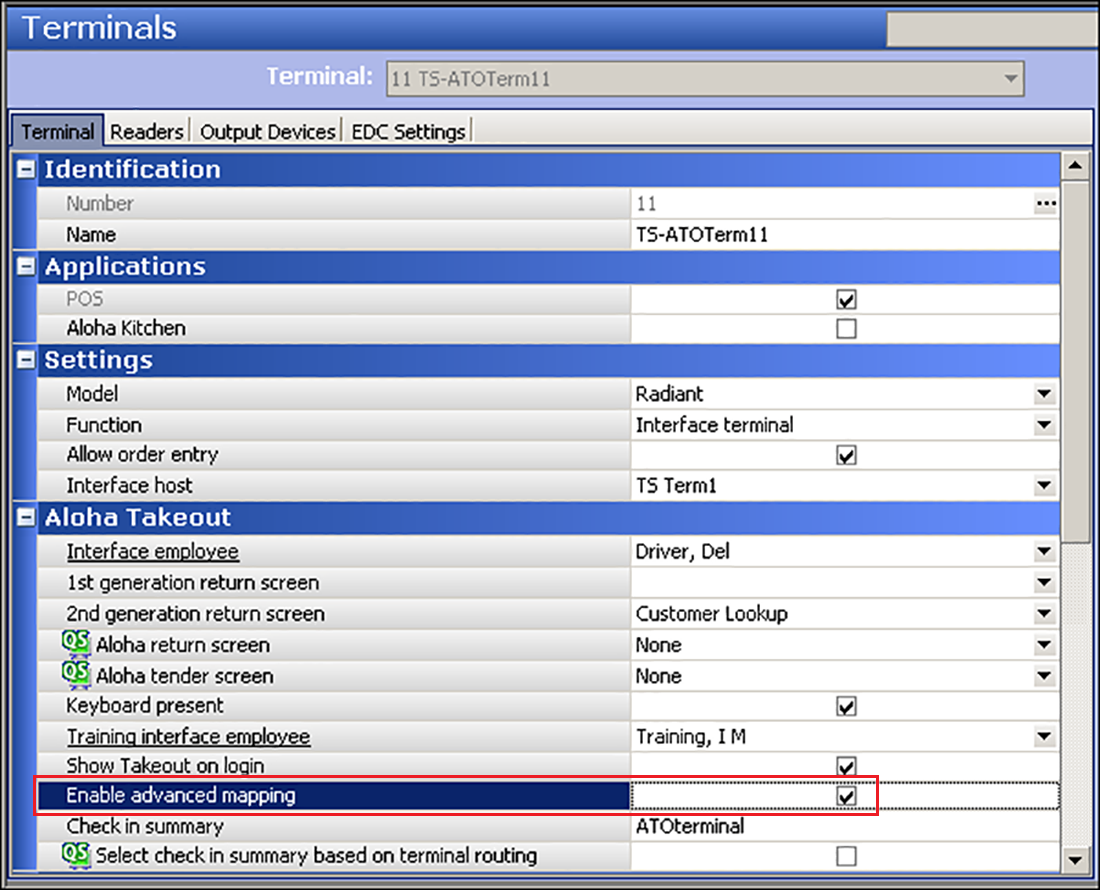
- Select an interface terminal to edit from the drop-down list.
- Under the 'Aloha Takeout' group bar, select Enable advanced mapping.
- Click Save.
- Repeat for each interface terminal from which you want to access the Map screen.
Providing access to the map screen
For employees to access the Map screen on the ATO FOH, you must update the job codes you want to access the Map screen.
To provide access to the Map screen:
- With Takeout selected in the product panel, select Maintenance > Labor > Jobcodes.
- Select a job code to edit from the drop-down list.
- On the Takeout tab, under the 'Screens' group bar, click the Add drop-down arrow, select Mapping Driver Dispatch, and click OK.
- Click Save.
- Repeat these steps for each job code that you want to access the Map screen.
Defining the action buttons to appear on the map screen
You can customize the action buttons available to your employees on the Map screen. Select the options best-suited to your operation. Match the action buttons you configured to appear on the Dispatch screen.
- With Takeout selected in the product panel, select Maintenance > Takeout Configuration > Takeout Settings > Panel Options tab.
- Select the Map Dispatch tab.
- Under the 'Settings' group bar, select Enable multi-selection.
- Under the 'Actions' group bar, click the Add drop-down arrow, select an action button as an action type, and click OK.
- Repeat for each action button to appear on the ATO FOH Map screen.
- Click Save.
Preventing the override of DeliveryArea.xml
When you create a delivery area with the delivery area configuration tool, the tool creates DeliveryArea.xml. To use the file you created, you must clear 'Enable DeliveryArea.xml export.' When cleared, the configuration management tool uses the DeliveryArea.xml file created with the delivery area configuration tool. When selected, the system displays a blank screen on the Map screen.
To prevent the override of DeliveryArea.xml:
- With Takeout selected in the product panel, select Maintenance > Takeout Configuration > Delivery Areas > Delivery Area tab.

- Under the 'Identification' group bar, clear Enable DeliveryArea.xml export.
- Click Save.
Adding the map screen to the navigation flow
The Map switch allows those employees who take orders and dispatch drivers to quickly navigate from the Order Entry screen to the Map screen for dispatch. This switch reduces the number of touches an employee must make to return to the Map screen. The new switch, 'MP,' is a chain button that allows you to navigate from a POS screen to the Map screen.
Note: Refer to the Aloha Takeout Implementation Guide for more information on navigation switches.
To add the Map Screen:
- With QS or TS selected in the product panel, select Maintenance > Screen Designer.
- Select Work with Panels.
- From the Panel Editor menu bar, select Open Panel. The Open Panels screen appears.
- Select the panel on which to add the MP Order Switch.
- Select the area to add the button and click New Button. A Properties screen appears.
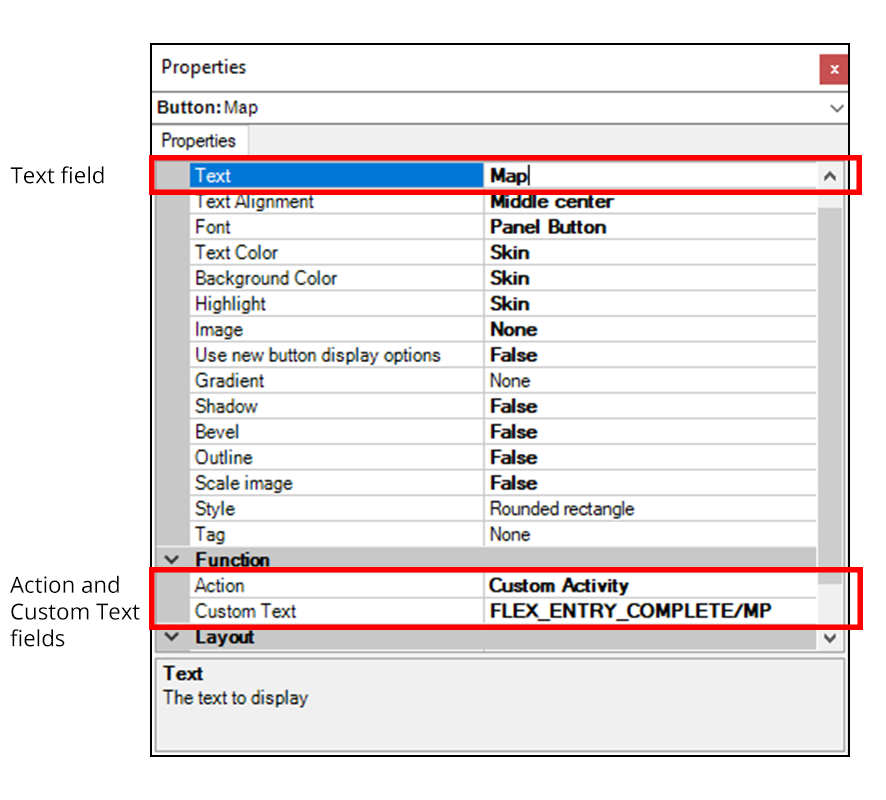
- Under the 'Appearance' group bar, type the text to appear on the button. (For example, Map.)
- Under the 'Function' group bar, select Custom Activity from the Action drop-down list. A Custom Text field appears.
- Type 'FLEX_ENTRY_COMPLETE/MP' in Custom Text.
- Select Panel > Save Panel from the Panel Editor menu bar or right-click the panel and select Save Panel.
- Select Panel > Close Panel from the Panel Editor menu bar or right-click the panel and select Close Panel.
Changing the map screen view quality
There are two map screen settings to help regulate the viewing quality of the map on the ATO FOH. The systems defaults to High. The High setting displays all roads and streets, whereas the Low setting only displays major roads. If you want to change the map screen view quality to Low, follow the procedure below.
To change the Map Screen quality:
- With Takeout selected in the product panel, select Maintenance > Takeout Configuration > System Parameters > System tab.
- Under the 'Service' group bar, select Low from the Map quality level drop-down list. To change the map view setting back to High, select High.
- Click Save.