Managing delivery orders
The Map and Dispatch screens contain a series of command buttons located on the right side of the screen to aid you in managing your delivery business. The command buttons allow you to assign deliveries to a driver, as well as dispatch a driver with a delivery run. When you assign multiple orders to a driver, the system arranges the stops of the delivery run in the order in which you select them; however, by using Arrange Stops, you can re-arrange the stops for a delivery run. Prior to a driver leaving with a delivery order, you can view or print a delivery route, as well as print an itinerary, which includes an order receipt along with turn-by-turn directions.
Note: This section displays screen shots and step-by-step directions from the Map screen. The step-by-step directions are the same for the Dispatch screen.
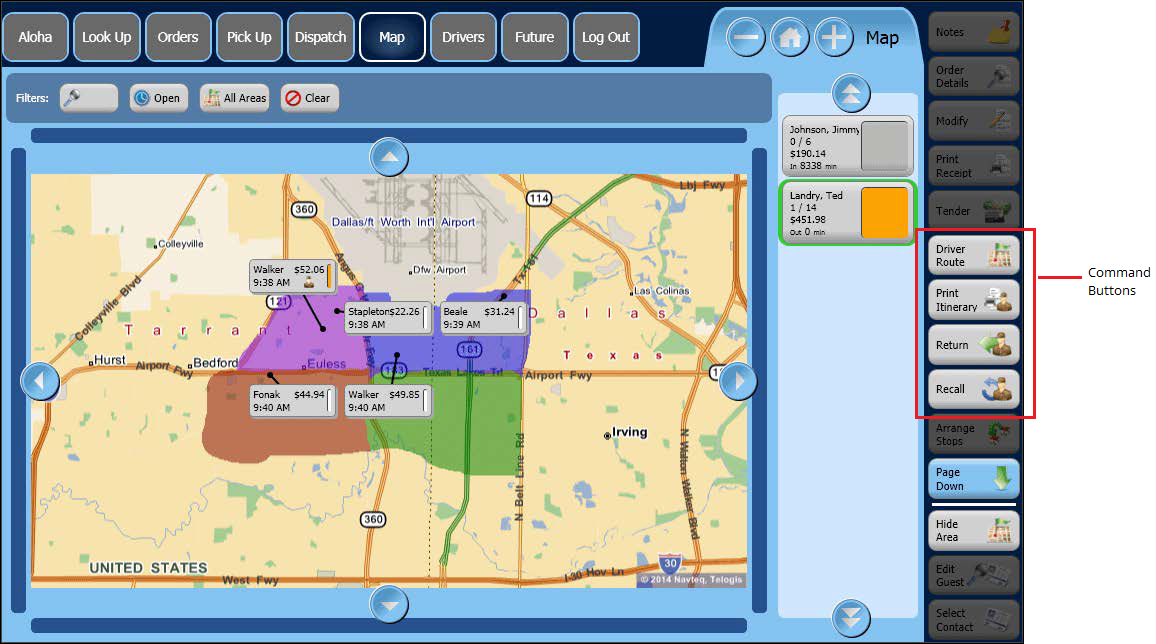
The available command buttons located on the right side of the Map and Dispatch screen, unless otherwise noted.
| Button | Description |
|---|---|
 | Driver Route displays the suggested driving route for the deliveries. The system provides turn by turn directions, as well as a map overview. You can print the driver route to a local printer on 8 1/2x 11 paper. |
 | Print Itinerary prints an order receipt, along with turn-by-turn directions, to the local receipt printer. |
 | Dispatch assigns selected orders to a selected driver. The system then considers the driver out for delivery. |
 | Return places a driver back in idle status when he returns to the store after a delivery run. |
 | Recall returns a driver to the store without considering the order as delivered. Use this button for such times when a driver forgets part of an order or the customer modifies their order, and you track actual delivery times. |
 | Arrange Stops allows you to re-arrange the stops of the delivery orders according to your preference. |
 | Unassign removes a delivery order from a delivery driver and allows you to assign the delivery order to another driver. |
 | Capacity Detail displays your delivery orders for the current time frame against your previously configured capacity detail. |
 | Driver Orders allows you to view any active assigned orders for a selected driver. Only available on the Map screen. |
Assigning delivery orders
Dispatching orders with the Map screen works the same as with the Dispatch screen. The difference is that the Map screen enables you to visualize the location of delivery orders so that you can group and dispatch multiple orders that are in closer geographic proximity to one another. When you create a delivery order, the system creates an order button on the Map screen according to the delivery address and on the Dispatch screen according to the promised time. The customer button includes the last name of the customer, the order total, and the order promise time. When you assign an order to a driver, a driver image appears on the order button.

The order button also includes an order status bar on the right side of the order button. The system uses color to represent the status of the order.
| Color | Description |
|---|---|
| White | An active order. |
| Yellow | A warning indicating an active order is approaching late status. |
| Red | An active order is late. |
| Orange | The order is currently dispatched with a driver. |
| Gray | The order is closed. |
| Purple | An unreleased future order. |
| Light Red/Pink | The order is in progress and contains unordered items. If the order is finalized and still pink, this usually indicates there is an issue (incorrect queue, incorrect order mode, wrong custom activity configuration) with the order. |
| Blue | The driver has returned, but the order is not closed. If the color remains blue, there may be an issue with a balance remaining on the check. |
Note: To dispatch orders for delivery, first select the orders, then the driver.
If your operation dispatches orders primarily by promise time, you may want to use the Dispatch screen for dispatching orders. The Dispatch screen arranges orders by promise time. You can then use the Map screen to assist you in determining the location of a delivery order.
To assign delivery orders:
-
Touch Map on the navigation bar to access the Map screen or touch Dispatch to access the Dispatch screen.
-
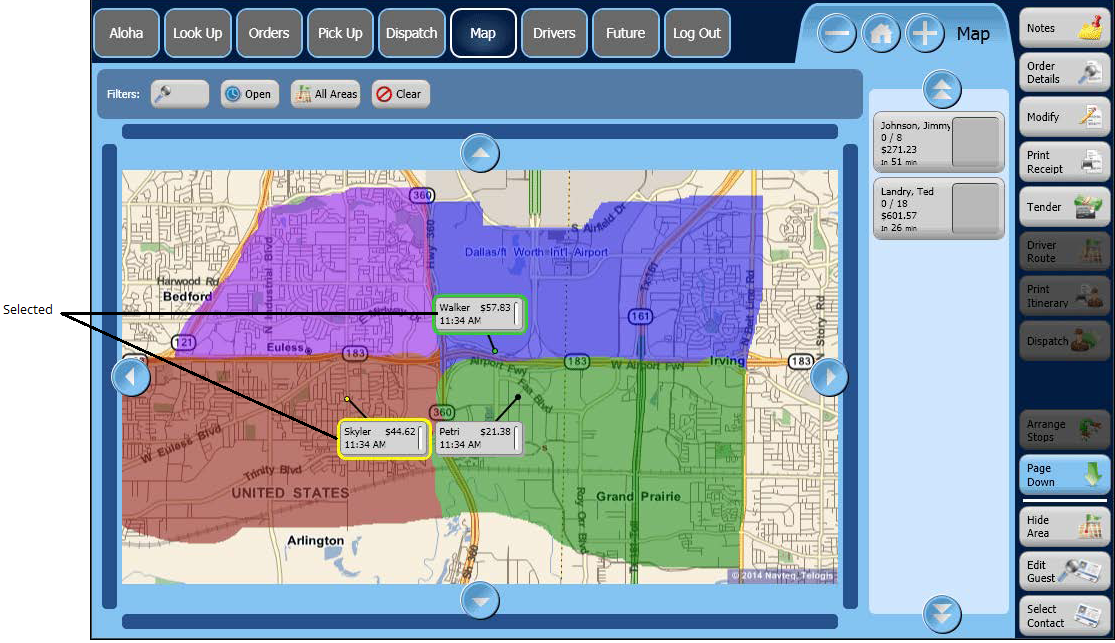
Touch the orders to assign for delivery. The system outlines the selected orders with a color and the last order you select appears with a green outline.
Note: If you exceed the number of orders allowed per driver, manager approval is required.
-
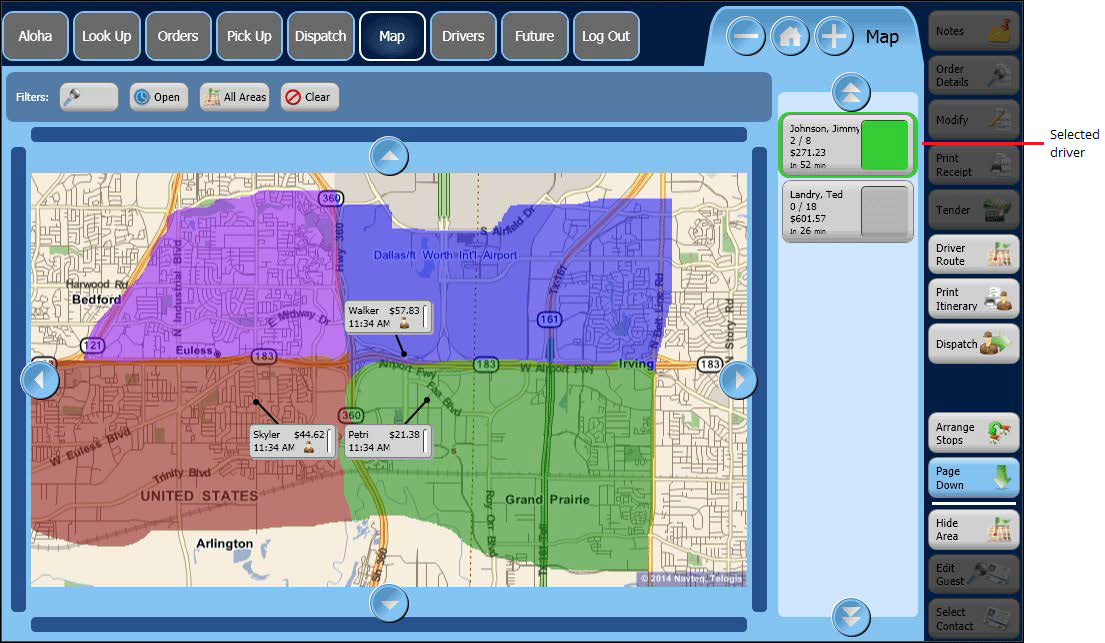
Touch a driver to deliver the orders. The available drivers appear on the right of the screen.
Note: When you assign a driver to an order, a driver icon appears on the order button.
-
Touch Dispatch.
Rearranging the order of a delivery run
When you assign more than one delivery order to a driver, the system routes the delivery orders based on the order in which you select them rather than the best available route. Once you assign a group of orders to a driver, you can rearrange the stops according to your needs. You may need to arrange them according to a better route, size of order, time ordered, or any other situation.
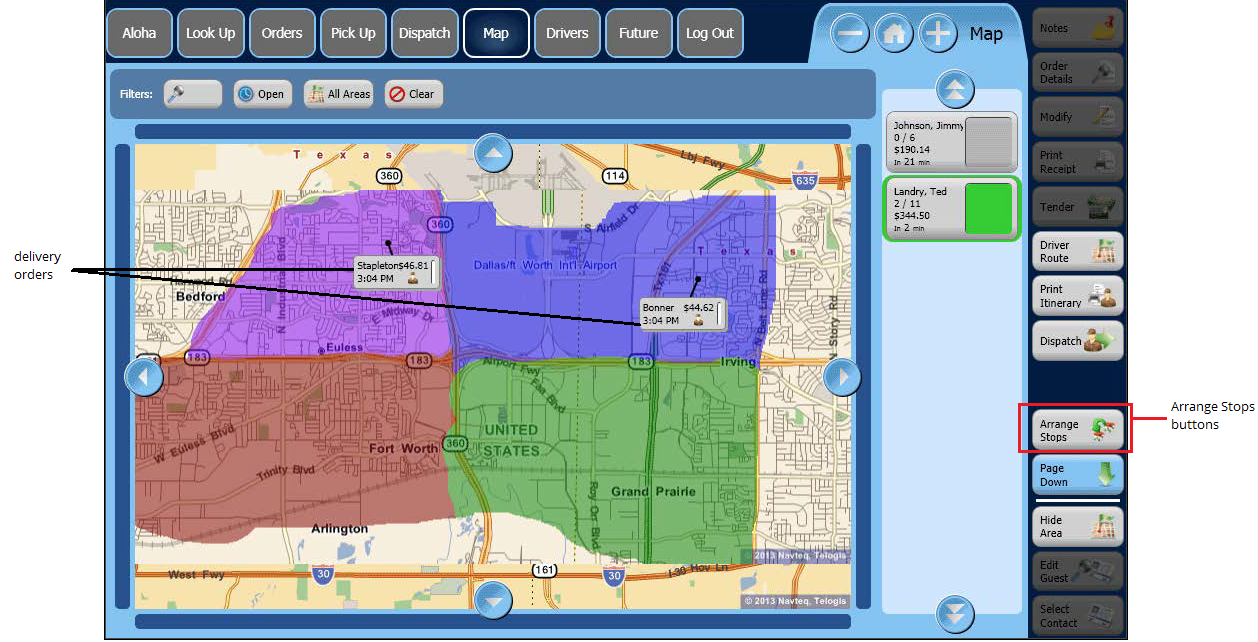
To rearrange the order of a delivery run:
- Touch Map on the navigation bar to access the Map screen or touch Dispatch to access the Dispatch screen.
- Touch the driver with the delivery orders for which you want to re-arrange the stops.
- Touch Arrange Stops. The 'Stop order for...' screen appears and lists the current stops for the delivery run.
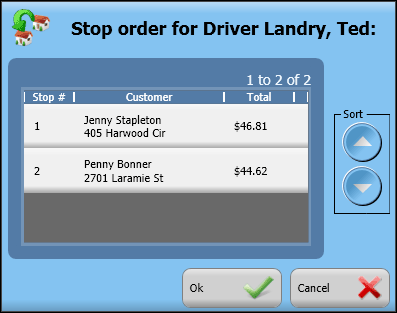
- Select a delivery order.
- Touch the up or down arrows to sort the deliveries into the preferred order.
- Touch Ok.
- Touch Dispatch.
Note: Once you dispatch a driver, you can no longer use the Arrange Stops button to change deliveries for that driver. To rearrange the stops for a driver after touching Dispatch, select the driver, touch Recall, follow the Arrange Stops procedure, and dispatch the driver again.
Viewing and printing a driver route
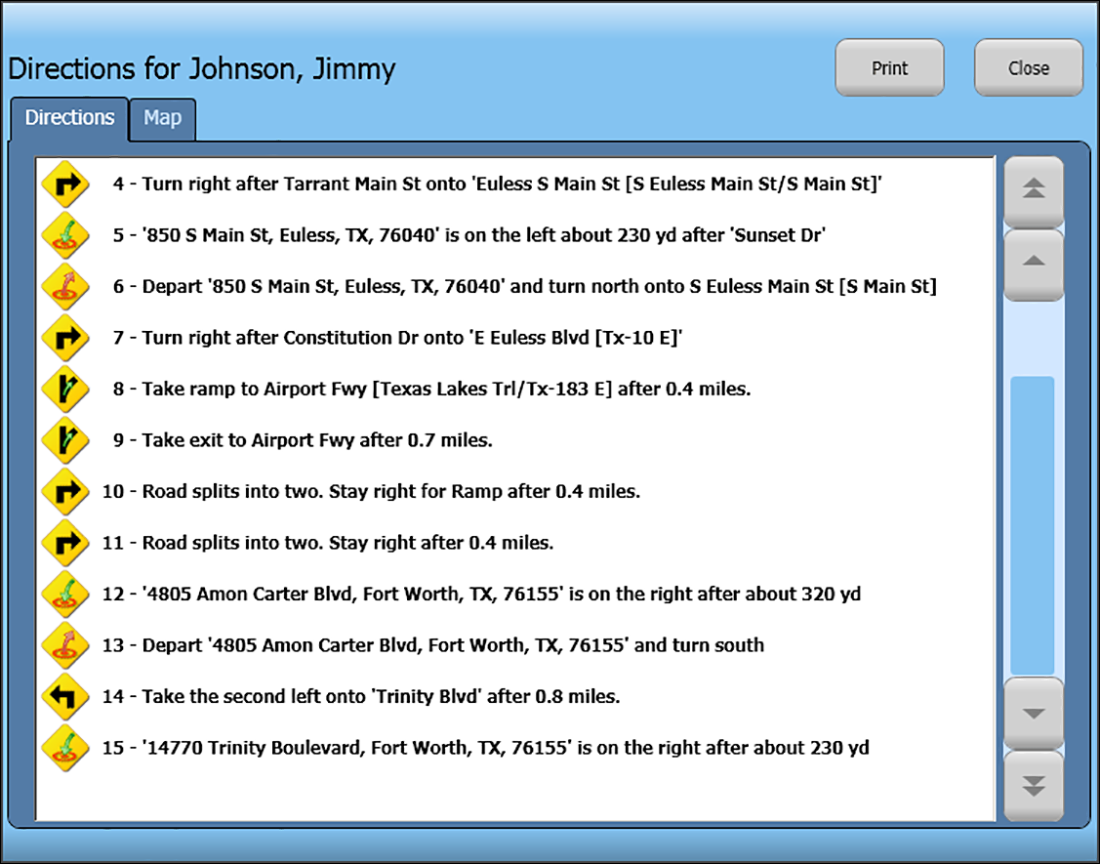
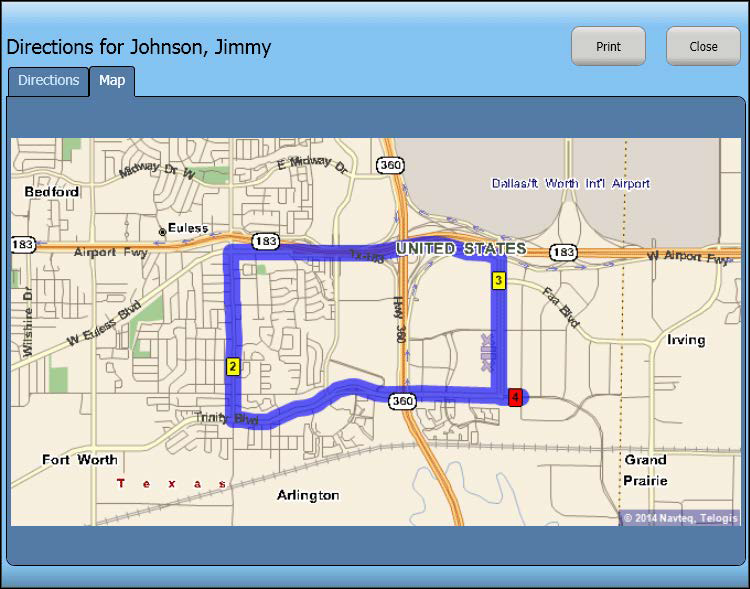
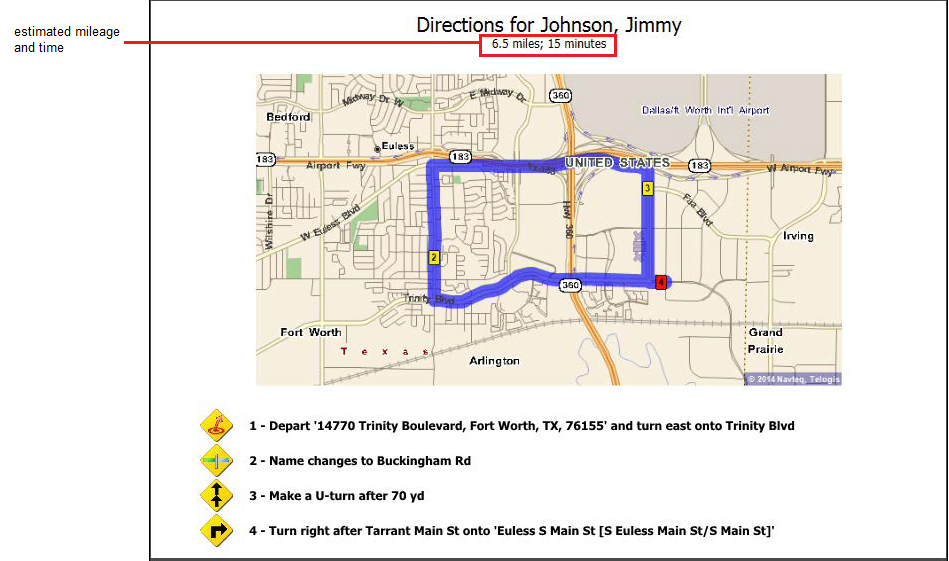
You can view, as well as print, a driver route after assigning a delivery order to a driver. The driver route contains turn by turn directions along with a map overview. The map overview is only available on the Map screen. When you print a driver route, the system prints both a map overview along with turn-by-turn directions. Additionally, the printed overview includes the total mileage to the deliveries, as well as an overall estimated time. The mileage and drive time only appear on the printed copy. The printed overview does not include the return mileage or estimated time back to the store. The estimated time is not a real-time estimate based on traffic or road construction. The driver route directions print on 8 1/2 x 11 paper to a local or networked printer.
To view and print a driver route:
- Touch Map on the navigation bar to access the Map screen or touch Dispatch to access the Dispatch screen.
- Select a driver with assigned orders.
- Touch Driver Route. The Directions screen appears.
- Touch Print to print the driver route directions. The system prints the directions and map to a local printer.
- Touch Close to return to the Map Screen.
Printing a driver itinerary manually
When you use Print Itinerary, the system prints an order receipt along with turn-by-turn directions for a delivery run. The driver itinerary prints to the receipt printer of the terminal. If the driver itinerary automatically prints, you can skip this procedure.
To print a driver itinerary manually:
- Touch Map on the navigation bar to access the Map screen or touch Dispatch to access the Dispatch screen.
- Select a driver with assigned orders.
- Select Print Itinerary. The system prints the delivery order itinerary to the local receipt printer for the terminal.
- Touch Print.
- Touch Done to return to the Map screen.
Reassigning a delivery order
In some instances, you may want to change the driver assigned to a delivery order. ATO contains an Unassign button so that you can change the delivery order from one driver to another. To do so, the system requires you to first remove the driver from the delivery order and then reassign the delivery order to a different driver.
To reassign a delivery order:
- Touch Map on the navigation bar to access the Map screen or touch Dispatch on the Dispatch screen.
- Select the order for which you want to unassign the driver.
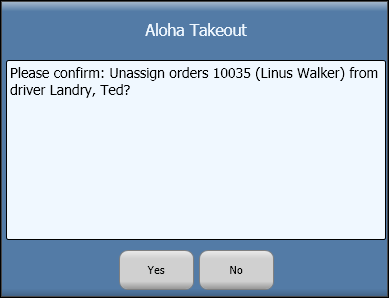
- Touch Unassign. The 'Please confirm: Unassign orders from driver?' screen appears.
- Touch Yes.
- Touch the order on the Map screen.
- Select a different driver.
- Touch Dispatch.
Recalling a driver
In some instances, you may need to recall a driver from a delivery run. A driver may have forgotten part of the order or the customer may have requested additional items. Rather than having an inflated delivery drive time due to the driver leaving the store, returning to the store for the additional items, and then leaving the store again, use the Recall button to obtain a more accurate record of the actual delivery time. If your operation does not track driver delivery times, you may not want to use Recall.
Note: For more information on Driver reports, see the Aloha Takeout Report Guide.
To recall a driver:
- Touch Map on the navigation bar to access the Map screen or touch Dispatch on the Dispatch screen.
- Select the driver.
- Touch Recall.
Returning a driver
After a driver completes a delivery run, you can return him to the system to tender the checks. When you return a driver, the system changes the status of the driver to 'In' rather than 'Out.'
To return a driver:
- Touch Map on the navigation bar to access the Map screen or touch Dispatch on the Dispatch screen.
- Select the driver.
- Touch Return.
Viewing capacity details
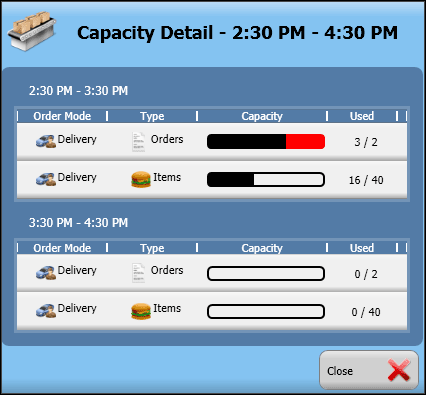
Capacity Detail provides a quick on-screen display of your actual delivery orders for a specific time frame compared to your previously configured order scheduling limits.
Note: You set your Order Scheduling limits in Maintenance > Takeout Configuration > Takeout Settings > Order Scheduling > Schedules tab.
To view capacity details:
- Touch Map on the navigation bar to access the Map screen or touch Dispatch to access the Dispatch screen.
- Touch Capacity Detail.
- View the content on the Capacity Detail screen.
- Touch Close to return to the Map screen.