Creating a specific menu for dine-in
If your dine-in menu offers different submenus or menu items than other menus, such as for pickup, curbside, or delivery, you can create a specific menu for dine-in. The dine in menu appears when the consumer scans the QR code.
To create a specific menu for dine-in:
- In Menu Configurator, select a company from the list and click OK.
- Select File > Check Out Design. The Select Company Design dialog box appears.
- Select a design for which to create a dine-in specific menu and click OK.
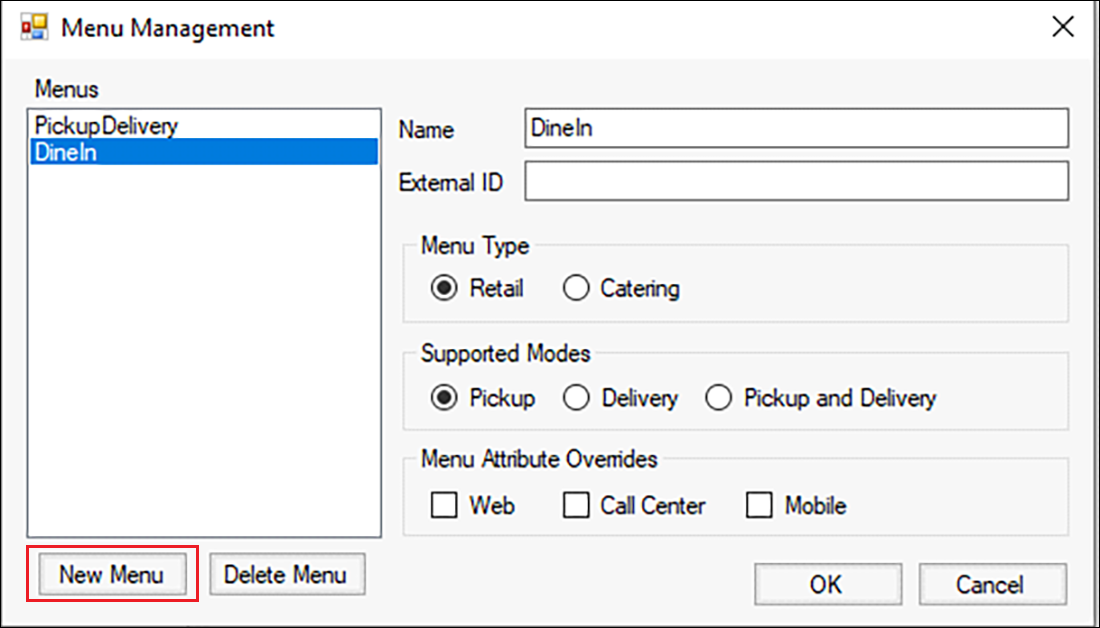
- Select Web Menu > Menu Management. The Menu Management dialog box appears.

- Click New Menu. A new menu is added to the 'Menus' list box.
- Type a name for the new menu, such as 'DineIn.'
- Leave the defaults for all other options.
- Click OK.

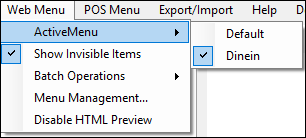
- Select Web Menu > Active Menu, and select the new menu to appear as the active menu.
At this point, the new menu has no assigned submenus so you must decide whether to:
- Share submenus for dine-in only.
- Use an existing submenu and only change items for dine-in only.
- Create completely new submenus for the dine-in menu.
Tip: You may find you want to use a combination of each of the methods; however, remember that changes made on shared submenus affect submenus on other menus. For the least amount of menu management, you may also find the easiest solution is to share all submenus, and then create dine-in specific submenus for your dine-in menu.
To share a new submenu for dine-in only:
This involves sharing a submenu between menus. Any change made to a shared submenu also impacts the same submenu on other menus.
- Right-click the the new menu in the top left corner of the screen and select Share Existing Submenus from the menu that appears.
- Select the submenu to share and click OK.
- Repeat this procedure for another submenu to share between menus.
- Add any new submenus to appear for your dine-in menu.
To use an existing submenu and only change items for dine-in:
This involves copying a submenu from another menu. Any change made to a copied submenu does not impact the same submenu on other menus.
- Right-click the new menu in the top left corner of the screen and select Duplicate Existing Submenu from the menu that appears.
- Select the submenu to copy and click OK.
- Repeat this procedure for another submenu to copy.
- Modify any menu items to appear for your dine-in menu.
- If necessary, add any new submenus to appear for your dine-in menu by either sharing, copying, or creating a new submenu.
Reference: To create completely new submenus for the dine-in menu, refer to the Aloha Online Ordering Implementation Guide.
To assign the 'DineIn' order mode to the dine-in menu:
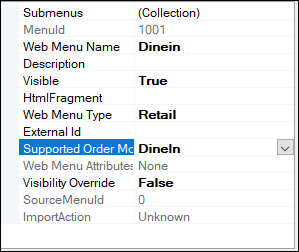
- With the dine-in menu active in Menu Configurator, select the menu from the top-left corner of the screen, and select DineIn from the 'Supported Order Modes' drop-down list in the properties window.

- Select File > Check In Design.
To assign the dine-in menu to the site or sites in Web Admin:
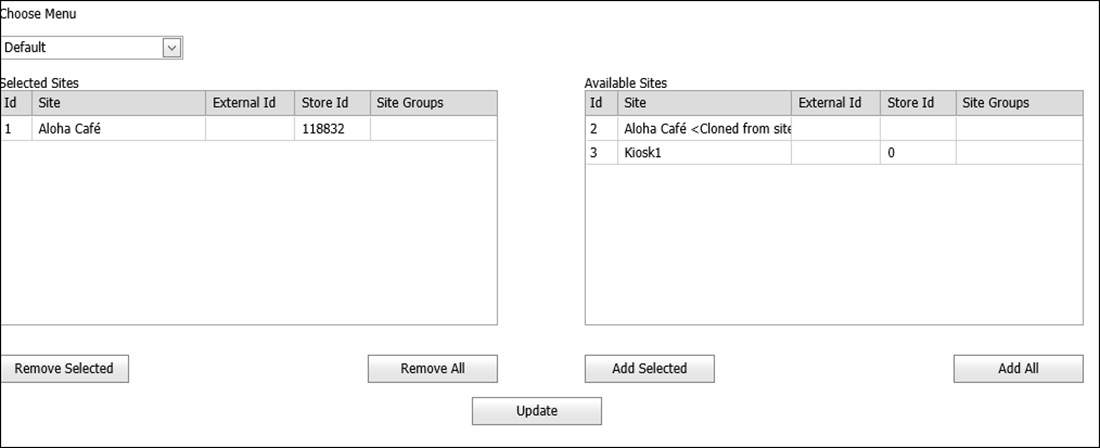
- In Web Admin, select Designs > Site Menu Assignment.

- Select the menu from the Choose Menu' drop-down list.
- Select the site from the 'Available Sites' list and click Add Selected to move the site to the 'Selected Sites' list. To add the menu to all sites, click Add All.
- Click Update.