Managing portal members
Use the Custom Roles and Members functions to control access to different areas within the portal.
Creating roles for portal access
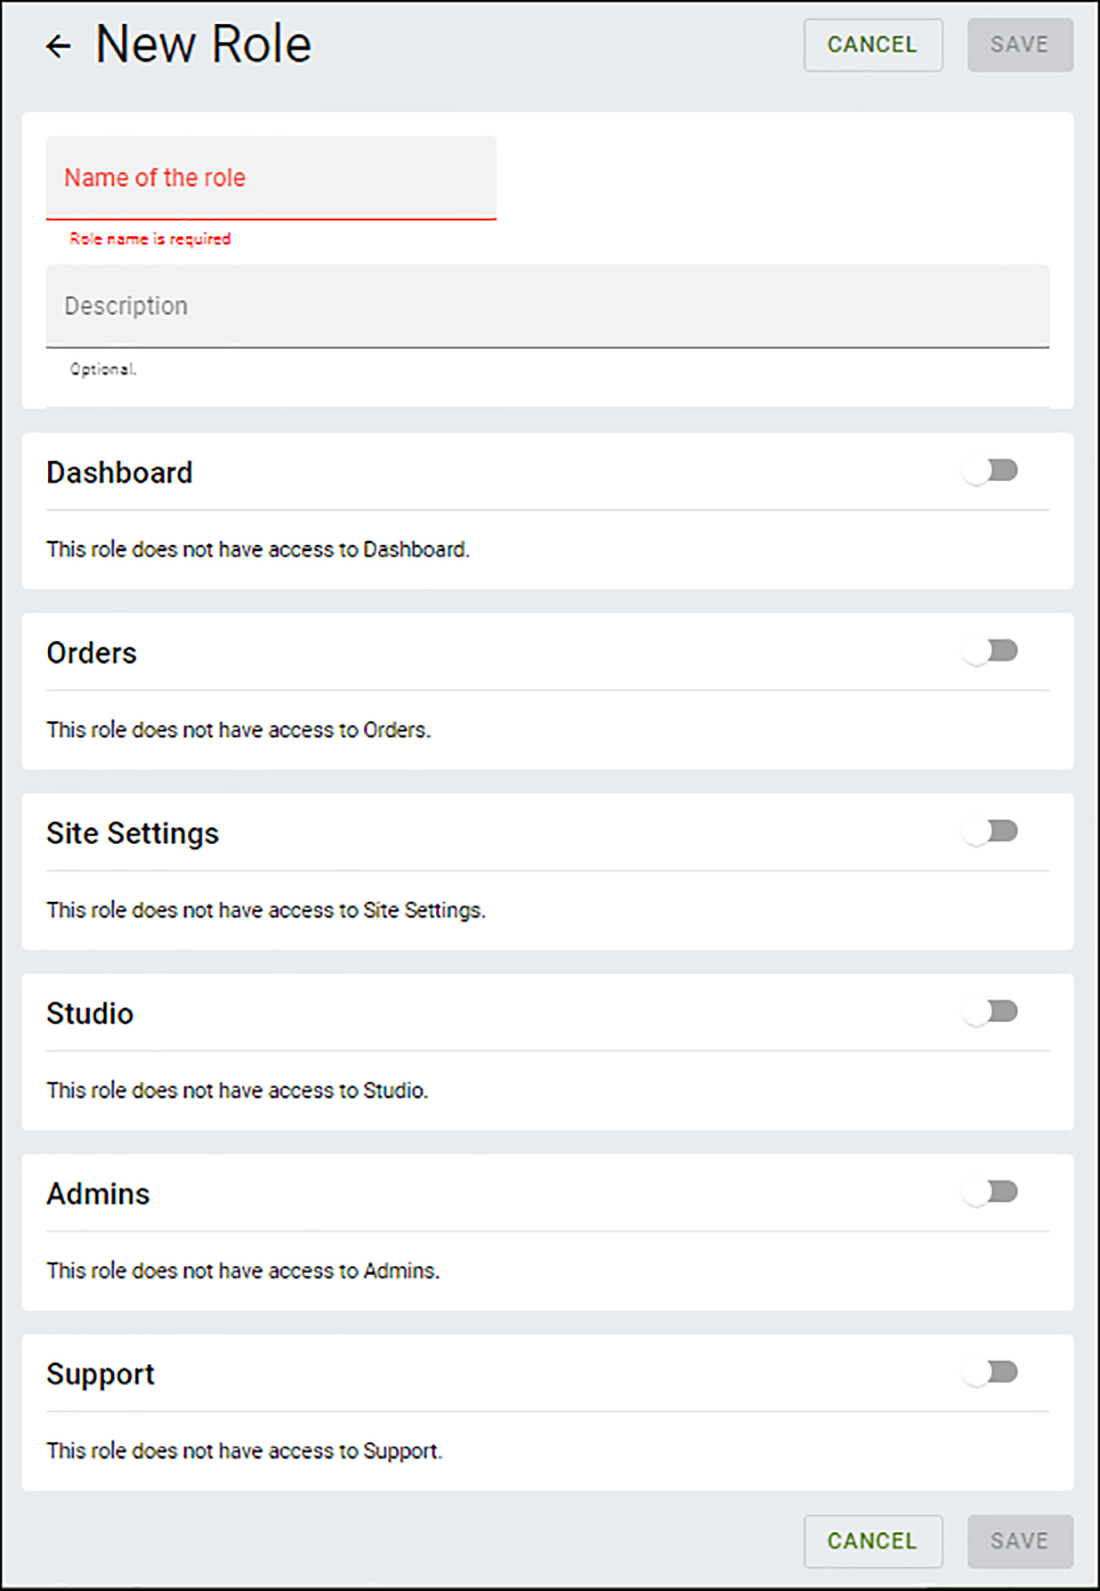
Click Admins > Custom Roles in the navigation pane to add roles for access to the Digital Ordering portal. Use this function to create any custom roles besides the ones pre-populated in the portal. For example, you can create a specific role for a lower manager at the site.
To create a role for access to the Digital Ordering portal:
- Click Admins > Custom Roles in the navigation pane.
- Click Add New.

- Type a name for the role.
- Type a description for the role.
- Slide the following to the right to allow the user role to access the function:
- Orders
- Site Settings
- Studio
- Admins
- Support
- Click SAVE to save your settings or click CANCEL to cancel the record.
Creating members for portal access
Click Admins > Members in the navigation pane to access the Members function and view, add, or edit members for the Digital Ordering portal.

To add a member:
- Click Admins > Members in the navigation pane to access the Members function.
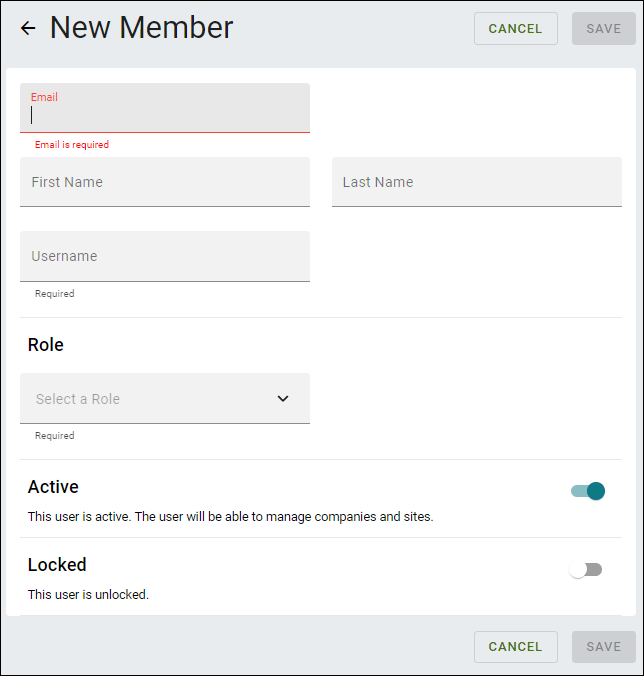
- Click Add New. The New Member function appears.

- Type the email address associated with the member.
- Type the first and last name of the member.
- Select a username for the member to use in the Digital Ordering portal.
- Select the user role from the 'Role' drop-down list to assign to the member. See Creating roles for portal access to create a custom role for a specific portal user.
- Slide Active to the right to indicate the member is active and can manage companies and sites; otherwise, leave it disabled.
- Slide Locked to the right to indicate the member is able to access the portal; otherwise, leave it disabled.
- Click SAVE to save your settings or click CANCEL to cancel the record.
Return to the main "Implementing Digital Ordering" page.