Using Back Office reports
Back Office reports provide an in-depth view of your business metrics. Reports are categorized by Operations, Sales, Customers, and Lists. All of the reports, except for lists, allow you to customize the time period for the report. You can either print reports or export the reports into several different formats.
The following Back Office reports, by category, are available:
Operations
- Shifts — This report provides a synopsis on the stores total sales including all devices and employees that operated on that day.
- Store Summary — This report provides 2 different views of a shifts sales summary. Through this report, you can access the store summary for a particular shift on a specific device, as well as a breakdown of the cash reconciliation at the time of shift close.
- Device Activity — Enables you to review the net sales activity entered through each device.
- Employee Activity — Enables you to review the sales activity entered by each employee.
- Location Activity — Enables you to review the sales activity for each location.
- Discounts and Promos — This report shows you all discounts applied at your store for the selected time frame.
- Price Overrides – This report provides you with details about price overrides made at your POS such as override reason, employee, item level, override amount.
- Taxes — Provides you with a breakdown of the taxes collected by tax jurisdiction. If you have multiple selling locations, it will breakdown tax information by each location for the selected time frame.
- Time Clock – This report shows you the hours worked by your employees. You can view a summary or choose detailed view within this report.
- Tips — Provides a report of the total amount of credit card tips declared by an employee.
- Offline Credit — Enables you to review the offline credit transactions and their settlement status.
Sales
- Department Sales — Enables you to track the sales activity for each department.
- Item Sales — This report shows you all your items with sales activity within a selected time frame.
- Non-Sales Revenue — Enables you to track the list of items sold for a given date with their price and margin details.
- Modifier Sales — Enables you to track the sales activity for each modifier.
- Sales Summary — Provides you with an overview of your sales and enables you to look for sales trends.
Customers
- Bulk Email — Enables you to track the effectiveness of your marketing email messages.
- Customer Notes — Displays the notes entered for your customers.
- Customer Sales — Provides you with a sales summary by customer.
Lists
- Items — Displays all of the items on your menu according to category.
- Modifiers — Displays all of the modifiers sold in the selected date range. Also shows all modifiers sold, whether they have a price associated with them or not.
- Customers — Displays a list of all of your customers.
- Devices — Displays a list of all devices associated with your establishment.
Accessing Back Office Reports
To access and run a report in your Back Office:
- Log in to Back Office.
- Select RESULTS > REPORTS.
- Select the report to run from the left menu. The system automatically generates and displays the report.
- Configure the report, as needed, using date ranges or keywords.
- Click the refresh icon to refresh the report data.
Choosing a Report Date Range
The report functions allow you to select a specific date or date range to run a report.
To run a report for a specific date or date range:
-
Log in to Back Office.
-
Select RESULTS > REPORTS.
-
Select the report to run from the left menu. The system generates and displays the report.

-
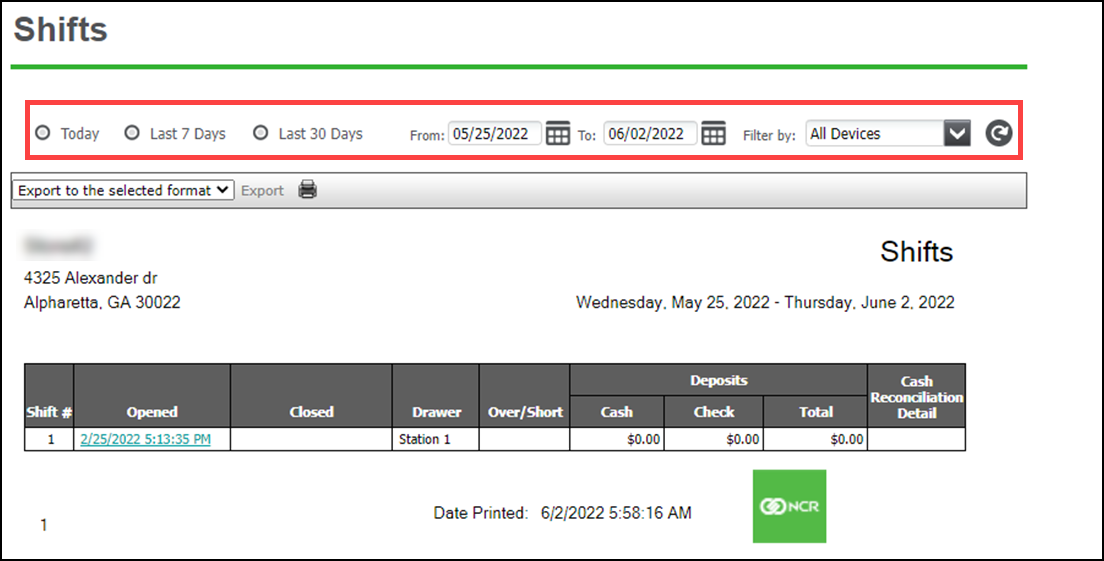
Select one of the pre-configured date ranges:
- Today
- Yesterday
- Last 7 Days
- Last 30 Days
-OR-
Use the From and To calendars to select a start and end date. -
Click the refresh icon to refresh the report data.
Exporting Report Data
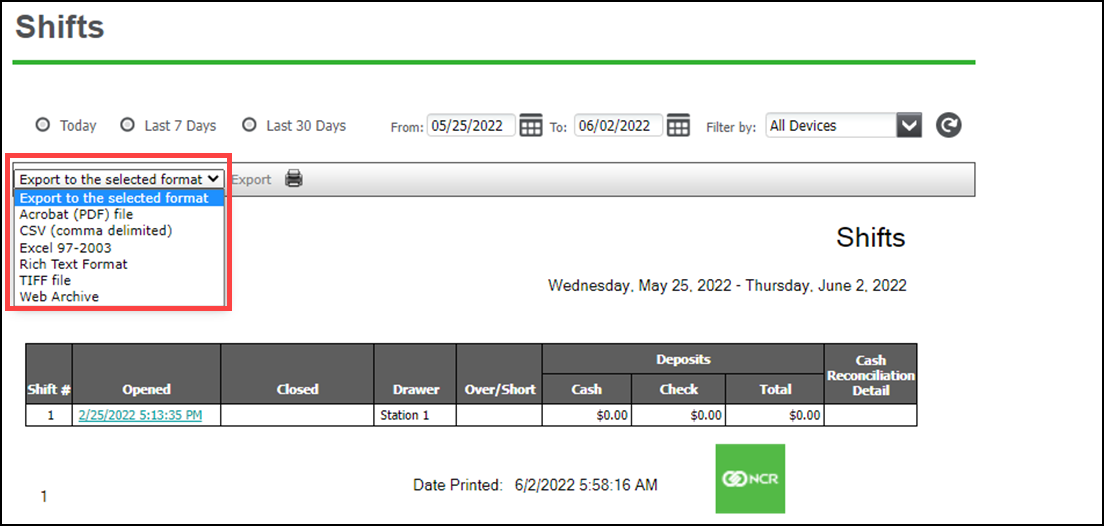
You can export each report to a variety of file formats.
To export report data:
- Select, configure, generate and display a report.
- Select a file format from the Export drop-down list on the Report toolbar and click the Export text link.

- Save the file to a location of your choice.
Looking for resources or help with Silver? Click here.