Configuring Revenue Centers
Use the 'Revenue Centers' feature to distinguish sales for different areas in the restaurant, such as dine-in, take-out, catering service, and more. You can assign a revenue center to a specific device and/or to an order mode for a store. This feature helps to understand operational efficiency, prepare accurate financial reports, track performance and sales of each revenue stream, and tax compliance.
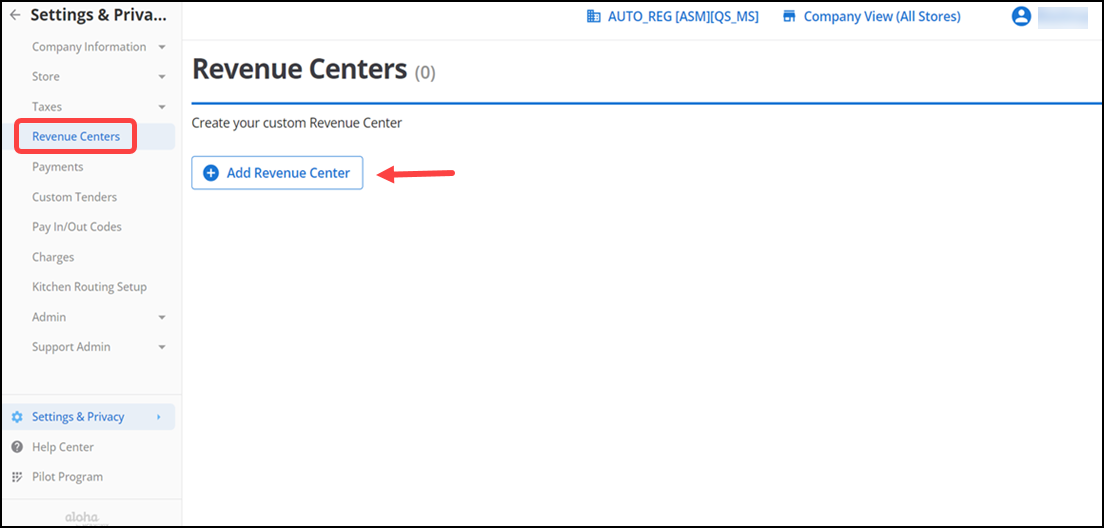
Use Settings & Privacy > Revenue Centers to configure Revenue Centers. You must log in using Company view to access this function.
To configure a revenue center:
-
Log in to Back Office using Company View (All Stores).
-
Select Settings & Privacy > Revenue Centers. The Revenue Centers screen appears.

-
Click Add Revenue Center.

-
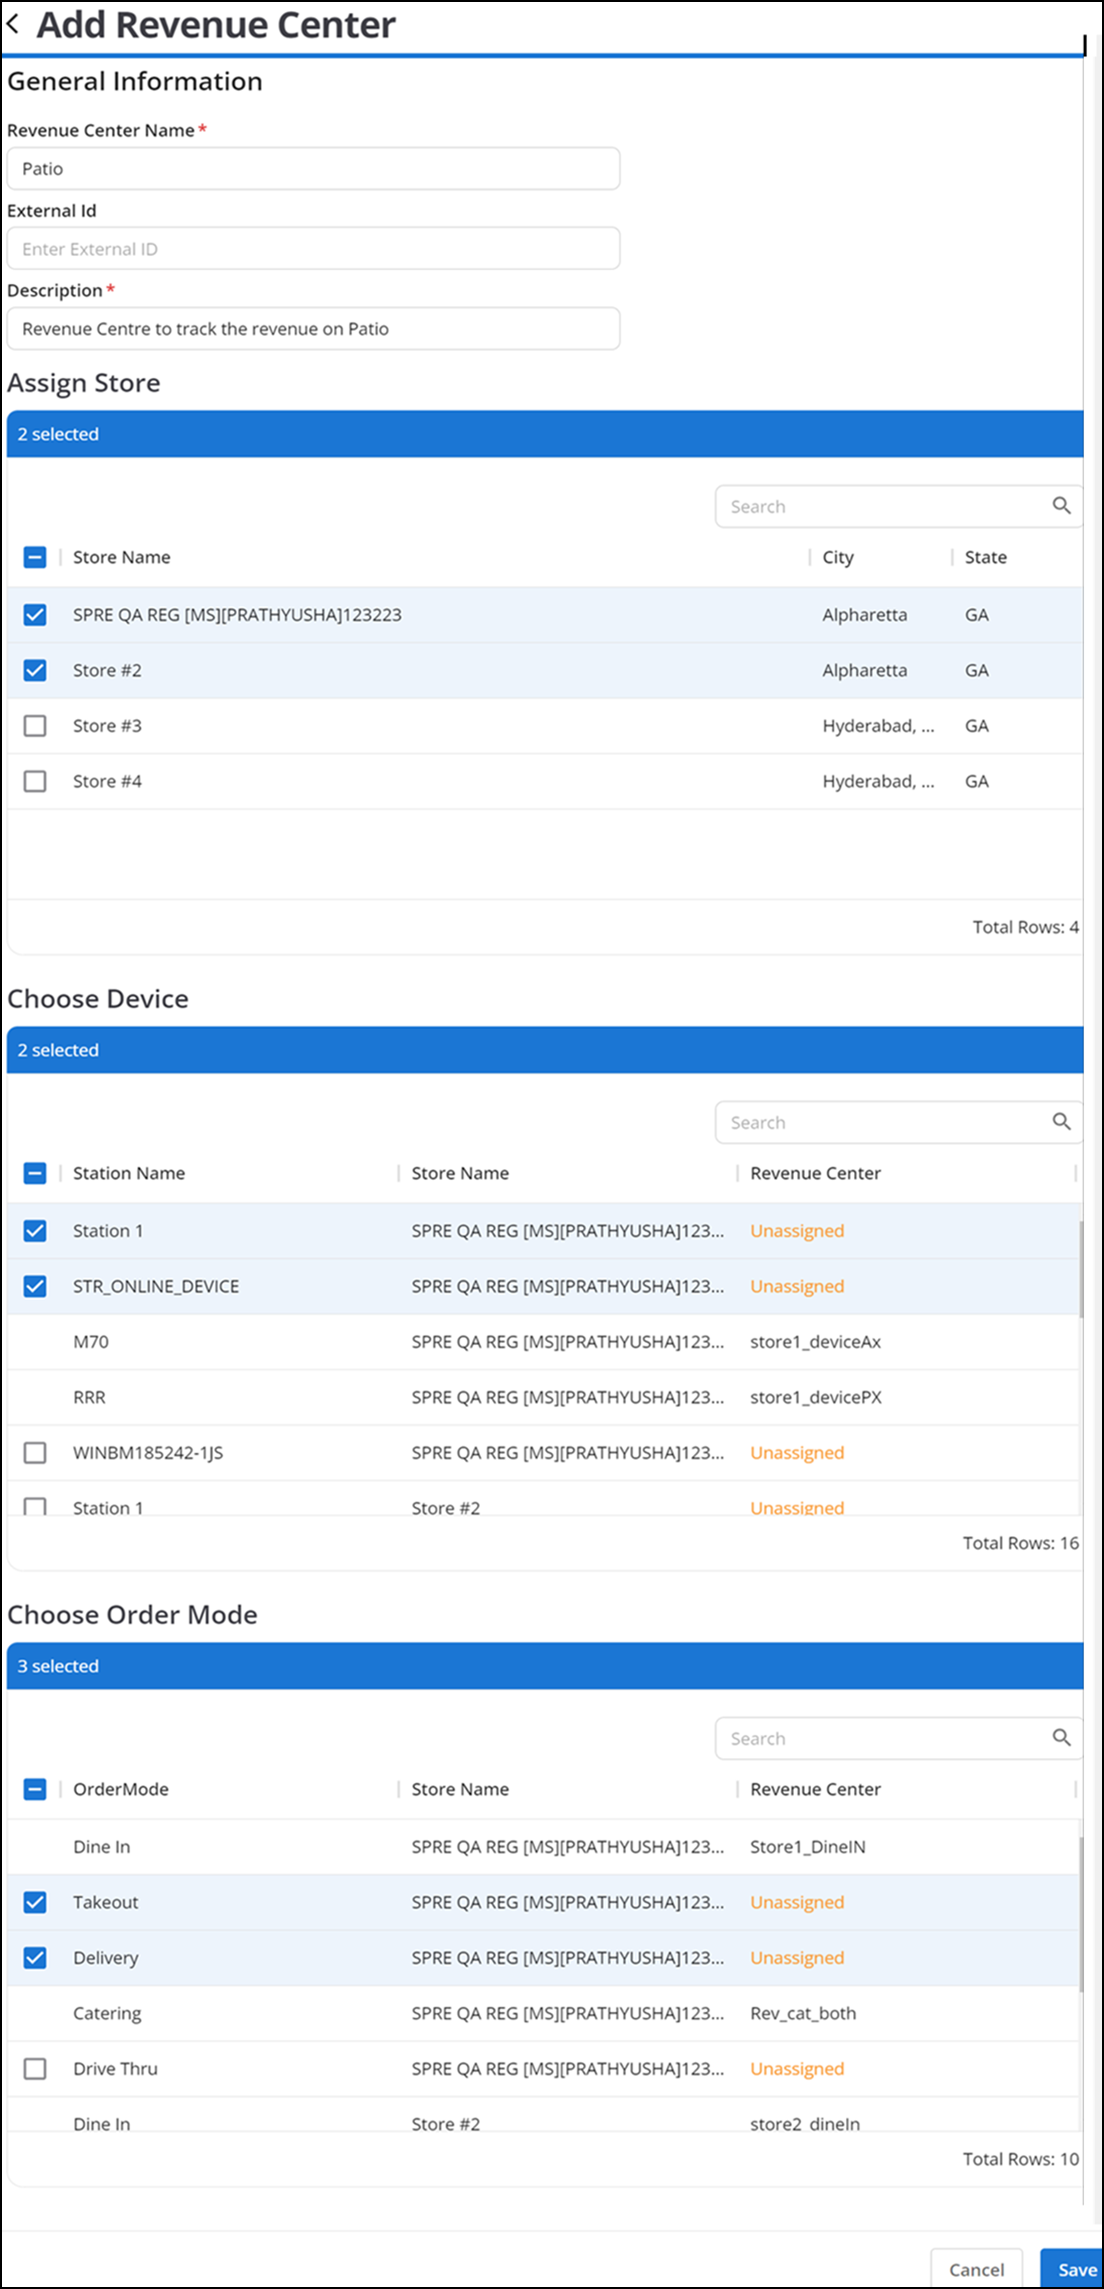
Under the General Information group bar, enter the Revenue Center Name, External ID and Description.
Note: If you leave External ID blank, the system populates the External ID automatically when you save the revenue center.
-
Under the Assign Stores group bar, select one or more stores. The Choose Device and Choose Order Mode grids appear.
-
Under the Choose Device group bar, select the stations to assign to the revenue center.
-
Under the Choose Order Mode group bar, select the order modes to assign to the revenue center.
Note: For the selected stores, you should assign a device or order mode to each revenue center.
-
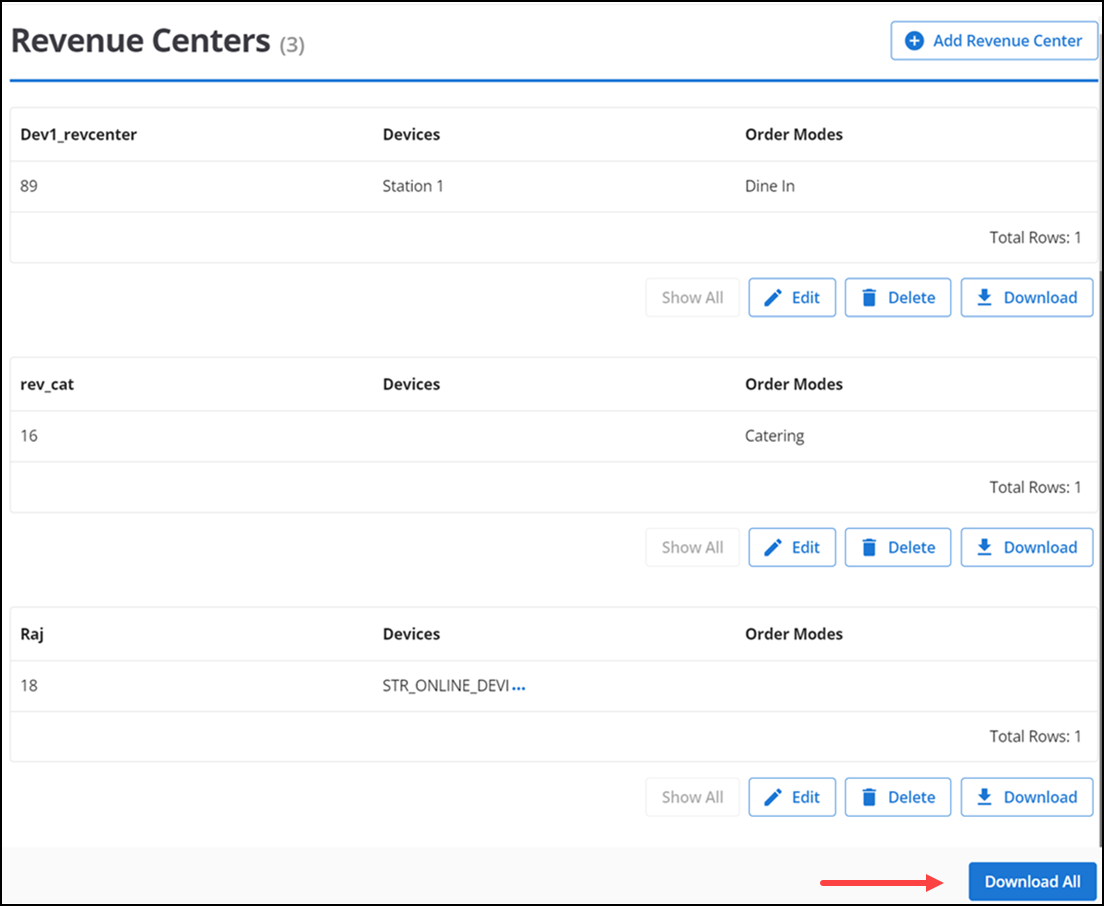
Click Save to save the changes.The configured revenue centers appear.

Note: Click Download All to create and view an Excel spreadsheet listing store assignments for all revenue centers or click Download to the right of a revenue center to view store assignments specific to the selected revenue center.
Note: Revenue Center reports are available for Aloha Smart Manager (ASM) and Non ASM subscribers. For viewing reports of ASM refer to the Revenue centers and for non-ASM refer to the Net sales by revenue center.