Adding Pictures of Menu Items
Adding pictures of your menu items can be a great way to assist your consumers in making their food selections. Aloha Online Ordering enables you to add pictures of menu and modifier items. You upload the pictures to the Graphics and Content page of Web Admin, and then you use Menu Configurator to associate the menu item to the picture.

The following table demonstrates the dimensions for each image used on a menu. To use different image sizes requires changes to AlohaOnline.css. Contact the Aloha Online Ordering team for more information.
| Image file name | Width (pixels) | Height (pixels) |
|---|---|---|
| Menu list image name. User defines the file name | 100 | 80 |
| Popup image name. User defines the file name | 250 | 450 |
| panel_header_image.png | 820 | 33 |
| panel_back_image.png | 820 | 10 |
| panel_bottom_image.png | 820 | 21 |
Uploading Pictures of Menu Items
You upload pictures of your menu items to the Graphics and Content section of Web Admin. Refer to To upload edited files to the Graphics and Content page for information on how to upload graphic files. Name the files in such a way to help you identify the menu item and the pixel size, such as ‘100x80_CheeseBread.png.’
Associating a Picture to a Menu Item
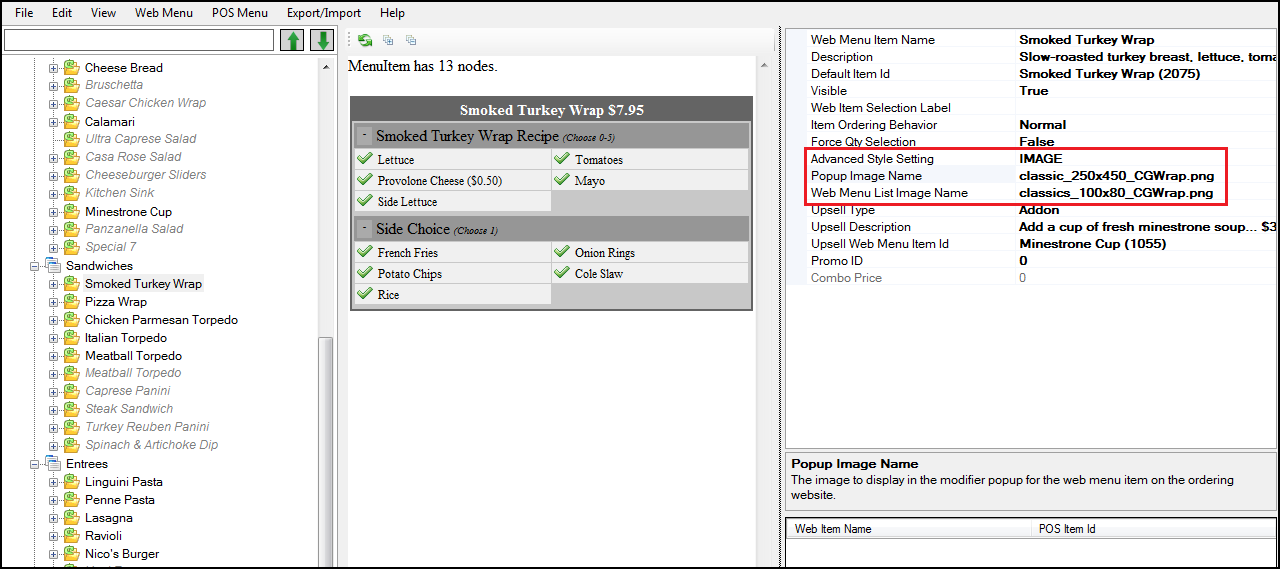
After you upload the pictures of your menu items to Graphics and Content, you then associate the picture of a menu item to the menu item in Menu Configurator. The picture displays alongside the item and its description in a submenu. You can also define a popup image to appear in the modifier popup window.
- In Menu Configurator, select the menu item for which to associate a picture.

- In Item Properties, type IMAGE as the ‘Advanced Style Setting.’
- Type the file name for ‘Popup Image Name.’ Type the file name exactly as it appears in Graphics and Content. If the item is does not appear in a popup window, skip this step.
- Type the file name for the Web Menu List Image. Type the file name exactly as it appears in Graphics and Content.
- Publish the changes.