Creating a context panel
Create one or more context panels in Panel Editor, depending on your needs. You can create one context panel that includes the modifiers for all your items, but most likely, you will create a separate context panel for each group of like items, such as sandwiches, drinks, pizzas, and more.
To create a context panel:
- Select Maintenance > Screen Designer > Quick Service Screen Designer.
- Select Work with Panels.
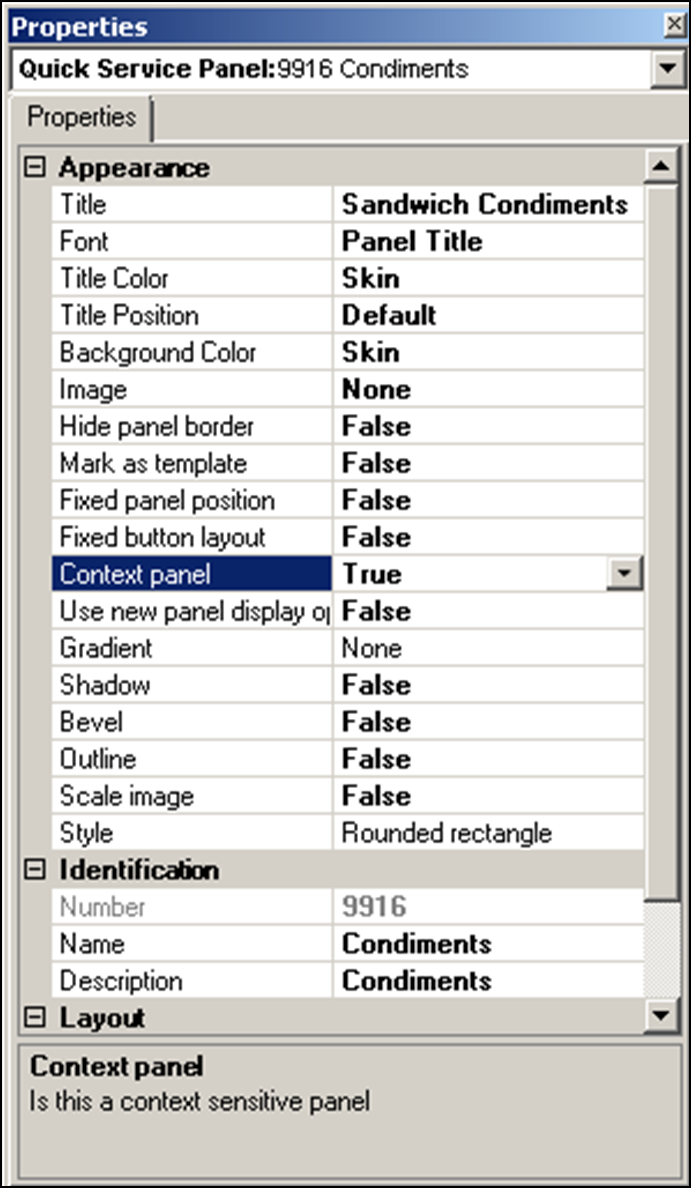
- Select Panel > New Panel, and size the panel. The ‘Properties’ dialog box appears.

- Under the ‘Identification’ group bar, click the ellipsis button (...) next to ‘Number’ to display the Number Assignment dialog box, from which you can choose a number.
- Type a name and description for the context panel.
- Under the ‘Appearance’ group bar, type a title for the panel, using the naming convention you determined when doing the design analysis.
- Select True from the ‘Context panel’ drop-down list to specify this panel is a context panel that automatically appears when you select an item, modifier, quick combo, or quick combo component from another panel or from the guest check window.
- Configure the remaining options as you would for any other panel.
- Select Panel > Save Panel.
- Repeat this procedure for any other context panels you want to create.
- Exit Quick Service Screen Designer.
Once you create a context panel, you can add buttons to the panel as you would any other panel, such as order modifiers, modifier codes, chains, quick combo upsells, and more. You can also add the Dynamic Included Modifier and Dynamic Substitute button functions, which are exclusive to context panels.
Reference: For information on configuring and using the Dynamic Included Modifier button function, refer to the Included Modifiers Feature Focus Guide - HKS482. For information on configuring and using the Dynamic Substitute button function, refer to the Quick Combos Feature Focus Guide - HKS1507.
Continue to "Associating a context panel with an item or modifier."