Adding buttons for course ordering to the FOH
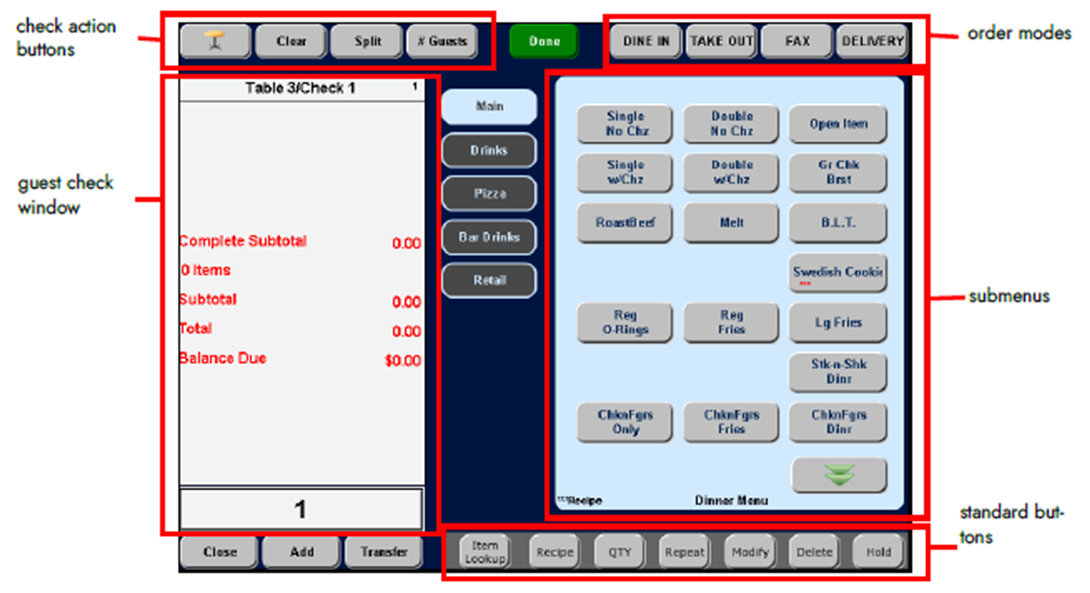
Aloha Table Service uses hard-coded screens to maintain familiarity and a consistent screen flow. The hard-coded design of the Table Service order entry screen includes the following areas:

The area located on the lower right side of the order entry screen, labeled 'standard buttons' in Figure 1, typically contains the following buttons: Item Lookup, Recipe, Quantity, Repeat, Modify, Delete, and Hold; however, it is possible to have an optional fifth order mode in place of the Hold button. Some of these buttons are available at all times, and some depend on the configuration of the Back-of-House (BOH).
To allow the assignment of course numbers, the Course Ordering feature requires that you create a custom panel to replace the hard-coded buttons that appear in the lower right side of the order entry screen. After adding a Course button, you can manually monitor the table and send courses to the kitchen without any additional configuration. If, however, you want to send courses based on preset increments of time, you must add preset Hold buttons to the same custom panel on which you place the Course button. Teaching you how to create a custom panel to replace the hard-coded buttons that appear on the lower right side of the order entry screen is beyond the scope of this document. To learn how to create this panel, refer to the Custom TS Order Entry Screen Feature Focus Guide. Teaching you how to create Hold buttons with preset increments of time is beyond the scope of this document. Refer to the Delay Send Feature Focus Guide for complete instructions on implementing this functionality.
Once you create the custom panel and set it up for activation, return here to this document to learn how to add the Course button to the custom panel.
To add the buttons required for Course Ordering to a custom order entry panel:
- Select Maintenance > Screen Designer > Table Service Screen Designer.
- Select Work with Panels.
- Select Panel > Open Panel, select the custom order entry panel on which to add the Course button, and click OK.
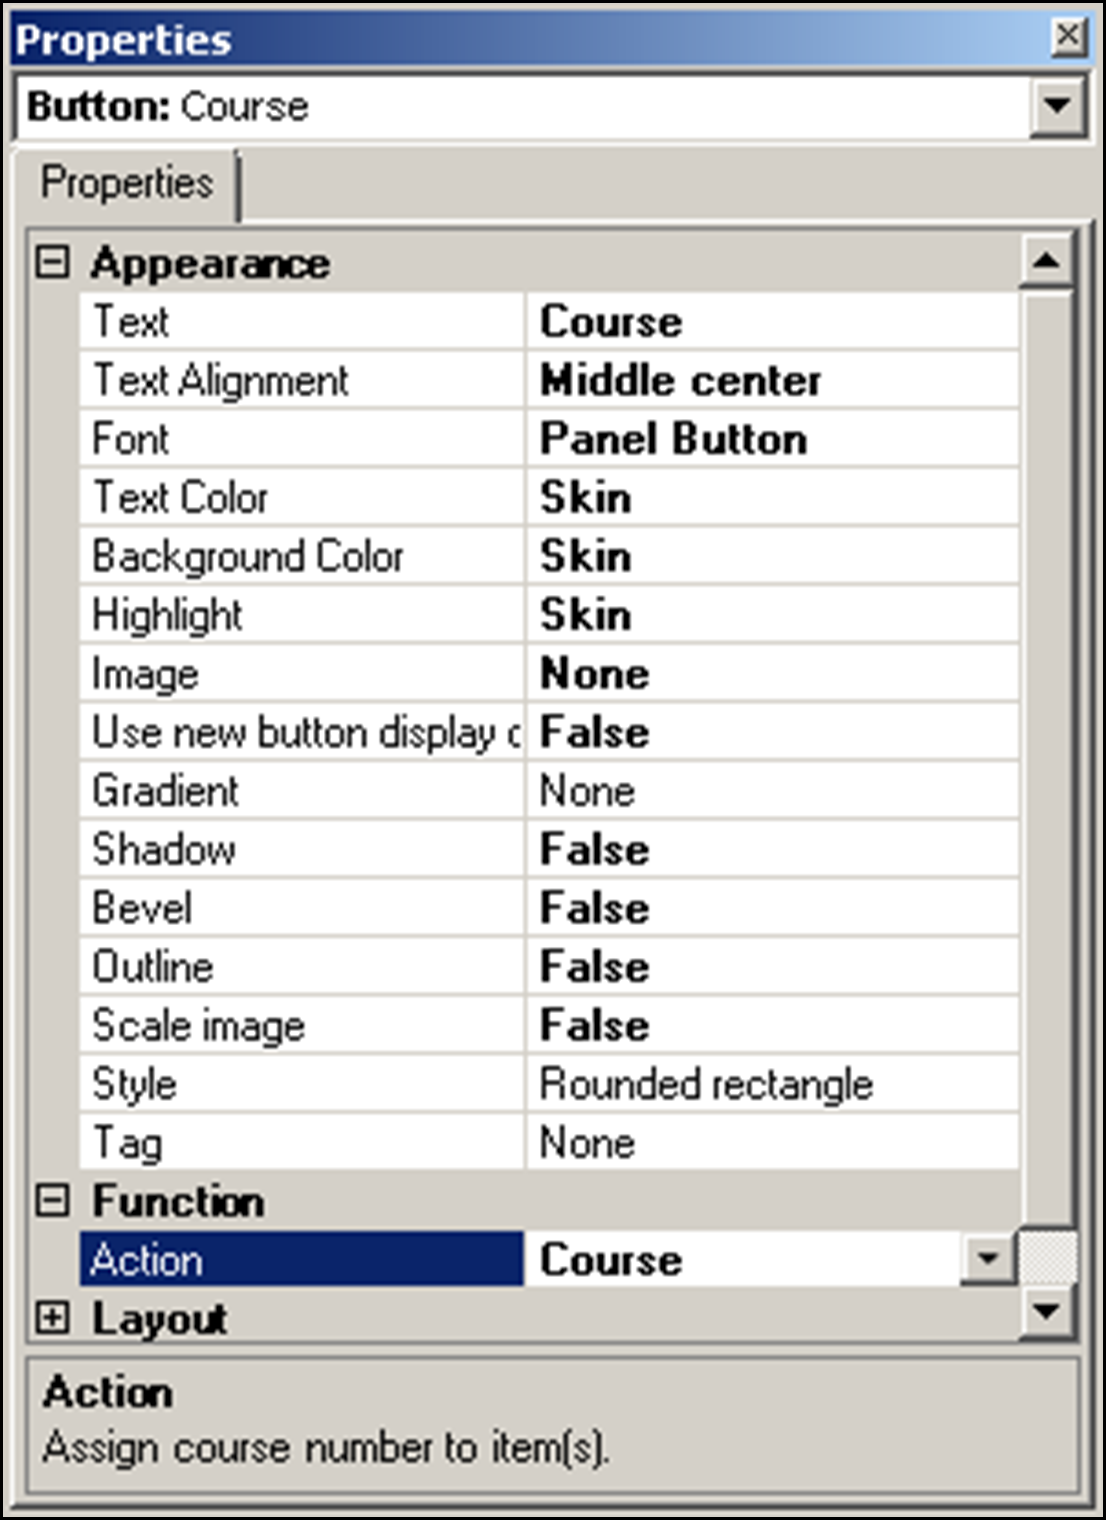
- Select an available button or create a new button. The Properties dialog box appears.

- Under the 'Function' group bar, select Course from the 'Action' drop-down list. You cannot include the Course button function in a script.
- Under the 'Appearance' group bar, type a name for the button, such as 'Course.' To display text on multiple lines, insert '\n' without spaces for line breaks.
- Configure the remaining options as you would for any other button.
- If necessary, add the preset Hold buttons to this same custom panel using the Delay Send Feature Focus Guide.
- Select Panel > Save Panel.
- Exit the Screen Designer function.
Continue to "Assigning priorities to items."