Designing the FOH Select a Report screen in Table Service
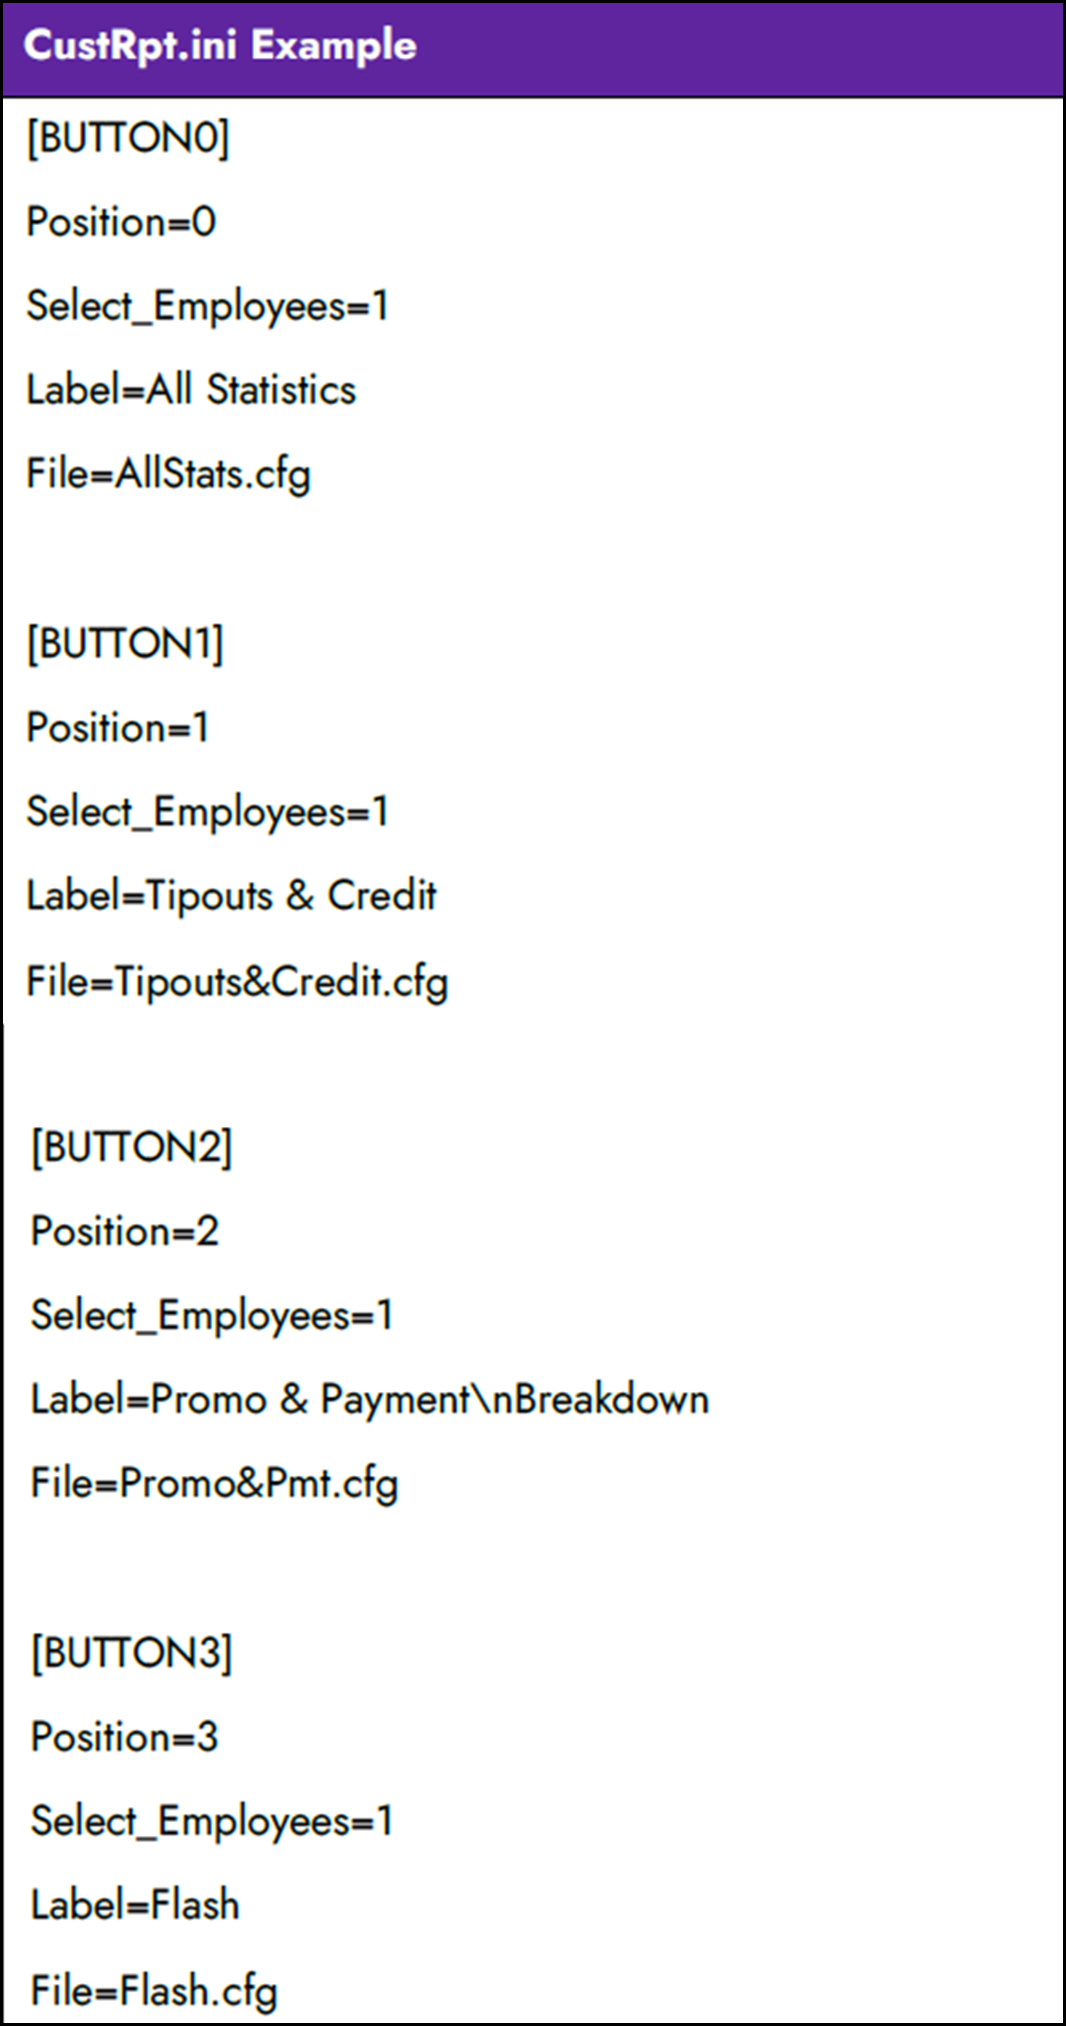
For Table Service operations that are not accessing reports from a floor plan screen, you must select your custom report buttons from the FOH Select Reports screen. The screen appears blank until you design the buttons to appear on the screen using a CustRpt.ini file, which is placed in the Data and Newdata directories. The file defines where to place a button using an internal grid, the text to appear on the button, the title to use for the report, and the custom report configuration file you are accessing. As an added feature, you can configure whether to generate data for the entire store or select specific job codes to include in the report data. The format of CustRpt.ini is as follows:

[ButtonX] — Specifies the section header for each button you are adding to the CustRpt.ini file, such as ‘Button2.’ Use the x value to identify the location of the button in relation to the screen.
Select_Employees — Determines how you want to generate the data, using the values of 0 or 1. Assign a value of 0 to Select_Employees, to use data for the entire store, or assign a value of 1, to enable an additional screen to appear from which you can select specific employees to include in the report data.
Position — Indicates the positioning on the screen where you want to place the button, using an internal grid. Position ‘0’ indicates the first button on the top upper left, and the numbering continues across the screen.
Label — Indicates the name of the report to appear on the button. Use ‘\n’ with no spaces between words, to display the text on multiple lines.
File — Specifies the name of the report configuration (.cfg) file to link to the custom button.
Continue to "Refreshing POS data."
After running a data refresh, return to the main Custom FOH Reports page.