Accessing a dashboard on demand
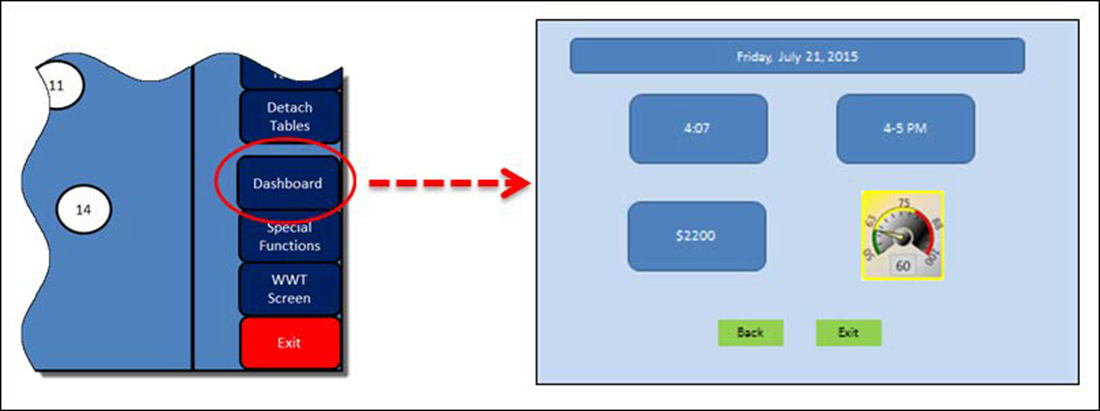
Another method by which to display a dashboard is to access it on demand by touching a button you configure on a submenu panel or a floor plan panel (TS only), or any panel (QS only). The system automatically adds Back and Exit buttons. Touching Back returns you to the previous screen, and Exit returns you to the floating logo or the logout screen.

To add a Dashboard button to a panel:
- Select Maintenance > Screen Designer > Table Service Screen Designer or Quick Service Screen Designer. The screen designer function opens in a new window.
- Select Work with Panels.
- Select Panel > Open Panel, select a submenu panel or a floorplan panel (TS only) or any panel (QS only) and click OK.
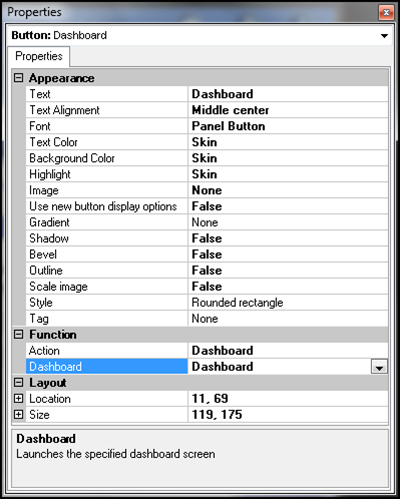
- Select an available button, or select Panel > New Button to create a new button. The Properties dialog box appears.

- Under the 'Function' group bar, select Dashboard from the 'Action' drop-down list.
- Select the dashboard to display when you touch this button.
- Configure the remaining options as you would for any other button.
- Exit the Screen Designer function.
If you want an employee to view a dashboard specific to a job role, such as a manager, you must design a unique floor plan for that job role. Select the job code to which that employee is assigned, and specify that the floor plan for that job code.
To allow an employee, such as a manager, to view the dashboard from the floor plan screen:
- Select Maintenance > Labor > Jobcodes.
- Select a job code for which you want to allow an employee, such as a manager, to view the dashboard.

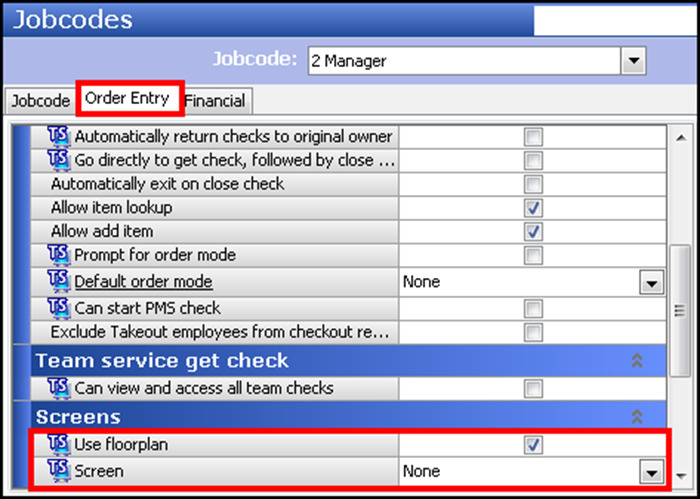
- Select the Order Entry tab.
- Under the 'Screens' group bar, select Use floorplan.
- Select the floor plan screen from the 'Screen' drop-down list.
- Click Save.
- Repeat the procedure for each job code for which you want to allow viewing of the dashboard.
- Exit the Jobcodes function.
Continue to "Reserving an area of a Quick Service screen for a dashboard."