Configuring visual indicators on Chain button functions
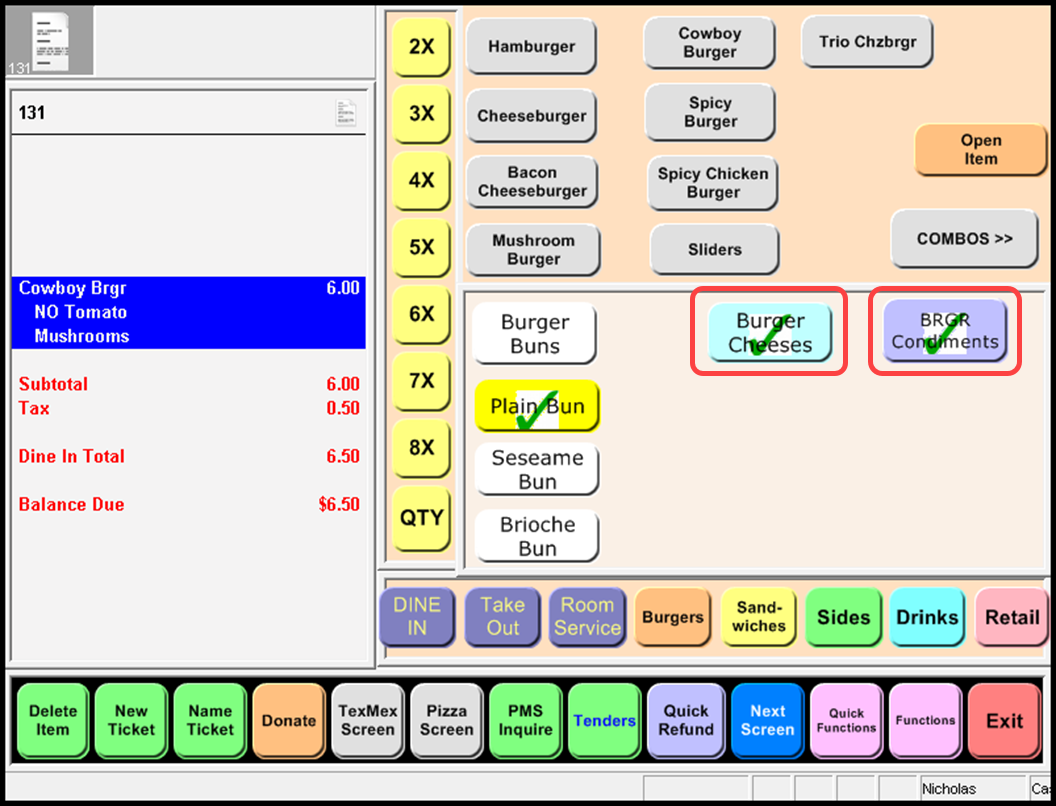
In "Configuring visual indicators to appear for included modifiers", we discussed adding an image or color to a modifier code as a visual indicator on a button. In a more complex Quick Service screen design using context panels, an included modifier could be located on a panel hidden beneath other panels and is not readily visible when you add the menu item to the check. The designer often segregates common modifiers, such as cheeses or protein choices, and uses chain buttons to access the context panel on which they reside. For example, one panel is dedicated to bread choices, while another could contain only cheese choices, or meat choices. An included modifier found on these panels is not visible when you add the menu item to the check. You must first touch the 'chain' button to navigate to the modifier panel before you can determine which modifiers on that panel, if any, are included with the item.

To easily identify which hidden panel contains at least one included modifier, you can also display the same visual indicator on the chain button that navigates to a panel that has an included modifier. For example, a chain button named 'Cheese Menu' appears for the item you are currently entering and the 'cheese panel' to which the 'cheese menu' button navigates contains the included modifier Cheddar Cheese. The same visual indicator appears on both Cheddar Cheese and the 'cheese menu' chain button.
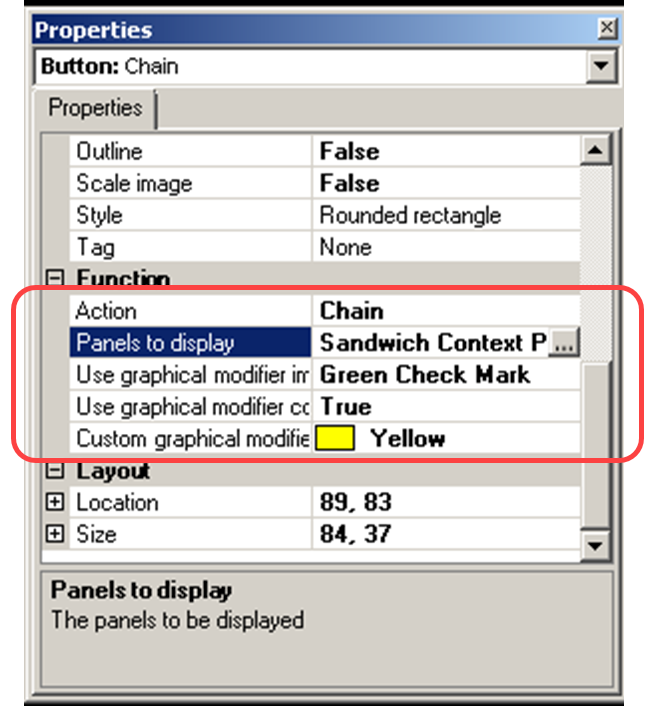
To display the visual indicator on a button that chains to a modifier panel containing included modifiers, you must specify the image or color to use in the chain button function definition.
Tip: A script button function often includes a chain function as part of a multi-function action. To use visual indicators on a chain button function, you must place the chain function as the first action defined in the script.
To configure a visual indicator to display on a chain button function:
- Select Maintenance > Screen Designer > Quick Service Screen Designer.
- Select Work with Panels.
- Select Panel > Open Panel, then select a panel to use, and click OK.
- Add a button, or select an existing button.
- In the Properties window and under the ‘Function’ group bar, select Chain from the 'Action' drop-down list.

- Select a panel from the 'Panel to display' drop-down list.
- To add an image to a chain button, select an image from the 'Use graphical modifier image' drop-down list.
- To add a color to a chain button, select Use graphical modifier color and a color from the 'Custom graphical modifier color' drop-down list.
- Select Panel > Save Panel.
- Repeat this procedure to specify an image or color for another chain button.
- Select File > Exit to exit Quick Service Screen Designer.
Continue to "Supporting dynamic included modifiers."