Customizing the Print Designer layout
As you add elements to the Print Designer layout, you can customize them by changing the font size and style, width and height, and alignment as they appear on the custom print. Additionally, you can suppress any leading and trailing internal linefeeds to promote a ‘green’ environment and regulate the size of the chit or guest check.
Grouping items by categories (production layout)
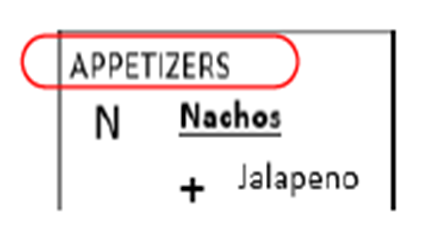
Items on a production chit appear and print in the order in which you add them to the check, or by using a defined priority. For better organization, you can group and print items using general (non-sales) categories. For example, you can group items by:
- Courses, such as appetizers, entrees, and dessert.
- Stations, such as grilled, fried, and cold.
- Length of time to prepare, such as two minutes, three minutes, five minutes.
To do this, assign items to general categories in the Categories function, and then use the Chit Item Category Grouping function to group the categories. We recommend putting an item in only one of these categories. Once grouped, all production chit layouts defined in the Print Designer function use that grouping. Any item not assigned to a category within the grouping prints independently. You can configure only one Chit Item Category Grouping record, per store. If you later decide you do not want the grouping, delete the Chit Item Category Grouping record.
To assign items to a general category:
- With Kitchen selected in the product panel, select Maintenance > Menu > Categories.
- Click the New drop-down arrow, select General, and click OK.
- Type a name for the category, such as ‘Apps.’
- Select the Items tab.
- Select an item from the ‘Available’ list and click >> to move the item to the ‘Included’ list.
- Repeat step 5 to include each item in the category.
- Click Save.
- Repeat this procedure until you assign all necessary items to a category.
- Exit the Categories function.
To assign categories for chit item category grouping:
- With Kitchen selected in the product panel, select Maintenance > Hardware > Print Designer Configuration > Chit Item Category Grouping. The Chit Item Category Grouping function appears.
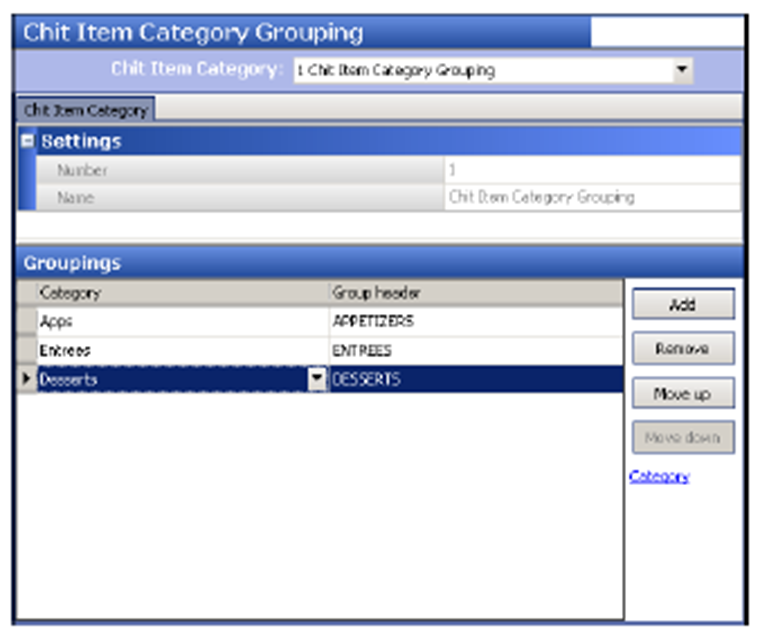
- Under the ‘Groupings’ group bar, click Add.
- Select a category to include in the production chit grouping from the ‘Category’ drop-down list.
- Type the name to identify the category in ‘Group Header,’ if different than the default text. Thename of the category appears as the default text, but you can use an alternate name that is more descriptive or friendly. To have more than one category appear as though it belongs to a single category, type the same group header for each applicable category.
- Repeat steps 2 through 4 until you group all the necessary categories.
- Click Save and exit the Chit Item Category Grouping function.
Changing the size of an element (all layouts)
You can control the size of an element layout by setting the size, width, and height attributes for each element to print. You can change the printing to preset relative sizes for the text.

You can expand the width and height of an element.

To customize the size of an element:
- Select an element in the list, under the ‘Design’ group bar.
- Under the ‘Print style settings’ group bar that appears, select the relative size of printed text for the selected element from the ‘Size’ drop-down list. Your choices are ‘Large,’ ‘Medium,’ ‘Small,’ ‘Very small,’ and ‘Very large.’
- Select Expanded width, to stretch the printed element horizontally across the line.
- Select Expanded height, to increase the height of the printed element.
- Click Save in the Command panel.
You can override the font and font sizes for an element defined in Print Designer when you use an Epson TM-88 printer with Windows printer drivers in the Printers function. These drivers have proven to print text and graphical images on a chit with more clarity. We recommend you use an Ethernet connection for your operations since an Epson TM-88 printer installed with Windows printer drivers may print slower in comparison to other printers.
For example, if you select ‘Large’ as the font size for an element in Print Designer, you can stipulate the font size for large as being 15 points in the Windows printer definition. While there is no option in the Print Designer function to specify the font type, you can override the default font using ‘Font name’ in the Windows printer definition.
To override the font and font sizes for an element using a Windows printer:
- With Kitchen selected in the product panel, select Maintenance > Hardware > Printers.
- Click the New drop-down arrow, select Aloha Kitchen, and click OK.
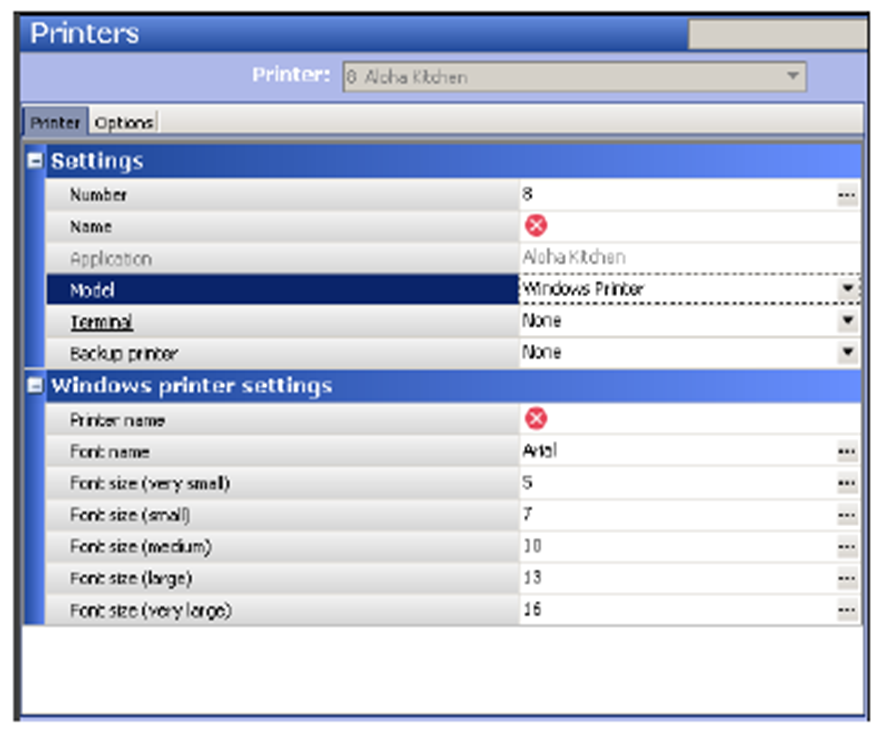
- Type a name to identify the printer.
- Under the ‘Settings’ group bar, select Windows Printer from the ‘Mode’ drop-down list to expose the ‘Windows printer settings’ group bar.
- Select the terminal that uses the printer.
- Select the backup printer to use for the terminal.
- Under the ‘Windows printer sttings’ group bar, type a name to identify the printer in ‘Printer name.’
- Select a font to use instead of the default font for chit printing from the ‘Font name’ drop-down list, if desired.
- Select a font size to use for very small printing from the ‘Font size (very small)’ drop-down list, if desired. The default is 5 points. This option overrides the default font size used for the ‘Very small’ choice for ‘Size’ on the Design tab in the Print Designer function.
- Select a font size to use for small printing from the ‘Font size (small)’ drop-down list, if desired. The default is 7 points. This option overrides the default font size used for the ‘Small’ choice for ‘Size’ on the Design tab in the Print Designer function.
- Select a font size to use for medium printing from the ‘Font size (medium)’ drop-down list, if desired. The default is 10 points. This option overrides the default font size used for the ‘Medium’ choice for ‘Size’ on the Design tab in the Print Designer function.
- Select a font size to use for large printing from the ‘Font size (large)’ drop-down list, if desired. The default is 13 points. This option overrides the default font size used for the ‘Large’ choice for ‘Size’ on the Design tab in the Print Designer function.
- Select a font size to use for very large printing from the ‘Font size (very large) drop-down list, if desired. The default is 15 points. This option overrides the default font size used for the ‘Very large’ choice for ‘Size’ on the Design tab in the Print Designer function.
- Click Save.
- Repeat this procedure for any other printer using a Windows printer.
- Exit the Printers function.
Changing the appearance of an element (production layout)
You can configure basic text attributes for your production layout, such as bold and italics, and print the element in a color of your choice, by setting line attribute overrides for each element to print. This allows an element to stand out while other elements print normally. You cannot customize attributes for a specific item or modifier.
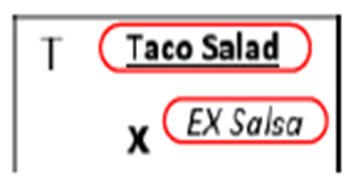
To change the appearance of an element:
- Select an element in the list, under the ‘Design’ group bar.
- Under the ‘Line attribute overrides’ group bar that appears, select Use line attributes to enable you to use additional basic text attributes, such as bold, italic, and underlined, and to print the element in a color of your choice. Selecting this option exposes the remaining options in the group bar.
- Select the color in which to print the text of the element from the ‘RGB color settings’ palette, as desired. The default is 0.0.0. You must use a color printer to print in color.
- Select Italic to print the text of the element in italic.
- Select Underlined to print the text of the element with an underline.
- Select Bold to print the text of the element in bold.
- Repeat steps 2 to 6 for any other element for which to override the standard printing.
- Click Save in the Command panel.
Changing the alignment of an element (all layouts)
Each element has a default alignment; however, you can change the alignment to print flush left or right.

To change the alignment of an element:
- Select an element in the list, under the ‘Design’ group bar.
- Under the ‘Print style settings’ group bar, select the horizontal position of the element on the chit from the ‘Alignment’ drop-down list. Each element has a default alignment. You can override that default by selecting another alignment from the drop down list. Your choices are Left, Center, and Right.
- Click Save in the Command panel.
Suppressing linefeeds (all layouts)
A linefeed is a blank line in the layout used for readability and sectioning. Reducing the number of blank linefeeds on your layout not only promotes a “green” environment, but also saves on the cost of expensive printer paper.
Inserted linefeed elements
The copied chit or guest check template from which you create your new layout contains inserted linefeed elements. Remove these linefeed elements as you would for any element, if desired.
Internal linefeeds
Some elements contain inherited leading or trailing linefeeds that appear on the layout to match the printing behavior of the element when you do not use Print Designer. For example, if you add the ‘Day part’ element to the design, the element has an internal linefeed after the printing of the element. Where applicable, you can suppress any internal linefeeds of a particular element. If an element has more than one internal linefeed, regardless if they are leading or trailing, the system suppresses all linefeeds.

To suppress the internal linefeeds of an element:
- Select an element in the list, under the ‘Design’ group bar.
- Under the ‘Print style settings’ group bar, select Suppress leading line feed and/or Suppress trailing line feed to promote “green” printing by using less paper.
- Click Save in the Command panel.
The following elements have suppressible internal linefeeds:
| Element | Supported Layout | Product | Internal Linefeed |
|---|---|---|---|
| Advance Order info | Guest Check | QS | Leading and Trailing |
| Advance Order footer | Guest Check | QS | Leading and Trailing |
| Alerts | Chit | QS/TS | Leading |
| Barcode | Guest Check | QS/TS | Leading |
| Day part | Guest Check | QS/TS | Trailing |
| Delivery info | Guest Check | QS/TS | Leading and Trailing |
| eFrequency check text | Guest Check | QS/TS | Trailing |
| Expo barcode | Chit | QS/TS | Leading |
| Footer | Guest Check | QS/TS | Leading |
| Frequent Diner message | Guest Check | QS/TS | Trailing |
| Frequent Diner subtotal | Guest Check | QS/TS | Trailing |
| Gift Card offline message | Guest Check | QS/TS | Leading and Trailing |
| Header | Guest Check | QS/TS | Leading and Trailing |
| Items | Guest Check | QS/TS | Leading and Trailing |
| Large Check name | Guest Check | QS | Leading and Trailing |
| Ordermode header | Chit | QS/TS | Trailing |
| Ordermode name | Chit | QS/TS | Trailing |
| Ordermode Trailer | Chit | QS/TS | Trailing |
| PMS Info | Guest Check | QS/TS | Trailing |
| PMS Room | Guest Check | QS/TS | Trailing |
| Promise time | Chit | QS/TS | Leading and Trailing |
| Refund | Guest Check | QS/TS | Leading and Trailing |
| Sales Category detail | Guest Check | QS/TS | Trailing |
| Signature | Guest Check | QS/TS | (2) Trailing |
| Single chit message | Chit | QS/TS | Leading |
| Split Chit message | Chit | QS/TS | Leading |
| Training | Chit | QS/TS | Trailing |
| Two Part check | Guest Check | TS | (2) Trailing |
Linefeeds caused by unused elements
Obviously, you want to add only the elements for the features you are using. If you add an element to the design related to a feature you are not using, the system prints a blank line. For example, if you add the ‘Club member number’ element, and you are not interfacing with Membership, only a blank line prints. You should leverage the features you are actually using when adding elements to your design.
Using a custom line element to position multiple elements (all layouts)
Custom lines contain up to three elements that print together on one line. You can create up to three custom lines; however, there is a very specific list of elements from which you can choose. You must select ‘None’ when you want only two elements on a line.
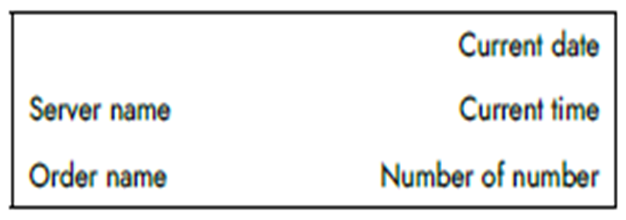
Tip: All three elements in a custom line use the print style settings for the grouped element ‘Custom line.’ For example, you cannot select only one ‘Custom line’ element to print in red ink and then have the others print in normal type, bold, or italics.
To create a custom line:
-
Select Custom line under the ‘Design’ group bar.
-
Select an element from the ‘Left,’ ‘Center,’ and ‘Right’ drop-down lists under the ‘Custom line settings’ group bar.
Tip You must select three elements to print on a custom line. If you only want two elements on a line, select None for one of the three alignments.
-
Click Save in the Command panel.
Printing an image with a menu item (production layout)
You can designate an image to print to the left of a menu item on a production chit created in Print Designer. You may want to do this to promote signature items or identify generic items, such as an image of a drink for your drink items. You could also use an image to indicate the serving temperature recommended for items, such as HOT for a coffee, or use an image containing the first letter of an item, such as the letter B for a burrito.
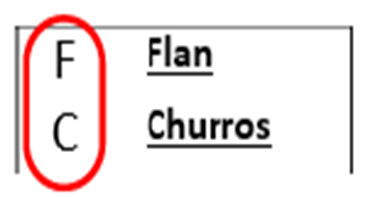
To designate an image to print to the left of a menu item on a production chit:
- Select Maintenance > Menu > Items > Item tab.
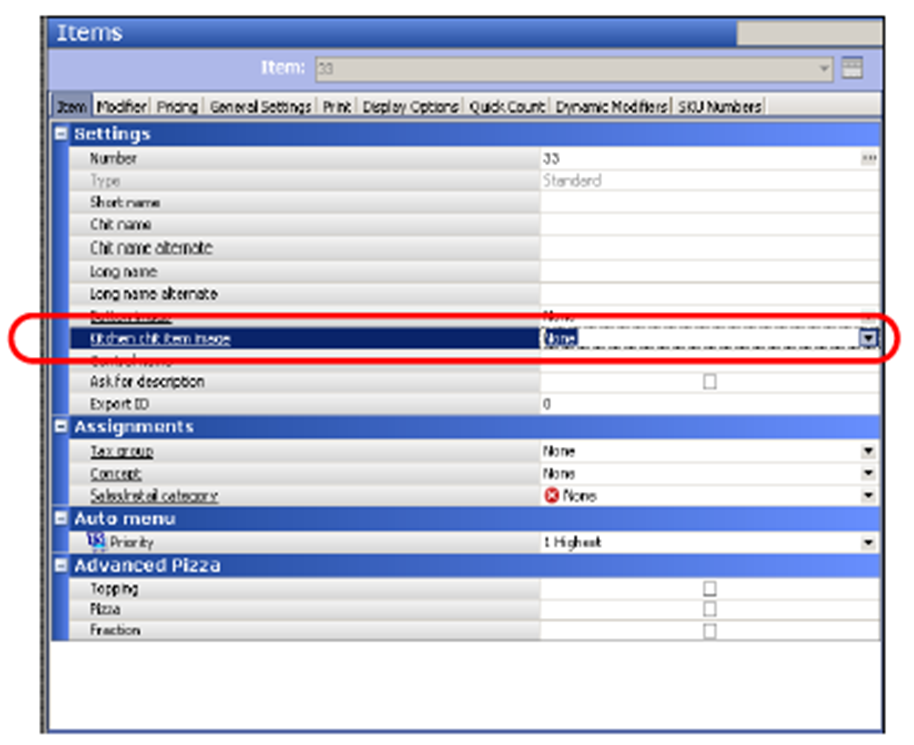
- Under the ‘Settings’ group bar, select the image to print to the left of the menu item from the ‘Kitchen chit item image’ drop-down list. The image prints to the left of the menu item on a kitchen chit, when using a production chit layout in Print Designer. You may want to do this to promote signature items or identify generic items, such as an image of a drink for your drink items. You could also use an image to indicate the serving temperature recommended for items, such as HOT for a coffee, or use an image containing the first letter of an item, such as the letter B for a burrito. We recommend using 22x22 as the dimensions for your image. Documented Version: AK v19.3. Required Options: You must import the image using the Aloha Kitchen application type in the Media Files function to make the image available in the drop-down list.
- Click Save.
- Repeat this procedure for any other menu item for which to designate an image.
- Exit the Items function.
Printing an image based on modifier code (production layout)
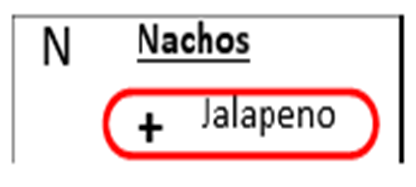
You can designate an image to print to the left of a modifier code on a production chit created in Print Designer. You might use a plus sign for a modifier added to an item (Add), a minus sign for a modifier removed from an item (No), and others. You could also use an image with the word ADD or NO. You must import the image using the Aloha Kitchen application type in the Media Files function to make the image available in the drop-down list.
To designate an image to print to the left of a modifier code on a production chit:
- Select Maintenance > Menu > Modifier Codes.
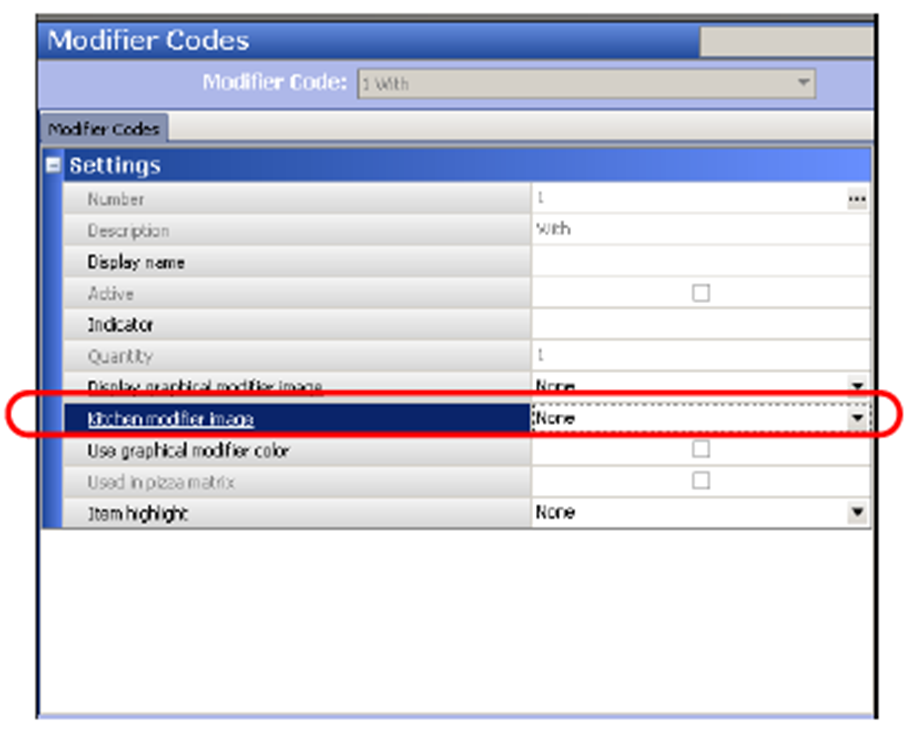
- Select a modifier code.
- Under the ‘Settings’ group bar, select the image to associate with the modifier code from the ‘Kitchen modifier image’ drop-down list. The image prints to the left of a modifier code on a kitchen chit, when using a production chit layout in Print Designer. You may want to use a plus sign for a modifier added to an item (Add), a minus sign for a modifier removed from an item (No), and others. You could also use an image with the word ADD or NO. We recommend using 22x22 as the dimensions for your image.
- Click Save.
- Repeat this procedure for any other modifier code for which to designate an image.
- Exit the Modifier Code function.
Continue to "Associating a production chit layout with an order mode production layout."