Defining guest check and voucher messages
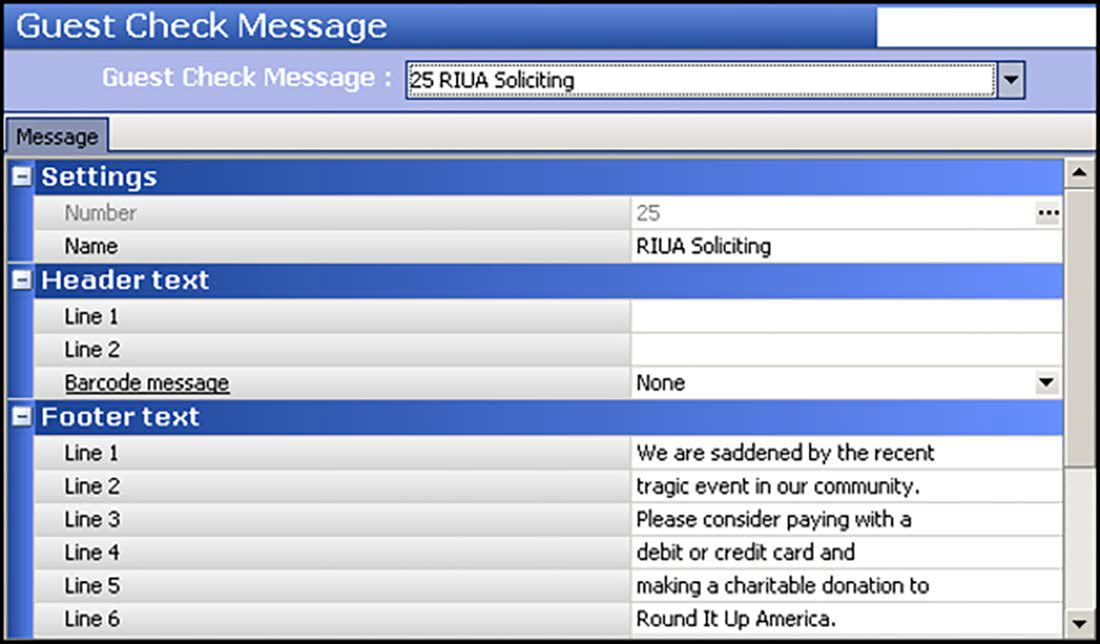
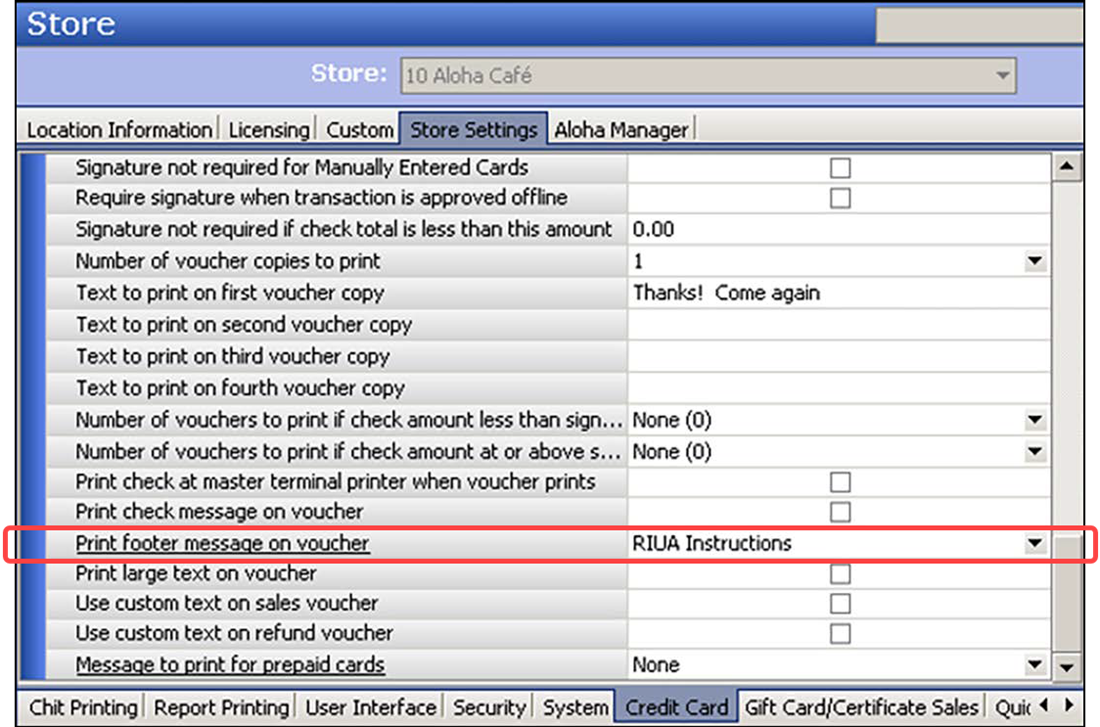
You can optionally print a custom message on the bottom of the guest check, to offer an opportunity to donate and define reasons for donations with Round It Up America. Once you create a custom guest check message, you must use the Activation Schedule and Event Schedule functions to establish when the guest check footer message prints. You may also want to print another guest check message on the debit or credit card voucher to provide instructions to the consumer on how to contribute. You define which guest check message to print on credit card vouchers in ‘Print footer message on voucher’ under the ‘Voucher print settings’ group bar in Maintenance > Business > Store > Store Settings > Credit Card group.
Tip: If you use Connected Payments, printing a guest check message in the footer of the debit or credit card voucher may not be beneficial, as the consumer has already completed the transaction at the time they receive the voucher.
To define a custom guest check message for offering an opportunity to donate:
- Select Maintenance > Messaging > Guest Check Message.
- Click New and accept the system assigned number, or click the ellipsis button (...) next to ‘Number’ to display the Number Assignment dialog box from which you can choose an alternate number.

- Type a name for the guest check footer message. For example, ‘RIUA Offering.’
- Under the ‘Footer text’ group bar, type the text to appear at the bottom of the guest check in ‘Line 1’ through ‘Line 12.’
- Click Save.
To define a custom guest check message for providing instruction:
-
Click New and accept the system assigned number or click the ellipsis button (...) next to ‘Number’ to display the Number Assignment dialog box, from which you can choose an alternate number.

-
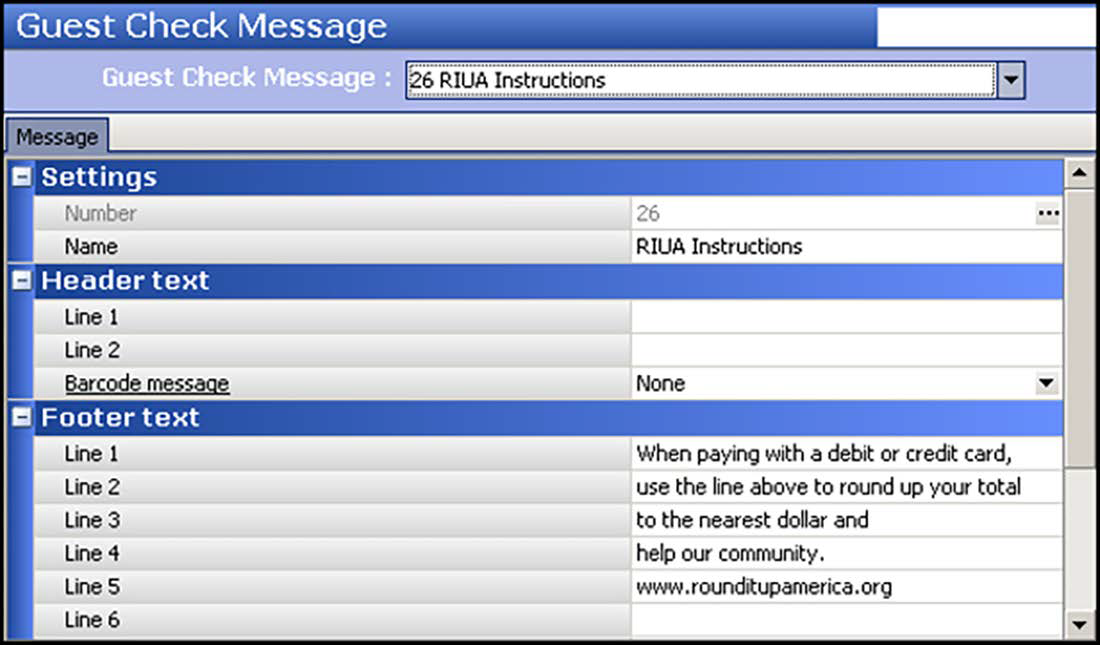
Type a name for the guest check footer message. For example, ‘RIUA Instructions.’
-
Under the ‘Footer text’ group bar, type the text to appear at the bottom of the guest check in ‘Line 1’ through ‘Line 12.’ As outlined in the Mission Partner agreement, and required by the State Attorney General, the www.rounditupamerica.org address appears on all printed receipts.
Example: ‘When paying with a debit or credit card, use the line above to round up your total to the nearest dollar and help our community. www.rounditupamerica.org.’
-
Click Save and exit the Guest Check Message function.
To activate the guest check message for offering an opportunity to donate:
Analyze your existing activation schedules to determine if a schedule with the desired recurrence interval for printing the custom guest check message already exists. If yes, use that activation schedule to activate the custom guest check message; if not, create a new activation schedule with the desired interval.
Reference: Refer to Activation Schedules for more information.
To configure the example cited in the scenario, you need a daily activation schedule that is in effect all day, so that the custom guest check message prints on every guest check. The POS system provides a default ‘Daily’ activation schedule configured for start-of-day, which meets the frequency needs of this requirement; there is no need to create a new activation schedule.
Add a ‘Set Guest Check Footer Message’ event type to an event schedule to establish the specific custom guest check message to print, the activation schedule to use, and the dates on which you want the message to start and end printing. Because the custom guest check message does not need to stop printing before the End-of-Day runs, you do not need to add an event to disable the custom guest check message; however, you can do this, if desired.
Note: How you are using the Event Schedule function determines whether you add new events to an existing event schedule or add them to a new event schedule you create. For the purposes of this document, we assume you use one event schedule to which you add all events.
- Select Maintenance > System Settings > Event Schedule.
- Select the event schedule to edit from the drop-down list.
- Select the Events tab.
- Click the Add drop-down arrow, select Set Guest Check Footer Message as the event type, and click OK.
- Select Daily from the ‘Activation Schedule’ drop-down list. Because the Daily activation schedule stipulates to begin at ‘start of day,’ you cannot edit the ‘Start time’ in the event definition. This information is read only.
- Select the date for the event message to begin printing in ‘Start date.’
- Select the date you no longer want the message to print in ‘End date.’
- Select the custom message created for Round It Up America from the drop-down list.
- Click Save and exit the Event Schedule function.
To print the instructional RIUA message on your credit card vouchers:
- Select Maintenance > Business > Store.
- Select the Store Settings tab.
- Select the Credit Card group located at the bottom of the screen.

- Under the ‘Voucher print settings’ group bar, select the footer message you created earlier from the ‘Print footer message on voucher’ drop-down list.
- Click Save and exit the Store function.
Continue to "Refreshing POS data."
After running a data refresh, return to the main "Round It Up America" page.