Using the Email Editor
Note: To create a more user-friendly experience, we have updated our email editor for Core, Advanced, and Premium (Portal 1.5 environment) users. Please read this article to learn more about how the change affects you and read below to learn more about the improved email editor, now available!
Within Consumer Marketing, you can easily create engaging you can easily create engaging emails that help you stay top of mind and build lasting relationships with your guests. The WYSIWYG (“what you see is what you get”) editor lets you see exactly how your email will look as you build it, so there are no surprises. You will simply drag and drop content from the right-hand side into the body of the email. Use the buttons in the bottom left corner to view your email as both a desktop and mobile preview. Use the action bar to perform other functions, such as undo and redo.
Blocks
To build your email or template, you must start with at least one block to which you then add your content using widgets to build out your communication. Each widget provides options that allow you to customize the content. You can add more than one widget to a single block. You can add multiple blocks to get the desired results.
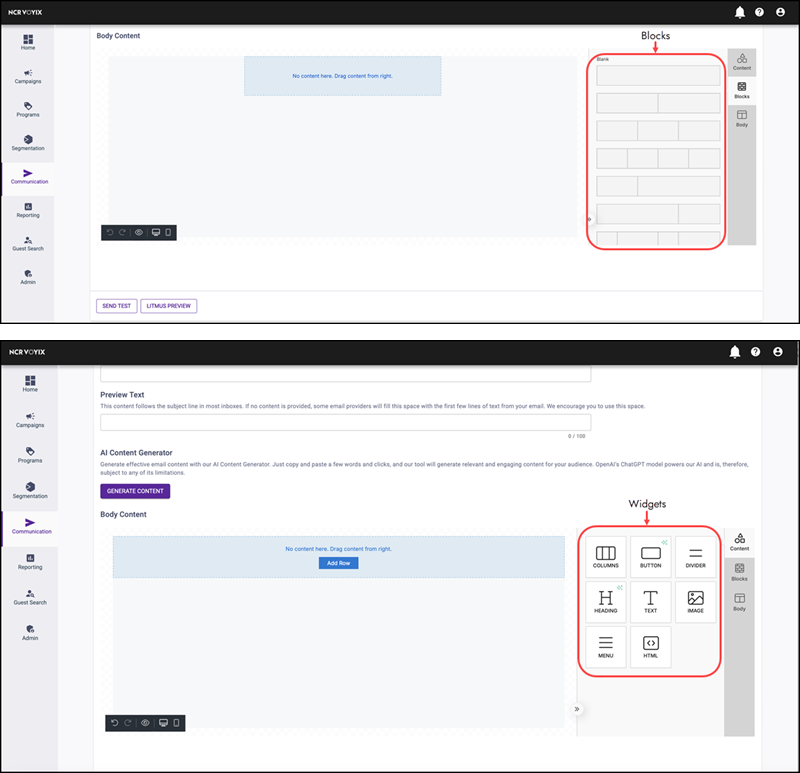
Below is a breakdown of the different content you can place in a block when creating your email:
COLUMNS
Use the COLUMNS widget to add one or more columns to your email structure. The columns widget acts as a block within the email. Three columns were chosen in this example.
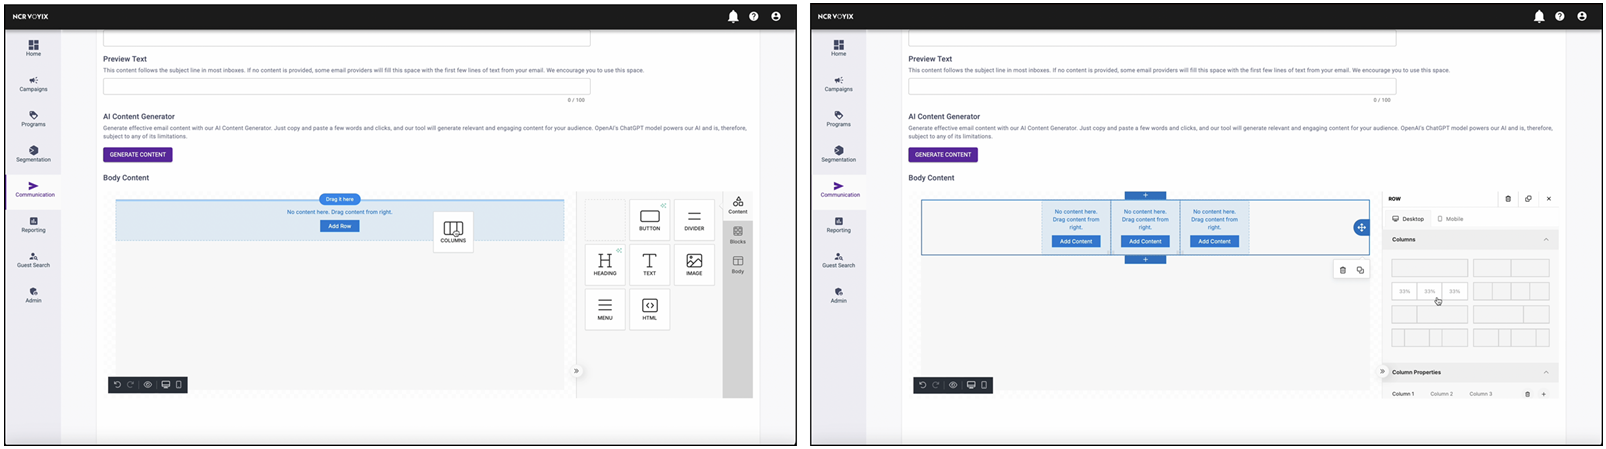
Click the COLUMNS widget, choose the number of columns to insert, and drag the widget to the appropriate block. Once added, use the widget to:
- Change the column background color.
- Change the row background color or add a background image.
- Adjust the padding.
- Determine if you want to stack on mobile.
- Add content to a column by clicking the ADD CONTENT button inside the column and dragging another widget, such as TEXT and IMAGE, into the column.
BUTTON
Use the BUTTON widget to allow the recipient to launch a website, send an email, or call a phone number. For example, you can add a button that, when clicked, the recipient is directed to your restaurant website. Determine if you want the link to open in the same tab or a new tab.
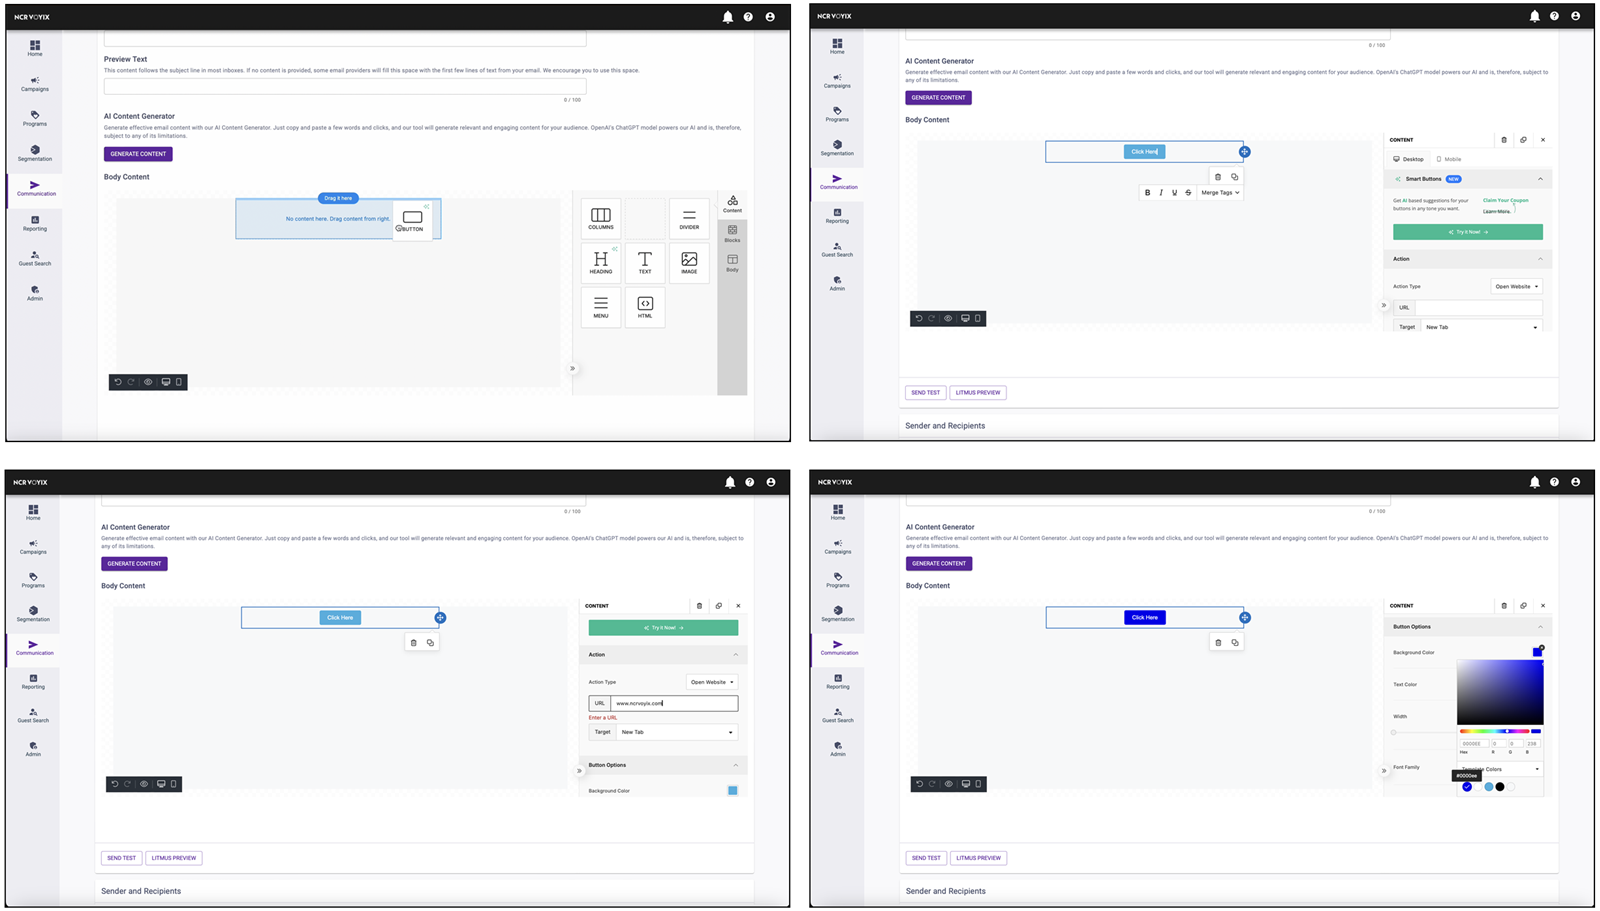
Click and drag the BUTTON widget into a block or column in your email body. Once added, use the widget to:
- Choose whether you want the button to launch a website, send an email, or call a phone number.
- Change the button text by clicking into the button and typing something new.
- Change the color of the button.
- Determine the button alignment, line height, and border.
- Adjust the button padding.
DIVIDER
Use the DIVIDER widget to create space between each section.
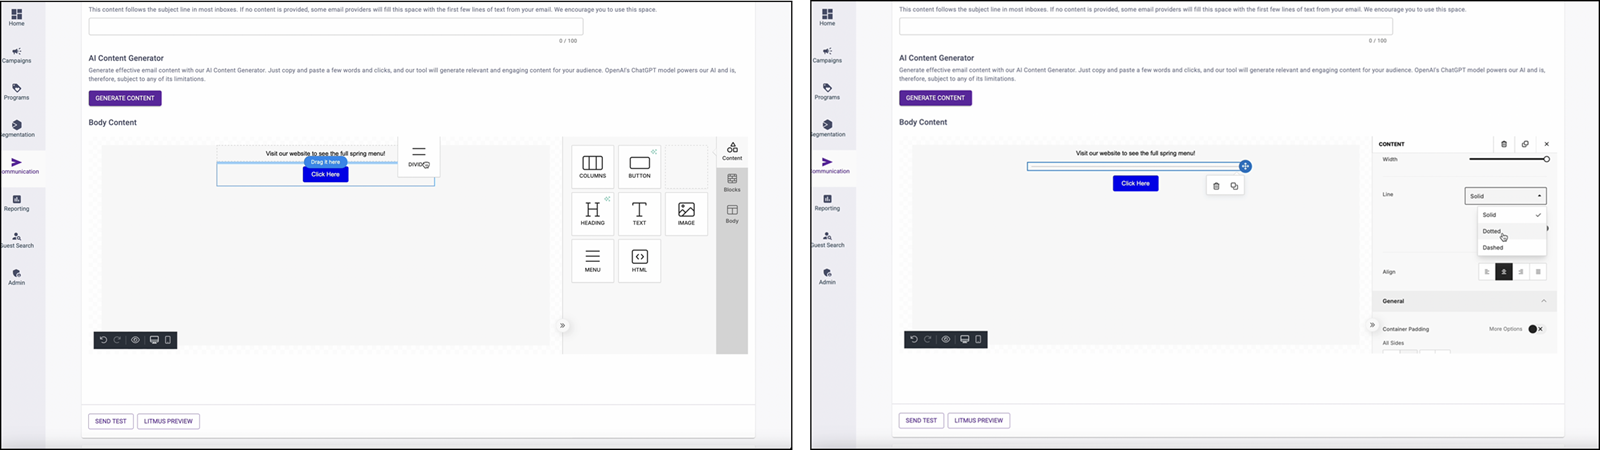
Click and drag the DIVIDER widget into your email body. Once added, use the widget to:
- Determine how wide the divider is.
- Decide if it is a solid, dotted, or dashed line.
- Pick the coloring, line size, and the alignment.
- Choose the line padding.
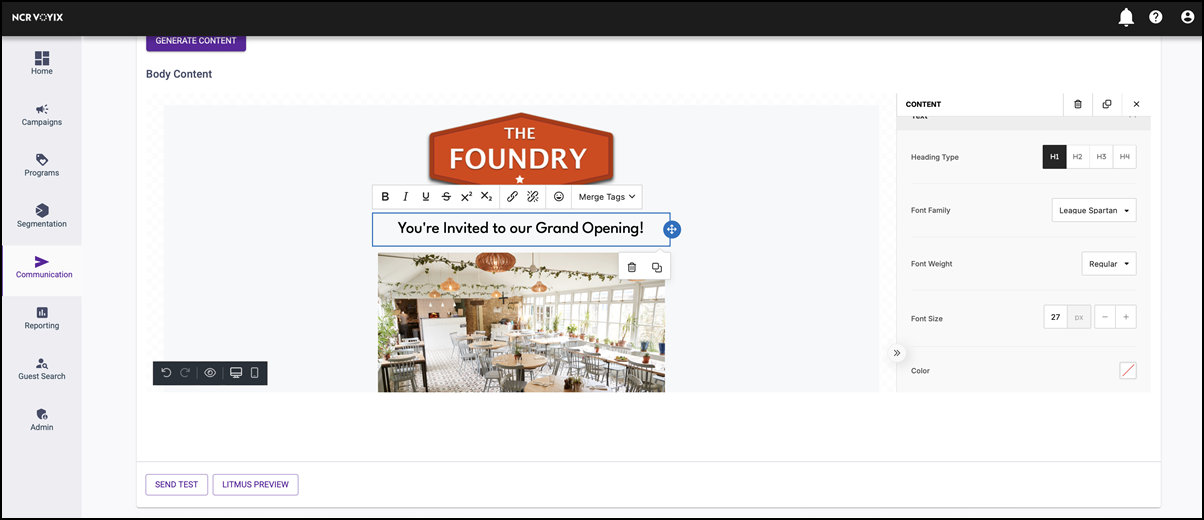
HEADING
Use the HEADING widget to easily add headings to your email body.
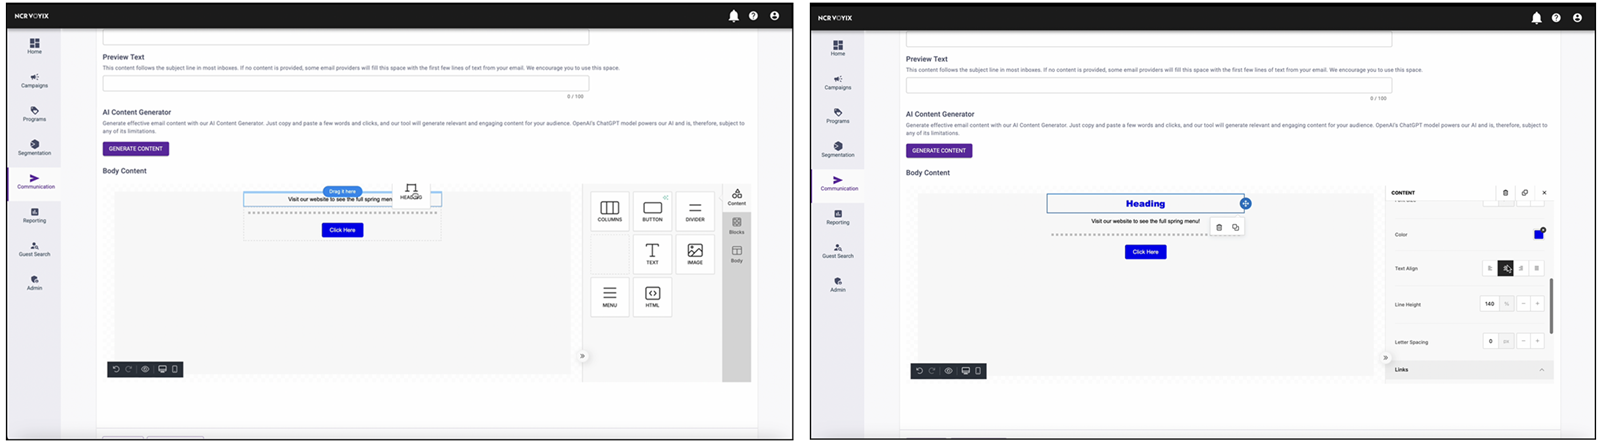
Click and drag the HEADING widget into a block or column in your email body. Once added, use the widget to adjust heading type, font family, font size, color, and more.
HTML
Use the HTML widget if you would like to embed custom HTML.
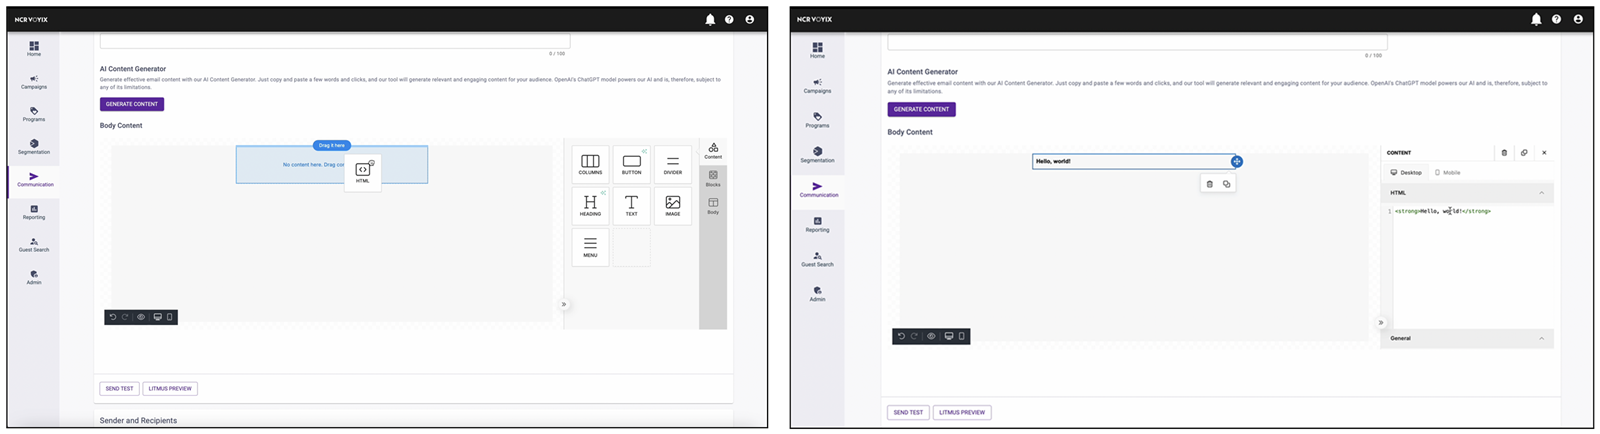
Click and drag the HTML widget into a block or column in your email body. Once added, use the widget to:
- Add HTML directly in the editor on the right and see it appear in the email body.
- Determine the HTML padding.
MENU
Use the MENU widget to quickly and uniformly add links to your email communication.
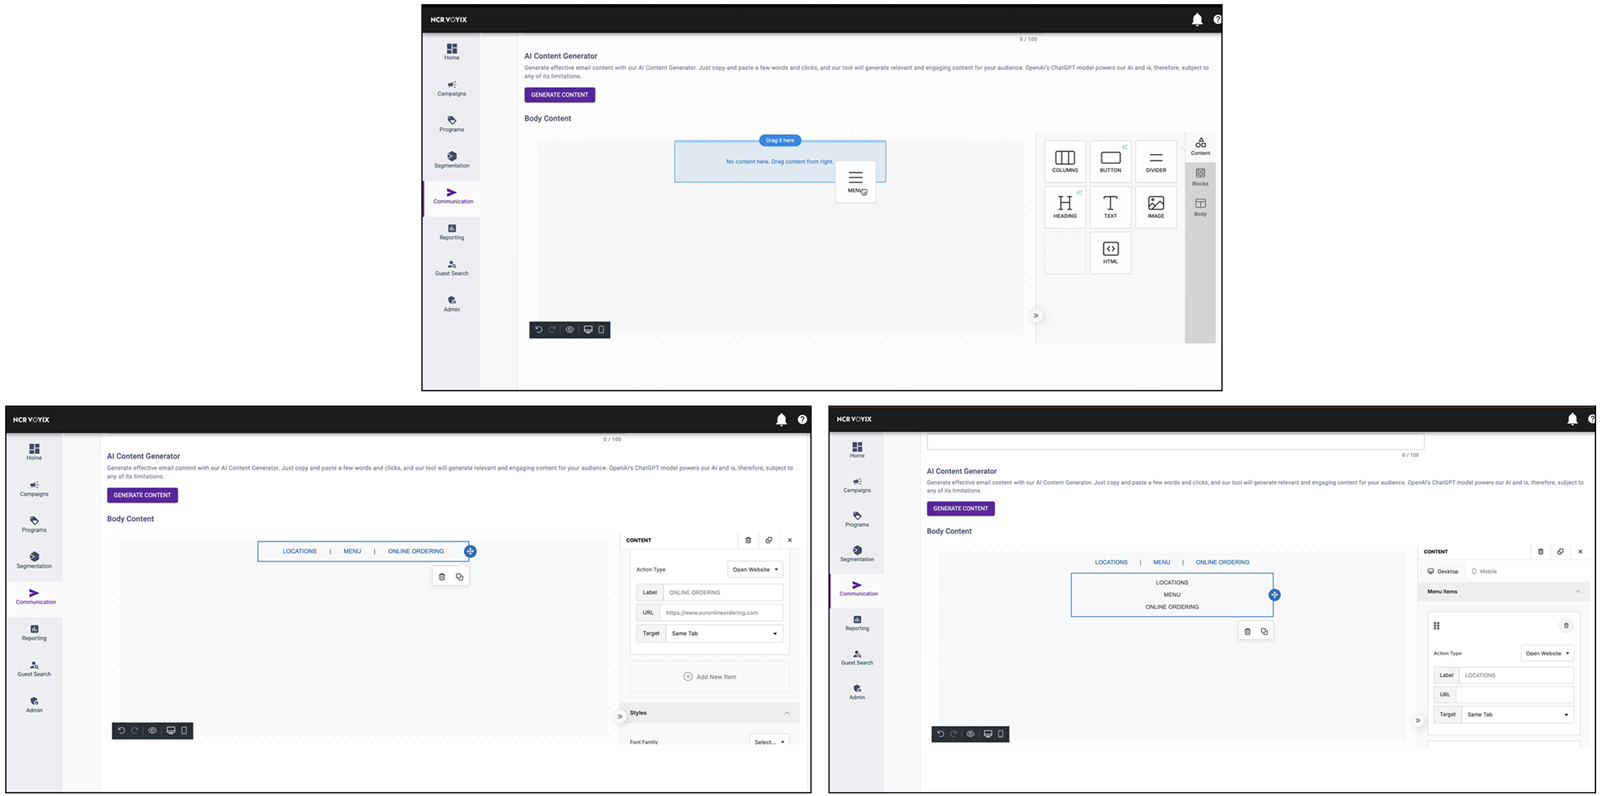
Click and drag the MENU widget into a block or column in your email body. Once added, use the widget to:
- Add links to your email that allow the consumer to launch a website, send an email, or call a phone number.
- Add a separator between the menu items.
- Organize the links either horizontally or vertically on the page.
- Modify menu style, font, menu links, and more.
TEXT
Use the TEXT widget to enter free form text into the body of your email.
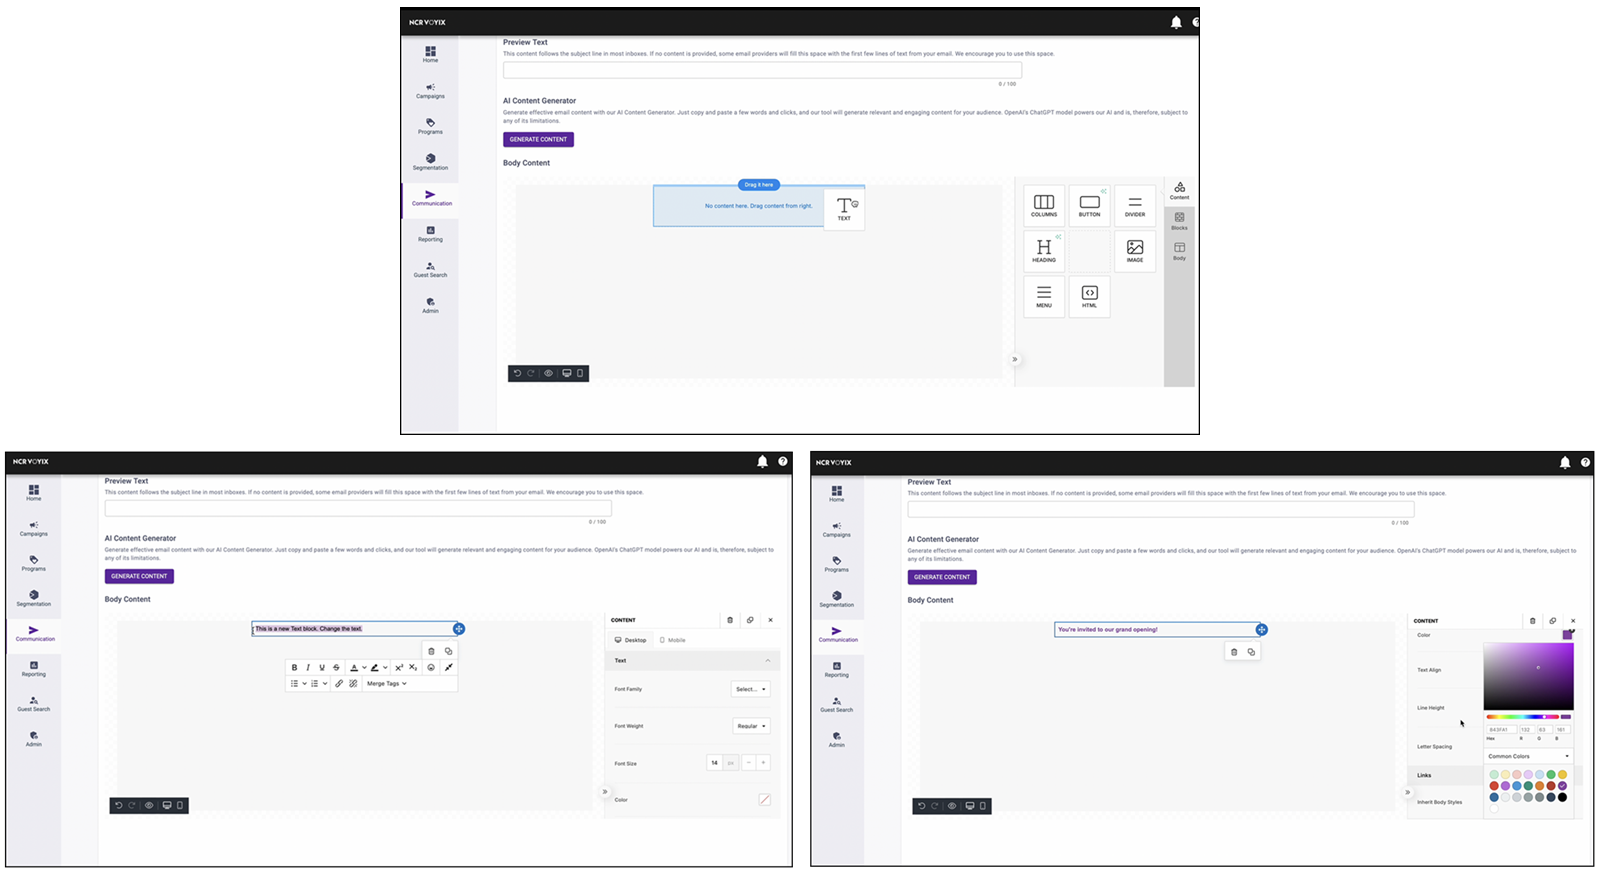
Click and drag the TEXT widget into a block or column in your email body. Once added, use the widget to:
- Type anything into the body of your email communication.
- To add merge variables, select the Merge Tags option in the popup below your cursor.
- Change the style of the text.
- Choose the alignment and line height.
- Determine the text padding.
IMAGE
Use the IMAGE widget to make your email more visually appealing.
Note: Images cannot be larger than 8 MB.
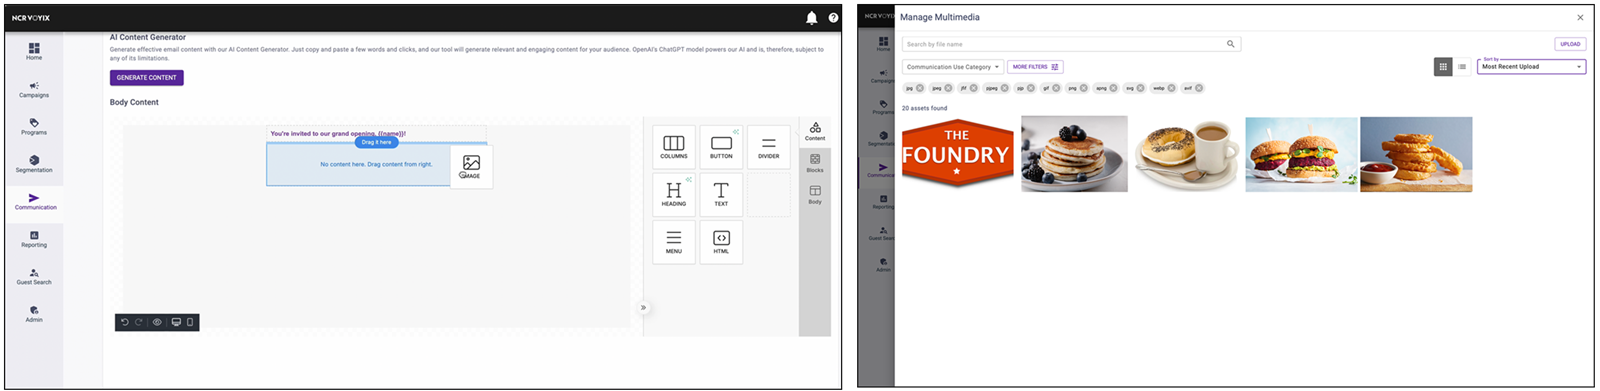
Click and drag the IMAGE widget into a block or column in your email body. Once added, use the widget to:
- Choose an existing picture from your digital asset manager by selecting the image in the asset manager tab, or click UPLOAD in the top right corner to add a new image to the asset manager.
- Optionally add a URL link and alternate text.
- Adjust the height and width of the image.
- Determine the alignment.
- Decide the image padding in the general tab.
View video
Please allow time for the "USING THE EMAIL EDITOR" video to load.
Looking for resources or help with Silver? Click here.