Configuring a marker item for online orders
Digital Ordering uses the Aloha Online (AO) API to communicate between the digital Web Services and other services, such as Enterprise Loyalty. During order submission, a duplicate of the order is sent to these services; however; it is not needed for recording.
We strongly recommend you configure a hidden marker item that is sent to the Aloha POS system with every online order submission. When the hidden marker item is detected by Aloha Transaction Gateway (ATG), the duplicate order is ignored by the system and only one order is recorded. Without the presence of the hidden marker item, the system records a duplicate of the same order for the site.
To configure a hidden marker file for online orders, do the following:
- Create a hidden marker item in the Aloha POS system.
- Add the POS hidden marker item to an online menu in Menu Configurator.
- Add the AddOnlineOrderItemId company setting in Web Admin.
Creating a hidden marker item in the Aloha POS system
The first step to configuring a hidden marker item for online orders is to create a POS item specifically for the marker.
- Log in to Aloha Configuration Center (CFC) or Aloha Manager (AM).
- Select Maintenance > Menu > Items.
- Click the New drop-down arrow, select General, and click OK.
- Type a name for the item, such as ‘AO Marker.’
- Leave all remaining options as their default.
- Click Save and exit the Items function.
Adding the POS hidden marker item to an online menu
Once created, add the POS hidden marker item to a submenu on the online menu in Menu Configurator. Use a new dedicated submenu specifically for the POS marker item and set the visibility of the submenu to False.
- Log in to Web Admin.
- Select Menu Configurator > Download Menu Configurator to launch the Menu Configurator application.
- Once you launch Menu Configurator, check out a menu design and note the Menu ID in the properties window.
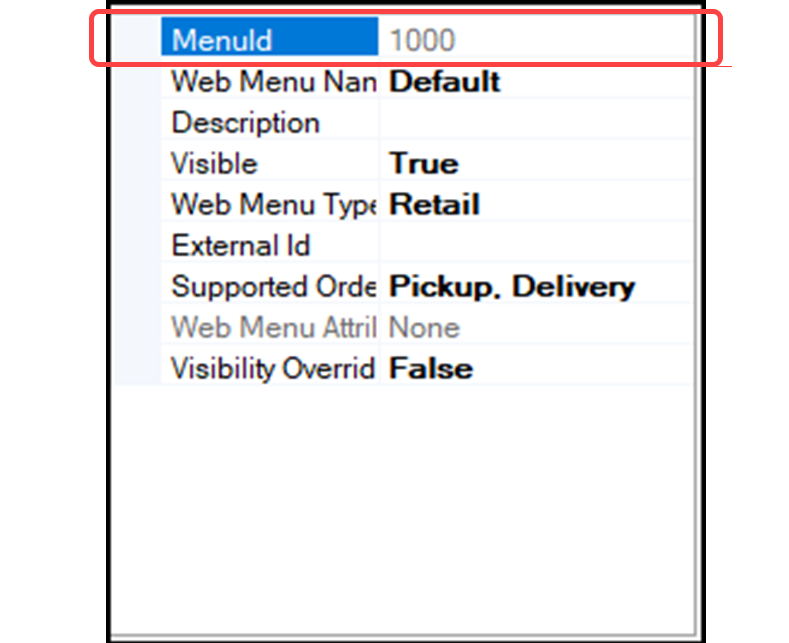
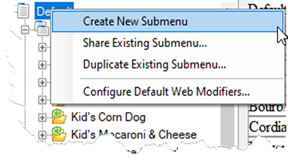
- Right-click the menu name in the tree to the left side of the screen and select Create New Submenu from the menu that appears.
- In the properties window, type a name for the submenu, such as ‘AO Marker.’
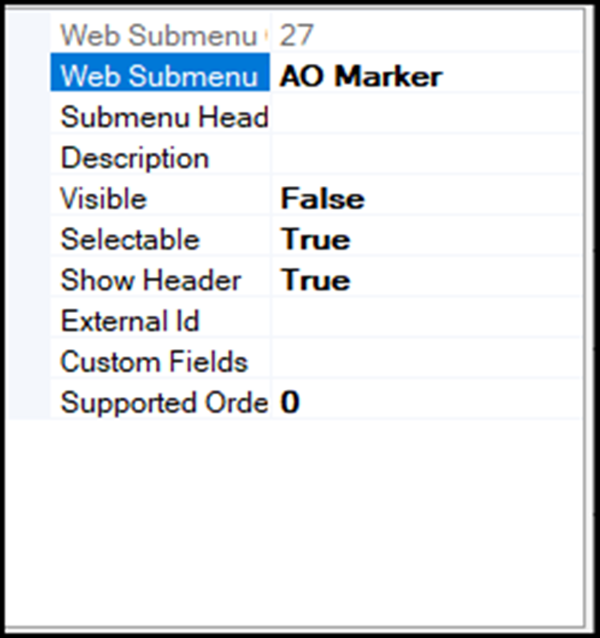
- Select False from the ‘Visible’ drop-down list.
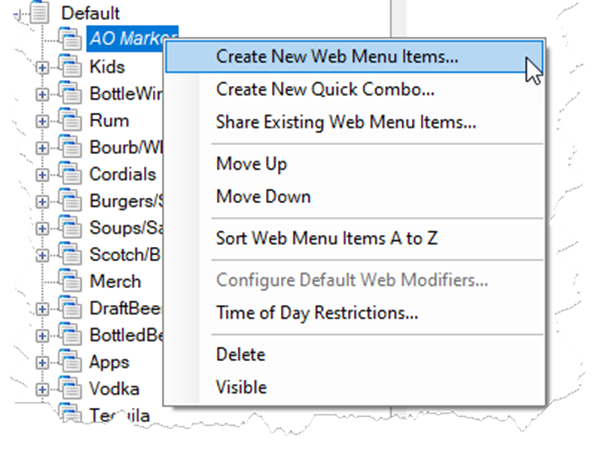
- Right-click the submenu name in the tree on the left side of the screen, and select Create New Web Menu Items from the menu that appears.’The Create New Web Menu Items dialog box appears.
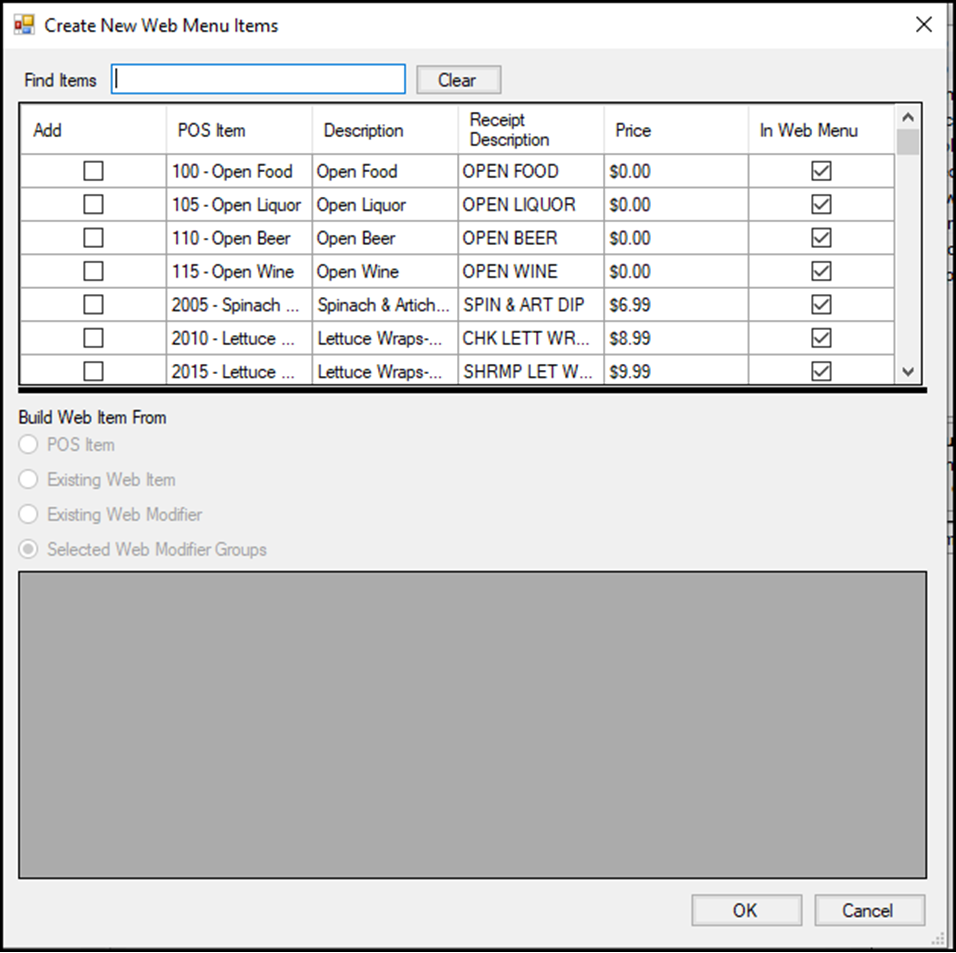
- Click Add next to the POS marker item and click OK.
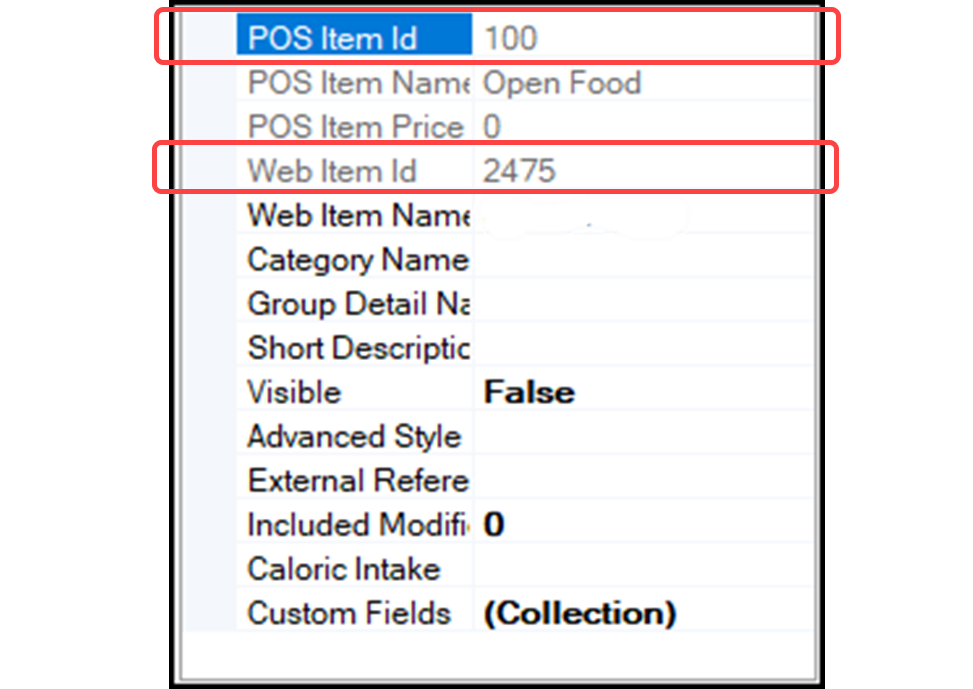
- In the properties window, note the POS Item ID and Web Item ID.
- Select File > Publish and exit Menu Configurator.
Adding the AddOnlineOrderItemId company setting
The final step is to add the AddOnlineOrderItemId company setting with the menu ID, POS item ID, and sales item (web menu) ID you noted.
- Log in to Web Admin.
- Select Configuration > Company Settings Setup.
- Select a set from the ‘Choose Settings Set’ drop-down list.
- Click Add Setting.

- Type AddOnlineOrderItemId in ‘Setting.’
- Type the menu ID, the sales item ID, and the POS item ID, separated by commas and enclosed by braces, in 'Value.' Use quotation marks and colons as shown in the above example for POS item ID 100, which is defined as sales item ID 2475 within the menu ID 1000 in Menu Configurator.
- Click Update and exit the Company Settings Setup function.
Continue to "Configuring deep linking."