Creating void reasons
Aloha Takeout requires two void reasons: Future Order and Canceled Order.
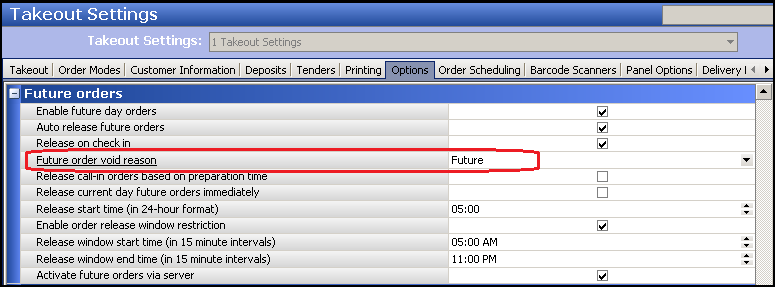
- When you add a future order to the system, ATO stores the order detail in a SQL database until the time at which you release the order. An order becomes an active POS order at the time of its release and is removed from the SQL database using the Future Order void reason.
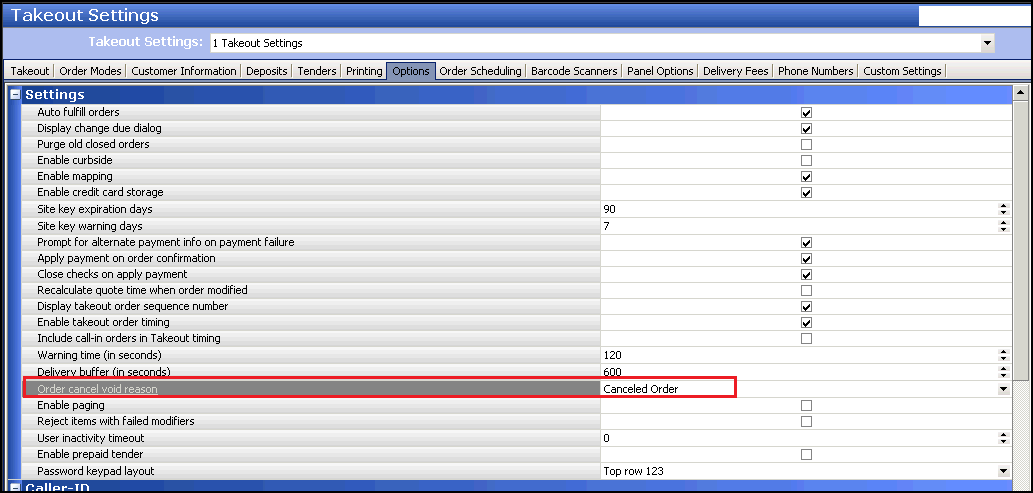
- When a customer calls to cancel an order, ATO uses the Canceled Order void reason to void the check. You determine if the Canceled Order void reason affects inventory or not, based on if you can prevent the items from being prepared or can reuse the items, or if you typically prepare and waste the items as a result of a canceled order.
To create the ATO void reasons:
-
Select Maintenance > System Settings > Void Reasons.
-
Click New to create a new void reason.
-
Under the 'Settings' group bar, type a name for the future order void reason in 'Description.'


-
Select or clear Return voided items back to inventory based on the following criteria:
For the Future Order void reason, clear Return voided items back to inventory, as these items are not ordered.
-OR-
For the Canceled Order void reason, select Return voided items back to inventory, if you can prevent the items from being prepared or can reuse the items; clear Return voided items back to inventory, if you typically prepare and waste the items as a result of a canceled order.
-
Select For Aloha Connect Use Only for both void reasons to prevent these void reasons from appearing on the Aloha POS FOH void screen. This prevents the mis-use of the void reason by managers.
-
Select Do Not Report for the future order void reason.
-
Clear Do Not Report for the canceled order void reason.
-
Click Save and exit the Void Reasons function.
To associate the new void reasons with Aloha Takeout:
- Select Maintenance > Takeout Configuration > Takeout Settings > Options tab.

- Under the 'Settings' group bar, select the void reason you created for canceled orders from the 'Order cancel void reason' drop-down list.

- Under the 'Future orders' group bar, select the void reason you created for future orders from the 'Future order void reason' drop-down list.
- Click Save.
Continue to "Creating and aligning tenders."