Working with Item Import
Use Settings & Privacy > Admin > Item Import to import items in bulk. You can import your menu from a .csv file.
Note: Prior to importing a file, it is necessary to create tax categories and select one as your default.
Importing items
-
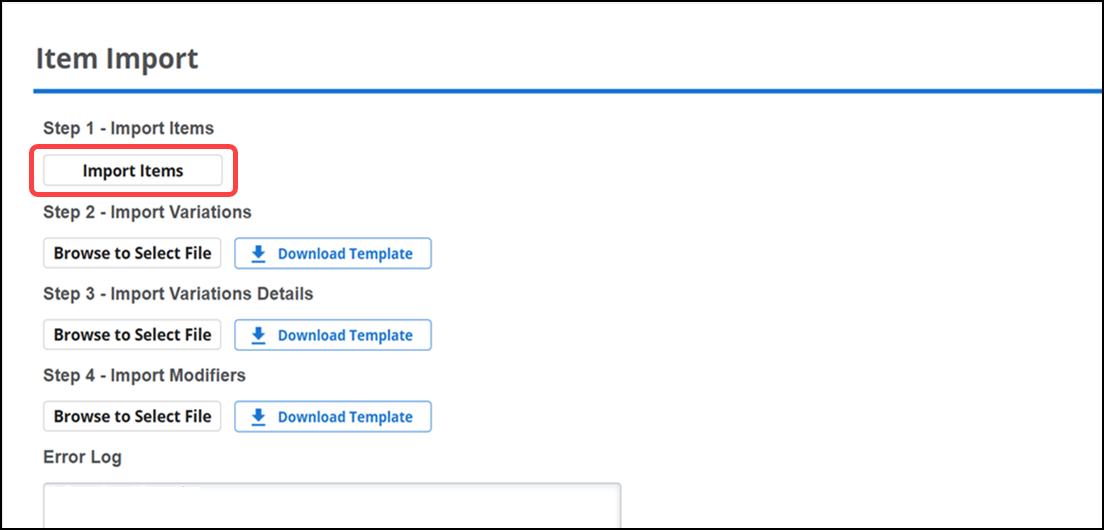
Click Import items. The 'Import Items' screen appear.
-
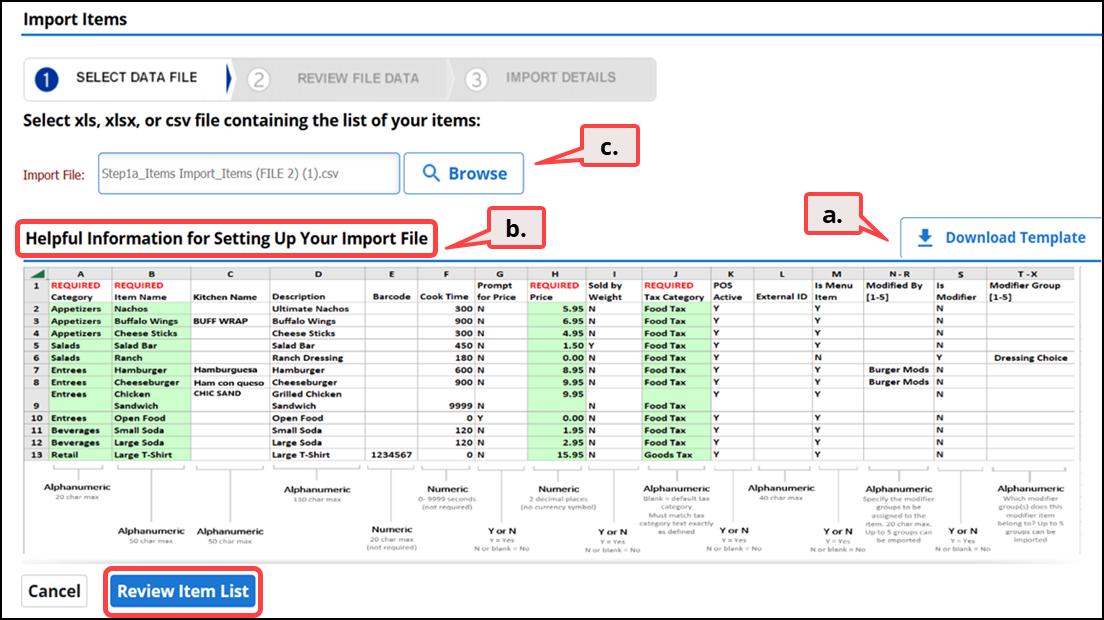
Perform the following on the Import Items screen:
- Click Download Template to download the template in .csv format for importing the items in bulk.
- View the sample information for setting up the import file.
- Verify the mandatory information for items in the .csv file.
-OR-
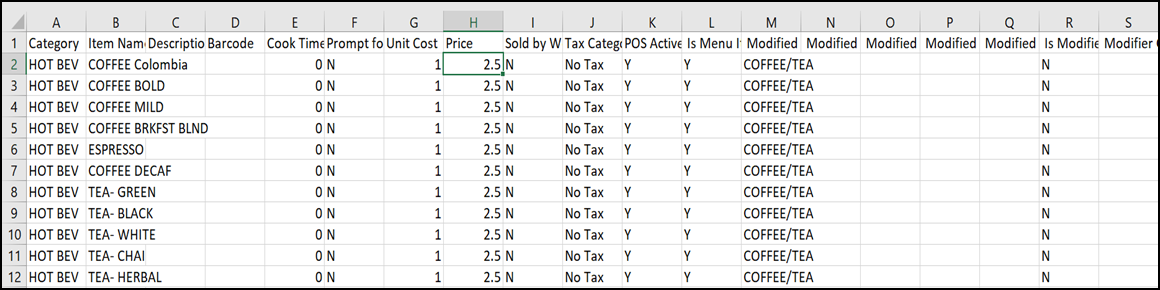
Click Browse to choose a file for importing items.
Note: Category Name, Item Name, Price and whether the item is a menu item, modifier item, or both is required; otherwise, an error message appears.
-
If no error message appears, click Review Item List to review the .csv file data. Back Office checks for import errors. The file processing window appears and navigates to the REVIEW FILE DATA tab.
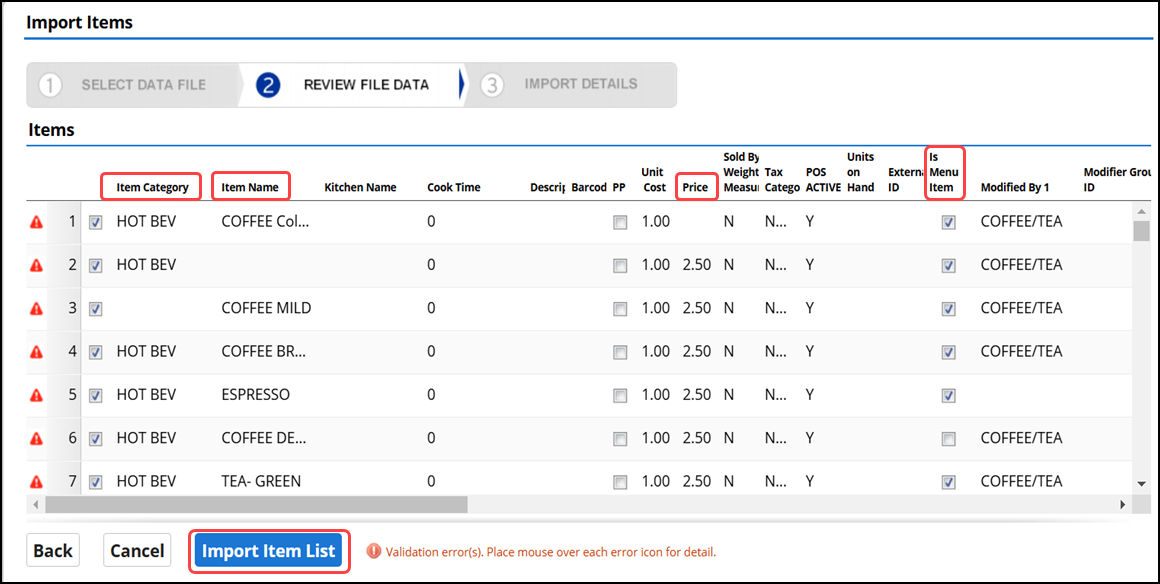
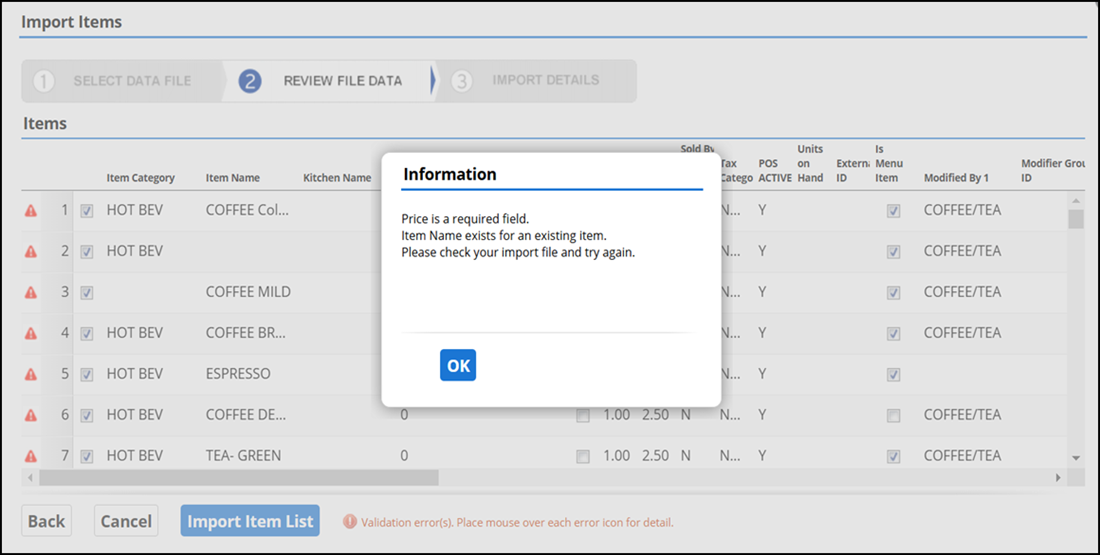
Note: Back Office places a red caution icon next to each row with an error. Click the icon to reveal the error. You can either correct the error on the screen, or cancel the import, correct the error in the .csv file, and re-import the file.
-
Choose the desired items for import from the displayed list. If required, modify the list.
-
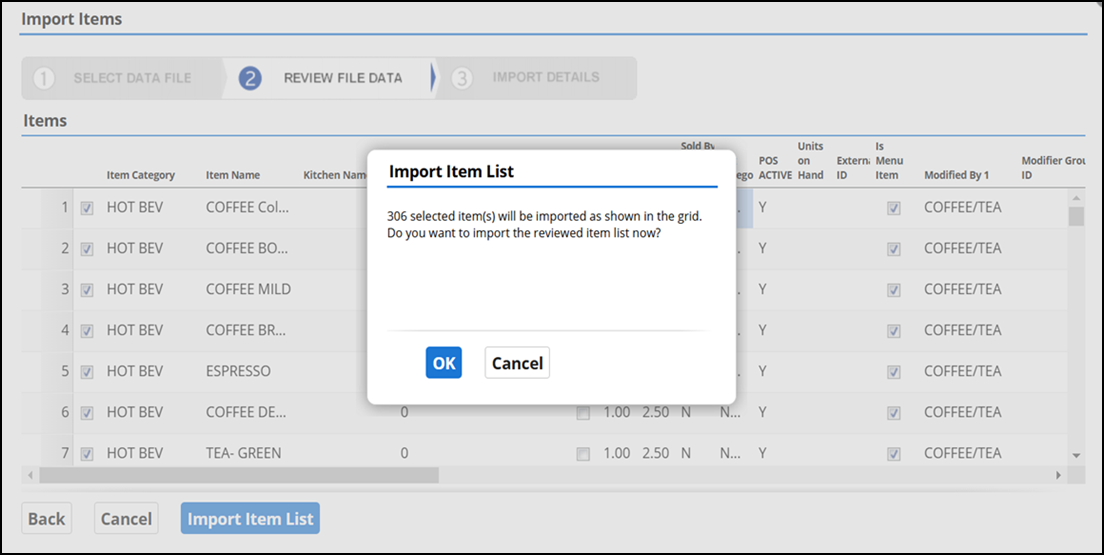
Click Import Item list. A confirmation message appears.
-
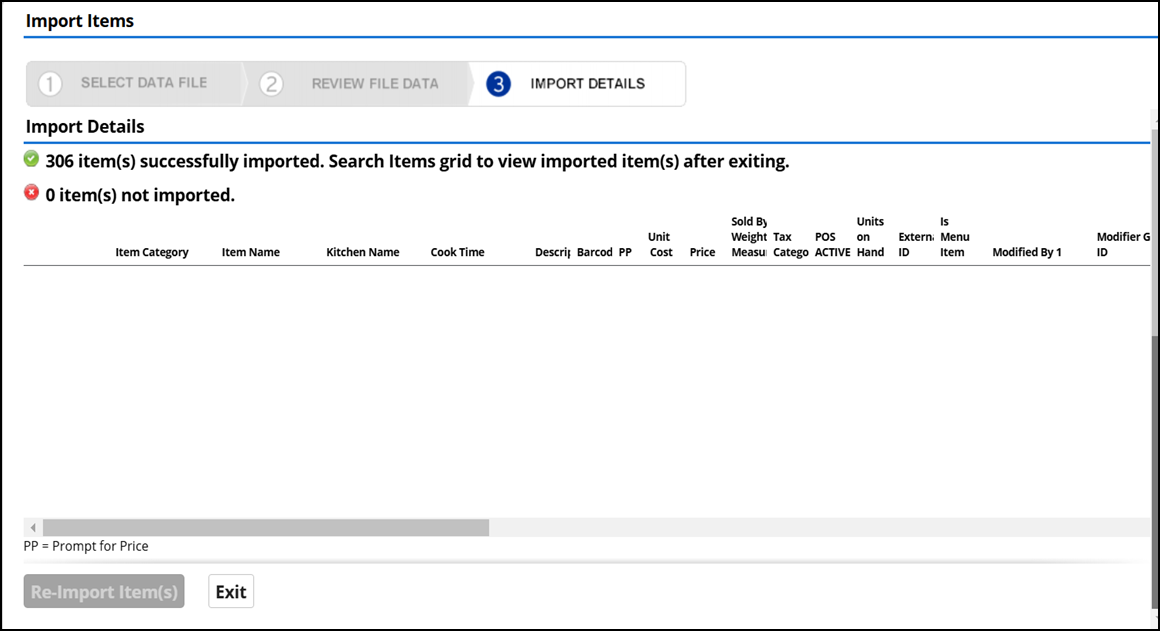
Click OK. The Import Details status appears on the screen.
-
Click Re-Import Item(s).
-OR-
Click Exit to return to the Item Import screen.
Note: You can view the list of imported items under Menu > Categories & Items.
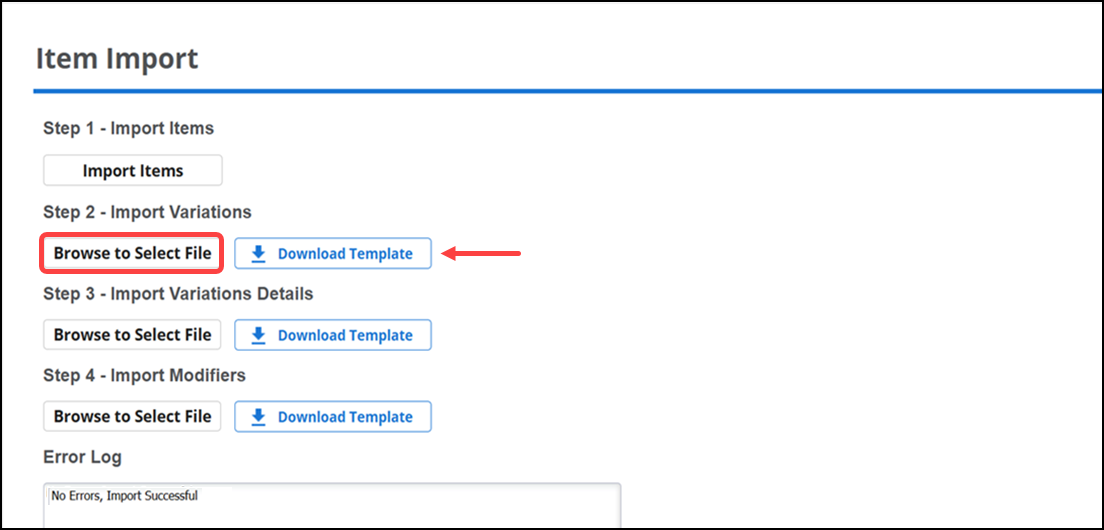
Importing Variations
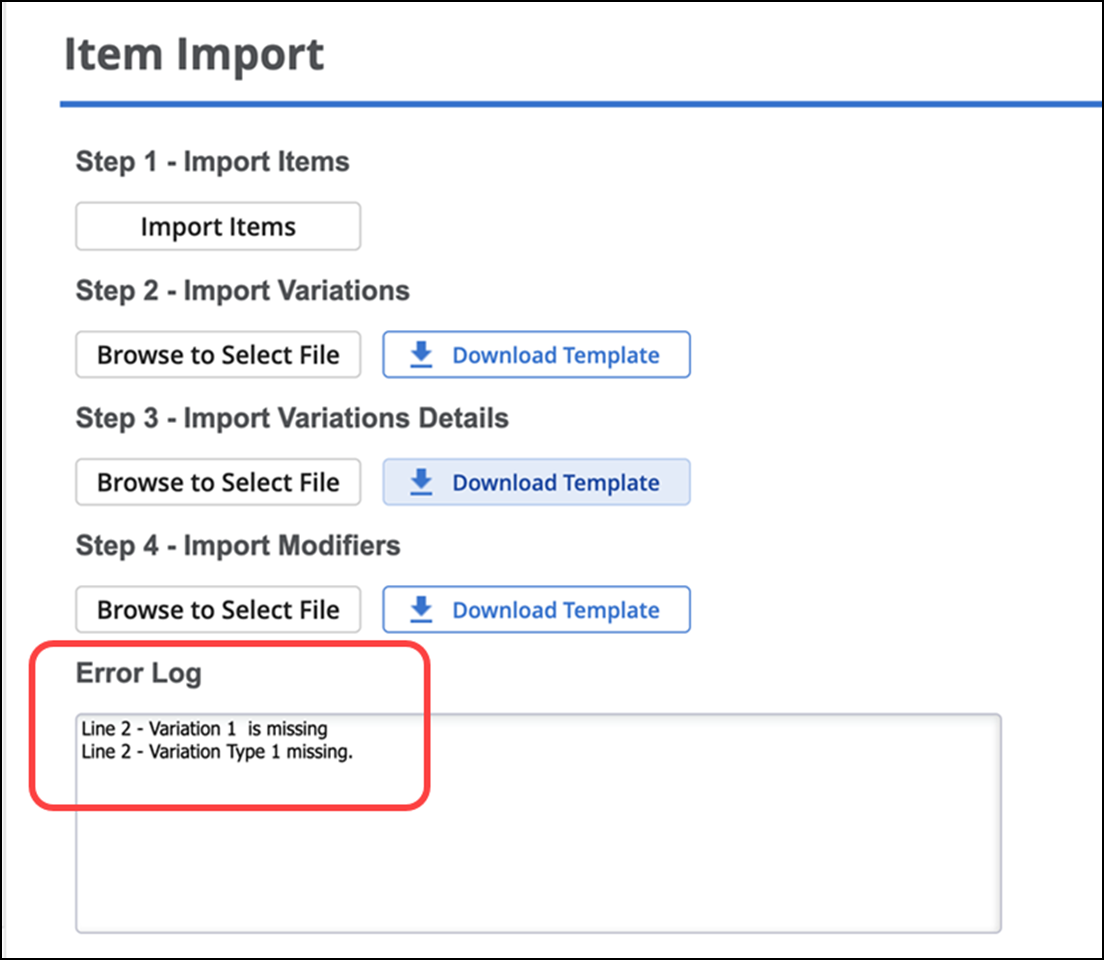
Under Step 2 - Import Variations, click Browse to Select File. The Back Office checks for any import errors and displays them in the error log. If there are no errors, variations are successfully imported, and you can view the import success message in the error log.
-OR-

Click Download Template to download the template in .csv format for importing the variations in bulk. The Back Office checks for any import errors and displays them in the error log.
Importing Variations Details
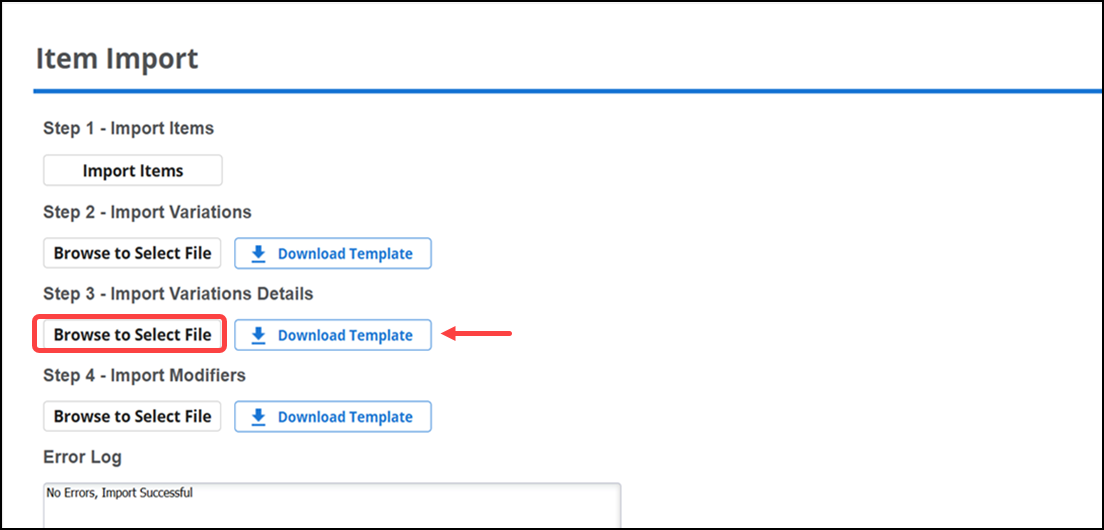
Under Step 3 - Import Variations Details, click Browse to Select File. The Back Office checks for any import errors and displays them in the error log. If there are no errors, variations details are successfully imported, and you can view the import success message in the error log.
-OR-
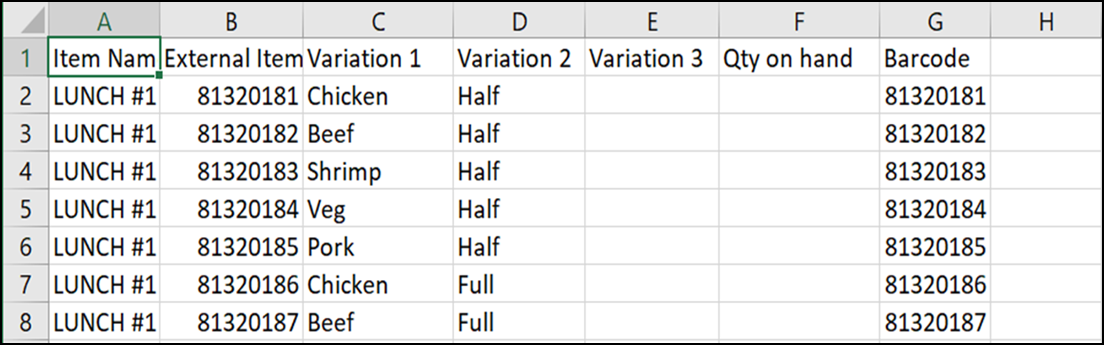
Click Download Template to download the template in .csv format for importing the variations details in bulk.
Importing Modifiers
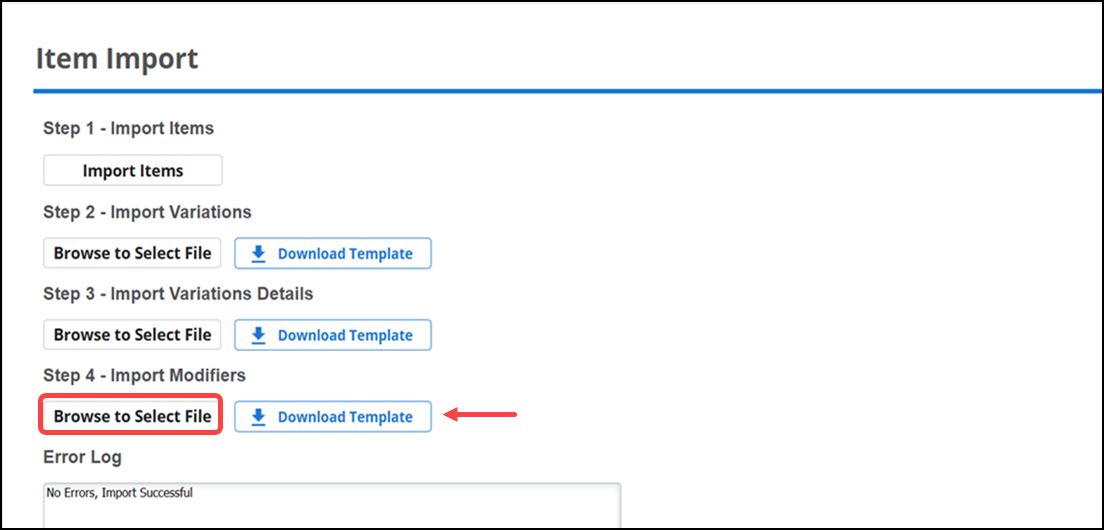
Under Step 4 - Import Modifiers, click Browse to Select File.. The Back Office checks for any import errors and displays them in the error log. If there are no errors, modifiers are successfully imported, and you can view the import success message in the error log.
-OR-

Click Download Template to download the template in .csv format for importing the modifiers in bulk.
Return to "About Admin."