Configuring Admin
Use Settings & Privacy > Admin to configure admin specific options, such as Merchant Settings, Admin Users, and more. You must log in to a specific site/company view depending on the configuration required to access this function.
The Admin function provides access to the following functions (on the left):
Configuring Merchant Settings
Use Settings & Privacy > Admin > Merchant Settings to configure merchant specific options.
To configure Merchant Settings:
-
Log in to Back Office using Company View (All Stores) or select a specific store.
-
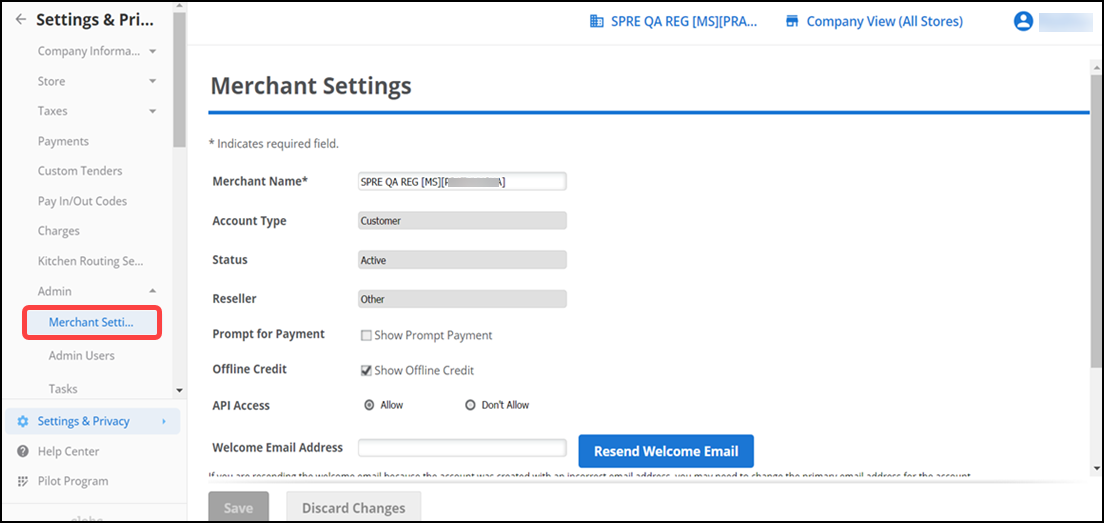
Select Settings & Privacy > Admin > Merchant Settings. The Merchant Settings page appears.
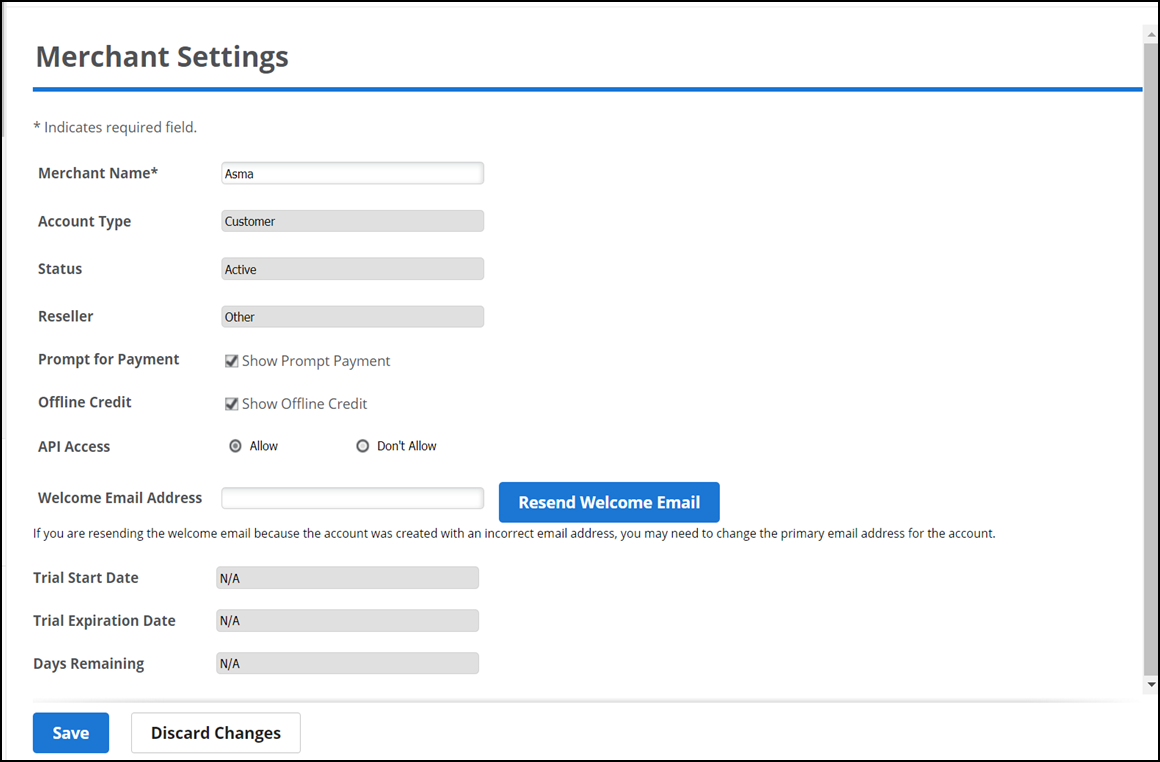
Tip: The system retrieves the information entered when your account was created and populates the information for Merchant Name, Account Type, Status, and Reseller options by default; however, you can change the Merchant Name based on your preference.
-
Review and edit Merchant Name, if required.
-
Select Show Prompt Payment to have a prompt appear on the Point of sale (POS) to allow the entry of a payment amount.
-
Select Show Offline Credit to perform offline credit transactions in the POS, which later reflect in the offline credit report.
Note: If you use Ingenico or Monetra as your payment gateway, you can see an offline credit report showing the status of transactions that were started offline.
-
Select Allow if the merchant requires API Access or select Don’t Allow.
Note: Merchant subscription Trial Start Date, Trial Expiration Date and Days Remaining options appear by default.
-
Click Save to save the changes.
Configuring Admin Users
Use Settings & Privacy > Admin > Admin Users to configure/view/search for Admin User details. Additionally, you can add/delete an Admin User role.
To view the Admin Users:
-
Log in to Back Office using Company View (All Stores) or select a specific store.
-
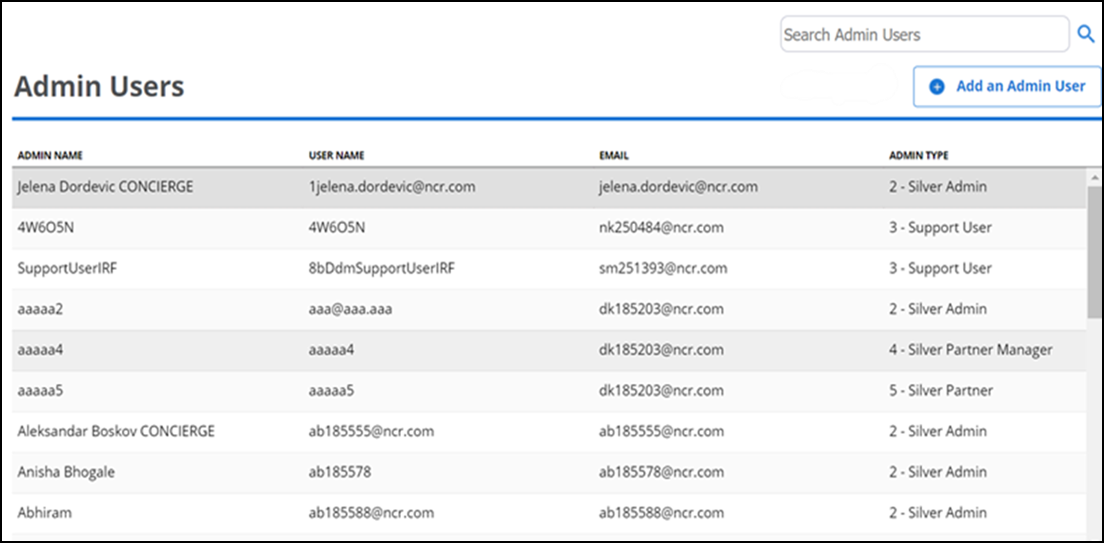
Select Admin > Admin Users.
-
Enter the desired details in the search box to view the Admin User. Each Admin User record contains information regarding their username, email address and admin type.
Tip: Click the Admin User record to configure the details.
Adding or removing an Admin User
To add an Admin User:
- Log in to Back Office using Company View (All Stores) or using a specific store.
- Select Admin > Admin Users.
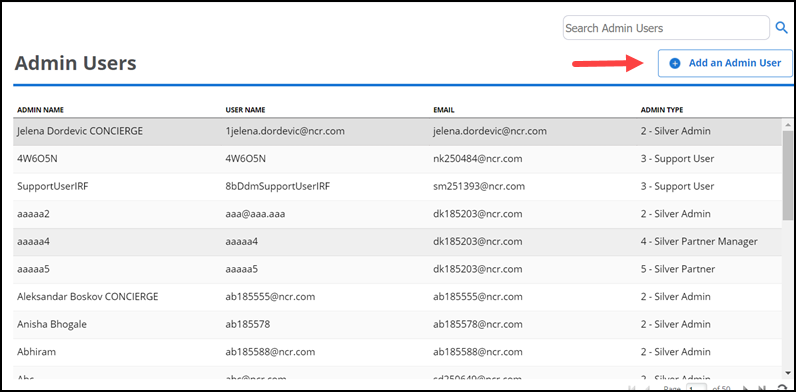
- Click Add an Admin User to create a new admin record. The Admin User Detail page appears.
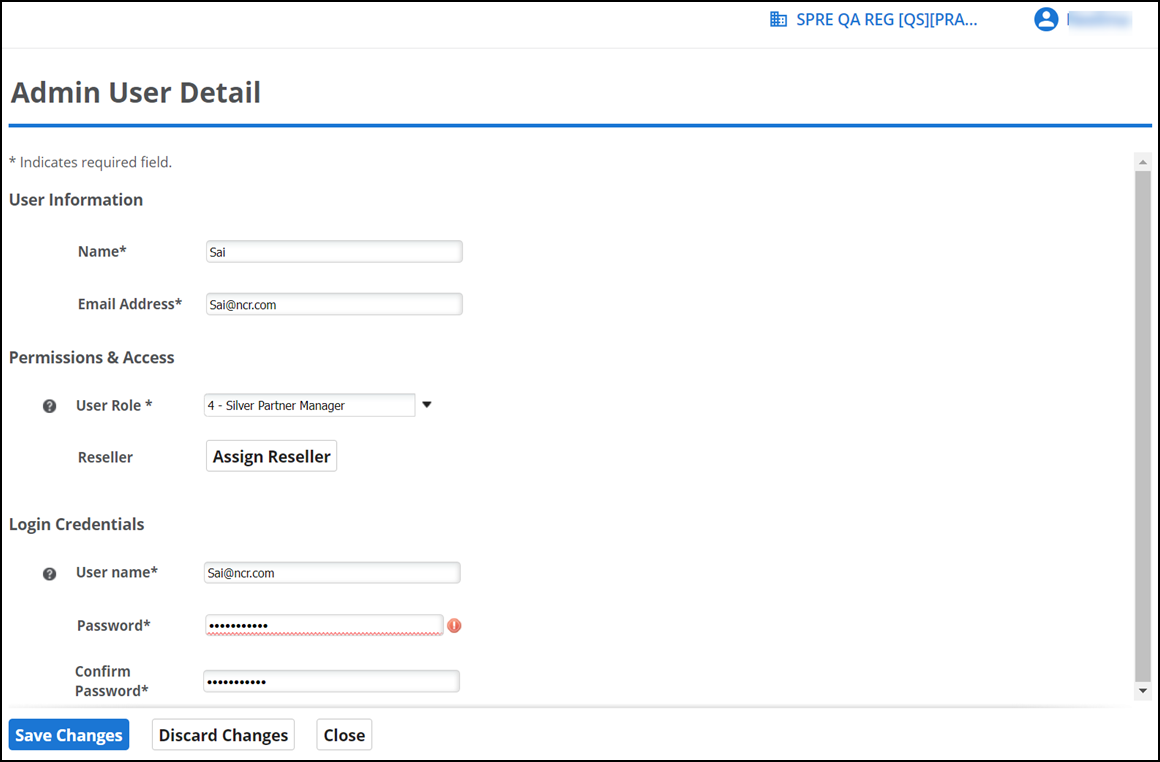
- Under the User Information group bar, enter Name and Email Address.
- Under the Permissions & Access group bar, select the desired User Role from the drop-down list.
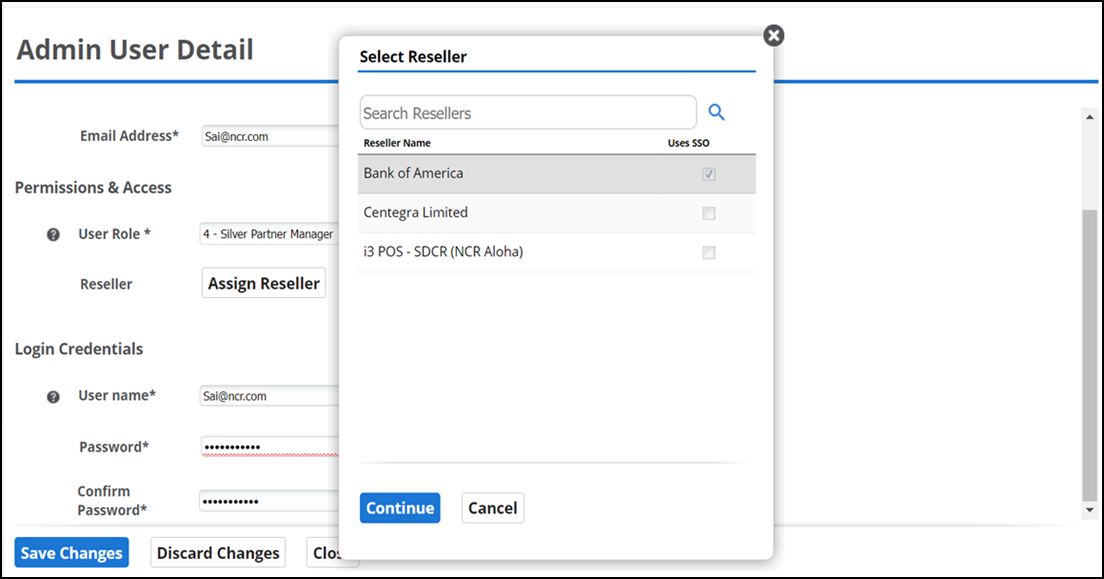
- If you select Silver Partner Manager or Silver Partner as the user role, the Assign Reseller button appears. Click Assign Reseller to select the desired reseller and click Continue.
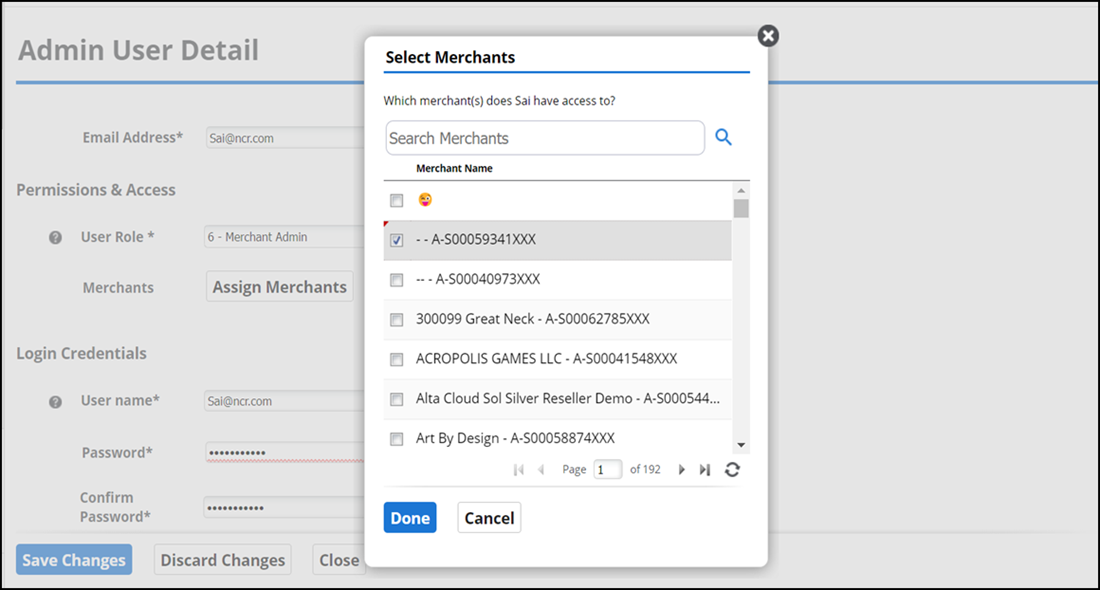
- If you select Merchant Admin as the user role, the Assign Merchants button appears. Click Assign Merchants to select the desired merchant and click Done.
- Under the Login Credentials group bar, enter Username, Password and Confirm Password.
- Click Save Changes.
To remove an Admin User:
- Select the desired user from the Admin User list. The Admin User Detail page appears.
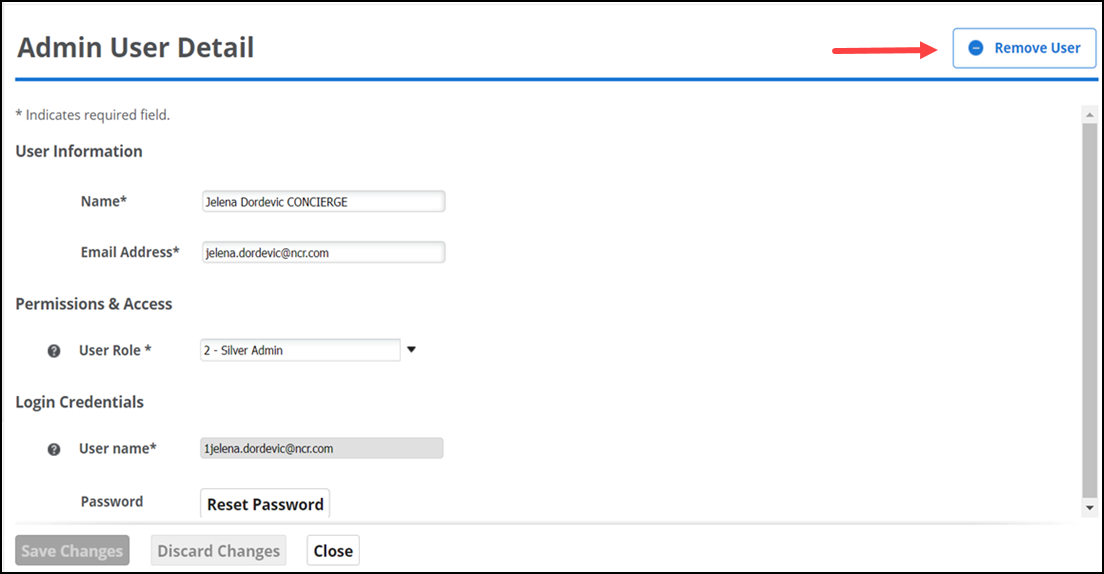
- Click Remove User to remove the Admin User.
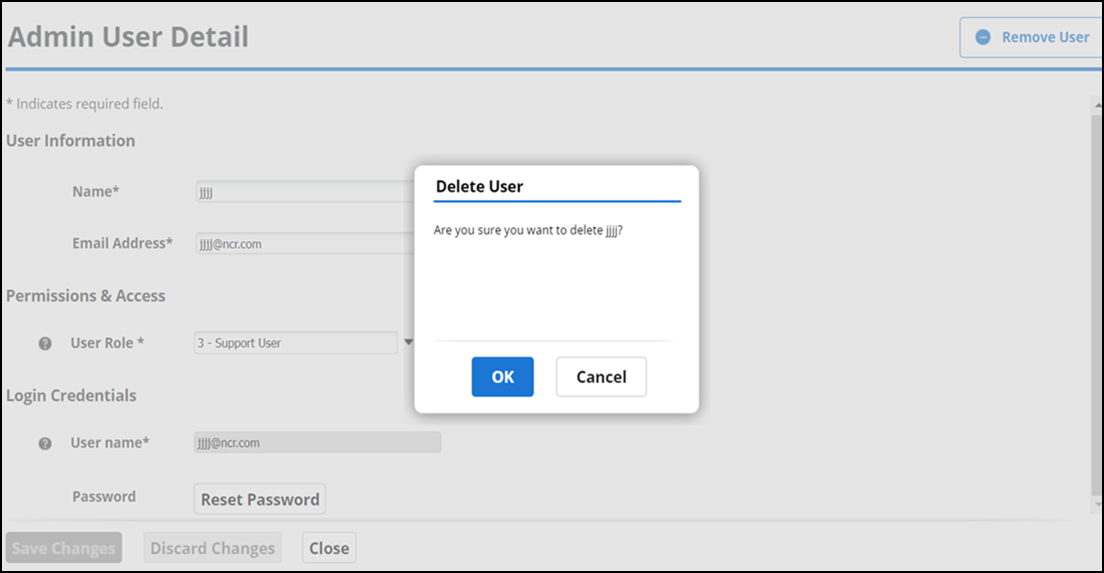
- Click OK.
Viewing tasks
Use Settings & Privacy > Admin > Tasks to search and view the Current Merchant or System tasks.
Click Current Merchant Context to view global context variables of the merchant (Merchant ID, Store ID, Store Name, and more.)
To view Current Merchant tasks:
- Select Current Merchant.
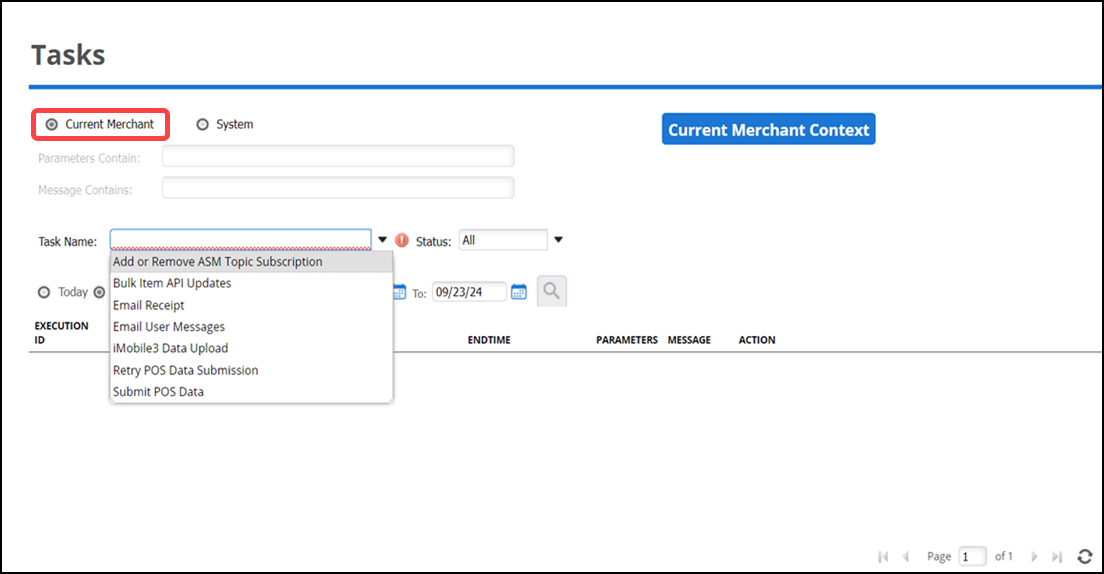
- Select the desired task from the 'Task Name' drop-down list. The options to enter a parameter and message for searching the tasks become available for entry.
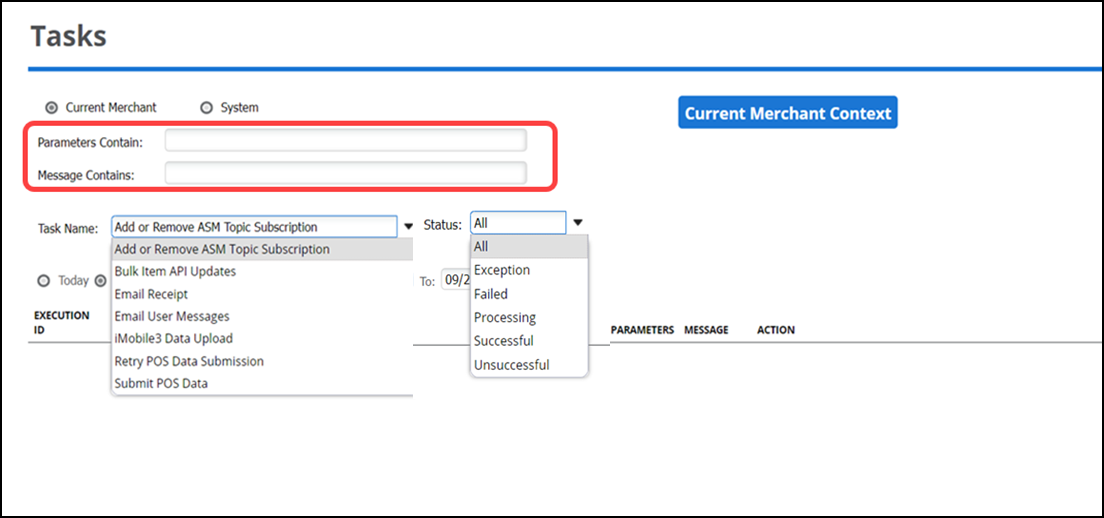
- Enter the desired parameter and message for searching the tasks, if required.
- Select the required status from the drop-down list.
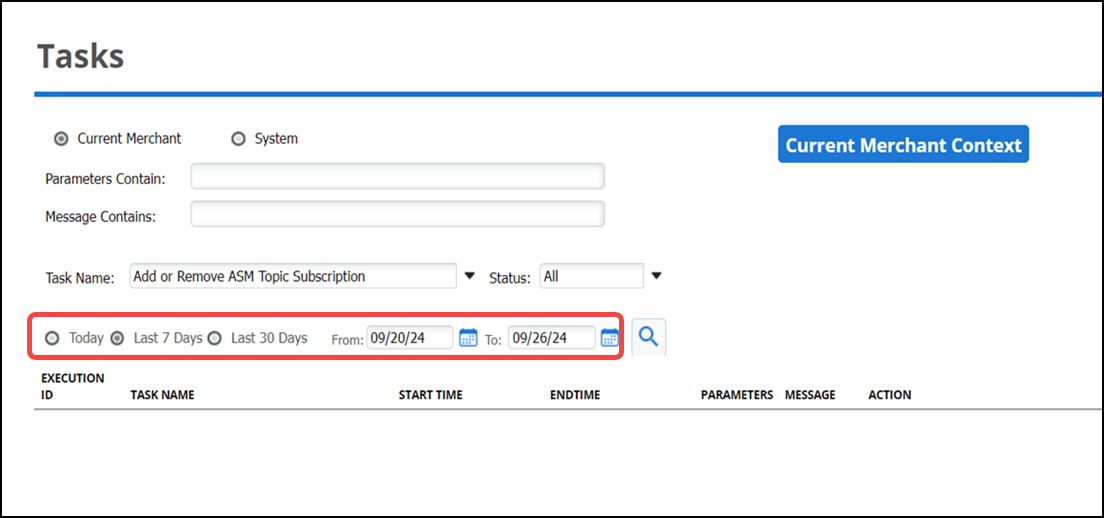
- Filter the results by Today, Last 7 days, Last 30 days or use the calendar icons to select a date range.
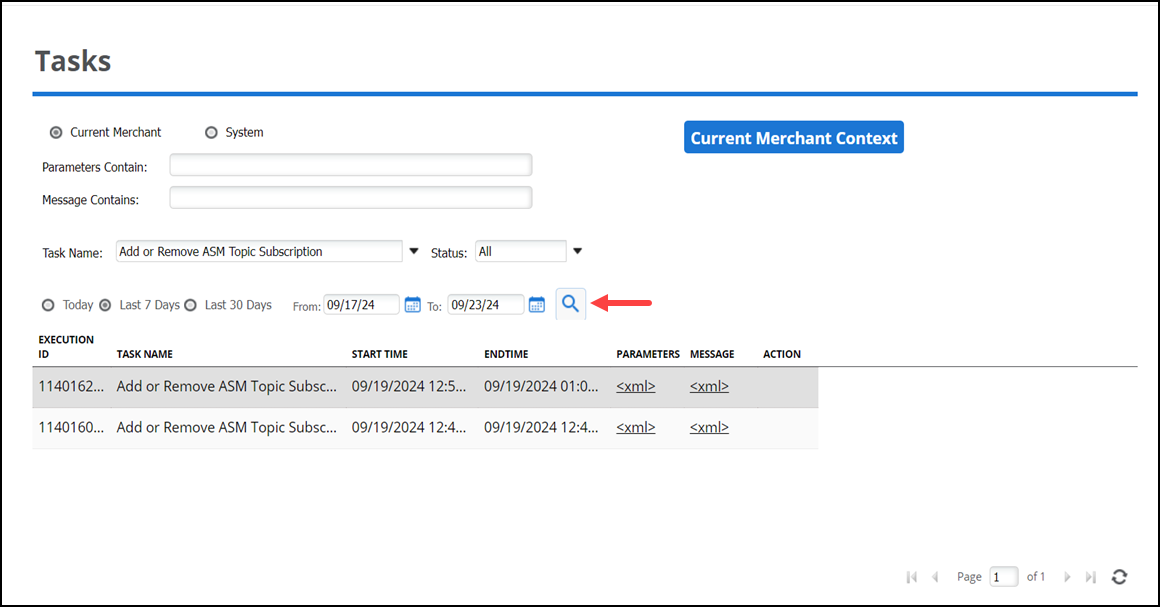
- Click the search icon to search and view Current Merchant tasks.
To view System tasks:
- Select System.
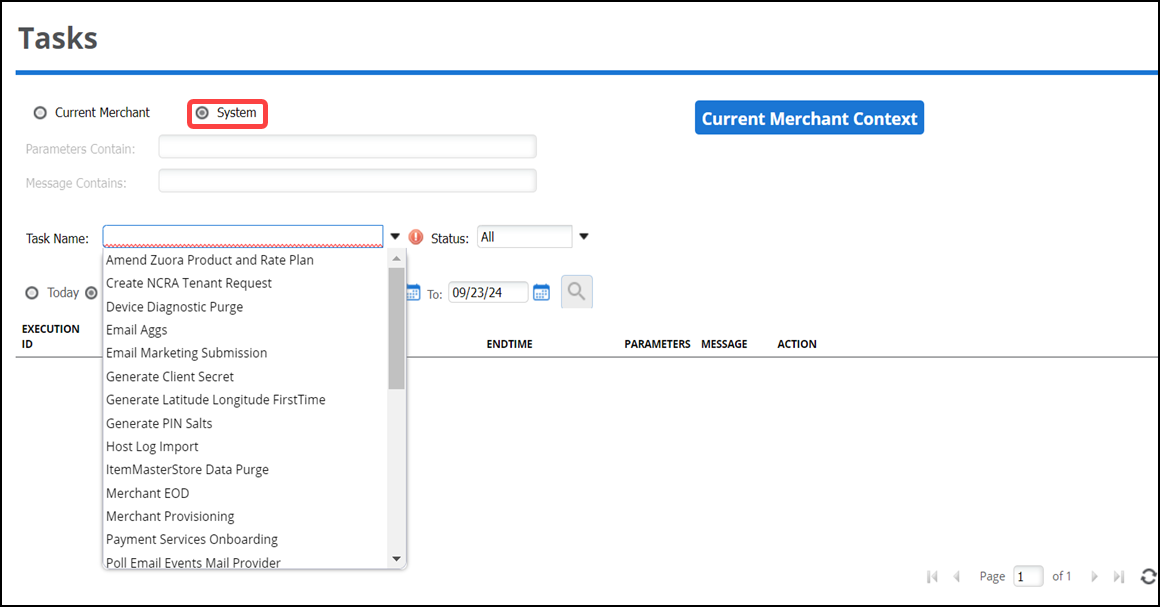
- Select the desired task from the 'Task Name' drop-down list. The options to enter a parameter and message for searching the tasks become available for entry.
- Enter the desired parameter and message for searching the tasks, if required.
- Select the required status from the drop-down list.
- Filter the results by Today, Last 7 days, Last 30 days or use the calendar icons to select a date range.
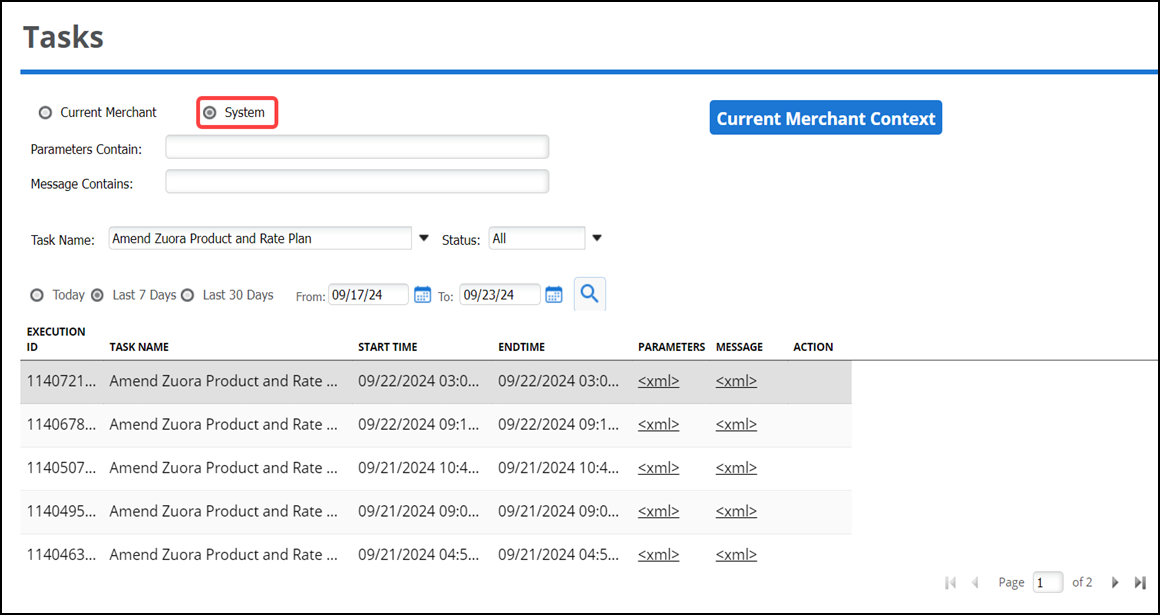
- Click the search icon to search and view System tasks.
Performing diagnostics
Use Settings & Privacy > Admin > Diagnostics to view uploaded logs or to request logs from the POS for any specific station. This helps to detect the error-prone data from the Point of sale (POS).
Prerequisite: You should upload diagnostics using Diagnostics > Upload diagnostics from the POS station.
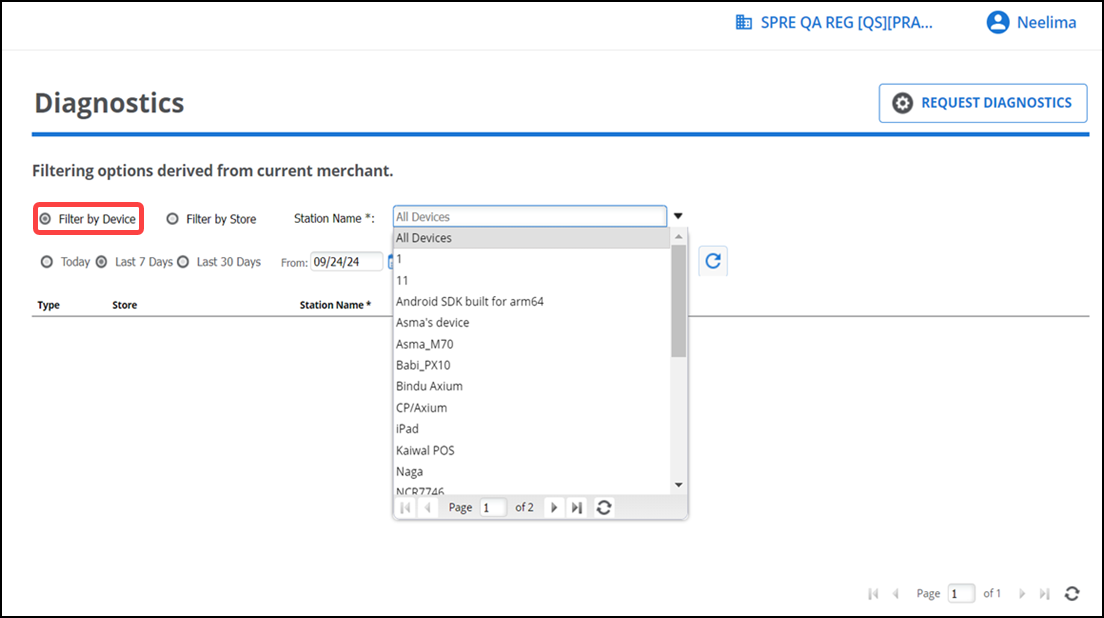
You can view device specific and store specific logs in the diagnostics page.
To view device specific logs:
-
Log in to Back Office using Company View (All Stores) or select a specific store.
-
Select Settings & Privacy > Admin > Diagnostics.
-
Select Filter by Device.
-
Select All Devices or the required device/station from the 'Station Name' drop-down list.
-
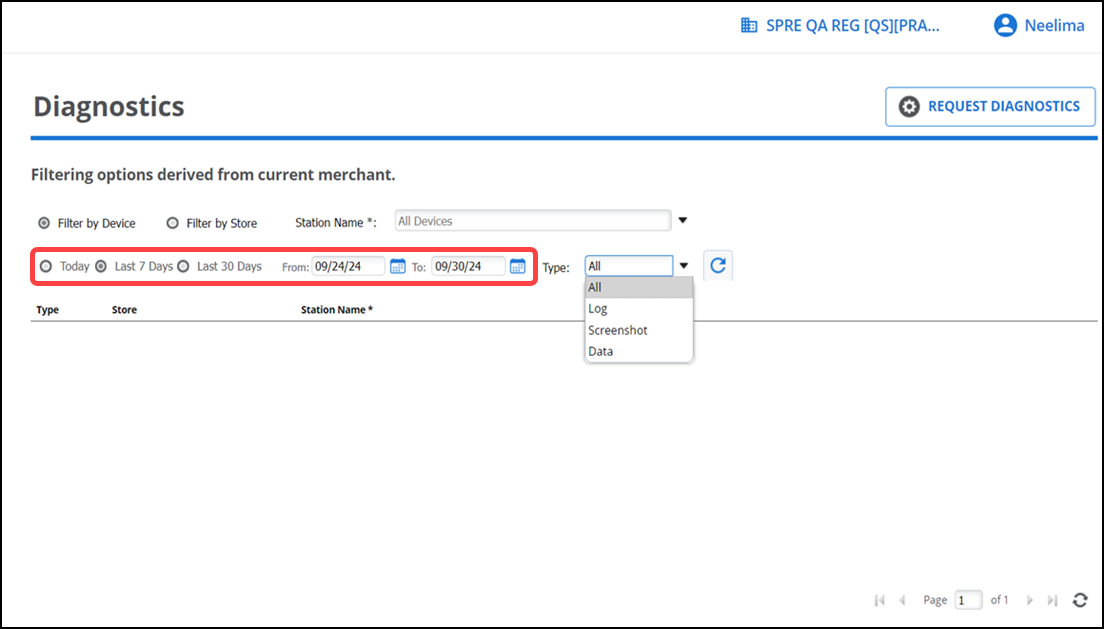
Filter the results by Today, Last 7 days, Last 30 days or use the calendar icons to select start and end dates.
-
Select the required log type (All, Logs, Screenshot, and Data) from the 'Type' drop-down list.
-
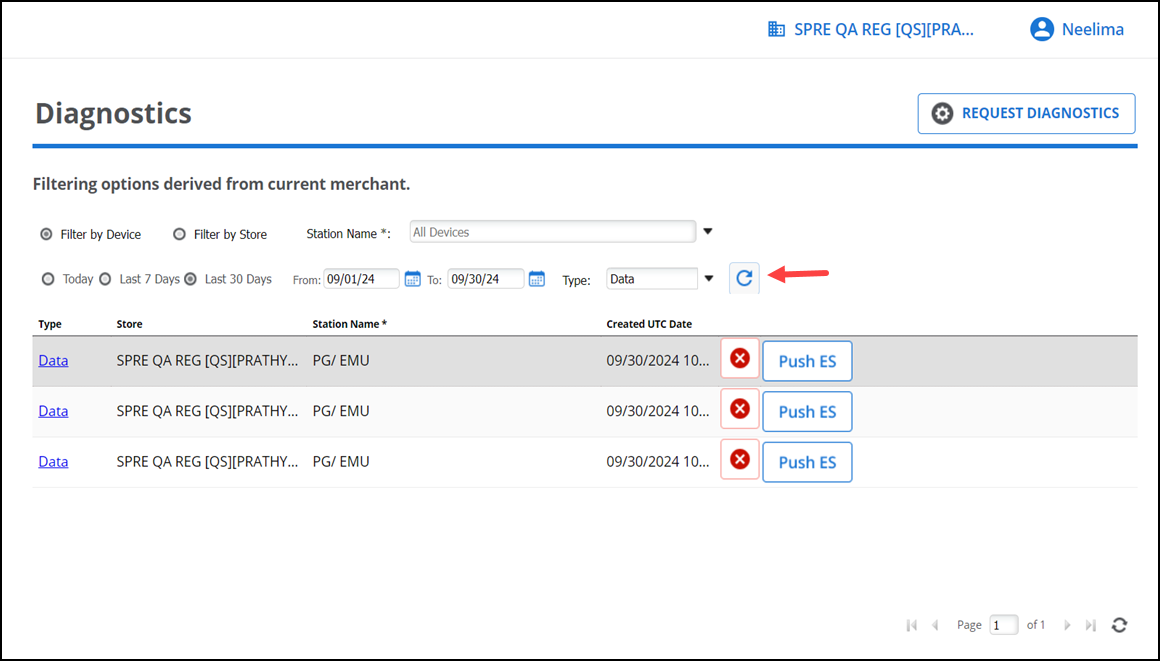
Click the refresh icon to view the device specific log.
Tip: Select the device specific log record to download to your system.
To view store specific logs:
You can view filtering options derived from current merchant.
-
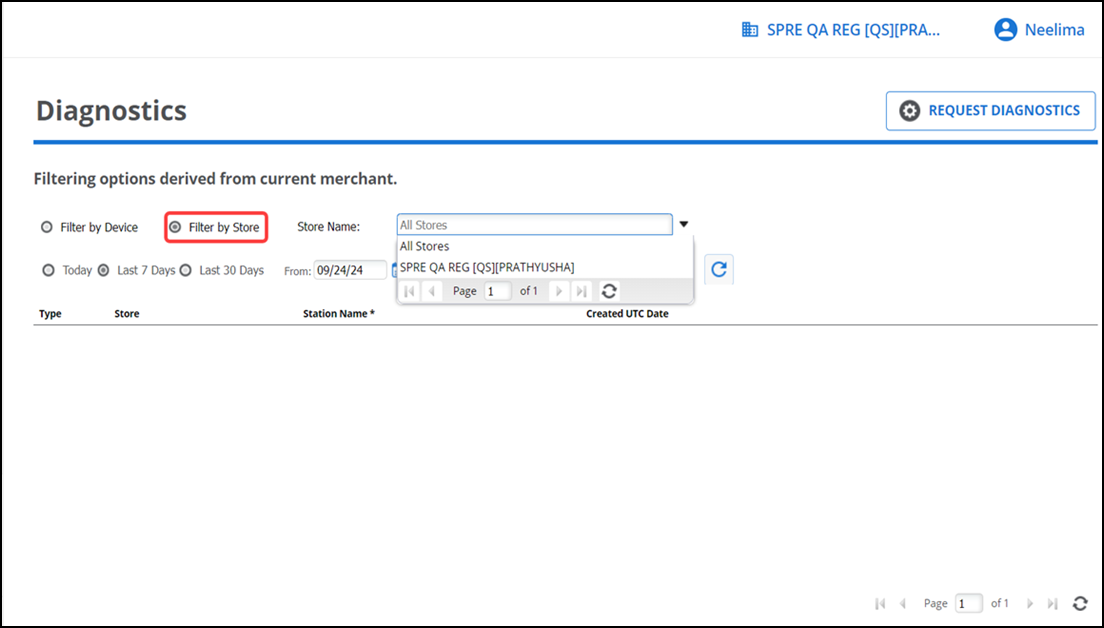
On the Diagnostics page, select Filter by Store.
-
Select All Stores or the required Store from the 'Store Name' drop-down list.
-
Filter the results by Today, Last 7 days, Last 30 days or use the calendar icons to select start and end dates.
-
Select the required log type (All, Logs, Screenshot, and Data) from the ‘Type’ drop-down list.
-
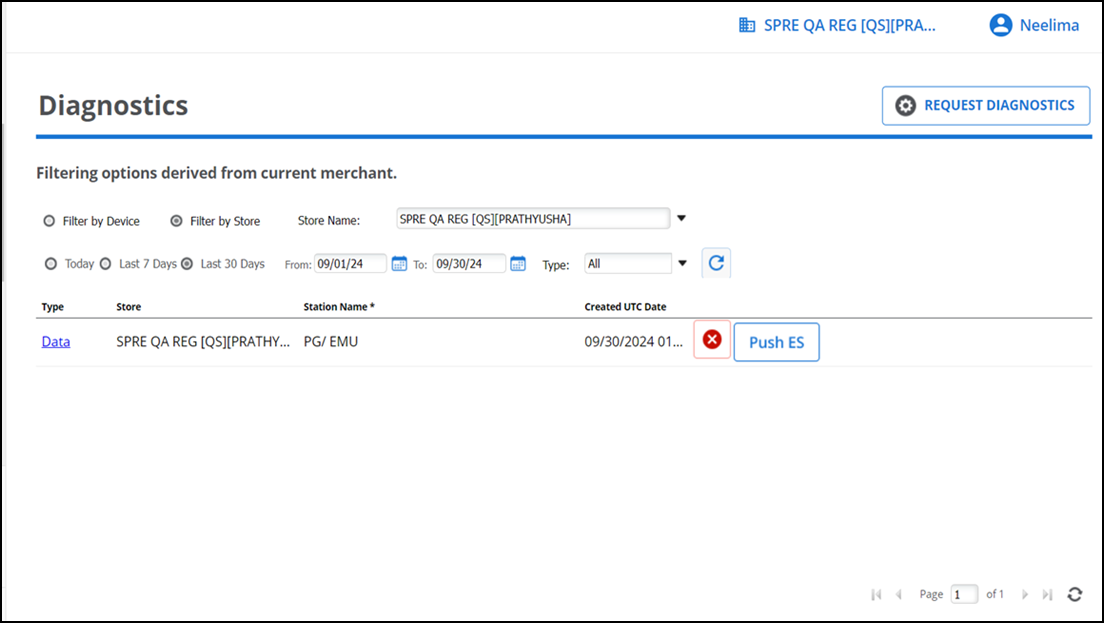
Click the refresh icon to view the store specific log.
Tip: Select the store specific log record to download to your system.
To request diagnostics from the POS:
-
On the Diagnostics page, click REQUEST DIAGNOSTICS.
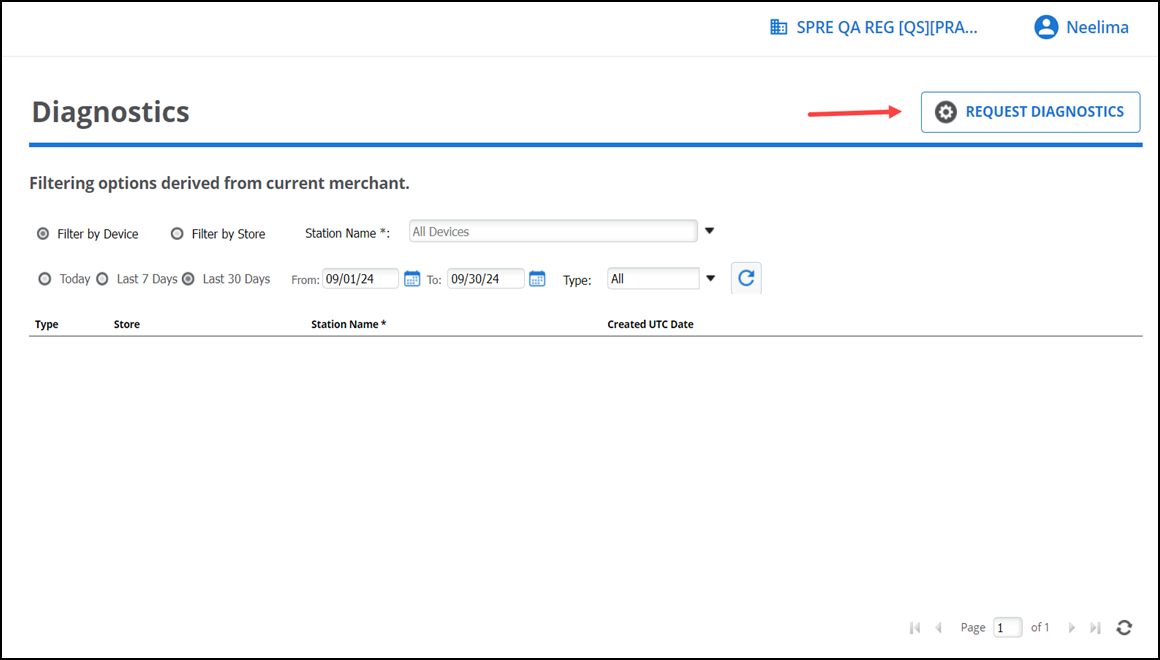
The 'Request Diagnostics' pop-up window appears.
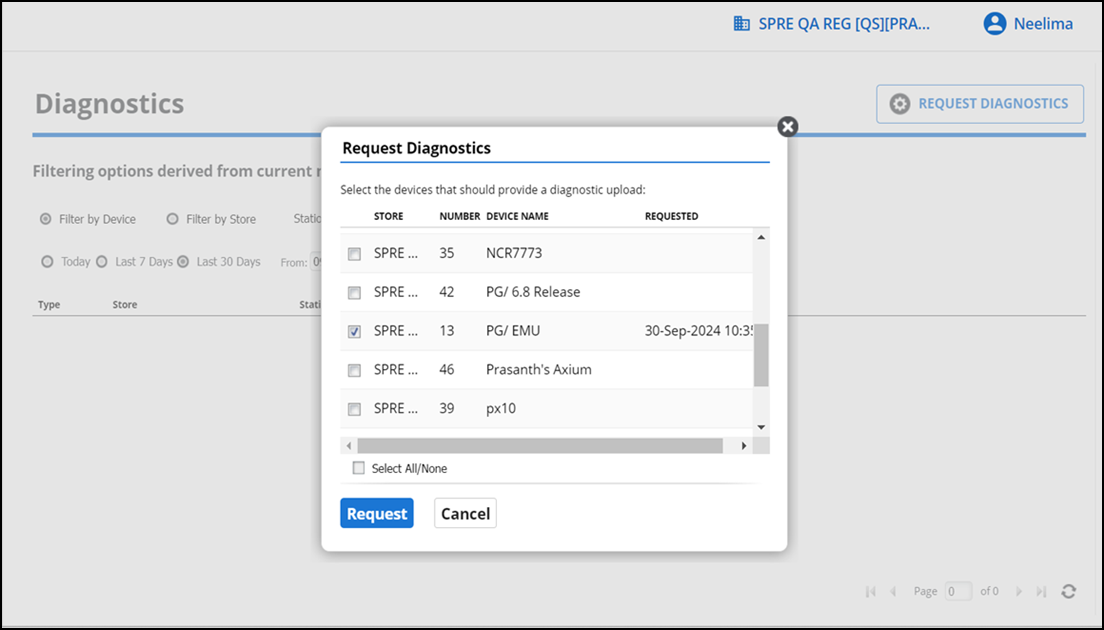
-
Select the required devices for which to provide a diagnostic upload and click Request.
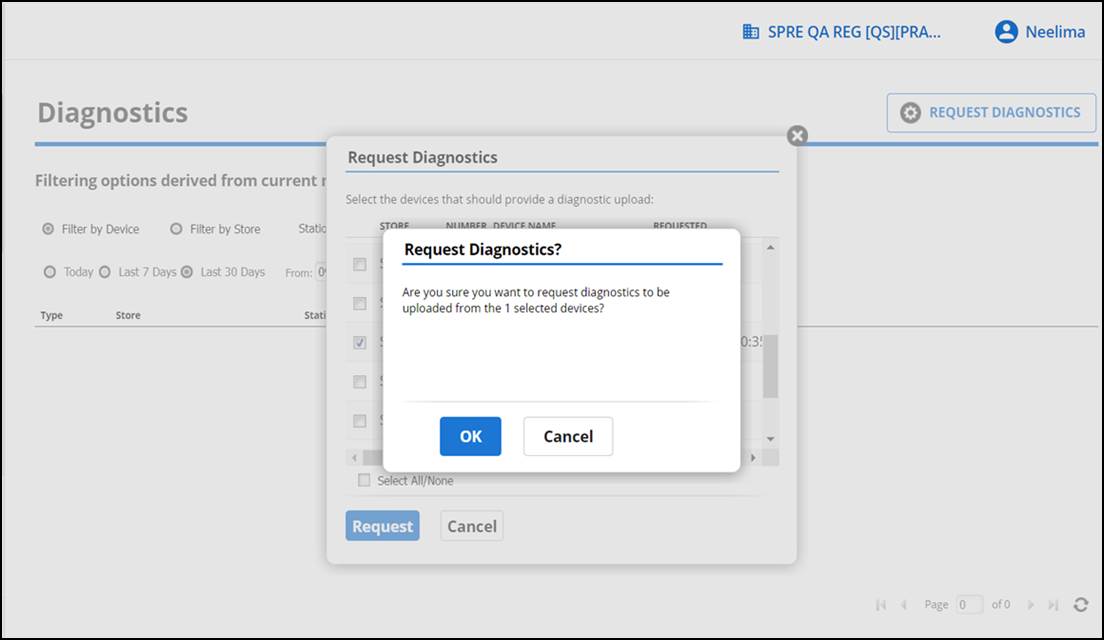
-
Click Ok to confirm.
Note: It may take some time for the results to appear.
Resetting inventory
Use Settings & Privacy > Support Admin > Reset inventory to reset the inventory for the selected store. You can reset the item inventory in all categories or all items in the selected category of a store.
Warning: The 'Reset inventory' function impacts and removes the inventory from all stores.
To reset the inventory:
-
Log in to Back Office using Company View (All Stores) or select a specific store.
-
Select Settings & Privacy > Support Admin > Reset inventory. The 'Reset inventory' screen appears.
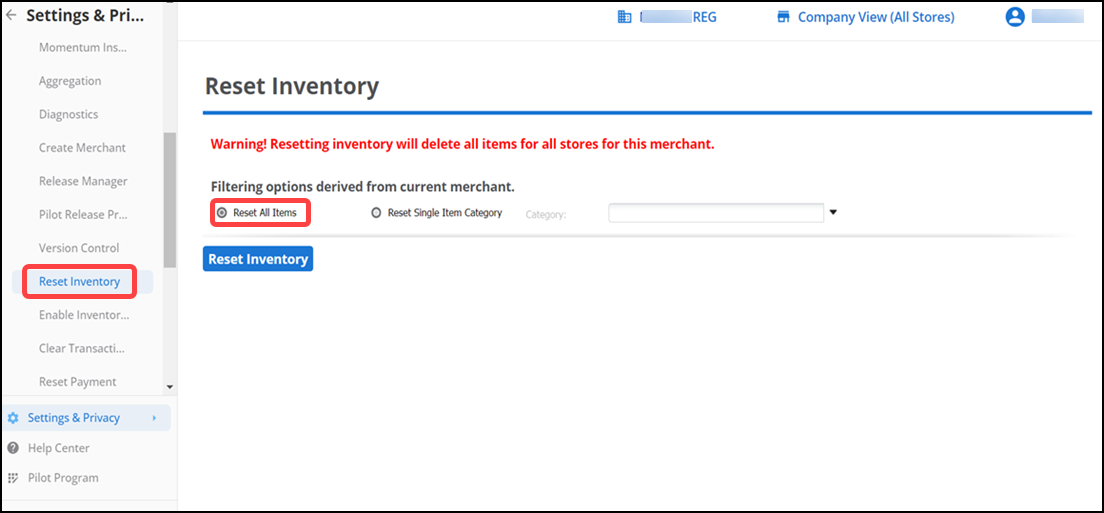
-
Select Reset All Items to remove the inventory for all items in the store (in bulk).
-OR-
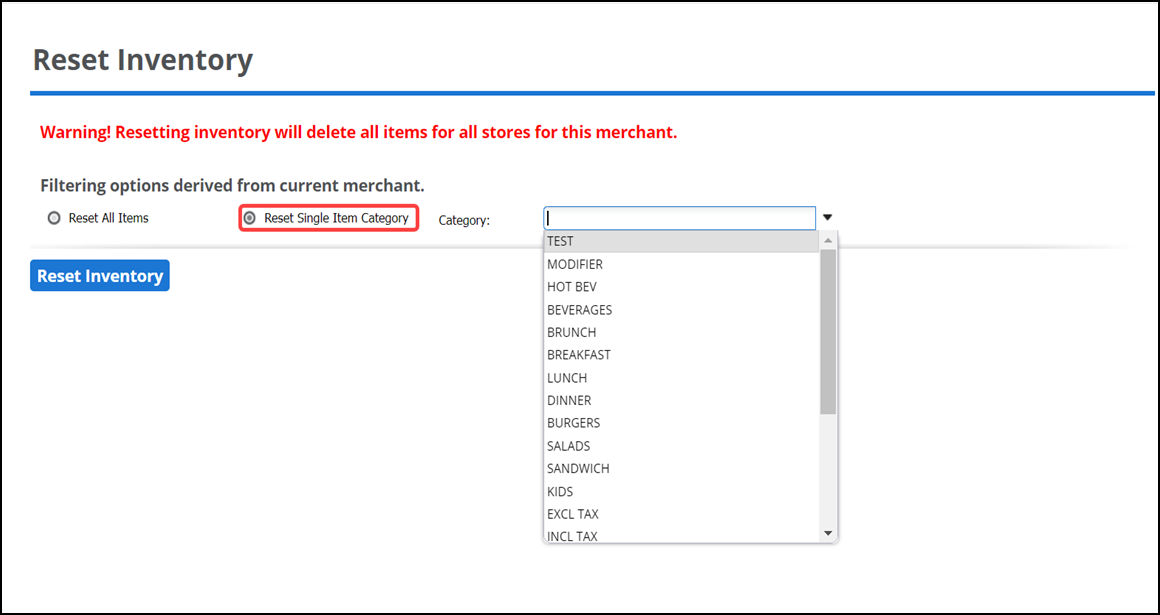
Select Reset Single Item Category, to enable the Category drop-down list.
-
Select a category for which to remove the inventory for all items in the category from the 'Category' drop-down list and click Reset Inventory.
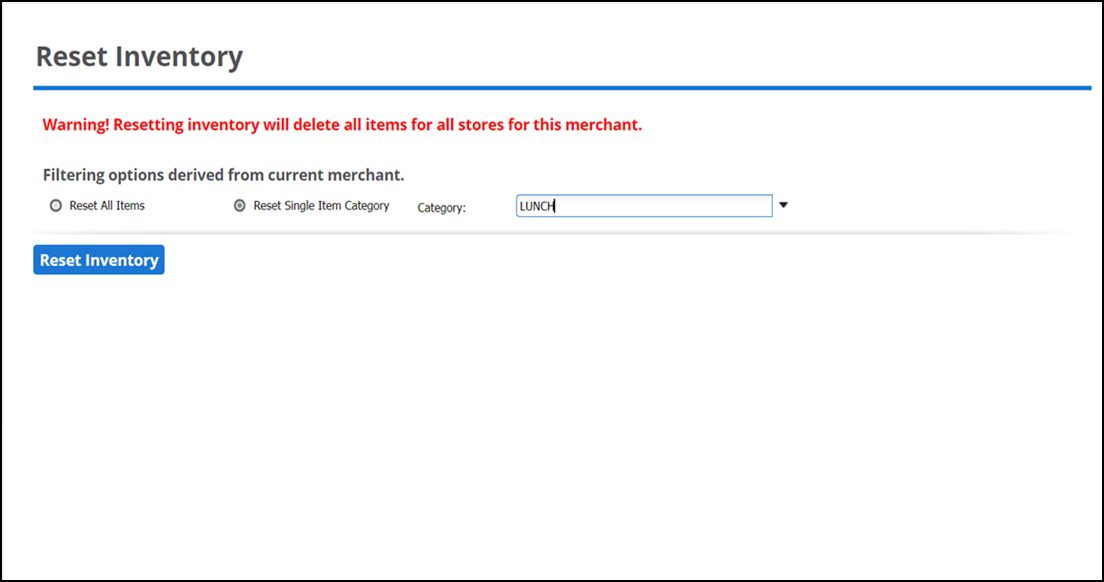
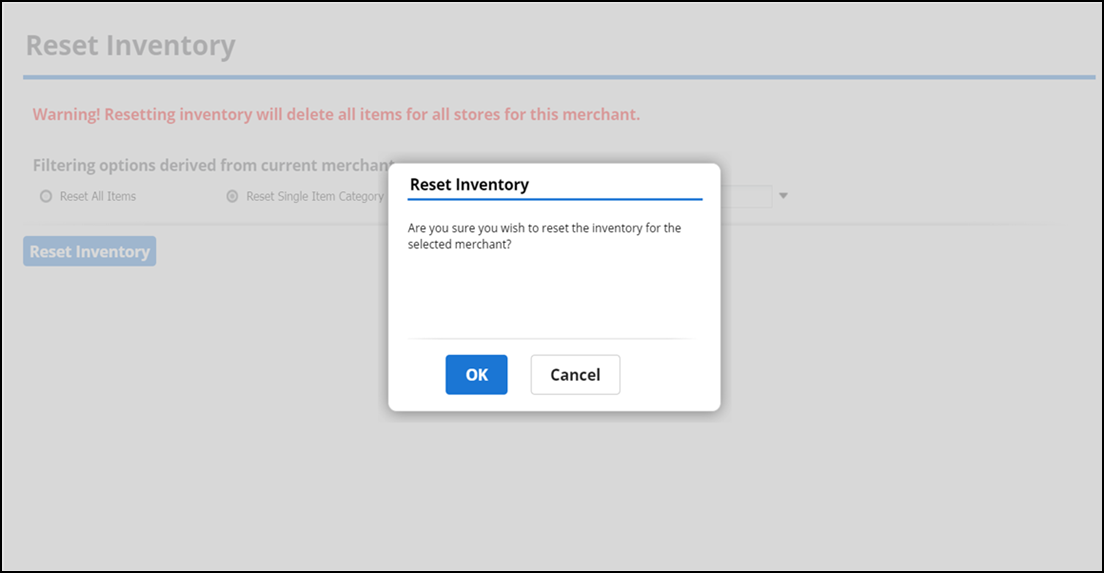
A confirmation window appears.
-
Click Ok to confirm. A message appears letting you know the reset was successful.
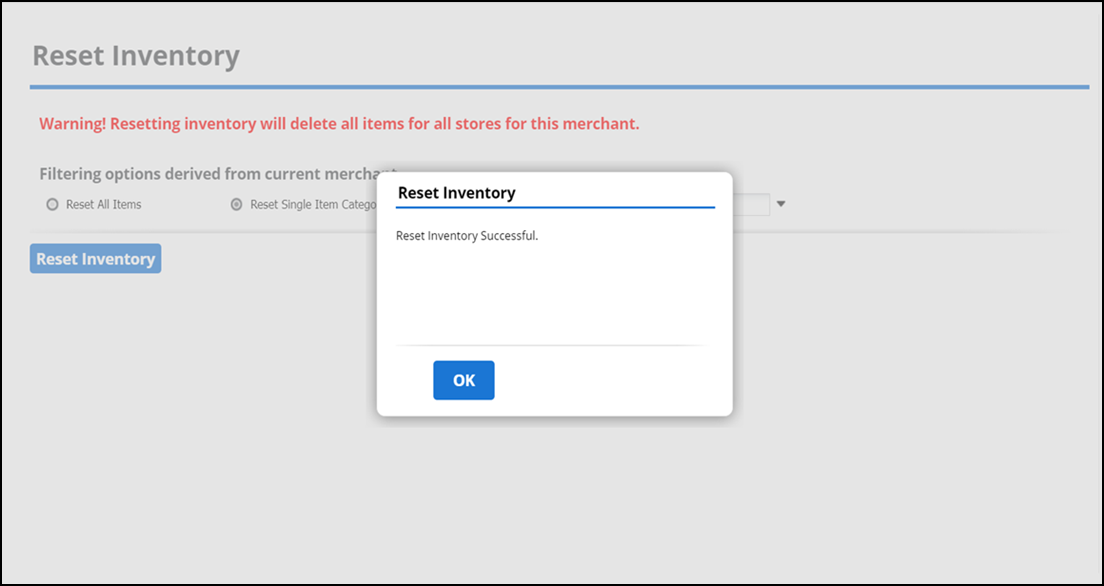
Note: You can observe your inventory status in Menu > Categories & Items.