Configuring Credit Card Lookup with Slide and Go
This solution accommodates a very fast-paced environment. The cashier must first press an Auto-Detect Credit Card button to invoke the Credit Card Lookup payment process, rather than lookup occurring automatically when you slide or tap a card. The Enter Card Information screen appears, at which time either the guest or the cashier slides or taps the card, depending on your operation. The system determines the card type and then continues the process of applying a payment.
To properly configure a ‘Slide and Go’ environment, we recommend you include the Auto-Detect Credit Card button function inside a scripted button so that fewer button touches are required. You can also configure your non-cash tenders to print a receipt without waiting for the authorization process to complete, shaving seconds off the time it takes to complete each transaction. To reduce your risk, you can establish an amount over which you want the authorization to complete before printing the receipt. This is referred to as a ‘Slide and Go’ environment.
SCENARIO: The threshold for printing a receipt before authorization is complete is $50.00. The cashier enters an order totaling $35.99. The guest hands a Visa card to the cashier for payment. The cashier touches the ‘Auto-Detect CC’ button to display the Enter Card Information screen. The cashier slides the card across the mag stripe reader. The system follows the scripted function by identifying the tender as a Visa based on the card prefix, displays the Visa tender screen, if necessary, prints the receipt before authorization completes, closes the check, chains to the order entry screen, and starts a new order.
To disable Credit Card Lookup at the store level:
The intention of a ‘Slide and Go’ environment is to move the auto-detection functionality to a button function, instead of the functionality being active at all times. We recommend you disable auto-detection of card types at the store level when implementing a ‘Slide and Go’ environment.
Tip: You can still enable auto-detection of card types at the store level when implementing the ‘Slide and Go’ solution. You must be aware of behavior changes when both are in use. Refer to “Configuring Credit Card Lookup when cashier controls payment card” or “Configuring Credit Card Lookup when guest controls payment card” for more information.
- Select Maintenance > Business > Store.
- Select the Store Settings tab.
- Select the User Interface group located at the bottom of the screen.
- Under the ‘Functionality’ group bar, clear Automatically detect card swipe.
- Click Save and exit the Store function.
To add a scripted tender for a ‘Slide and Go’ environment to a panel:
You must add the ‘Auto-Detect CC’ button function to a panel so the system prompts you with the Enter Card Information screen. While that screen is active, you can slide or tap the payment card for authorization. You can add a dedicated Auto-Detect CC button directly to a panel without nesting it in a script; however, we recommend you include the Auto-Detect Credit Card button function inside a scripted button so that fewer button touches are required.
Although you can include any supported function inside a scripted button, based on your needs and how fast you want your speed of service to operate, we recommend you include the following functions in a scripted button, in order of sequence:
- Auto-Detect Credit Card
- Close Check
- Chain
- New Order
This is assuming you also select ‘Auto-print when non-cash tender is applied’ in Maintenance > Store > Store Settings tab > Check Printing group; otherwise, include a ‘Print Receipt’ function after the ‘Auto-Detect Credit Card’ function so you can print a receipt to hand to the guest. Refer to “Configuring automatic printing of receipt for non-cash tenders."
- Select Maintenance > Screen Designer > Quick Service Screen Designer.
- Select Work with Panels.
- Select Panel > Open Panel.
- Select the panel on which to add the button and click OK.
- Select Panel > New Button.
- Select Script from the ‘Action’ drop-down list.
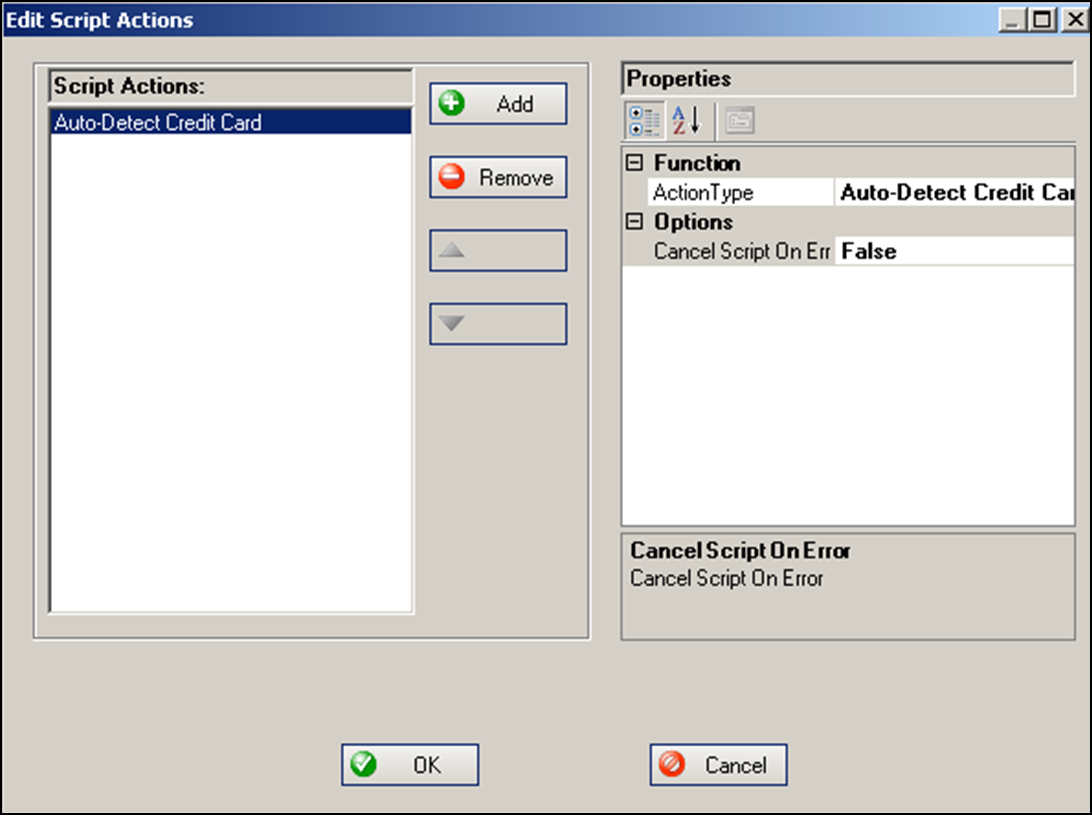
- To the right of the ‘Script Actions’ option, click the ellipses (...) to display the Edit Script Actions dialog box.

- Click Add for the first action in the script.
- Select Auto-Detect Credit Card from the ‘Action Type’ drop-down list.
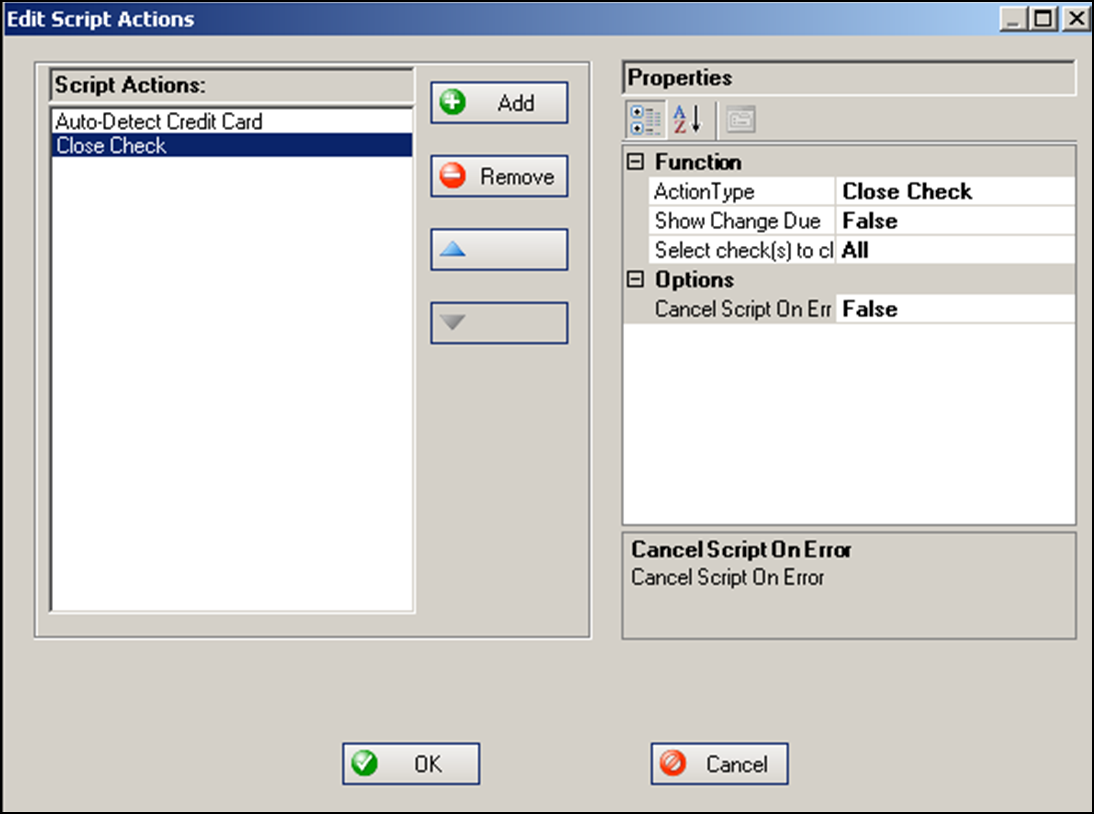
- Click Add for the next action in the script.

- Select Close Check from the ‘Action Type’ drop-down list.
- Select False for ‘Show Change Due’ since there is no change due required for a non-cash tender.
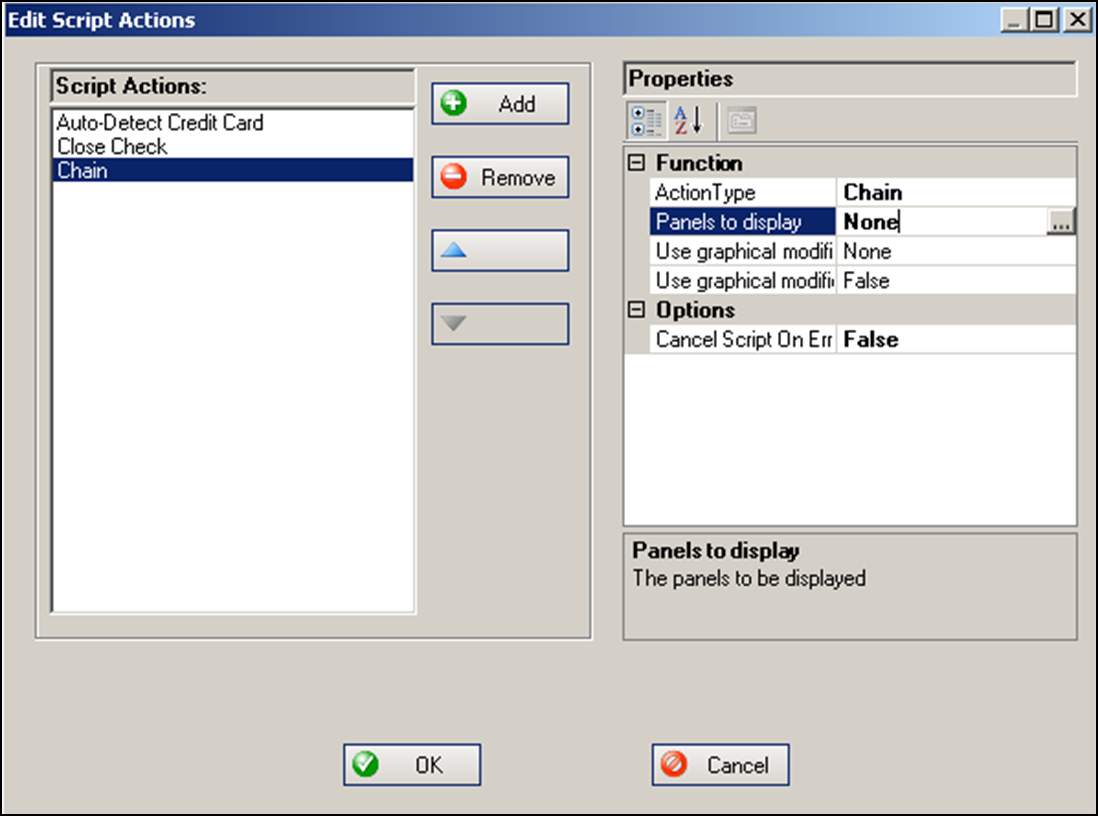
- Click Add for the next action in the script.

- Select Chain from the ‘Action Type’ drop-down list.
- To the right of the ‘Script Actions’ option, click the ellipses (...) to display the Select Panels dialog box.
- Add the panel to display upon selection of this button and click OK.
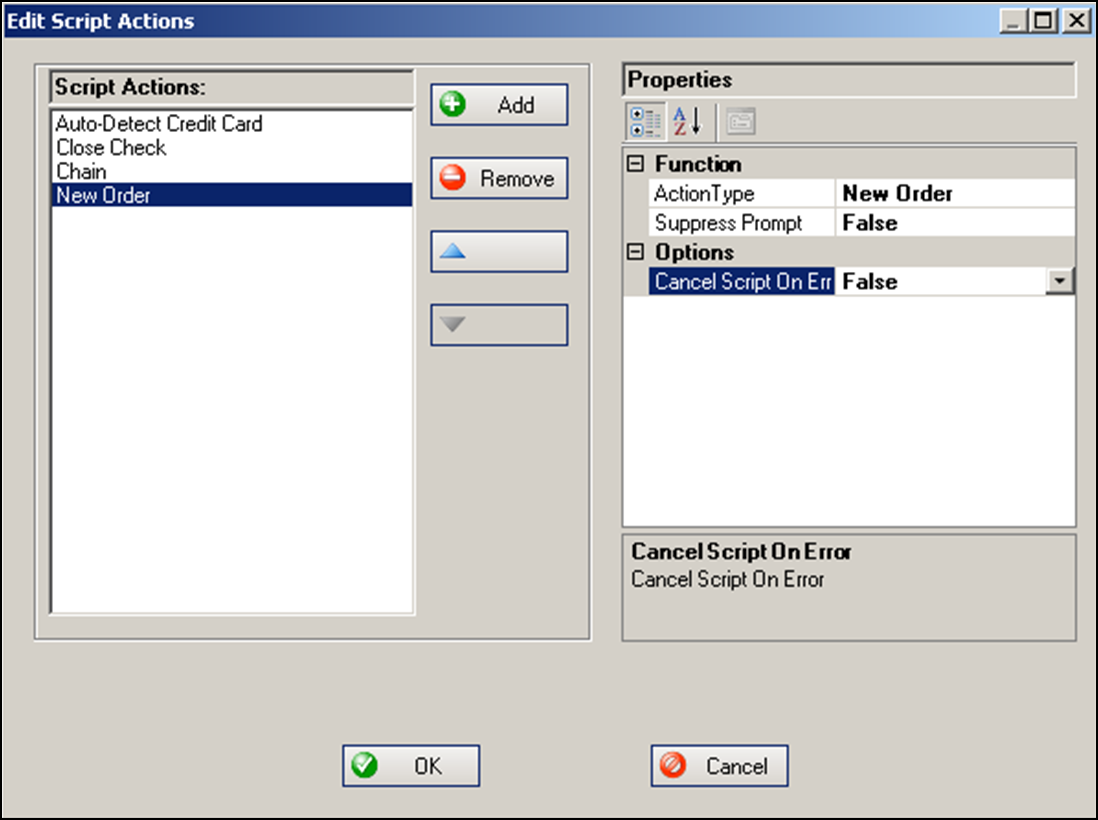
- Click Add for the next action in the script.

- Select New Order from the ‘Action Type’ drop-down list.
- Select True for ‘Suppress Prompt.’
- When you complete the script, click OK on the Edit Script Actions dialog box.
- Type a name for the scripted tender button, such as ‘Credit Card.’ Note: The text defaults to the button function name of ‘Script.’
- Complete the text, background, and bitmap options as you would for any other button.
- Select Panel > Save Panel and exit the Screen Designer function.
Continue to "Refreshing POS data."
After running a data refresh, return to the main Credit Card lookup in Quick Service page.