Adding a custom report button to a panel
For Aloha Quick Service operations, you must add a button to a panel for each customized report you create. You must also do this in Aloha Table Service, if you want to add a custom report button to a floor plan in use. If you want the report button to appear in a relative location as your other hard-coded reports in Table Service, refer to "Designing the FOH Select a Report screen in Table Service."
To add a custom report button to a panel:
-
Select Maintenance > Screen Designer > Quick Service (or Table Service) Screen Designer.
-
Select Work with Panels.
-
Select Panel > Open Panel. The Open Panels dialog box appears.
-
Select a panel to edit, such as Manager Reports, and click OK. The panel appears.
-
Select Panel > New Button. The Properties dialog box appears.

-
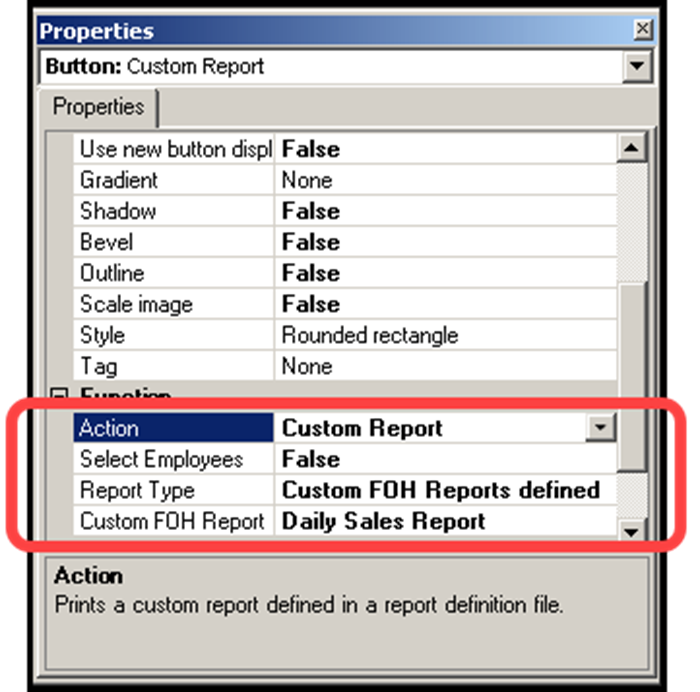
Under the ‘Function’ group bar, select Custom Report from the ‘Action’ drop-down list to add a custom report button to the ‘Select Report’ screen on the FOH.
-
Select True or False in the ‘Select Employees’ drop-down list, to allow you to select specific employees to include in the report at runtime. If set to False, the system generates data for all employees who worked during the time frame selected for the report.
-
Select Custom FOH Reports defined to indicate this button calls a custom FOH report created using the Custom FOH Report function.
Reference: The other option, 'Externally defined,' is used only for a custom FOH report you manually created using MS Notepad. Refer to Appendix B: Upgrading custom FOH reports.
-
Select the report to link to this button in ‘Custom FOH Report.’
-
Type the text to identify the specific report you want to generate in ‘Name.’ The text appears on the button.
-
Complete the remaining options for the button, such as font, background color, and text alignment.
-
Repeat this procedure for each custom report to add to the panel.
-
Select Panel > Save Panel and exit the Screen Designer function.
Continue to "Designing the FOH Select a Report screen in Table Service."