Using employee breaks with restrictions
This section describes how to use breaks in jurisdictions that legally require employees to receive breaks and take the minimum required minutes for the break. In these environments, we highly recommend you be aware of any break rule violations that occur. The system can notify you at clockout of this and prevent you from clocking out.
To view a break rule violation when you clock out:
- Touch Clock Out. Depending on the system, you may need to perform several functions during the checkout process, such as performing a checkout, declaring your tips, contributing in a tipshare pool, and more. The Break Rule Violation manager approval screen appears.
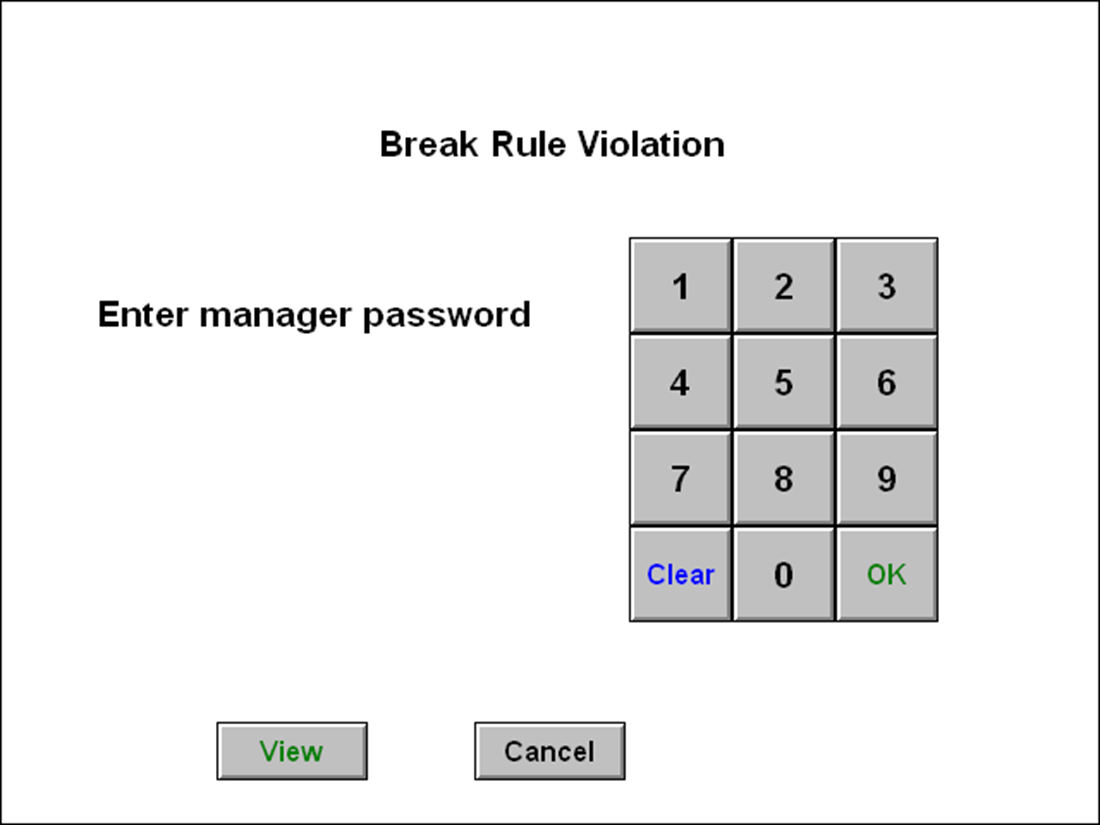
- To review the break rules that are violated, touch View.
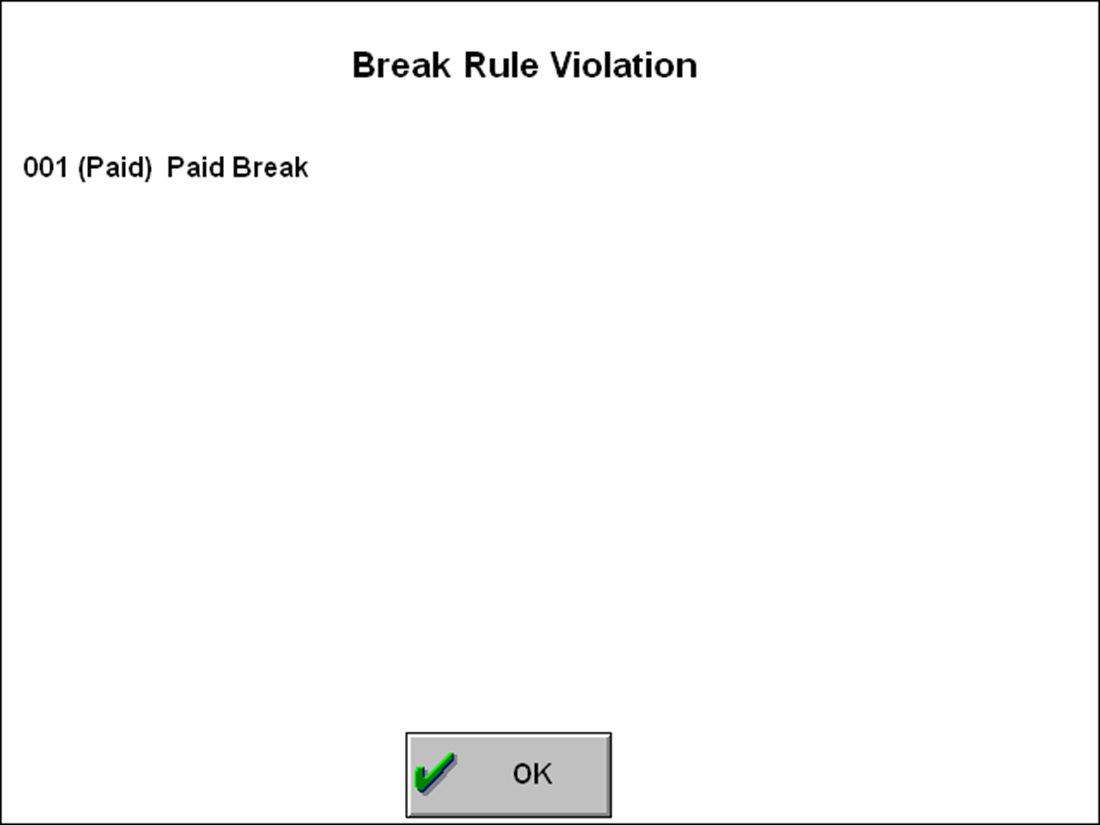
- Touch OK to return to the FOH Break Rule Violation manager approval screen.
- A manager, or an employee with sufficient access, must enter their password to approve the clock out and allow the violation.
- Upon approval, continue with clocking out of the system.
Using required breaks
You may have one or all of the advanced features for breaks in place; however, you must set up the elementary requirement of specifying the hours needed to earn a break. Therefore, the following procedure applies to all of the advanced features in this section.
Starting a required break
The system allows an employee to take only the breaks owed to them, based on the active break rules. It is important to note that if the applicable break button does not appear on the FOH, it could be because:
- The break rule has a stipulation for which you do not qualify to receive a break.
- You have not reached the minimum hours you need to work to receive the break.
- You have already taken the break.
In Aloha Table Service, when you earn a break, touch the Start Break button on the FOH Working with Tables/Tabs screen or a Table Service floor plan panel. In Aloha Quick Service, when you earn a break, touch the configured break button placed on a panel.
Tip: If the Start Break button does not appear on the Working with Tables/Tabs screen or if touching the configured break button does not display the ‘Select a break to start’ screen, then you are not eligible for a break at this time or you have already taken all your earned breaks.
- Clock in to the FOH.
- Locate and touch the Start Break button. If you are eligible to receive a break at this time, the ‘Select a break to start’ screen appears.A button appears on the left side for each available paid break and on the right side for each available unpaid break. The number of buttons that appear on the screen depends on how many breaks you already qualify for and how many are approaching.
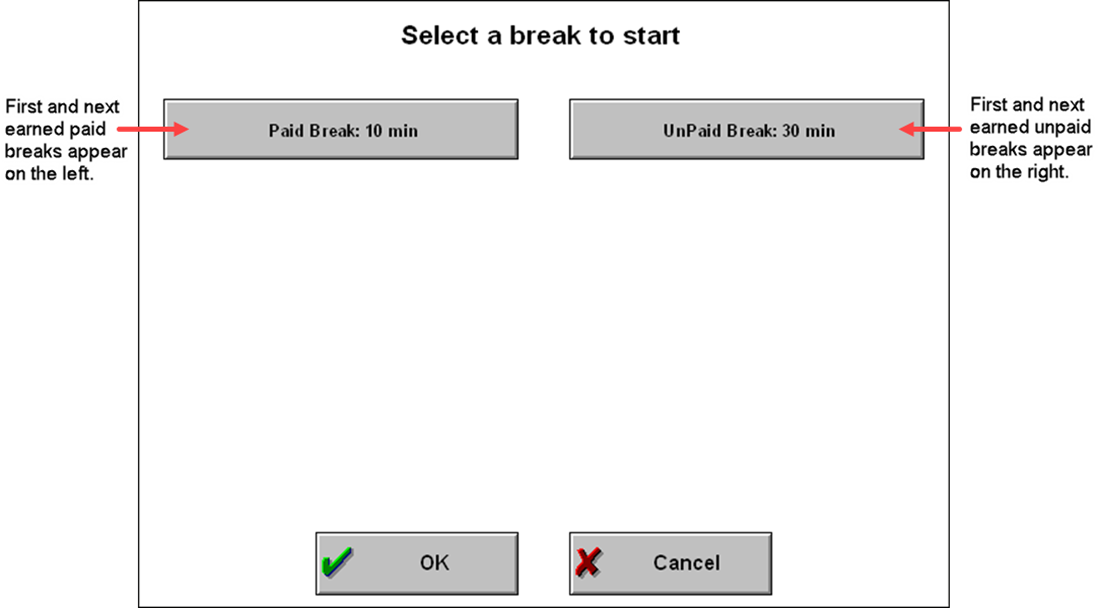
Breaks you are eligible to take appear with the type of break and number of minutes available to you. If you have yet to earn a break, but are approaching a break, an approaching break button appears with the amount of remaining time before you can take the break. - Touch the appropriate break button and touch OK. The Employee Break Information chit prints at the local printer.
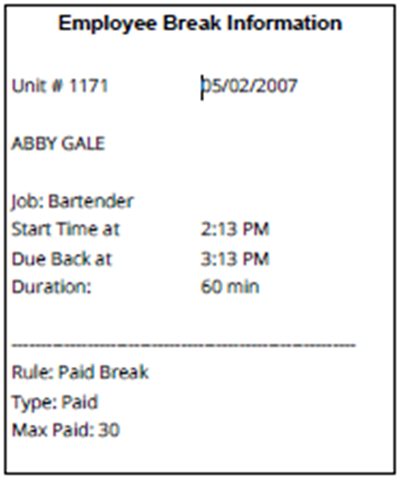
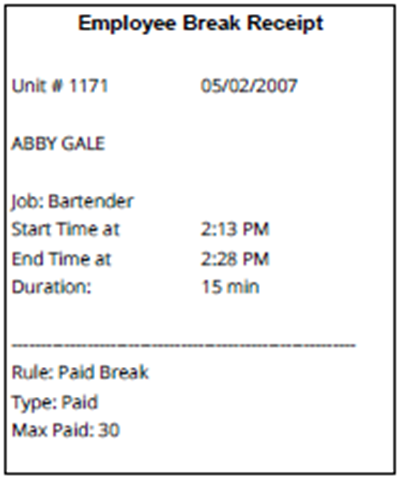
Use the Employee Break receipt to gauge the approximate time you should return from the break and the minimum number of minutes needed to constitute for a break. The ‘Max Paid’ field only appears if it is a paid break.
Ending a required break
- Clock in to the FOH. The end break screen appears.
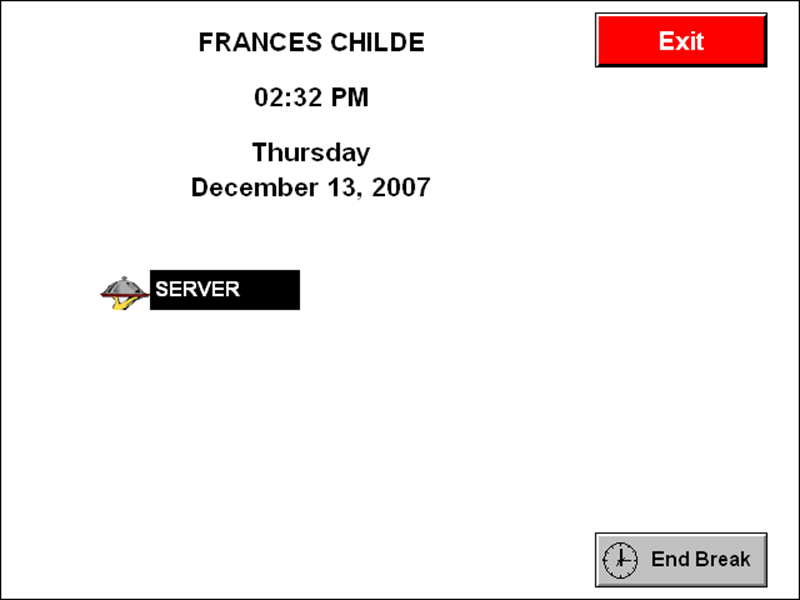
- Touch End Break in the lower right corner. The Employee Break receipt prints at the local printer.
Using required breaks with enforcements
Using a break with enforcements requires you to take a break within the time limits specified for the break and you must take the minimum required minutes.
Reference: This section is an extension to “Using required breaks”. Read that section as a prerequisite.
Using breaks with waive break and break reminder messages
When using waive break and break reminder messages for your consensual and mandatory breaks, the messages appear either when an employee clocks in to the FOH or when they clock out of the FOH, depending on the configuration of the break rule.
Reference: Refer to "Use case scenarios" for use case scenarios for waive break and break reminder messages.
Clocking in with waive break and break reminder messages
-
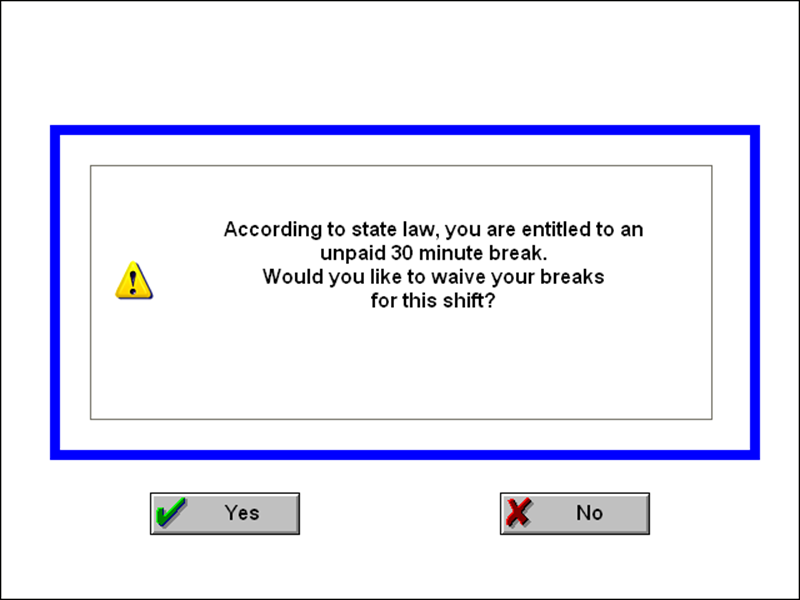
Clock in to FOH. The FOH Waive Break message appears for each consensual break for which you will be entitled during your shift.
-
Touch Yes to waive your break or touch No to not waive your break.
Tip: When you waive a break, the message does not appear again at clock out.
-
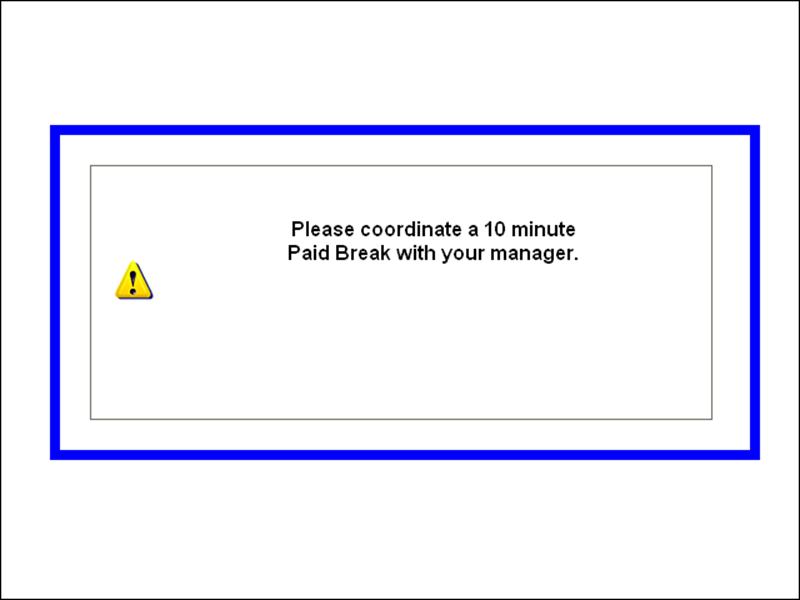
Repeat step 2 for any other waive break message that appears. For any break you do not waive, a break reminder message appears.
-
Touch the screen to remove the message.
-
Repeat step 5 for any other break reminder message that appears. After acknowledging all messages, the system clocks you in.
Clocking out with waive break messages
The following procedure depicts a typical scenario for waive break messages for consensual breaks that are configured to appear at clock out. For each consensual break you were not prompted to waive at clock in, the system prompts you to waive the break at clock out.
Break reminder messages do not appear at clock out.
- Clock out of the FOH. The FOH Waive Break message appears, for each consensual break for which you did not take during your shift.
- Touch Yes to waive your break or touch No to not waive your break.
- Repeat step 2 for any other waive break message that appears. After acknowledging all messages, the system clocks you in.
Tip: If you do not acknowledge a waive prompt and the system times out, the system records a ‘Not Waived’ response and records a ‘Not Prompted’ response for any remaining waive break prompts.
Return to the main "Employee Breaks" page.