Implementing one-touch quick combo buttons
Most restaurants add the items in a quick combo to the guest check using a single button touch. Depending upon your configuration, you can add a quick combo to the guest check in its entirety, or display a pop-up screen that allows selections for sides and drinks.
Adding one-touch quick combo buttons to the FOH
The Aloha POS system allows you to add the items in a quick combo to the guest check using a single button touch. You decide if you want the button to add a basic type of combo with no selections, such as 'Hamburger,' 'Small Fries,' and a 'Small Coke,' or allow for selections. When you allow guests to make choices, system-generated panels appear in the middle of the FOH screen during order entry.
To add one-touch quick combo buttons to the FOH:
- Select Maintenance > Screen Designer > Quick Service Screen Designer.
- Select Work with Panels.
- Select Panel > Open Panel, select a panel, and click OK.
- Right-click the panel and select New Button. The Properties dialog box appears.
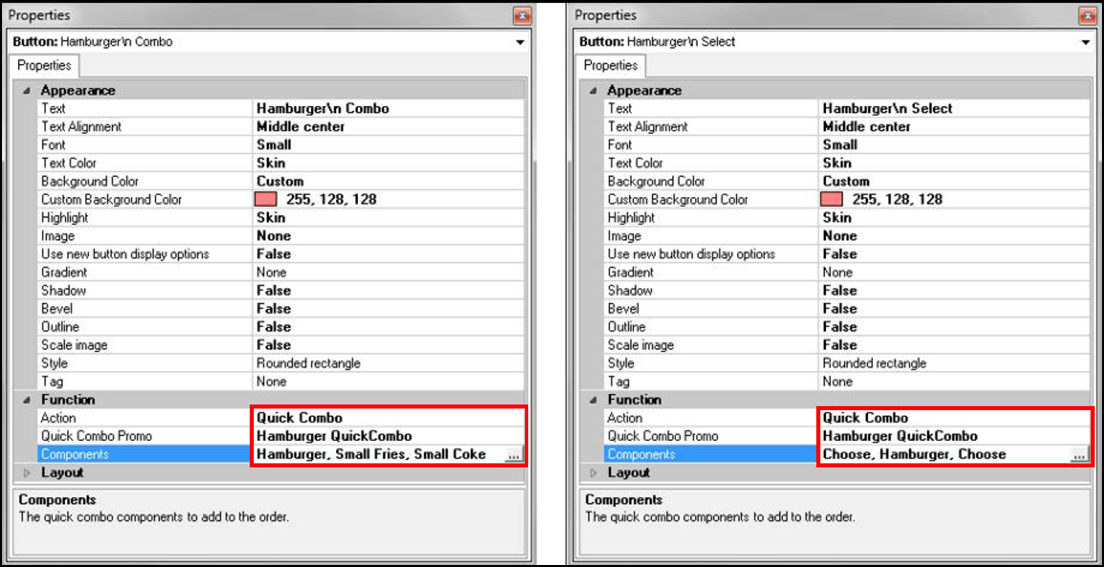
- Under the 'Function' group bar, select Quick Combo from the 'Action' drop-down list.
- Select the quick combo, such as Hamburger QuickCombo, from the 'Quick Combo Promo' drop-down list.
- Click the ellipsis (...). The Select Quick Combo Component dialog box appears.
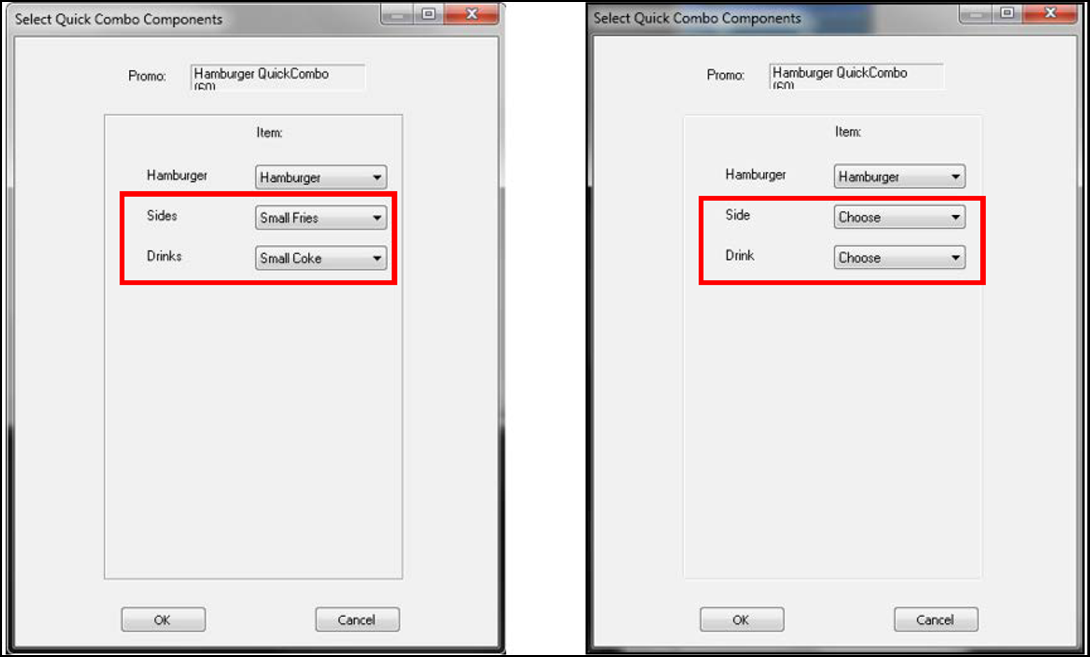
- Select the first component, such as 'Hamburger,' from the drop-down list.
- Select the second component, such as 'Small Fries,' from the 'Side' drop-down list. To allow your guests to choose a side, leave as 'Choose.'
- Select the third component, such as 'Small Coke,' from the 'Drink' drop-down list. To allow your guests to choose a drink, leave as 'Choose.'
- Click OK to close the Select Quick Combo Components dialog box.
- Under the 'Appearance' group bar, type a name for the button, such as 'Hamburger Combo,' or 'Hamburger Select.' To display text on multiple lines, insert '\n' without spaces for the line breaks, such as 'Hamburger\nCombo,' or 'Hamburger\nSelect.'
- Configure the remaining options as you would for any other button.
- Select Panel > Save Panel and exit Quick Service Screen Designer.
Customizing the system-generated quick combo screens
As mentioned earlier, when you allow guests to make choices, a system-generated panel appears for each item for which the guest can make a selection. By default, the system-generated panels appear as gray; however, you can use branded colors and make your screens more attractive. To do this, create a template panel where you define the attributes of the panel and the buttons on that panel.
Tip: The customization for the system-generated quick combo panels also affects the quick combo Item Substitution screen. Refer to Substituting quick combo components for more details.
To create a template for customizing the system-generated screens:
- Select Maintenance > Screen Designer > Quick Service Screen Designer.
- Select Work with Panels.
- Select Panel > New Panel.
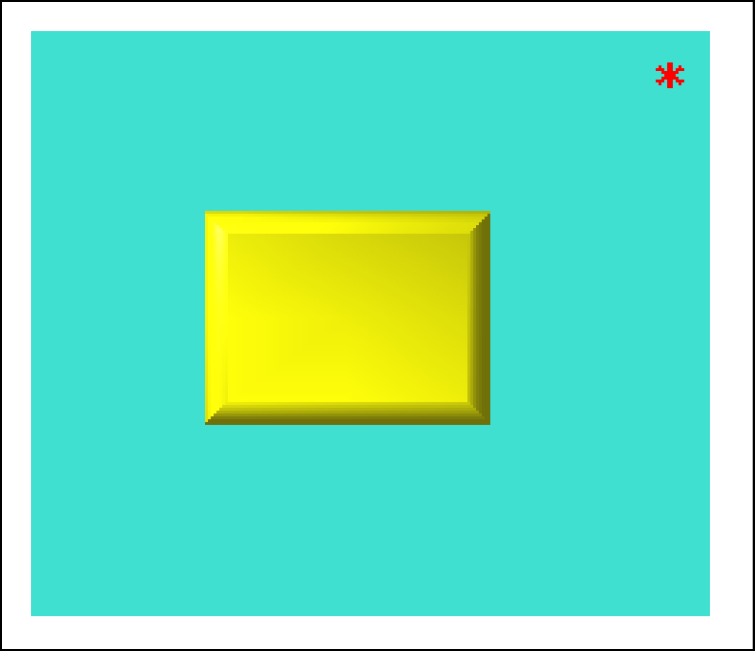
- Under the 'Appearance' group bar, configure the font, text color, and background of the panel, as desired.
- Type a name for the panel, such as 'QC Panel.'
- Right-click and select New Button.The Button Properties dialog box appears.
- Under the 'Appearance' group bar, configure the font, text color, and background of the button, as desired.
- Select Panel > Save Panel and exit the Quick Service Screen Designer.
After creating a template for the system generated panels, associate the template in Store Settings. You will also determine the order by which to sort the items on the system-generated panels. You can choose to sort the items by the Item ID, the item short name, or the upsell level.
To associate the template and determine the sort order:
- Select Maintenance > Business > Store.
- Select the Store Settings tab.
- Select the User Interface group located at the bottom of the screen.
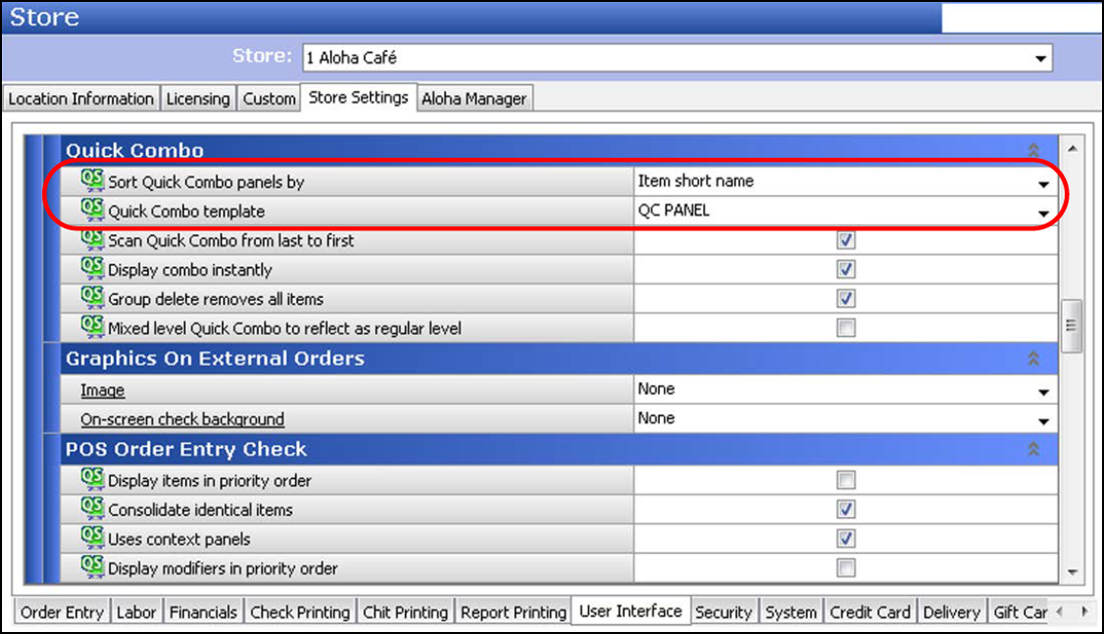
- Under the Display - Quick Combo group bar, select the order by which to sort the items on the system-generated panels. You can choose to sort the items by the Item ID, the item short name, or the upsell level.
- Select the template created in the previous procedure from the 'Quick Combo template' drop-down list.
- Click Save and exit the Store function.
You can optionally change the attributes per item at the item level. You must select the quick combo component in Item Maintenance and set the text color, background color, include an image, or hide the text.
To change the attributes at the item level:
- Select Maintenance > Menu > Items.
- Select a menu item used as a component in your quick combo from the drop-down list.
- Select the Display Options tab.
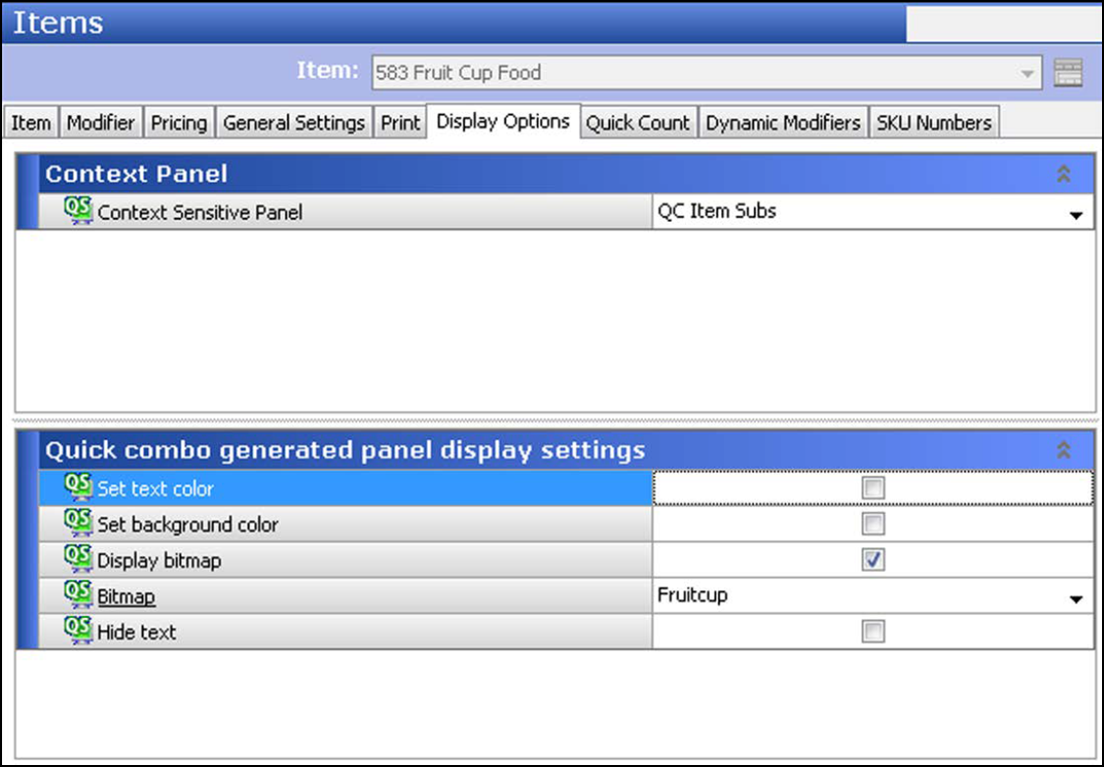
- Under the 'Quick combo generated panel display settings' group bar, select Set text color and define the color of the text that appears on the button.
- Select Set background color and define the color of the background that appears on the button.
- Select Display bitmap and choose the image to appear on the button.
- Select Hide text to suppress the text on the button. You may want to do this if you select an image for your button.
- Click Save.
- Repeat this procedure for any other component.
- Exit the Items function.
Adding a quick combo to the guest check using a one-touch button
When you use a one-touch button to add a quick combo to the guest check, you may encounter additional screens to complete the quick combo. Once finished, the system adds the quick combo to the guest check at its base level.
To add a quick combo to the guest check using a one-touch button:
- Log in to the FOH.
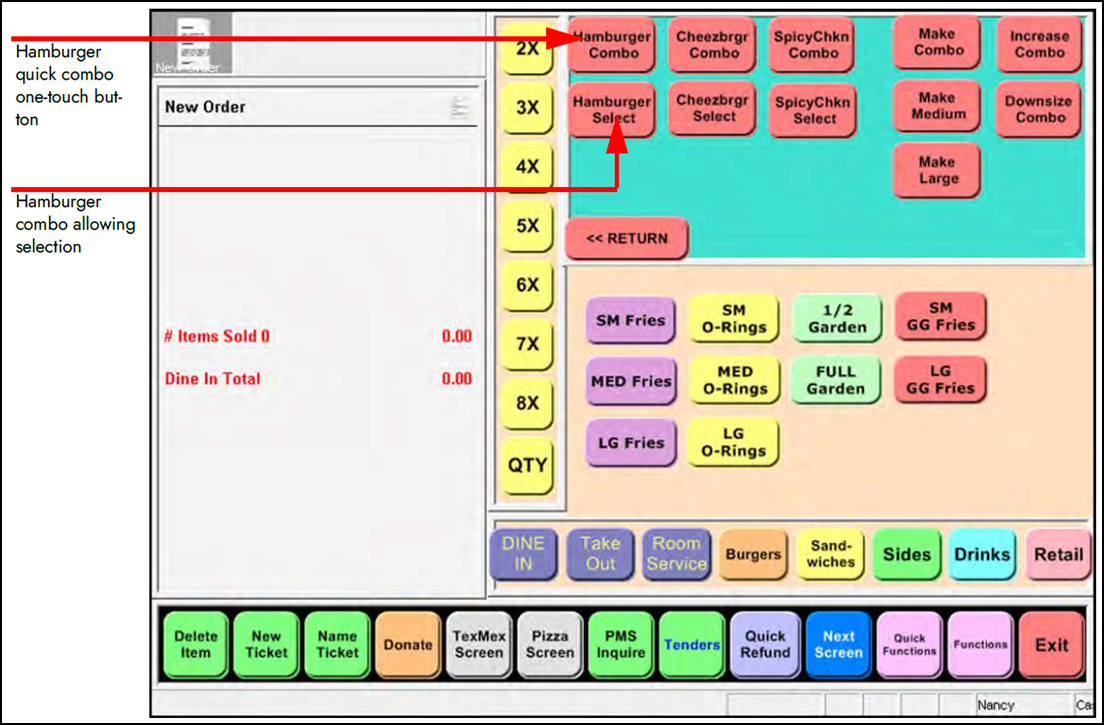
- Touch the button assigned to the Hamburger quick combo. The system builds the quick combo, or if additional screens appear, select the desired item(s) to complete the quick combo.
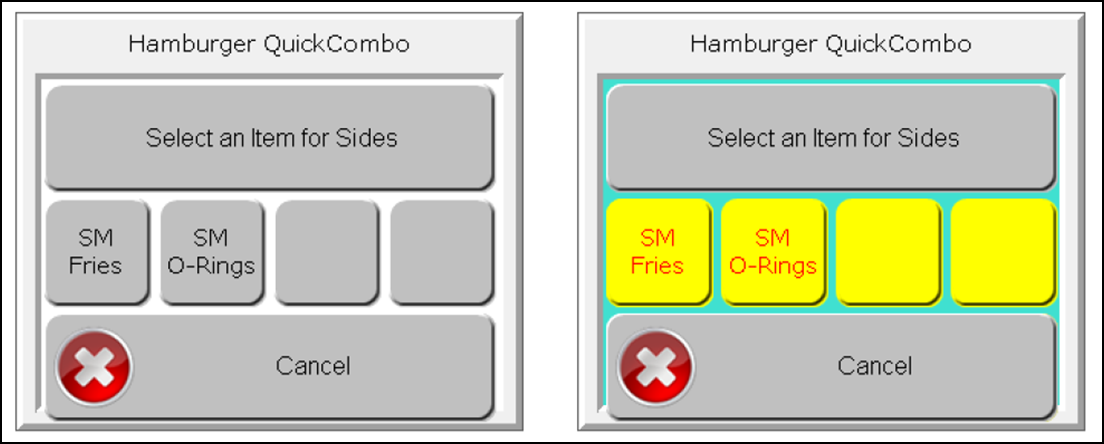 The quick combo appears in the guest check window at a discounted price.
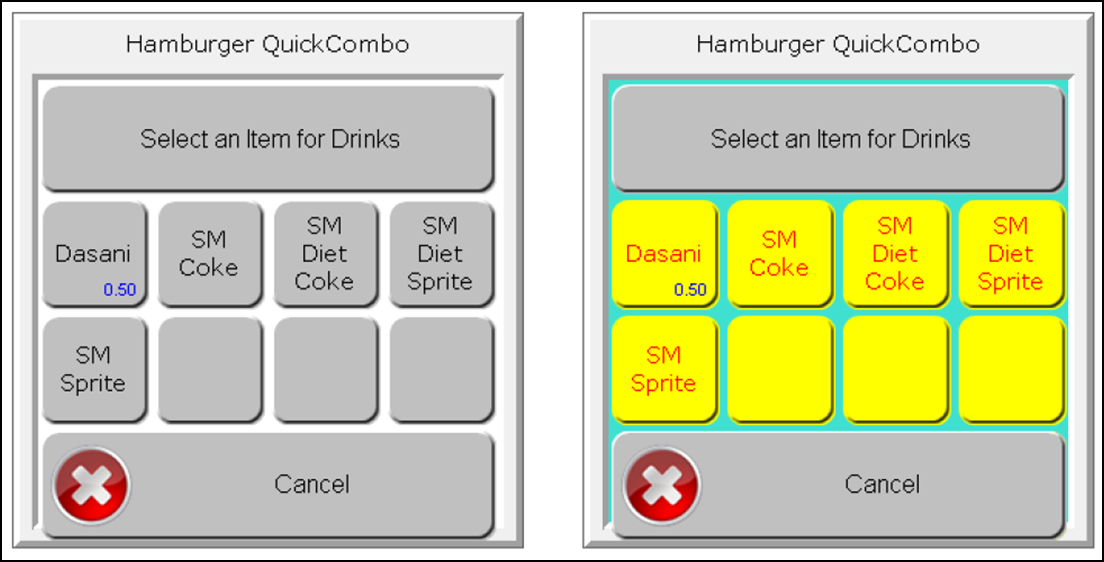
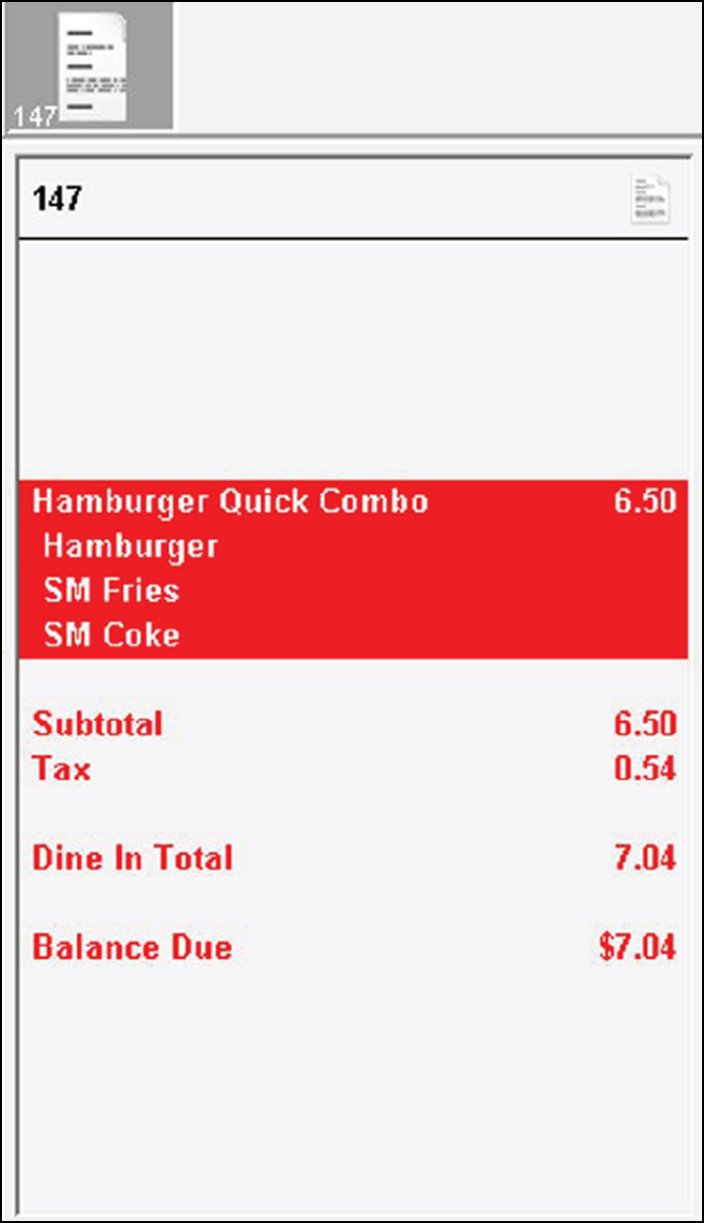
- Tender and close the check.
Continue to "Implementing a quick combo toggle button."