Substituting quick combo components
When you enter a quick combo, the default components appear. You can substitute the components based on what the guest orders. For example, a quick combo contains small French fries as the default, but the guest requests a fruit cup or onion rings instead. To do this, you configure item substitution, which is based on one category per component.
Tip: Before creating the substitution category, we recommend you access the Promotions function and determine the eligible items for each component for which you want item substitution, as you need to know these before creating the substitution category.
Configuring item substitution is a multi-step process. You must configure the quick combo to allow for item substitution and create categories of items you allow to be substituted for the component. Then you configure how to display the screens to use for substitution:
- System-generated screens, see Customizing the system-generated quick combo screens.
- Context panels, see Modifying quick combo components using context panels to display the items configured for substitution.
To create a substitution category for use with quick combo item substitution:
-
Select Maintenance > Menu > Categories.
-
Click the New drop-down arrow, select General as the 'Type,' and click OK.
-
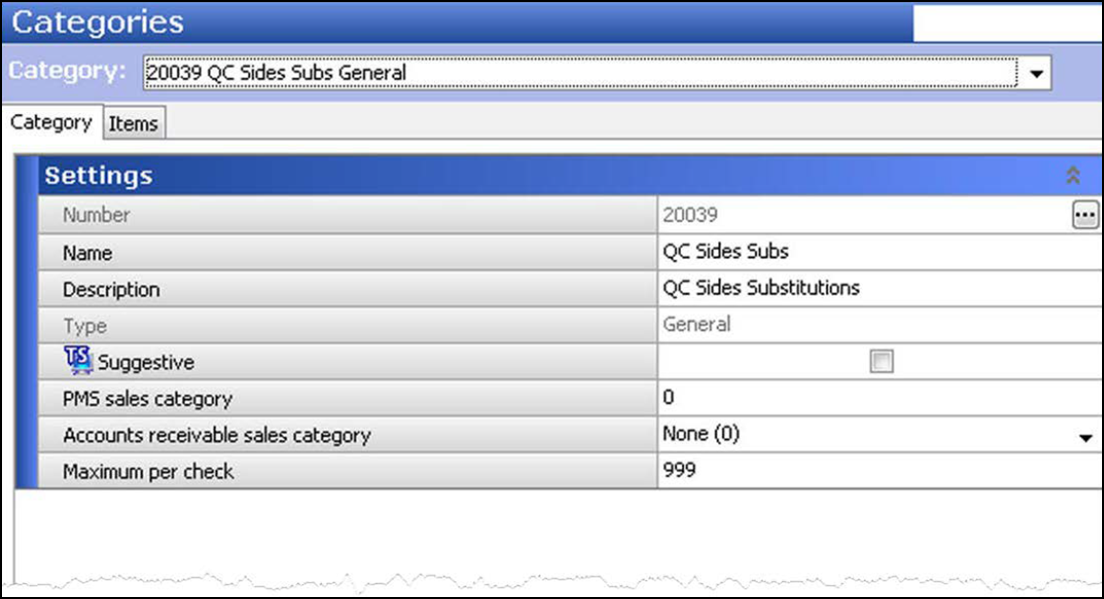
Under the 'Settings' group bar, accept the system assigned number or click the ellipsis (...) next to 'Number' to display the Number Assignment dialog box, from which you can choose an alternate number.
-
Type a name, such as 'QC Sides Subs,' for the category.
-
Type a description, such as 'QC Sides Substitutions.'
-
Select the Items tab.
-
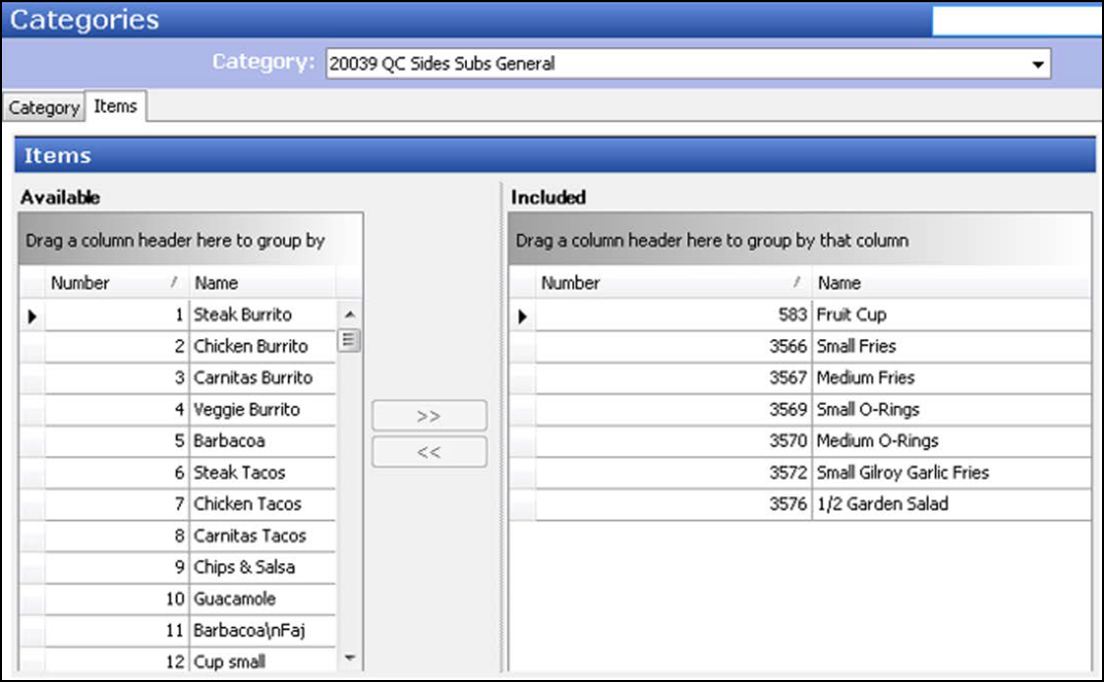
Select an item allowed for substitution from 'Available' and click >> to move it to 'Included.'
Tip: Be careful to select the items to achieve your desired result. If the item is defined as an eligible item for the component in Maintenance > Payments > Promotions > Quick Combo > Components QS tab, the system reconstructs the quick combo with the substituted item. If the item is not defined as an eligible item for the component, the system 'breaks' the quick combo and the items appear as a la carte pricing.
-
Repeat step 7 for each additional item you allow for substitution.
Tip: We recommend you also add the default menu items included in the quick combo itself. If the guest decides not to substitute a different item, perhaps refusing the additional cost; you can select the default components of the quick combo.
-
Click Save.
-
Repeat this procedure to create additional substitution categories, if necessary.
-
Exit the Categories function.
-
Continue to the next procedure.
To enable item substitution and assign the substitution category to a component:
- Select Maintenance > Payments > Promotions.
- Select a promotion configured as a quick combo from the drop-down list.
- Select the Component QS tab.
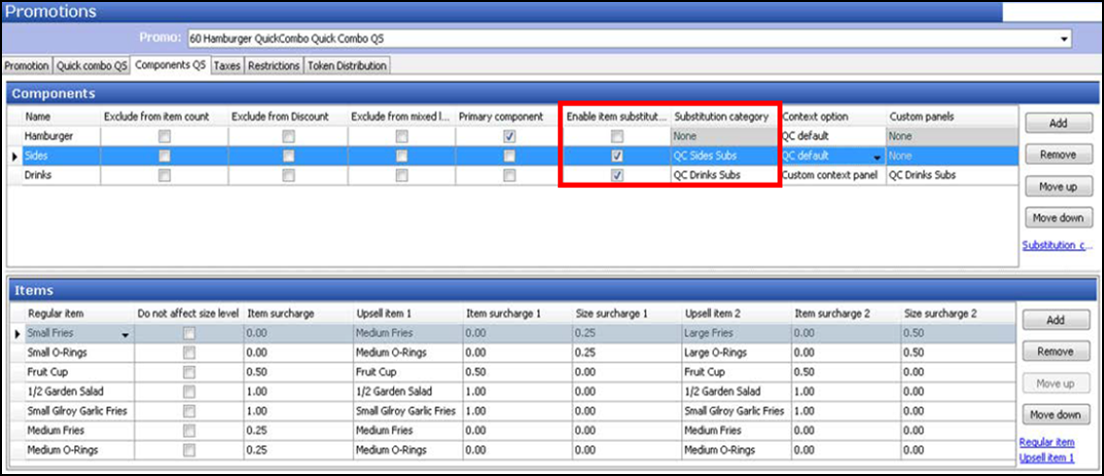
- Under the 'Components' group bar, select the component containing the item for which to allow item substitution. For example, 'Sides.'
- Select Enable item substitution to allow the guest to substitute the item in the quick combo for an eligible item.
- Select the category of eligible items for substitution you created earlier. For example, 'QC Sides Subs.'
- Click Save.
- Repeat this procedure for each component eligible for substitution.
- Exit the Promotions function.
Displaying a system-generated panel for quick combo substitution
After you enable item substitution and assign the substitution category, you can choose to use a system-generated panel from which to make the substitutions. By default, the system-generated panel appears as gray; however, you can use branded colors and make your screens more attractive. If not already done, follow the same procedure in Customizing the system-generated quick combo screens.
To display the system-generated panel for item substitution, you must:
- Set 'Context Panel' to 'None' in Maintenance > Payments > Promotions > 'Quick combo QS' tab.
- Select the 'Context option' as QC Default in Maintenance > Payments > Promotions > 'Components QS' tab.
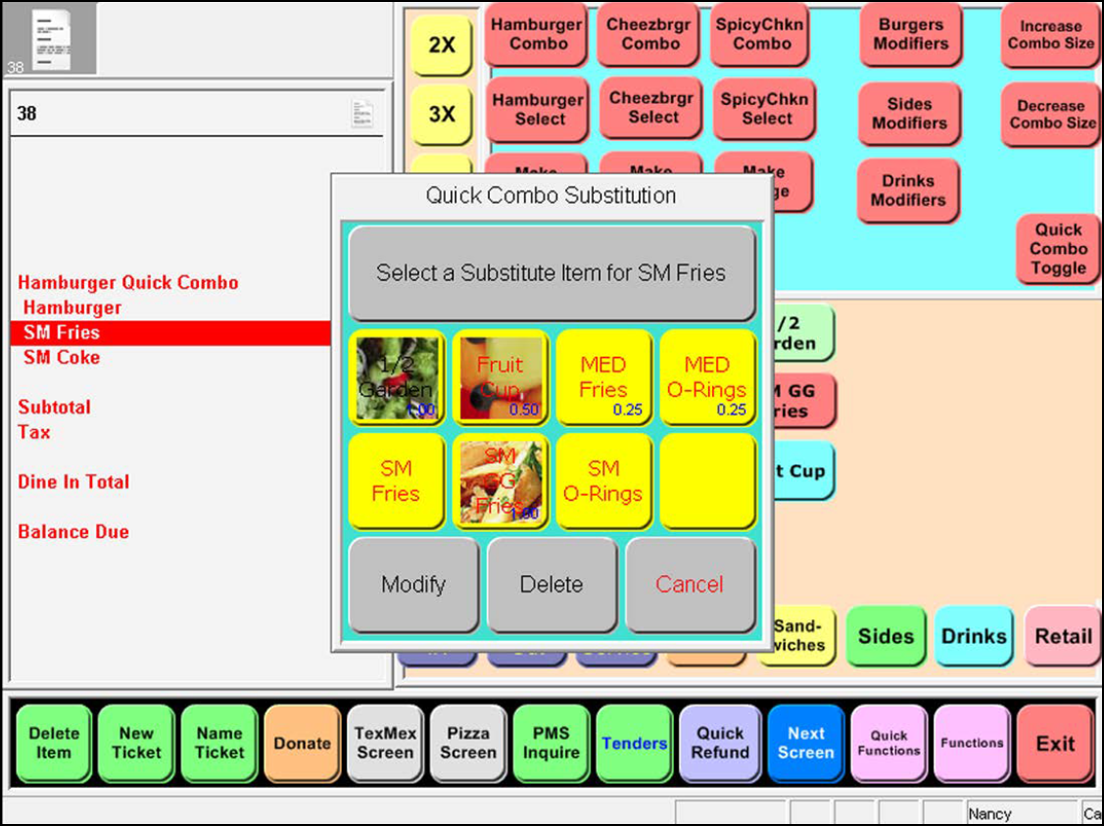
The system-generated panel features an additional screen, allowing you to make item substitutions using one-touch.
Displaying a context panel for quick combo substitution
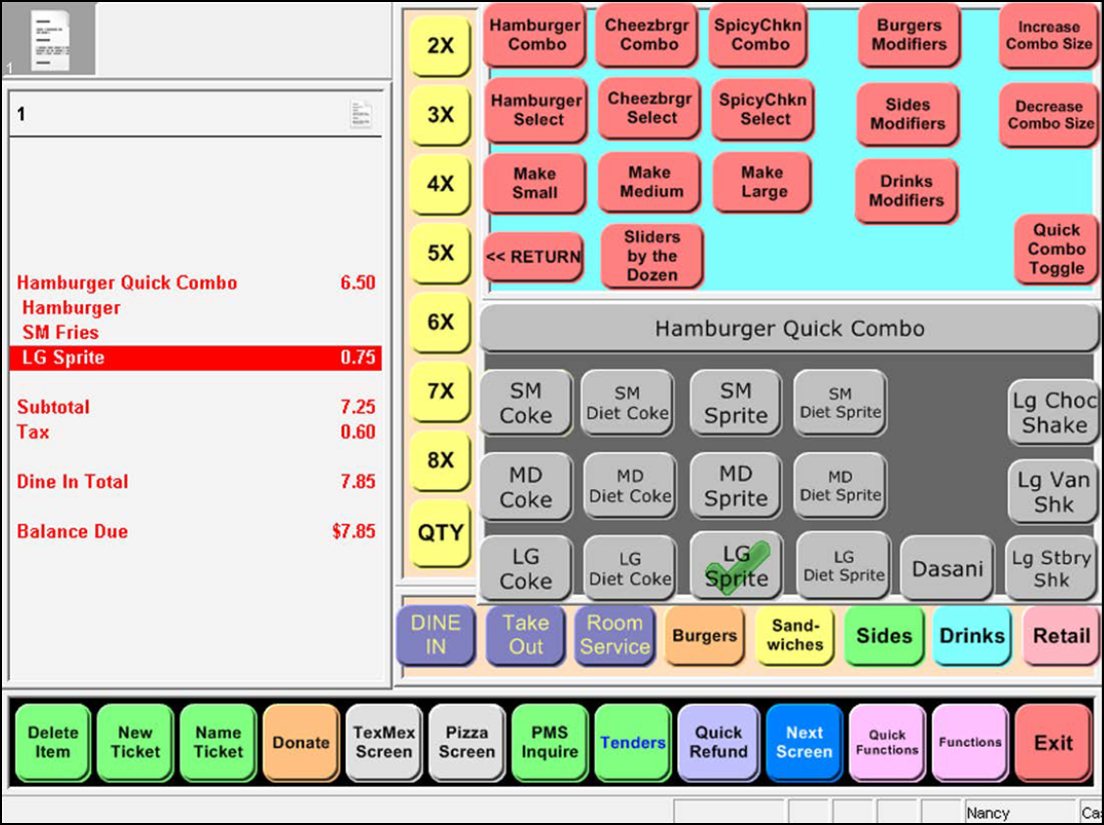
After you enable item substitution and assign the substitution category, you can choose to use a context panel from which to make the substitutions. You must configure dynamic substitution buttons for selection on a context panel. The dynamic substitution button detects if a quick combo component can be substituted for the item selected for this button, and, if yes, makes the substitution. When the entire quick combo is selected in the guest check window, the system first tries to make the substitution for the primary component, and if unsuccessful, tries to make the substitution for the other components in the quick combo, beginning from the first component and moving down to the last component.
You can associate only one context panel per component. In the previous procedure, Modifying quick combo components using context panels, we instructed you to create a panel for modifying a quick combo. In this procedure, we add the dynamic substitution buttons that allow you to substitute components.
To add a dynamic substitution button to a context panel:
- Select Maintenance > Screen Designer > Quick Service Screen Designer.
- Select Work with Panels.
- Select Panel > Open Panel, select a panel to use, and click OK.
- Right-click and select New Button. The Properties dialog box for buttons replaces the Properties dialog box for panels.
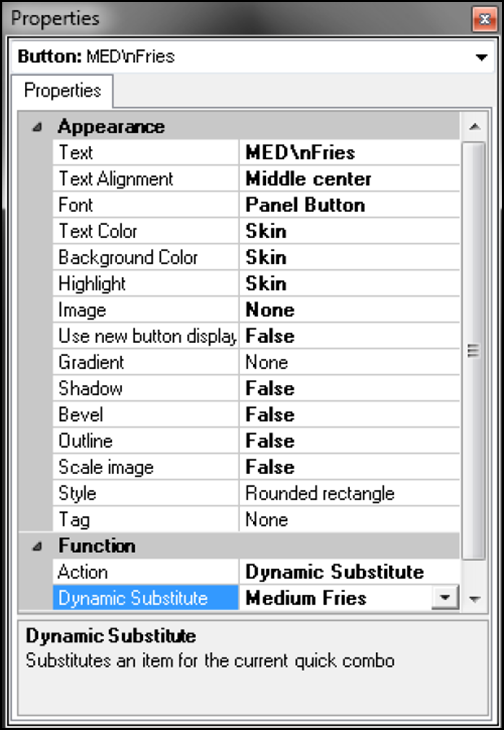
- Under the 'Function' group bar, select Dynamic Substitute from the 'Action' drop-down list.
- Select a menu item for which you allow guests to make substitutions from the 'Dynamic Substitute' drop-down list.
- Configure the remaining options as you would for any other button.
- Under the 'Appearance' group bar, type a name for the button, such as 'MED Fries.' To display text on multiple lines, insert '\n' without spaces for the line breaks, such as 'MED\nFries.'
- Repeat steps 4 through 8 for each additional dynamic substitution button.
- Select Panel > Save Panel and exit the Screen Designer function.
The context panel appears when you select the quick combo and allows for dynamic substitution.
Continue to "Displaying dynamic text on buttons (optional.")