Creating email lists
You may want to send emails to lists of people outside of your segments. Typically, these are called Subscription lists; however, you can also send messages using Transactional lists and Test lists.
Access to these lists varies based on your package and user permissions.
- Subscription Lists — Premium Package only
- Transactional Lists — Premium Package only
- Test Lists — Core, Advanced and Premium Packages
To create an email list:
-
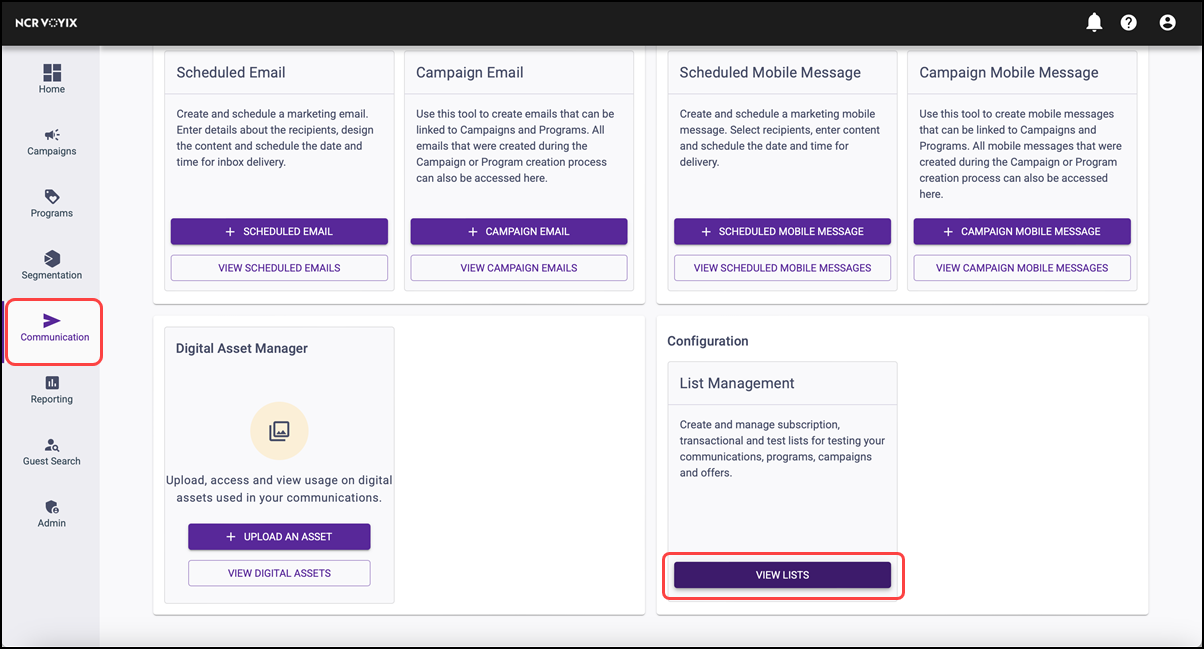
Navigate to the Communication page.
-
Under the Settings tile, within List Management, click GO.
-
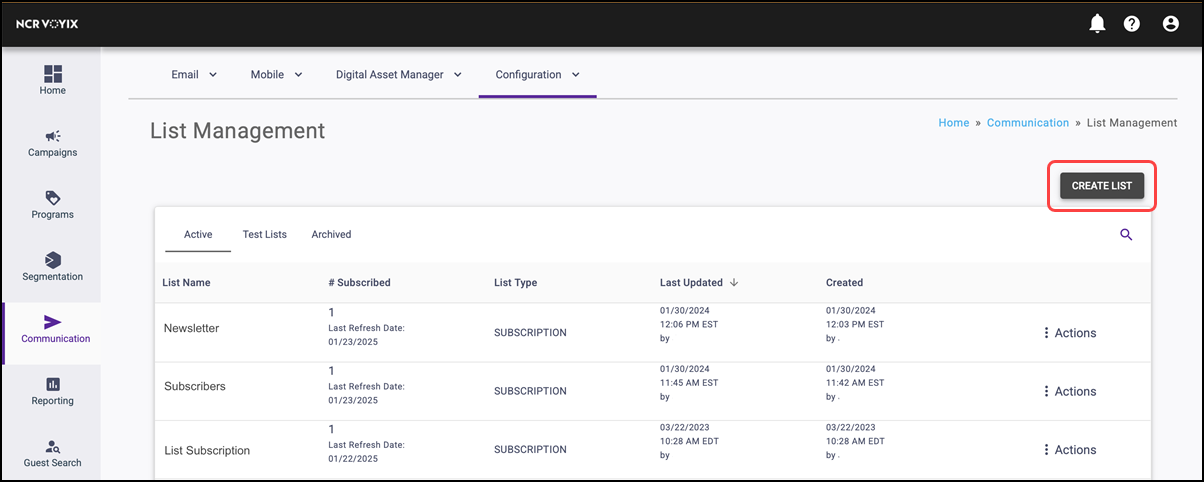
Click CREATE LIST.
-
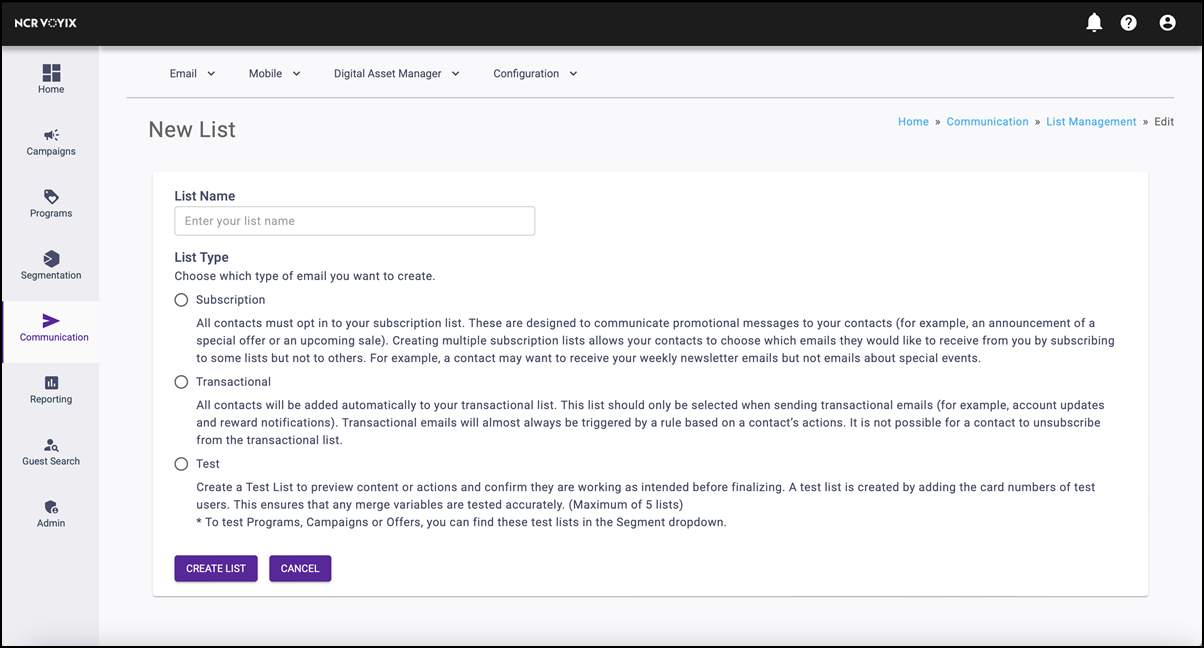
Select the type of list you would like to create.
Subscription Lists (Premium Package) Use Subscription lists to communicate promotional messages and general messages to your contacts from the brand. You will likely utilize Subscription lists most of the time. Transactional List (Premium Package Use Transaction lists for campaign-triggered content and messages that would be based on account updates. All contacts are automatically added to your Transaction list. Your brand can only have one Transaction list. Contacts cannot unsubscribe from this list. Test Lists (Core, Advanced, and Premium Package Use Test lists to quickly send a test message to a small group of users without influencing reporting stats. Using a Test list enables your test message to populate merge variables because your test will send to an actual card from the database. -
Click CREATE LIST. Then follow the instructions within the flow.
Subscription lists
Use Subscription lists to communicate promotional messages and general messages to your contacts (for example, an announcement of a special offer or an upcoming sale). You will likely use Subscription lists most of the time. A contact must opt in to a Subscription list to receive the messages sent to that list. Creating multiple Subscription lists allows a contact to choose the messages they would like to receive by subscribing to some lists but not to others. For example, a contact may want to receive your weekly newsletter emails but not emails about special events.
If you select Subscription, follow the steps to create a new Subscription list.
Opting customers into a Subscription list
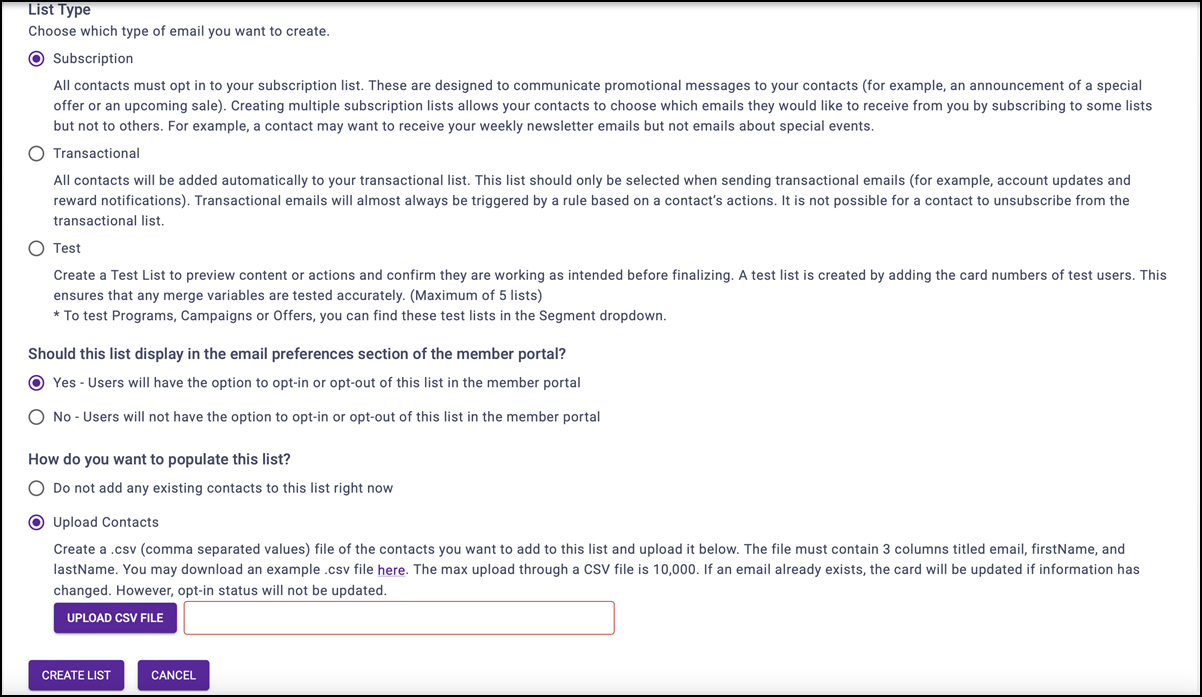
To add new customers to a Subscription list, upload the contacts to your Subscription list using a .csv (comma separated values) file. The file must contain three columns titled email, firstName, and lastName. You can download an example.csv file here. The max upload through a .csv file is 10,000. If an email already exists, the card is updated when information has changed; however, the opt-in status is not updated.
To upload the .csv file:
- Select Upload Contacts for the How do you want to populate this list? option.
- Click UPLOAD CSV FILE.
- Browse to and select the .csv file.
- Click CREATE LIST to update the list.
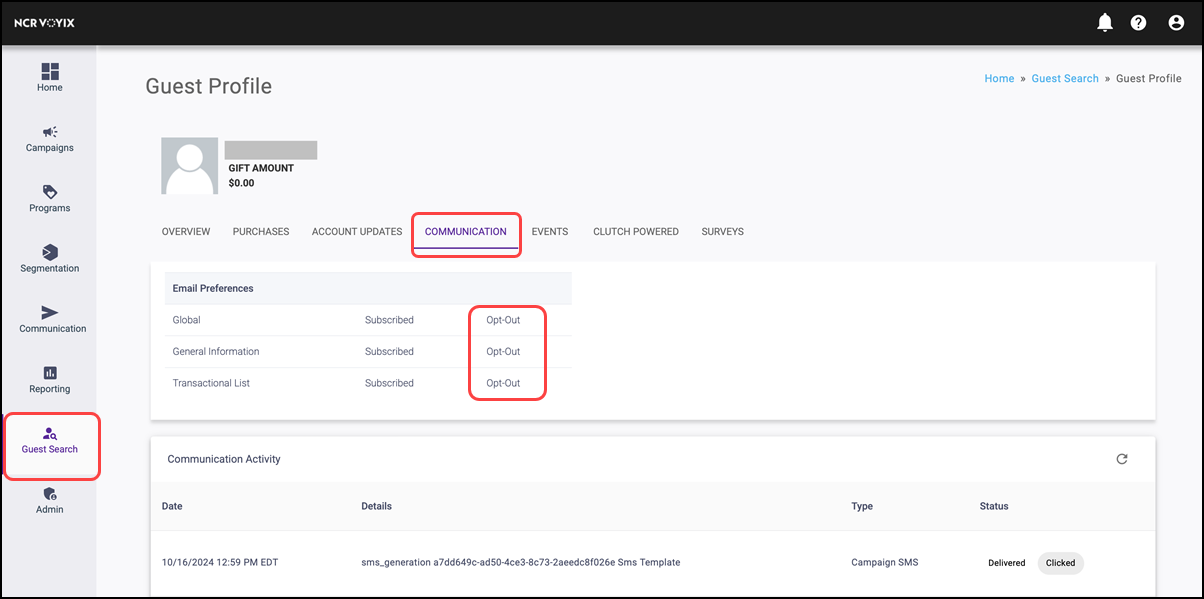
Opting customers out of a Subscription list
To opt a customer out of a list, search for the customer within the Guest Search section. Find and click their profile. Click the COMMUNICATION tab. Under Email Preferences, find the list to unsubscribe the guest from and click Opt-Out to remove them from this list.
Transactional lists
Use Transactional lists for campaign-triggered content and messages that are based on account updates. All contacts are automatically added to your Transactional list. Your brand can only have one Transactional list. Contacts cannot unsubscribe from this list.
If needed, you can select Transactional to add contacts to this list.
Test lists
Use Test lists to quickly send a test message to a small group of users without influencing reporting stats. Using a Test list enables your test message to populate merge variables because your test sends to an actual card from the database.
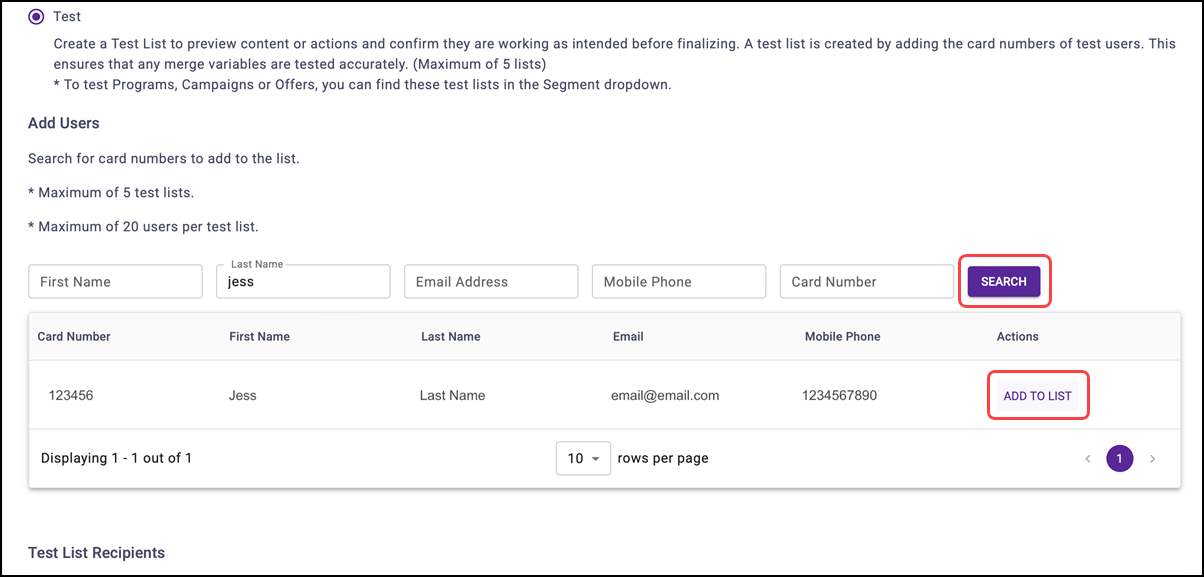
It is always a good idea to send a test email to ensure everything looks good before sending it out to your customers.
- Select the Test list type.
- Click SEARCH to locate customer cards to add to your test list.
- Click ADD TO LIST.
To learn more about how to use a Test list, click here.
Email list actions
While viewing lists in the table view on the List Management page, an Actions bar is available for each list. Click the Actions bar to view a popup menu from which you can perform a variety of actions for a list.
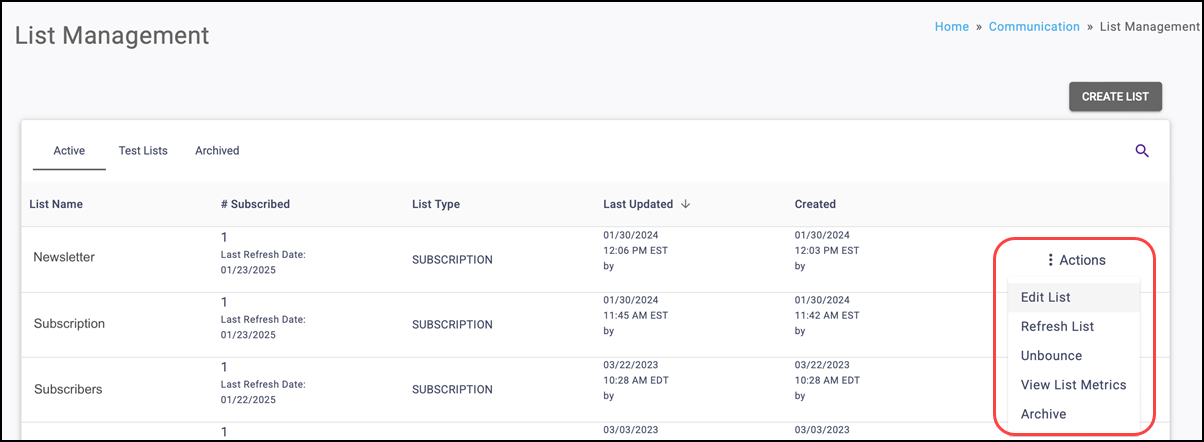
Edit a list
Use Edit List to easily edit a list name, and add and remove contacts from the list.
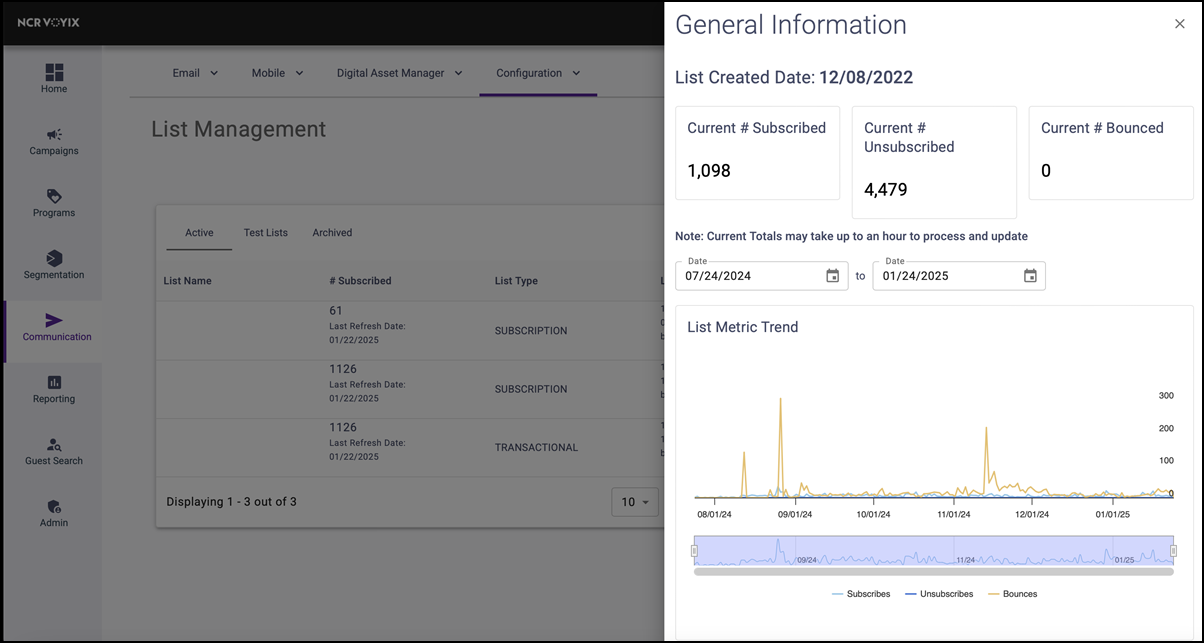
View list metrics
Use View List Metrics to view such things as the number of subscribers, unsubscribers, and bounces over time.
Archive a list
Use Archive to archive a list. Once you archive a list, it appears within the Archived tab instead of the Active tab.