Counting inventory and managing locations (Inventory Core only)
Effective inventory control is essential for restaurant operations, and it begins with accurate inventory counting at different locations at the store. This feature allows managers and employees to perform real-time inventory counts directly from designated storage areas — such as walk-ins, dry storage, or bar stations — ensuring that stock levels are recorded precisely where items are stored and used. The Inventory counting and location management greatly enhances the efficiency and accuracy of tracking inventory in your store. This helps in tracking the exact amount of stock available at the store.
Managers can use the ‘Counting and locations’ feature to:
- Maintain a list of inventory items at a store. See Maintaining the inventory list.
- Manage the inventory items at a location in the store. See Managing the inventory locations.
- Count and post the count of inventory items. See Counting and posting the inventory.
Maintaining the inventory list
Use the ‘Inventory list’ option to define count frequencies and to set parameters for the inventory posting process. The frequency of schedules to count the inventory item includes:
- Shift — Inventory count for each shift.
- Daily — Inventory count for each day.
- Weekly — Inventory count for each week.
- Fiscal Period — Inventory count for a fiscal period.
- Unassigned — Inventory items that are not counted and not assigned to any location. The items that contain one or more inventory units appear under ‘Unassigned.’
To update the inventory list:
-
Select Inventory > Counting and locations > Inventory lists. The Inventory list screen appears with the inventory list frequency, inventory count for that frequency, and an option to update the frequency of the items.
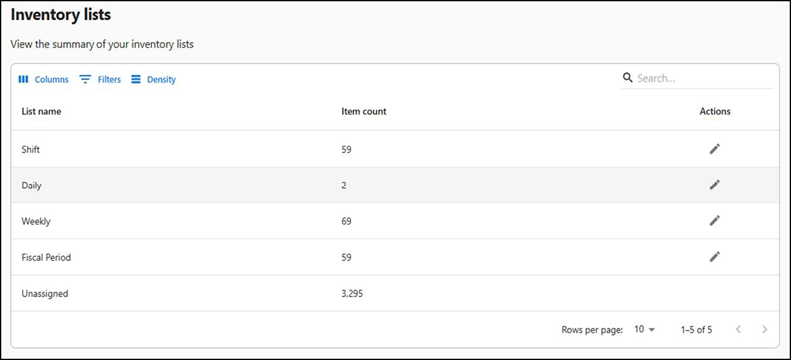
- List name — Frequency at which the counting must be scheduled.
- Item count — Number of inventory items scheduled for counting.
- Actions — Option to update (add or remove) the inventory items from counting.
-
Perform one of the following to update the inventory list:
-
Click the pencil icon.
Or,
-
Select a list name to view the exact item(s) counted for that frequency including the inventory name and its unit of measure. Click Edit.
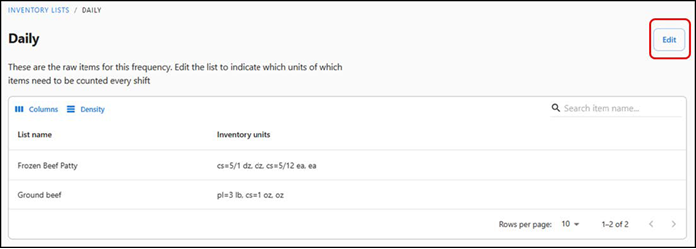
The following screen appears. The inventory items that are set to count for the corresponding frequency is already selected and the items that are not part of the counting are not selected.

-
-
Select or clear the items to update the counting of the inventory item. The selected items are counted as per the scheduled frequency and the cleared (not selected) items are ignored. The inventory items selected for counting appear under the Current selection section.
-
Click Save to confirm the changes.
Managing the inventory locations
Use the ‘Locations’ option to define or maintain physical storage locations. Creating storage locations allows you to assign raw items and prep items to be stored and counted in each location.
To manage the locations:
-
Select Inventory > Counting and locations > Locations. The Locations screen appears.
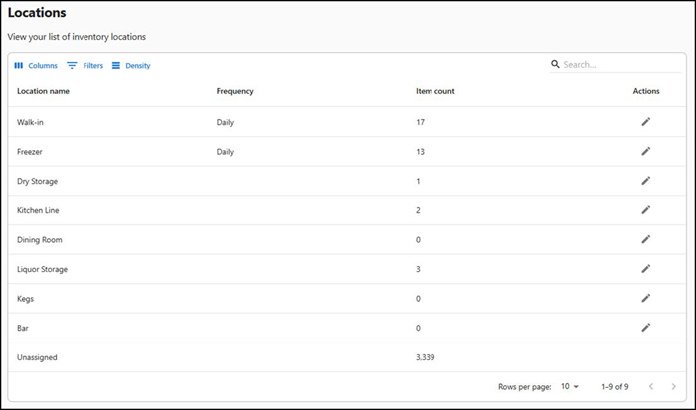
- Location name — Specific place at the store where the inventory is stored.
- Frequency — Routine during which the inventory count must be recorded.
- Item count — Count of inventory item stored at the location.
- Actions — Option to update the inventory list at the location.
-
Select a location name to view the exact item(s) stored at that location and its count. For instance, if the store stores sliced ham in a freezer, on selecting the location name, you can view the sliced ham item and its count (Inventory units).
Tip: Alternatively, if you want to go back to the locations main screen, select the Locations menu.
-
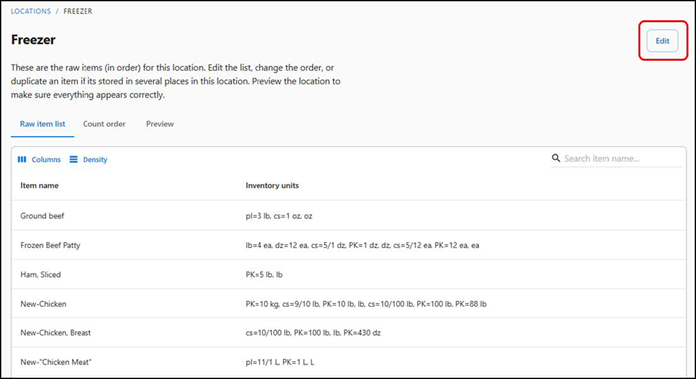
Click Edit at the top-right corner to view the items list at the location in detailed and edit if required. The Raw item list screen appears by default.
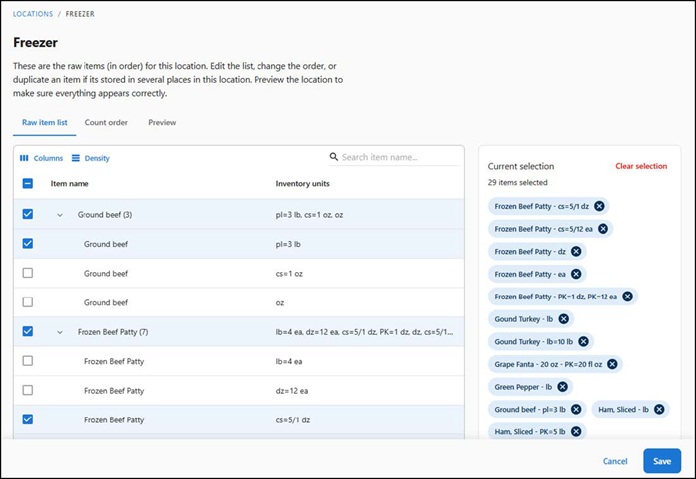
- Item name — Items stored at the location. As per the above figure, the items are stored in the freezer.
- Inventory units — Units of measure of the corresponding items stored in the location. For example, as per the above figure, five packets of sliced ham is stored in the freezer.
-
Select or clear the items to update the list of inventory items available at the location. The selected items are counted and stored at selected location whereas the cleared (not selected) items are not counted or stored. The inventory items stored at the selected location appear under the Current selection section.
-
Click Save to confirm the changes.
-
Click Edit at the top-right corner.
-
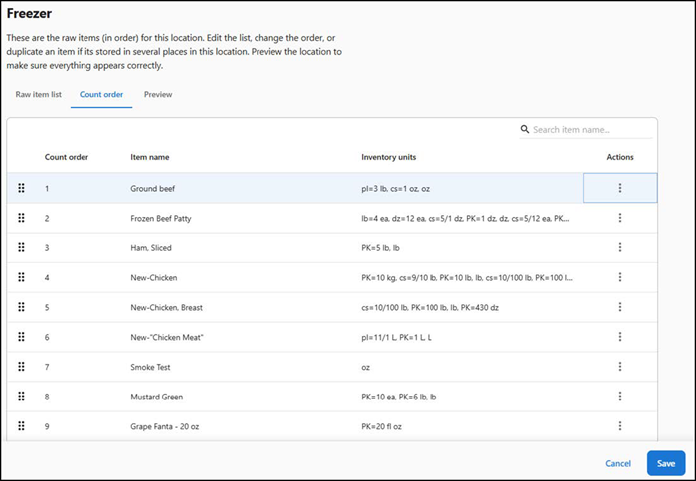
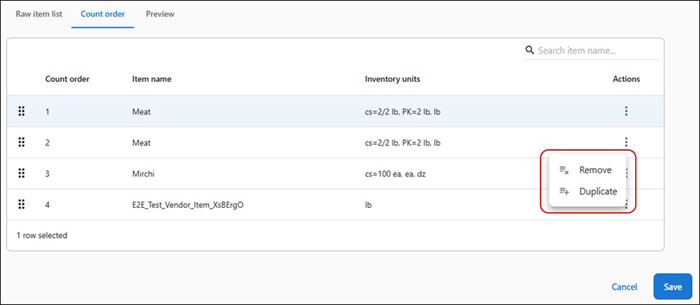
Click Count order. The details in the Count order tab appear.
-
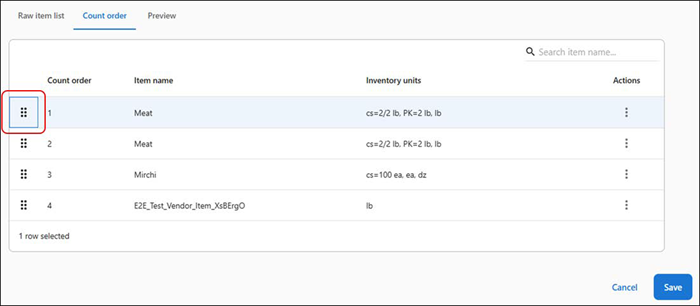
Perform the following actions as required to rearrange the order in which the list of items must appear for counting in the ‘Inventory count’ screen:
- If you want to rearrange the items according to sheet-to-shelf sequence, click and drag the double three dots icon and arrange the items.
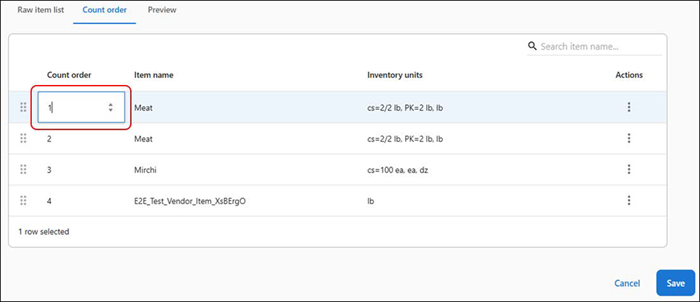
- If you want to manually type the sequence order, click the count order option and type the sequence count.
- If you want to rearrange the items according to sheet-to-shelf sequence, click and drag the double three dots icon and arrange the items.
-
If you want to duplicate or remove an item, click the three dots icon. The option to remove or duplicate a specific item appears. If you remove or duplicate an item, click Save to confirm the changes.
-
Click Save to confirm the changes.
-
Click Edit at the top-right corner.
-
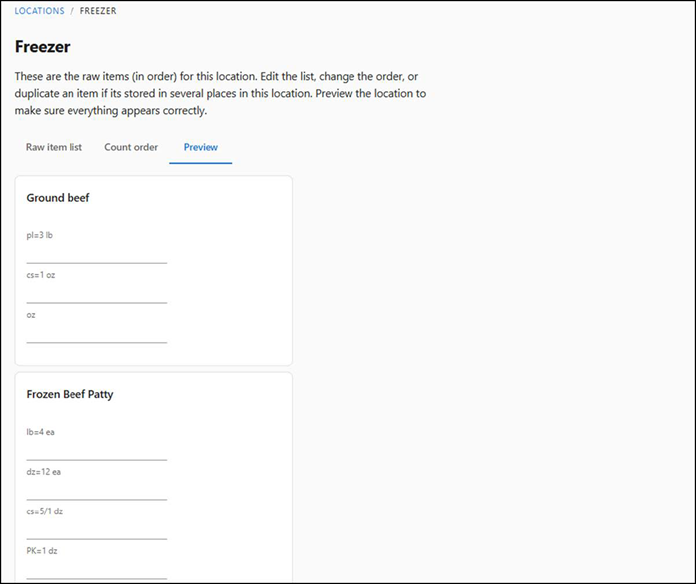
Click Preview to view the final list of inventory items at each location available at the store.
Counting and posting the inventory
Use the ‘Inventory count’ option to record the physically counted stock of inventory items at their store. The counted values can be recorded using a smartphone. Record the inventory items at the beginning or end of a day, week, or fiscal period. In the case the manager wants to count the items during a shift, the manager can record the count by specifying the exact date and time of the shift. Additionally, a manager can record the count of unassigned items.
To count and post the inventory item for a day:
-
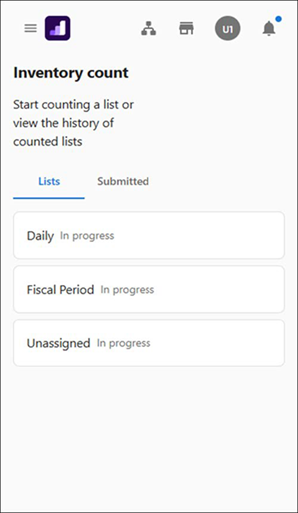
Select Inventory > Counting and locations > Inventory count. The Inventory count screen appears.
-
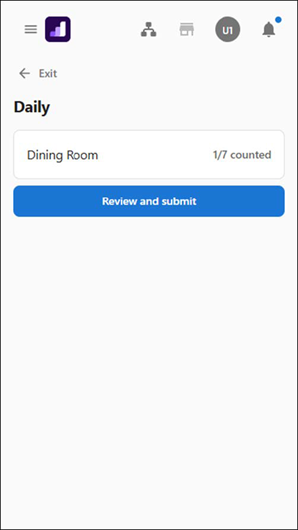
Under ‘Lists’, select Daily. The locations for which the frequency of counting is set as ‘Daily’ appears. The total number of inventory items at the location appears. In the below figure, for the ‘Dining Room’ location, the total inventory items to count is seven with one counted out of seven.
-
Select the inventory location to count.
Note: If you are counting for the first time, a pop-up message appears to start the counting or preview the locations before counting. The pop-up message do not appear after the first count is initiated.
-
Click Start.
-
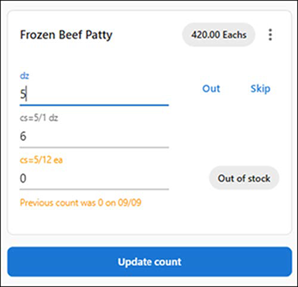
Click the tile to enter the actual count of inventory items. The following indications appear when you click the options to enter the count:
-
The options to specify an item is out of stock or to skip the counting of an item.
-
The system auto-calculates the weight of the inventory item and the result appears next to the inventory item name. Additionally, the unit of measure appears to easily understand the conversion details.
-
The previously counted values appear below each option. For example, ‘Previous count was 0 on 04/09’ indicates the previous counted entries were posted on the mentioned date and the counted value was zero.
-
The ‘Out of stock’ indication appears if the count is ‘0’.
-
-
Click the three-dotted icon. The following options appear:

-
Click Out to specify the inventory item is out-of-stock.
-
Click Skip to bypass the entry of a count for the inventory item.
Tip: Click Save & exit (at the top) to close the screen to save the entered details and revisit again to update the count later. The count is not posted. A success message of saving the details appear.
-
-
Click Update count (scroll to bottom) to confirm the count of inventory items at the location.
-
Click Review and submit. The pop-up window with the option to review and submit the details for posting appears:
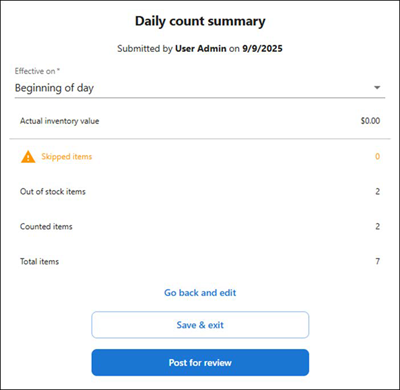
- Effective on — Period of the day, either beginning or end of day, when the count was posted.
- Actual inventory value — Total value of the inventory items.
- Skipped items — Number of inventory items at the location that were not counted.
- Out of stock items — Number of inventory items at the location that were marked as out of stock.
- Counted items — Number of inventory items at the location that were counted and the corresponding values were entered in the system.
- Total items — Grand total of the inventory items at the location.
-
Perform one of the following actions:
- Click Go back and edit to close the pop-up window without saving the details. The count is not posted.
- Click Save & exit to save the details but do not post the count.
- Click Post for review to save and post the count instantly. The counted details is sent to the manager for approval. The counted details appear under the Submitted tab for review. For information about the submitted inventory count, see Posting the inventory count.
Posting the inventory count
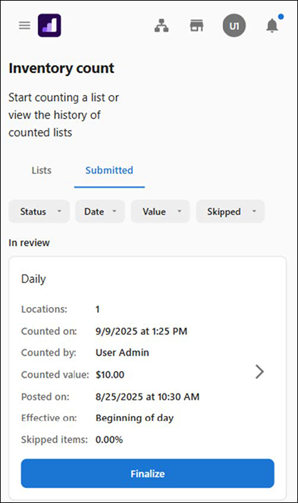
The counted inventory list appears under the Submitted tab in a tile format. The lists under the ‘In review’ section awaits manager’s approval. The Managers can review the counted list and finalize it. Likewise, administrator can unfinalize a list, if required.
Filter options
Use the following filter options to locate the required counting list:
- Status — Retrieve the counting list based on the current status of approval:
- In review — Counted inventory items waiting for manager’s approval. Manager can use the Finalize option to approve.
- Finalized — Reviewed and approved by the manager.
- Unfinalized — Reviewed and finalized; however, the administrator opted to unfinalize the already finalized list. You can review the list and finalize it again.
- Date — Retrieve the counting list for a specific period.
- Value — Retrieve the counting list based on the counted value.
- Skipped — Retrieve the counting list based on inventory items skipped percentage.
Counting list details
All the inventory items that are counted and posted appear under the ‘Submitted’ tab with the following details:
- Period — Time frame when the counting occurred.
- Locations — Number of locations available to count.
- Counted on — Date and time when the counting occurred.
- Counted by — Employee who counted the inventory items.
- Approved by — Manager who approved the counting. This option appears for finalized list only.
- Counted value — Total value of the counted items. You have an option to update the values.
- Posted on — Date and time when the previous posting occurred.
- Effective on — Time of the day (beginning or end) when the count was posted.
- Skipped items — Items that were not counted (indicated in percentage).
To finalize a counted list:
- Select Inventory > Counting and locations > Inventory count. The Inventory count screen appears.
- Click the Submitted tab.
- Under ‘In review’, click Finalize. A success message appears. The corresponding counting list is finalized and moved under the ‘Finalized’ status.
To unfinalize a counted list:
-
Select Inventory > Counting and locations > Inventory count. The Inventory count screen appears.
-
Click the Submitted tab.
-
For an administrator, under ‘Finalized’, click the three-dotted icon available on the tile. The Unfinalize option appears.
-
Click Unfinalize. A success message appears. The corresponding counting list is moved under the ‘Unfinalized’ status.

Note: You can use the Finalize option to finalize the counting list again.
Return to "About inventory management,"