Defining company information
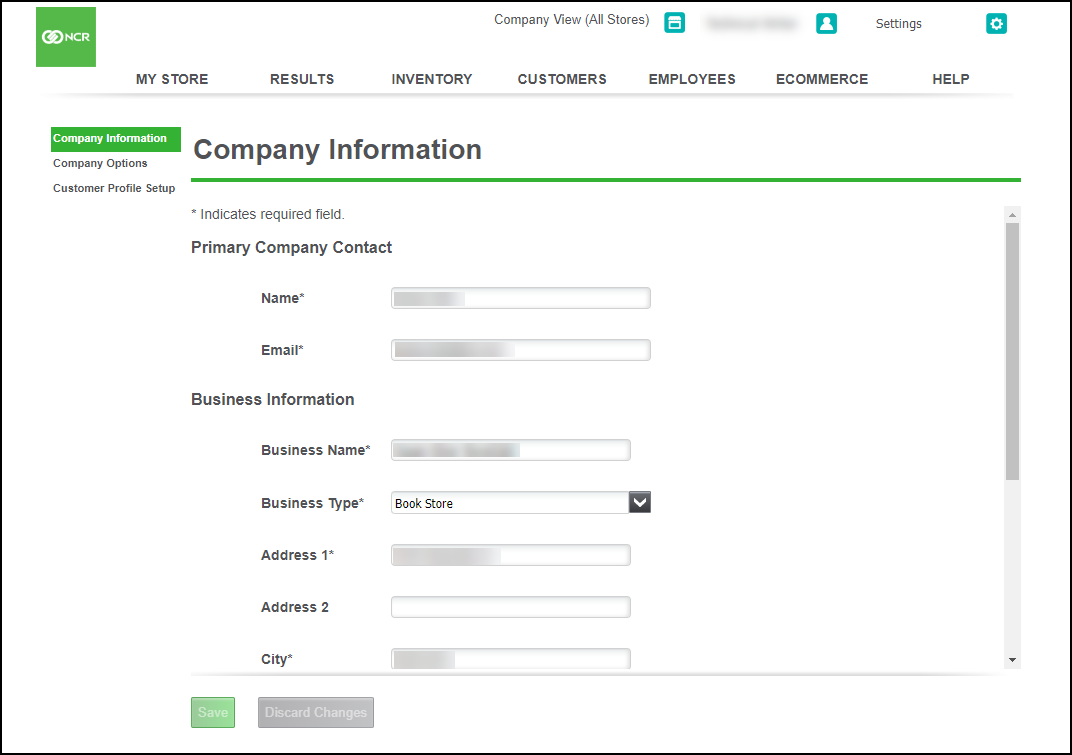
When you first access Settings > Company Information, it is pre-populated with the information entered when your account was created. You need to log in using Company View (All Stores) to expose options not available to you when you log in to a specific site. You cannot make any changes to Company Information when you log in to a specific site; it is read only.
This function offers three menu options (on the left): Company Information, Company Options and Customer Profile Setup.
Using company information
Use the Company Information menu option to designate a primary contact person, the company address, website address, and more.
- Log in to Back Office.
- Select Settings > Company Information. The Company Information menu option appears by default.

- Under the 'Primary Company Contact' group bar, review and edit the name and email address for the primary contact person for your company, if necessary.
- Under the 'Business Information' group bar, review and edit the business name, type, and address, if necessary.
- Under the Email Marketing Information' group bar, type the Website URL for your company. The system displays the website URL on receipts you print and email.
- Type the email address to use as the 'Reply To Email' for email marketing. The system displays this email address as the ‘From’ email address in any email marketing messages.
- Click Save.
- Continue to the next procedure.
Using company options
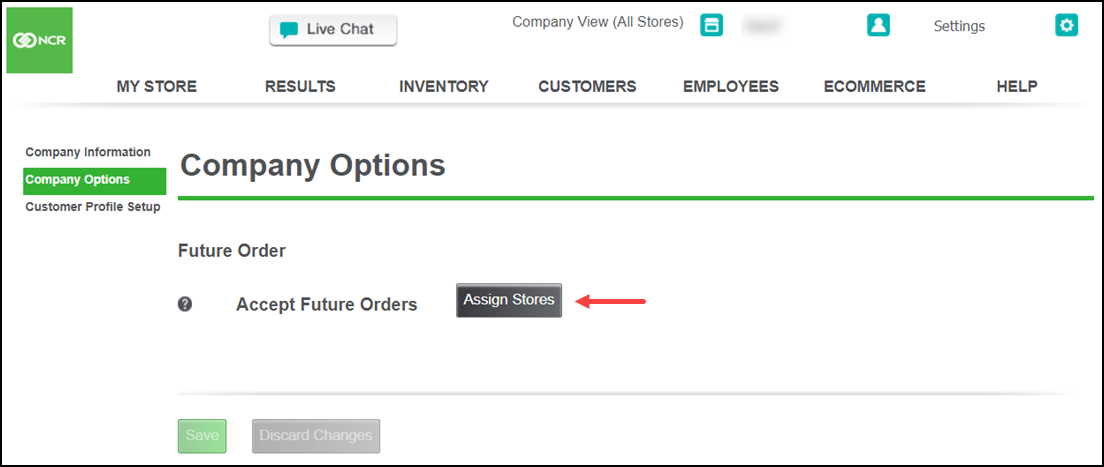
Use the Company Options menu option to enable or disable future orders.
- Log in to Back Office.
- Select Settings > Company Information. The Company Information menu option appears by default.
- Select Company Options from the left menu.

- Click Assign Stores to assign a particular store for future orders feature while in company view.
Customer profile attributes
The Customer Profile lets you customize attributes for your customers that are specific to your store. You can create these attributes and assign them to each customer to keep track of their preferences. For example, a makeup company may want to track attributes called skin type, while a wine shop may want to track attributes called red wines. Attribute fields and their available options are displayed on the customer record on the POS.

To create customer attributes in the Back Office:
- Log in to Back Office.
- Select Settings > Company Information. The Company Information menu option appears by default.
- Select Customer Profile Setup from the left menu.
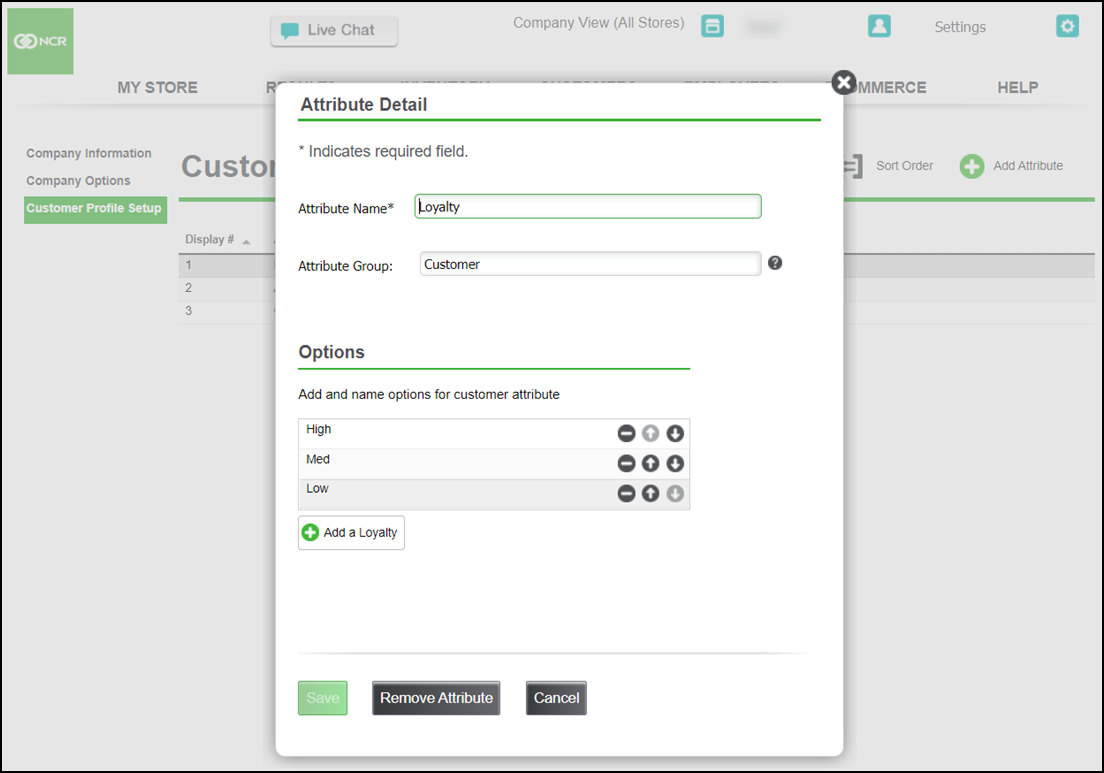
- Click Add Attribute.
- Enter name, group, and options for the attribute.

- The Attribute Name field name can be alphanumeric up to 30 characters.
- The Attribute Name field must be unique across all attributes.
- The Attribute Group field is an optional field that can be used to group Attributes together. For example, you might create an attribute called “Red” and one called “White” and add them both to an Attribute Group called Wines.
Export customer attributes
- Log in to the Back Office with a specific store.
- Select the RESULTS tab.

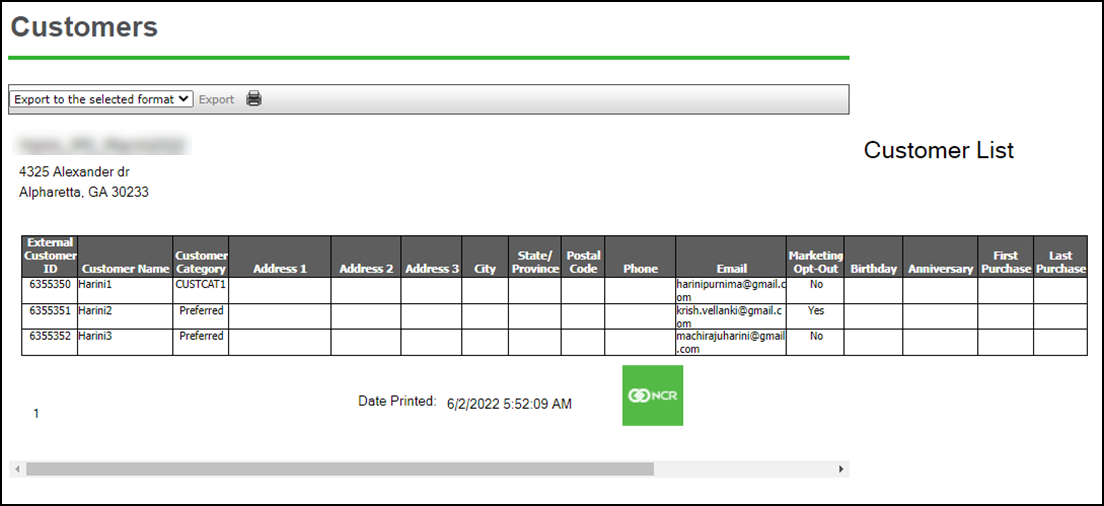
- Select Customers under the List section.
- Select your desired format to view the report.
- Click Export.
Looking for resources or help with Silver? Click here.