Working with taxes
Use Settings > Taxes to configure as many tax categories as necessary for the items you sell, and designate a specific tax category to use as the default while creating a new item; otherwise, the system defaults the tax category to a ‘No Tax’ category. For example, create a tax category called Food Tax and assign it to food items, such as hamburgers and french fries. Create another tax category called Alcohol and assign it to your alcoholic beverages, such as beer and wine. When you create a guest check for a hamburger, french fries, and a beer, the system calculates the applicable tax based on the tax rate associated with the tax category assigned to each item.
Configuring taxes
Use the Taxes menu option to define the tax categories needed for the items you sell.
-
Log in to the Back Office website using Company View (All Stores).
-
Select Settings > Taxes. The Taxes menu option appears by default.
-
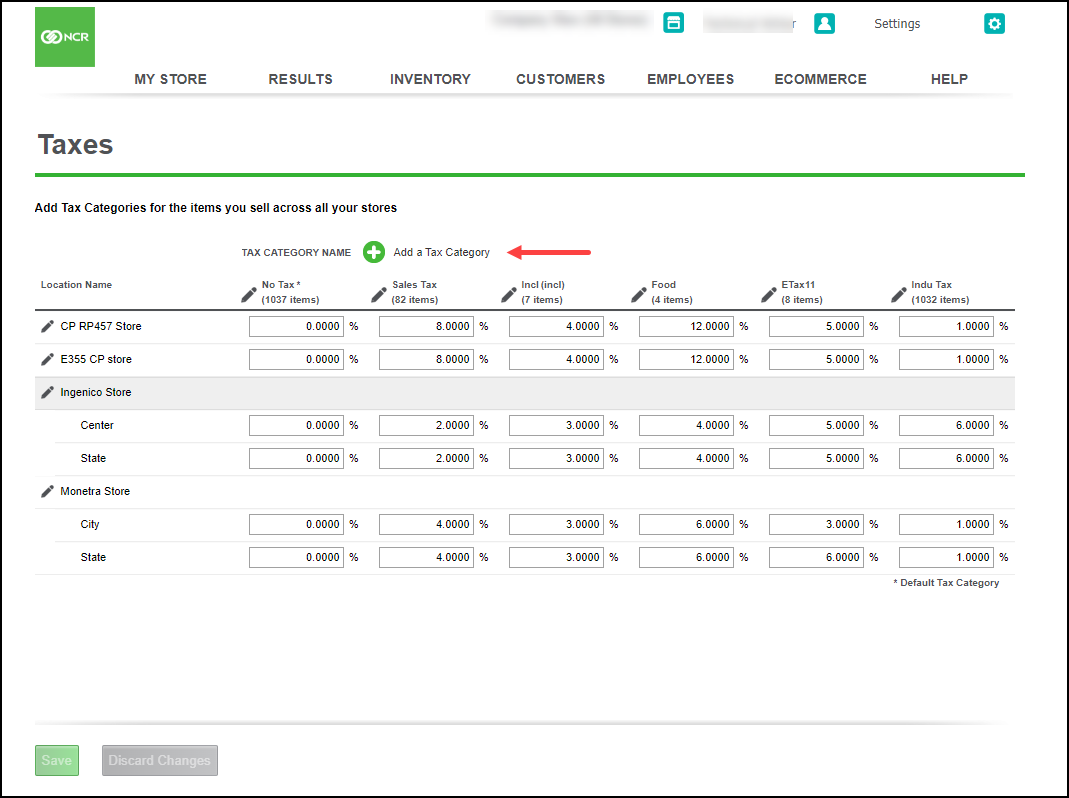
Click Add a Tax Category. The Add New Tax Category screen appears.
-
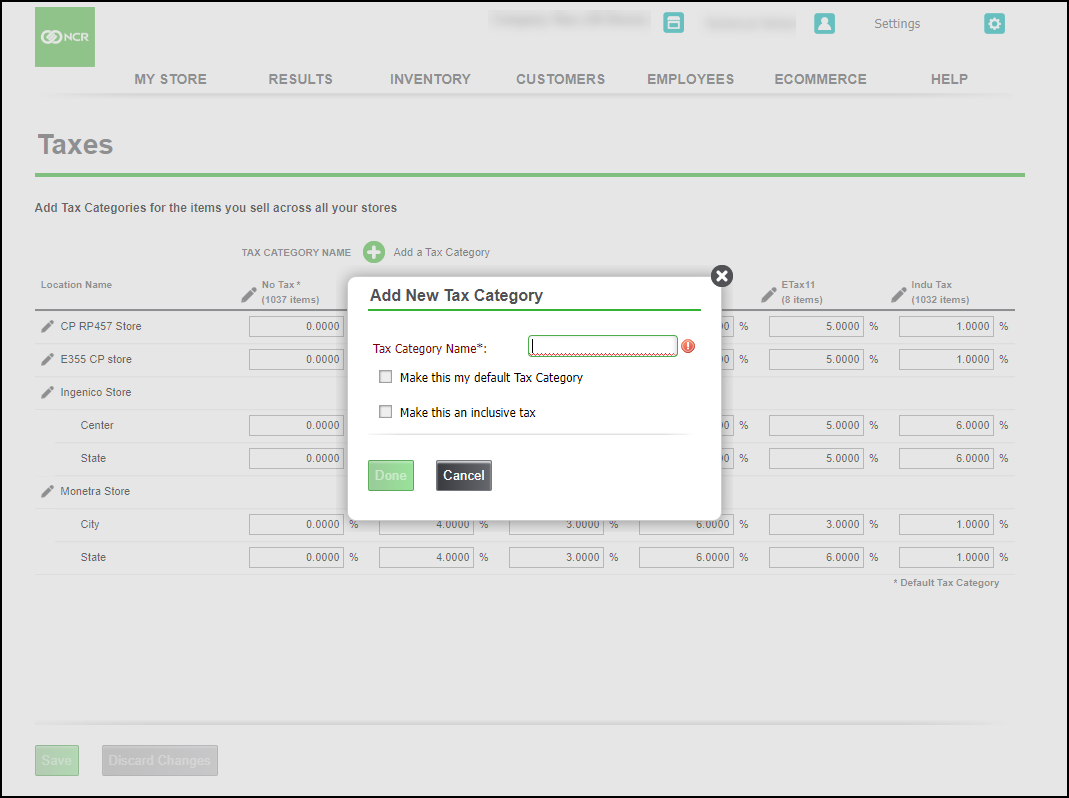
Type a name for the tax category.
-
Select Make this my default Tax Category, to use this tax category and to apply for your main tax rate. You can only select one tax category as the default. On the Taxes page, the system identifies the default tax category with an asterisk next to the name.
Note: When you create a new item, the system applies the default tax category to the item; however, you can change it if needed.
-
Select Make this an inclusive tax to include the sales tax in the quoted price to make the transaction easier for some items, such as alcoholic beverages. (incl) appears on the Taxes page next to any tax category designated as inclusive.
-
Click Done to return to the Taxes screen. The new tax category appears to the right of Location Name.
-
Locate the category just created and type the applicable tax rate.
-
Click Save.
Working with tax jurisdictions
In some locations, it is mandatory to track the collection of sales tax according to tax jurisdiction and to display the sales tax assessed by tax jurisdiction on the customer receipt. Silver Back Office enables you to easily configure your tax settings to comply with your tax jurisdiction regulations.
To work with tax jurisdictions:
-
Log in to the Back Office website.
-
Select Settings > Taxes.
-
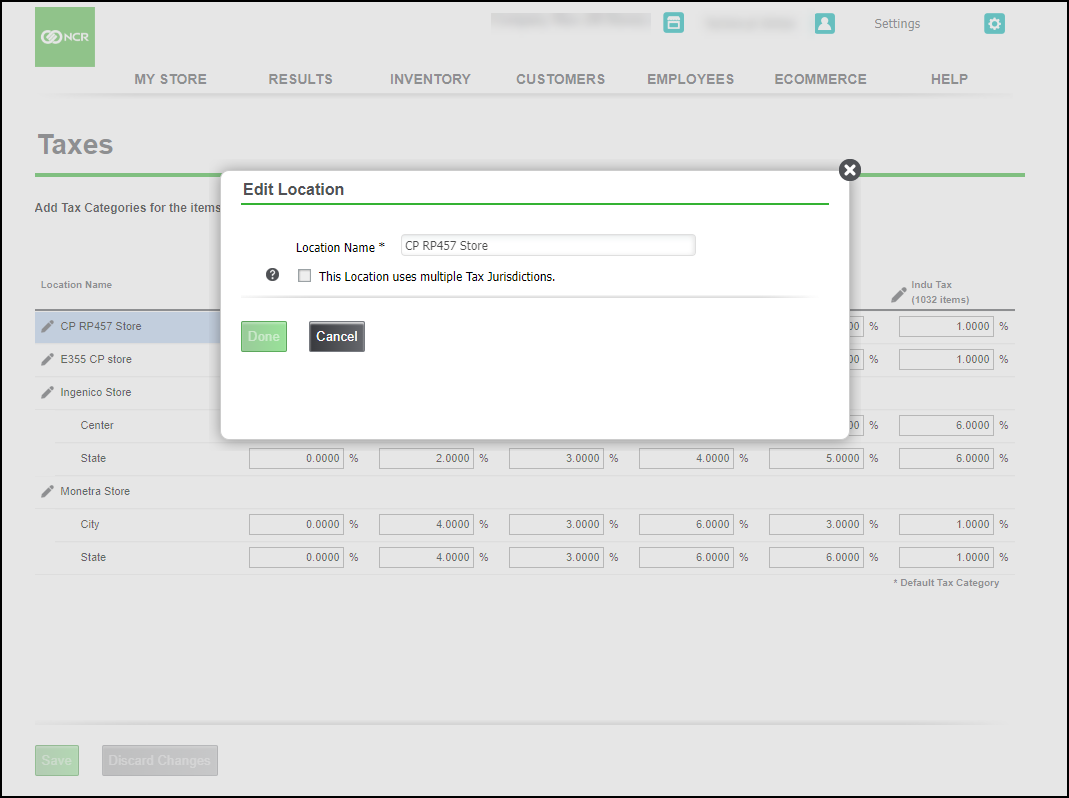
Click a location from the Location Name column. The Edit Location screen appears.
-
Select This location uses multiple Tax Jurisdictions, to include Tax Jurisdictions. The Edit Location screen expands.
-
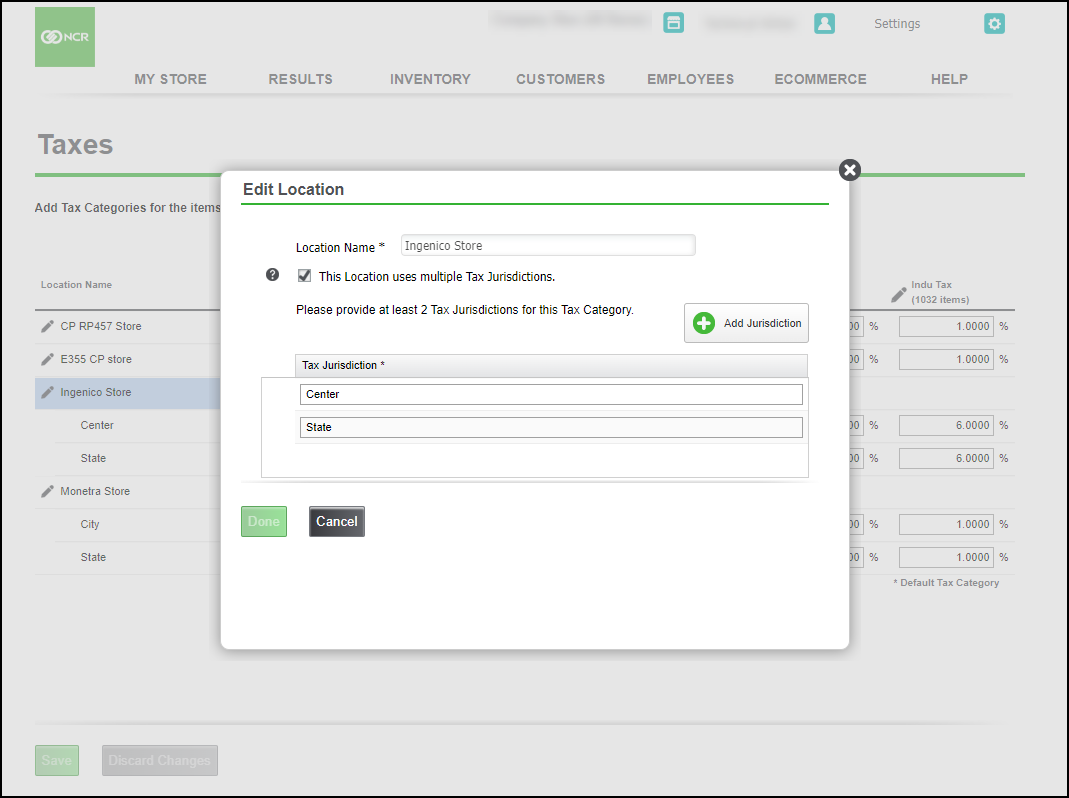
Click Add jurisdiction to add jurisdiction.
-
Enter a name to the each jurisdiction in the fields provided.
-
Click Done.
-OR-
Click Cancel to return to the Taxes screen.
-
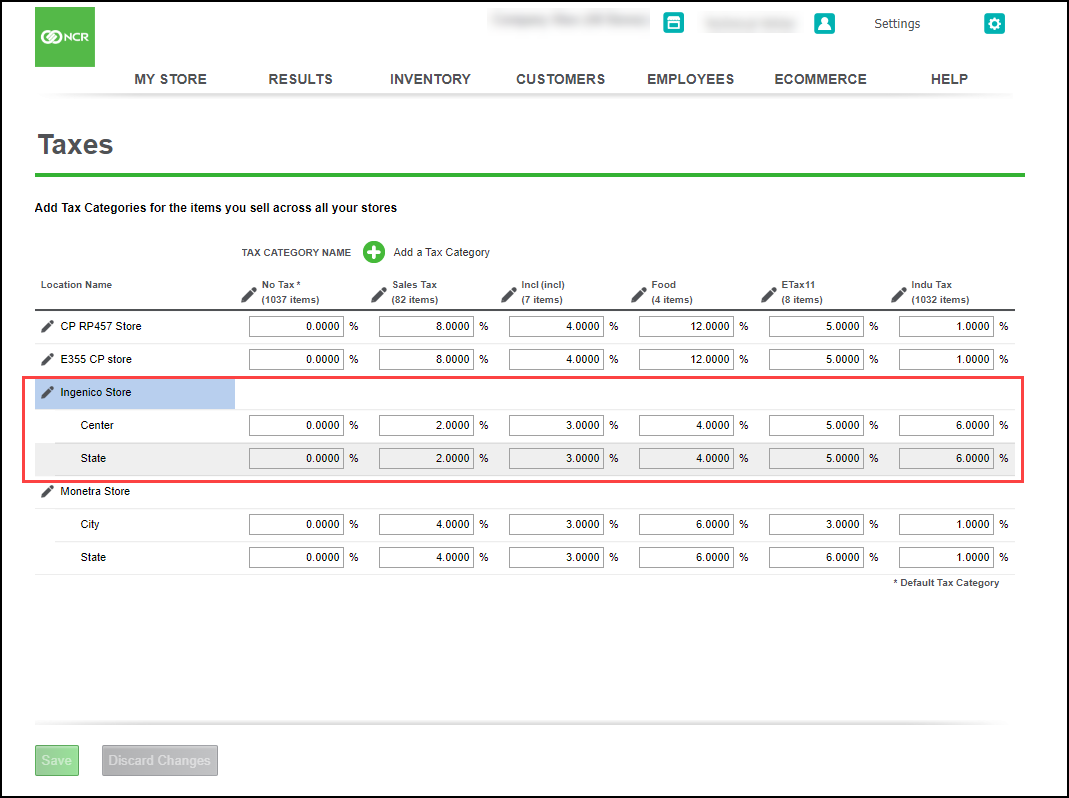
For each tax jurisdiction, enter the tax percentage.
-
Click Save and exit the Taxes screen.
Looking for resources or help with Silver? Click here.