Defining store information
Use Settings > Store Information to designate the information to appear on customer receipts and to configure store specific options. You must log in to a specific site to access this function.
This function offers four menu options (on the left): Store Configuration (active by default), Alert Management, and Menu QR Code.
Working with store configuration
Use the Store Configuration menu option to designate a primary contact and control the look of customer receipts.
- Log in to Back Office using a specific site.
- Select Settings > Store Information. The Store Configuration menu option appears by default.
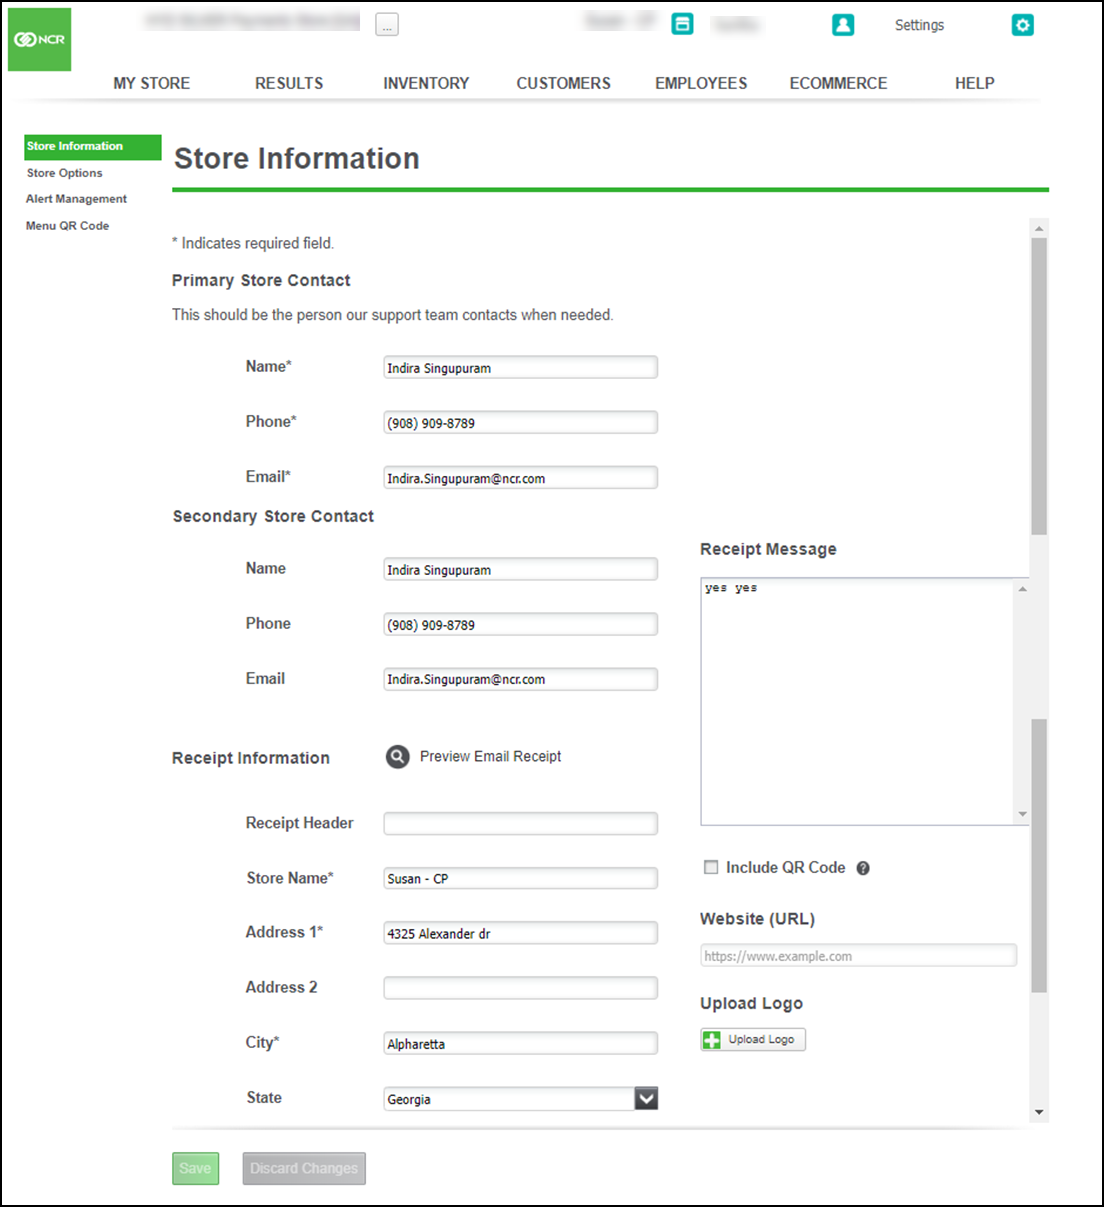
- Under the 'Primary Store Contact' group bar, review and edit the name, phone number, and email address of the primary store contact for NCR support, if necessary. The system retrieves the information entered when creating your account.
- Under the 'Receipt Information' group bar, type the text to appear as the 'Receipt Header.'
Note: Any information you enter under ‘Receipt Information’ appears on the receipts you provide to your customers.
- Type the store name.
- Type the address. You can optionally type additional address information in 'Address 2.'
- Type the city, state, and zip code.
- Type the store phone number.
- In Receipt Message, type any additional information to appear on your receipts.
- (Optional) Select Include QR Code to link to a URL of your choice and to enter the URL in 'Website URL'.
- (Optional) Click Upload Logo to select a logo to appear on all customer facing displays (CFD) and on the print receipt.
- Under the 'Tip Message' group bar, type the message to appear for tip suggestions on the check, and type the tip percentages to use for the suggested tip calculations in Suggestion 1, Suggestion 2, and Suggestion 3.
- Click Preview Email Receipt to view a receipt on the screen.
- Click Save.
- Continue to the next procedure.
Using alert management
The system sends alerts to your Activity Dashboard when unusual sales activity or other important information needs to be brought to your attention. Use the Alert Management menu option to configure the criteria for what is considered unusual.
- Select Alert Management from the left menu.
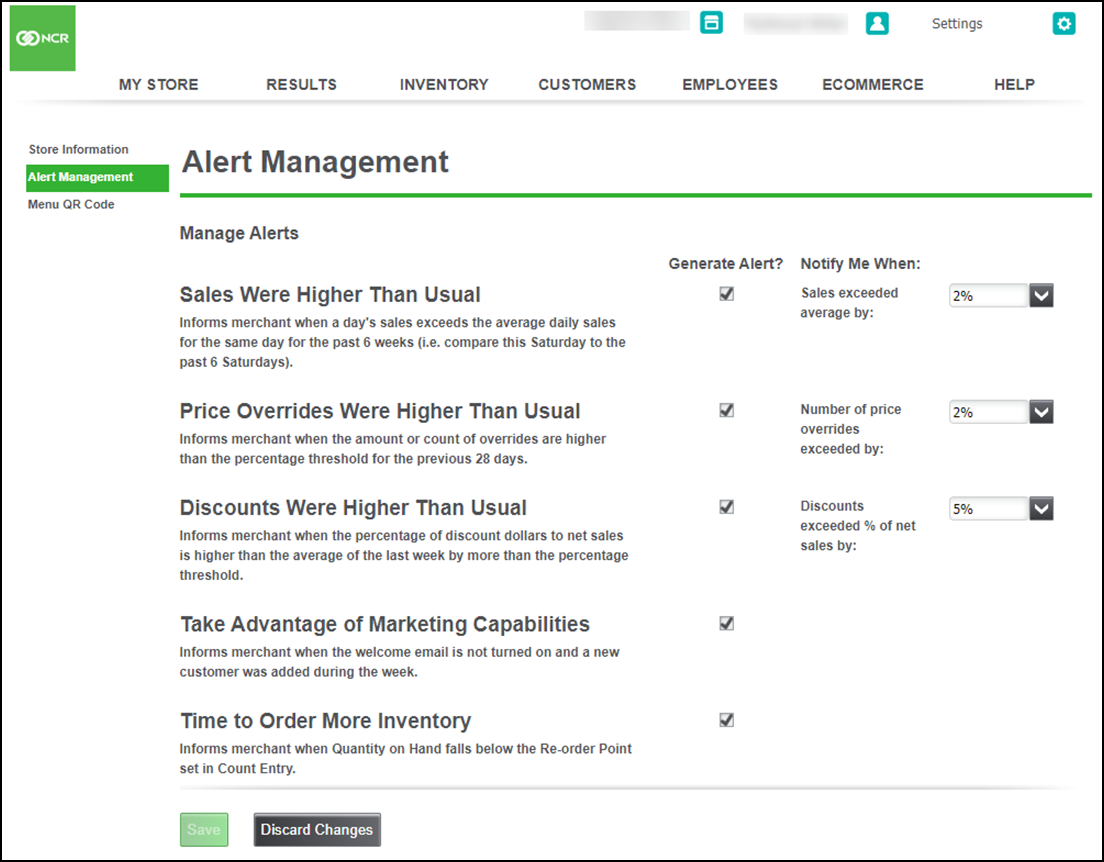
- Configure the following alerts:
- A Sales Were Higher Than Usual alert is generated if the net sales for the day being closed are higher than the average “same day” net sales for the previous 6 weeks by more than the percentage threshold. This alert compares a day’s business against the same day of the week in previous weeks, such as Monday to Monday, Tuesday to Tuesday, etc.
- A Price Overrides Were Higher Than Usual alert is generated if the amount or count of overrides is higher than the percentage threshold for the previous 28 days. This alert also contains a link to the Price Overrides Report in the Back Office.
- A Discounts Were Higher Than Usual alert is generated if the percentage of discount dollars to net sales is higher than the average of the last week by more than the percentage threshold. This alert also contains a link to the Discounts Report in the Back Office.
- A Take Advantage of Marketing Capabilities alert is generated if the welcome email is not turned on and a new customer was added during the week.
- A Time to Order More Inventory alert is generated if Quantity on Hand falls below the Re-order Point set in Count Entry.
- To make an alert active, select the Generate Alert? check box to the right of the alert.
- Determine the percentage threshold at which to generate an alert from the 'Notify Me When' drop-down list for each alert.
- Click Save.
- Continue to the next procedure.
Viewing alerts
Alerts appear on your MY STORE > ACTIVITY SUMMARY page in the upper-right corner. You can view alerts for the previous seven days.
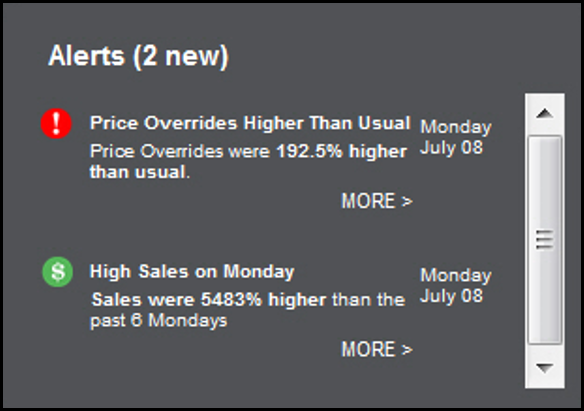
Click More > underneath any alert to view the details that caused the alert to generate.
- The graphs on the right compare the alert trigger data to the data from the previous week to explain why the alert activated.
- Below the graphs, the top five transactions that triggered the alert appear.
Click Hide to exit the alert.
Using menu QR code
Use the Menu QR Code option to upload the QR code of the menu.
To upload menu QR code:
- Log in to Back Office using a specific store.
- Select Settings > Store. The Store Configuration menu option appears by default.
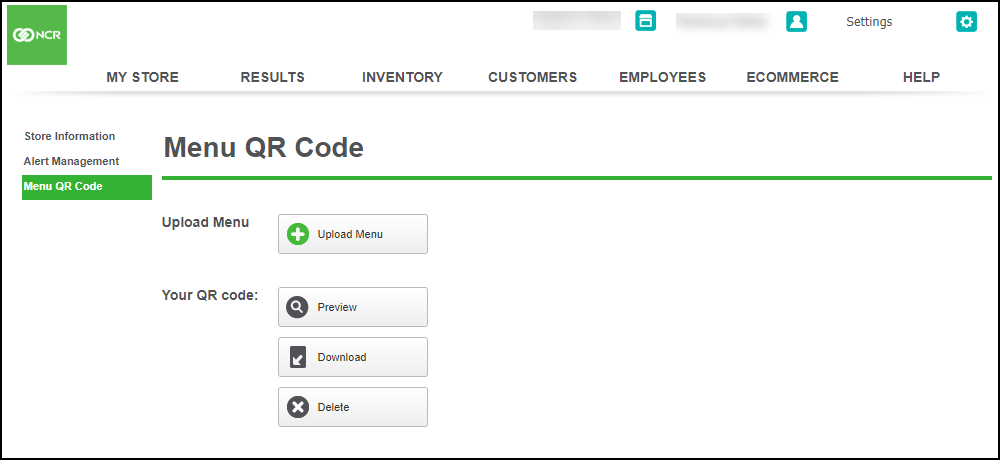
- Select Upload Menu. The Upload Menu screen appears.
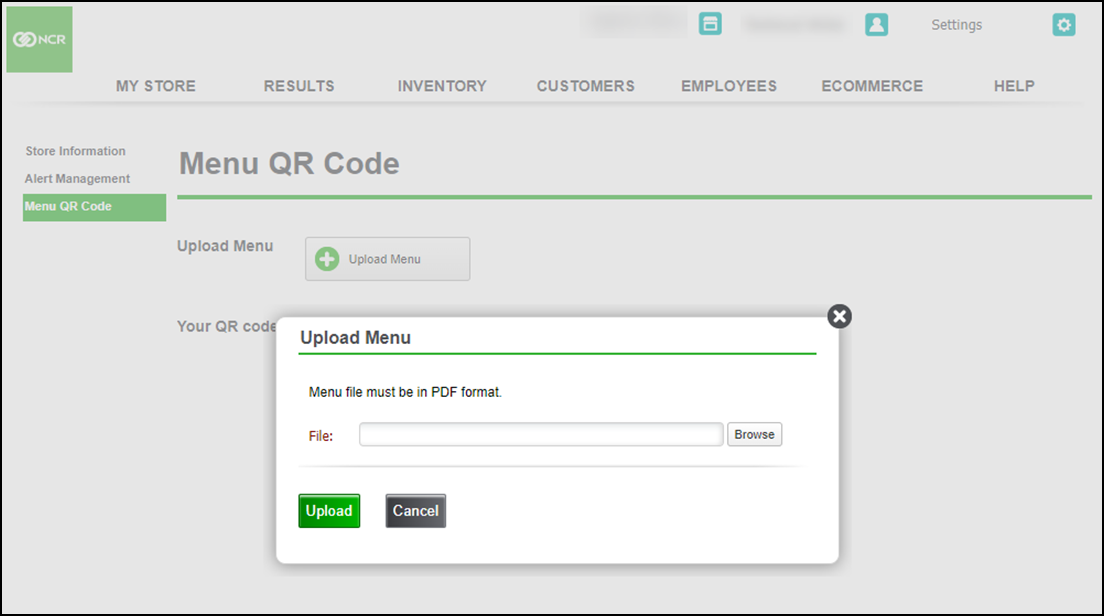
- Select Browse to select the file.
- Click Upload.
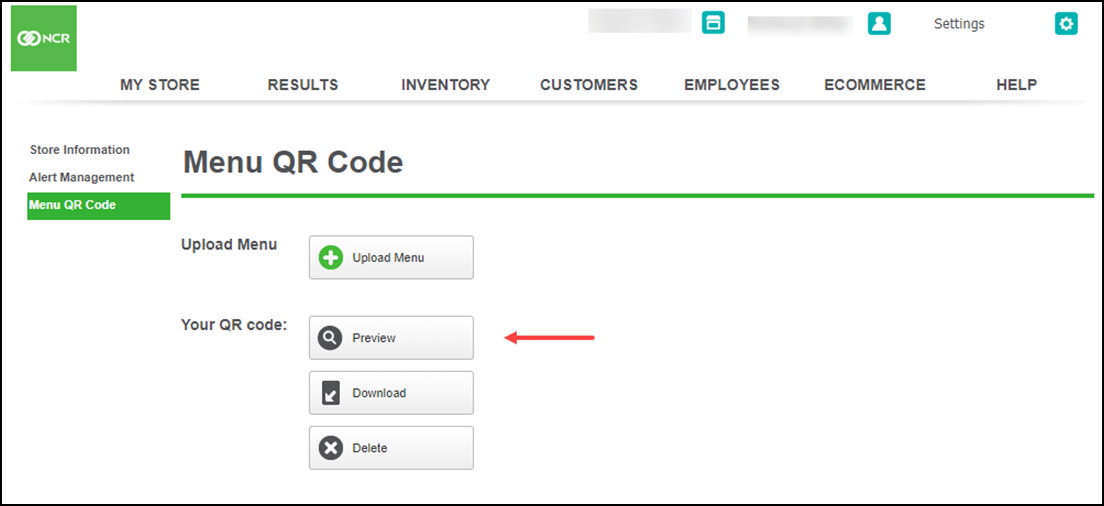
- Select Preview to preview the menu QR code.
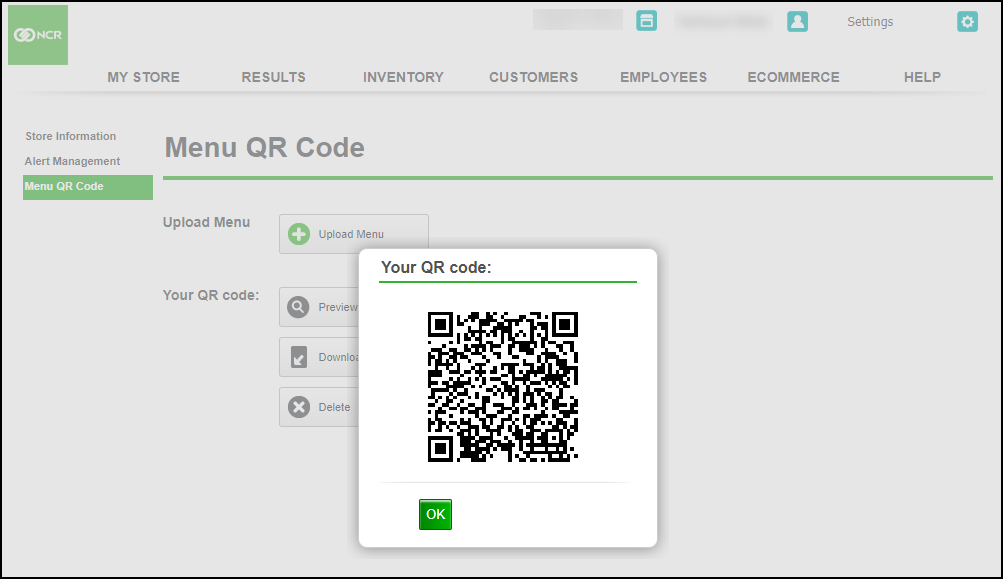
- Click OK.
- Select Download to download your menu QR code.
- Select Delete to delete the menu QR code.
Looking for resources or help with Silver? Click here.