User management
User identity is the latest process of managing users. Hence this page either temporiarily or permanently will not be in use 04-Aug-2025
User Management is an administrative functionality within NVL that enables the creation and management of user accounts. Each user is assigned a specific role, with roles granting varying levels of access such as full, interim, and limited to perform actions in NVL.
User roles are categorized into four types:
- System Admin: A user with full administrative privileges across all modules within NVL. This role includes the ability to create, view, edit, and delete content in areas such as the promotion priority grid, mutual exclusion groups, configuration settings, and user management. Additionally, the System Administrator holds authority to approve promotions for deployment.
- Business Admin: A user with comprehensive access to all business-related modules within NVL, with the exception of the promotion priority grid, mutual exclusion groups, and configuration settings, where access is limited to read-only. This role allows the creation and modification of users but does not permit user deletion. The Business Administrator also holds special privileges to approve promotions for deployment.
- Marketing: A user with full access to create, view, edit, and delete all business-related modules within NVL, except for the promotion priority grid, mutual exclusion groups, configuration settings, and user management, where access is restricted to read-only.
- Customer Service: A user with permissions to create and update consumer segments, customer identifiers, and loyalty data. Access to all other modules is limited to view-only.
-
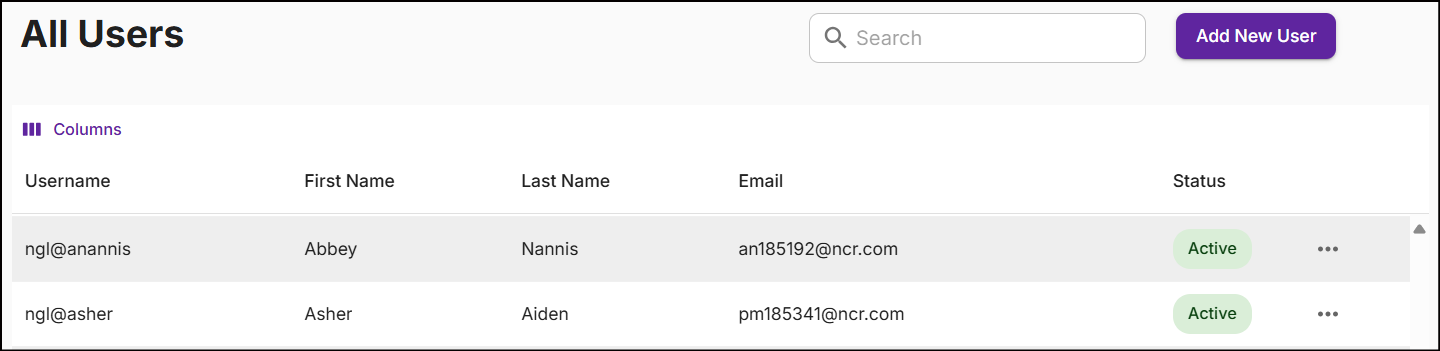
On the left navigation panel, expand Admin and click User Management. The following screen will appear:
-
All Users screen displays Username, First Name, Last Name, Email, Status, and Ellipsis for more options.
- Username: The unique identifier a user uses to log in to the NVL application.
- First and Last Name: The user's full name.
- Email: Email address of the user.
- Status: Indicates whether the user account is currently active or inactive.
-
Locate a user by typing their Username, Full Name, or Email into the search bar.
-
Click the Columns icon to customize, reorder, or adjust the columns. Click here to learn more.
Add new user
Add a user and assign a role that grants access to NVL modules with create, modify, read-only, and delete authorizations.
-
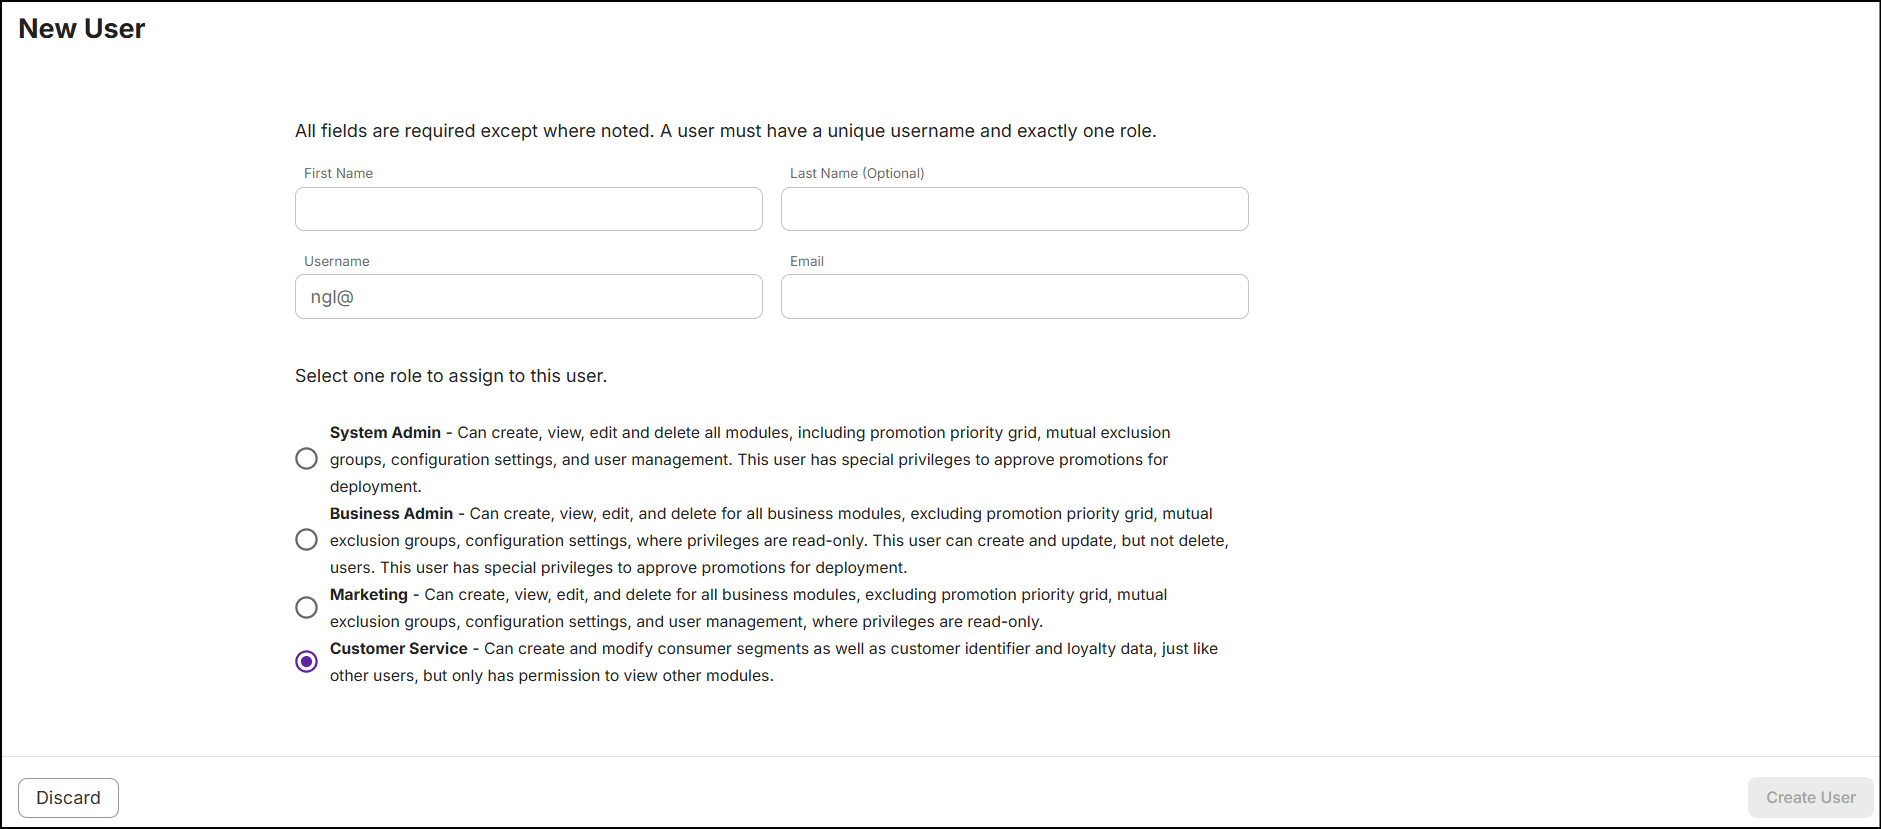
From the All Users screen, click Add New User in the top right corner. A New User screen will appear:
-
Enter the user's First and Last Name (Optional), Username and Email ID in the respective fields.
Note: The organization ID 'ngl@' displayed in the Username field acts as a key to access the application.
-
Select a role that defines the user's access level.
-
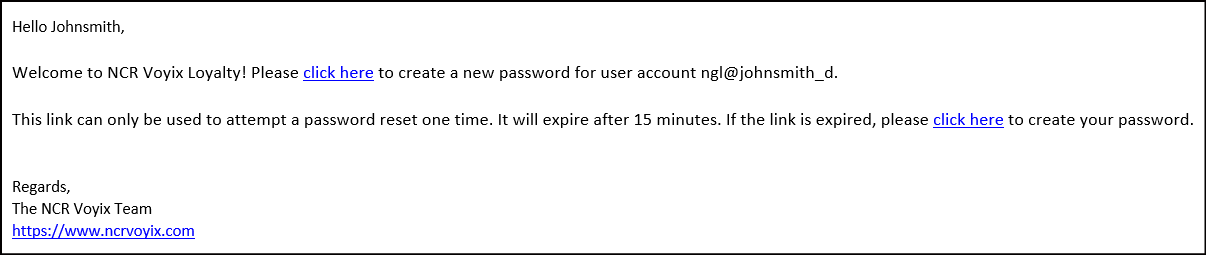
Click Create User. A message 'Successfully created user and assigned roles' appears on the All Users screen. An email is then sent to the user with instructions to set their password.
Note: If you don’t see the email in your inbox, please check your spam or junk folder.
Edit user details
Edit existing user details and permissions by following these steps:
-
Navigate to the All Users screen, tap the Ellipsis and select Edit user details. The Edit User screen will appear:
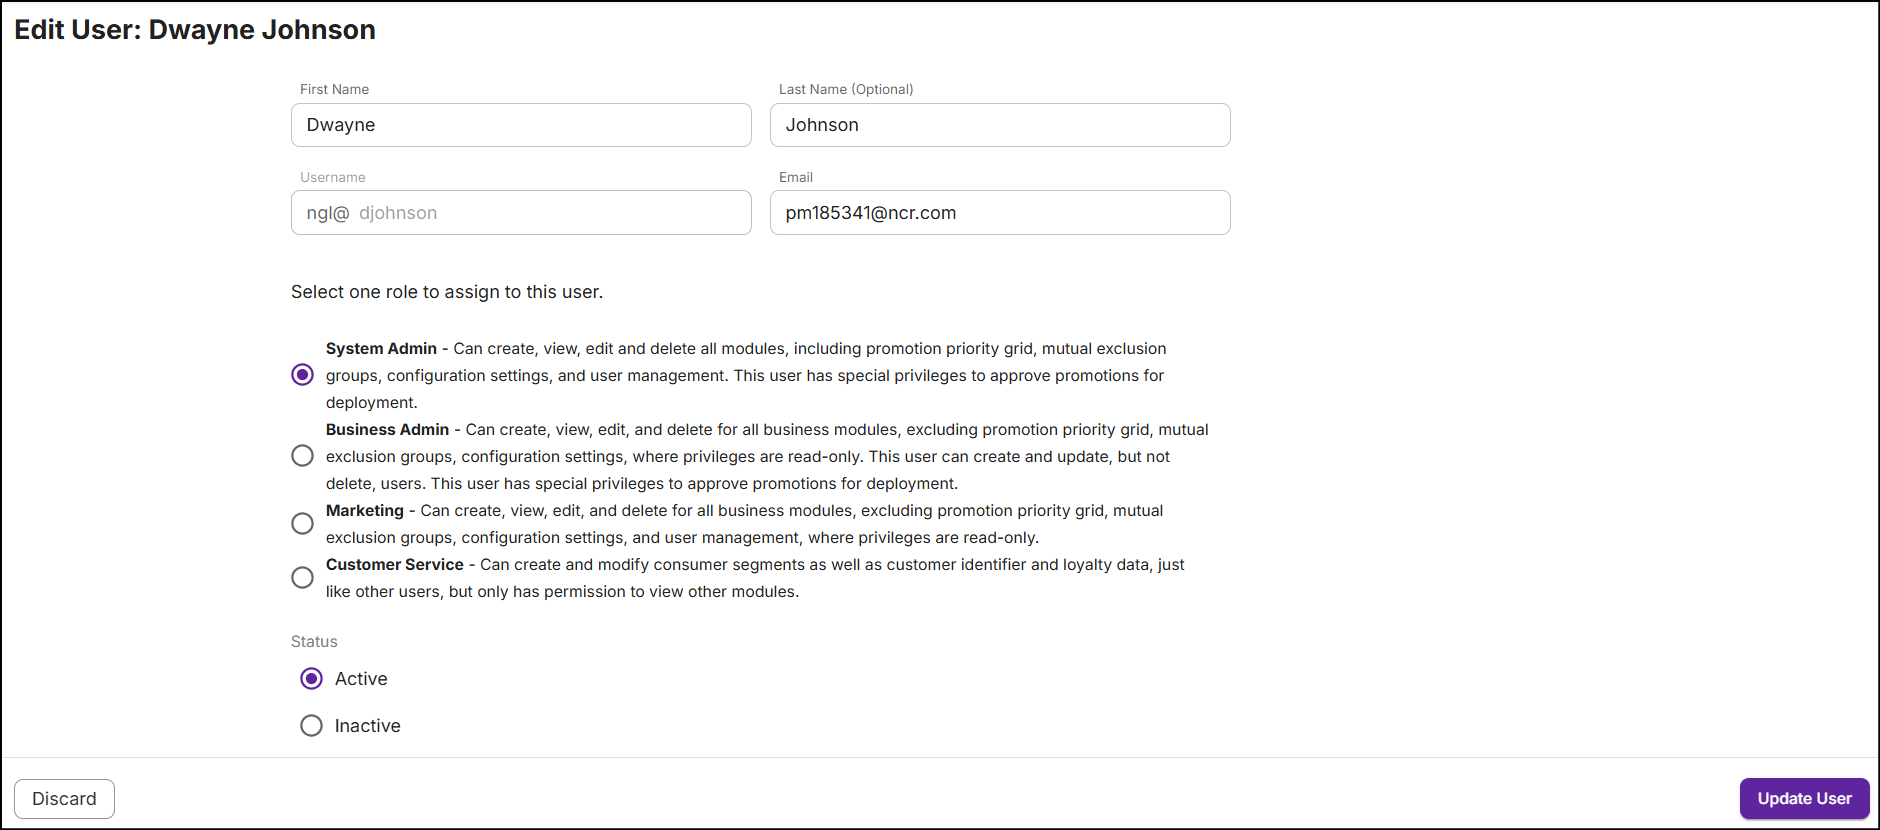
The Username cannot be changed once it’s created. However, you can update other user details.
-
To dismiss any changes, click Discard. A confirmation pop-up will appear. Click Discard again to confirm and exit.
-
Once you modify the details, click on Update User. A message 'Successfully updated user' will appear.
Delete user
Remove a user account and revoke all associated access.
-
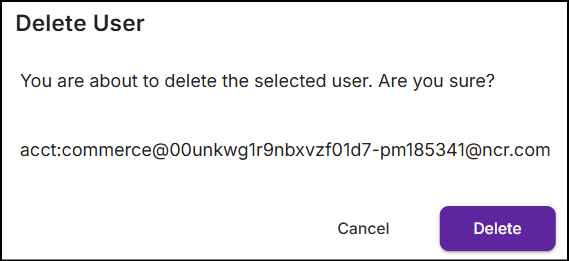
From the All Users screen, tap the ellipsis and select Delete User. The following pop-up will appear:
-
Click Delete. A message 'Successfully deleted user' will be displayed on the All Users screen.
Change user status
Update a user's status to active or inactive based on their current access needs.
For a user with an 'Active' status, tap the ellipsis and select Set as Inactive. To set user status to active, follow the same steps and choose Set as Active. A message 'Successfully updated user' will appear.
Setting a user's status to 'Inactive' revokes their ability to view, create, modify, and delete promotions.