Product management
Product management allows you to create and manage product groups. The products are already available in the NCR Voyix Business Services Platform (BSP) catalog service. It is not possible to create, delete or edit products using NVL UI in the catalog.
The loyalty system identifies products through the following entities:
Item: The smallest unit of a commodity/product offered for sale by a retailer.
Eg: Parker Rollerball Blue 1950324
Department: A collection of items that are frequently used together is typically arranged in close proximity within a retail store.
Eg: Stationery
Merchandising Category: A merchandise category refers to a collection of products that are classified based on shared characteristics and are typically utilized within the same workspace.
Eg: Office and School Supplies
Each entity is assigned a unique identifier along with a description. The identifier can be an alphanumeric value. If the description reads 'unknown' for any entity, it indicates that the entity is not listed in the catalog.
-
From the Dashboard, click on PRODUCTS or click Product Management in the left navigation panel. The following screen appears:
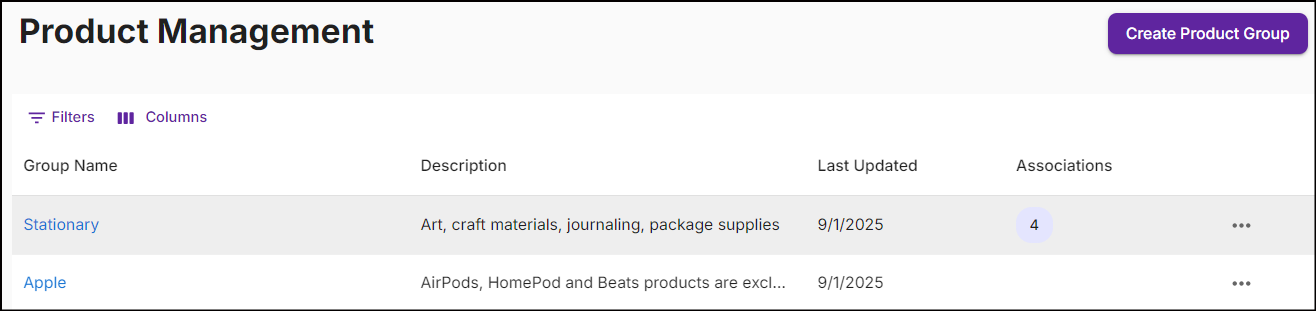
The Product Management screen displays Group Name, Description, Last Updated, Associations, Ellipsis, and an option to create a new product group.
- Group Name: The designated name for the product group.
- Description: A detailed overview of the product group.
- Last Updated: The date when the program was last updated.
- Associations: Promotions linked to the product group.
- Ellipsis: Drop-down menu to edit or delete the product group.
-
Click the Filters icon to filter and search for product groups. Click the Columns icon to customize, reorder, or adjust the columns. Click here to learn more.
-
Click on the Group Name to view the Product Group Summary.
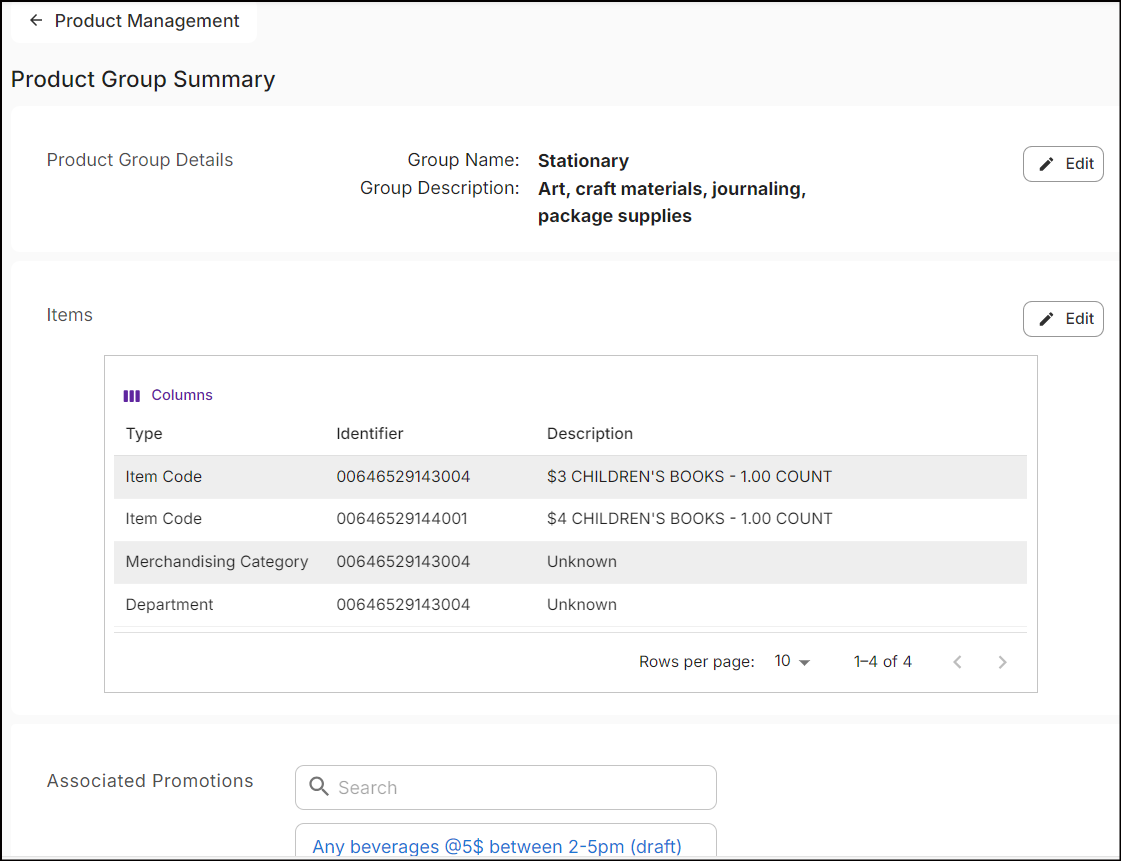
The product group summary gives an overview of the group's details, displays the items included in the group, and outlines the associated promotions.
Create product group
From the Product Management screen, click Create Product Group in the top right corner. A New Product Group screen will appear, featuring items and details sections.
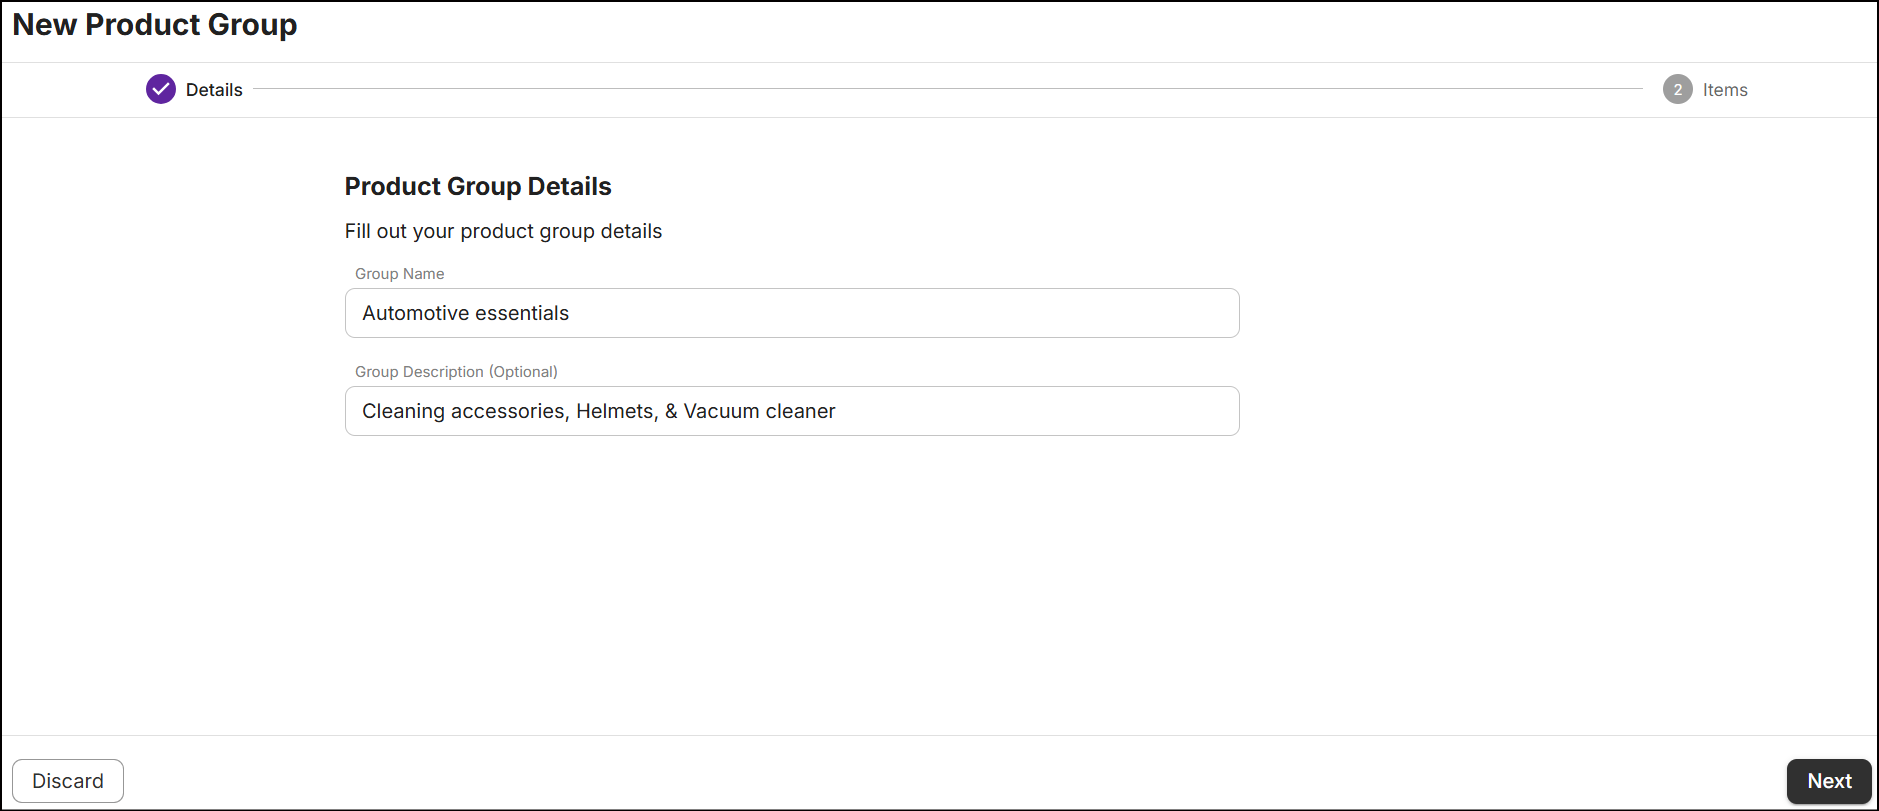
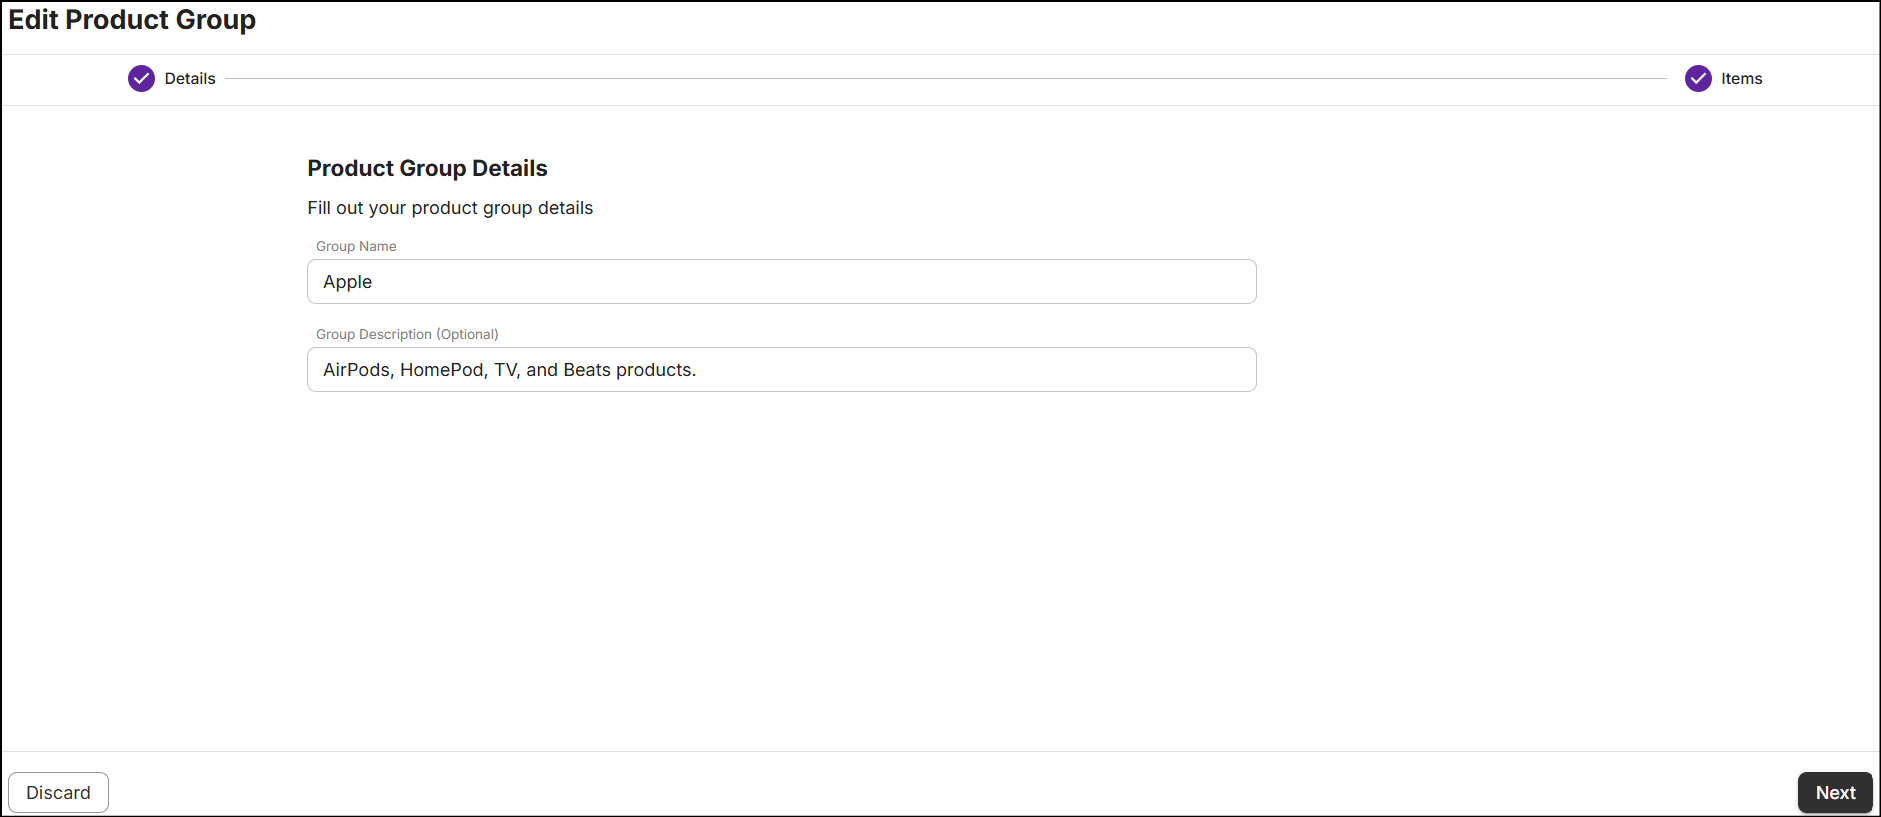
Details
-
In the text box below Group Name, enter a name of the product group.
-
Optionally, enter a Description for the product group highlighting its details.
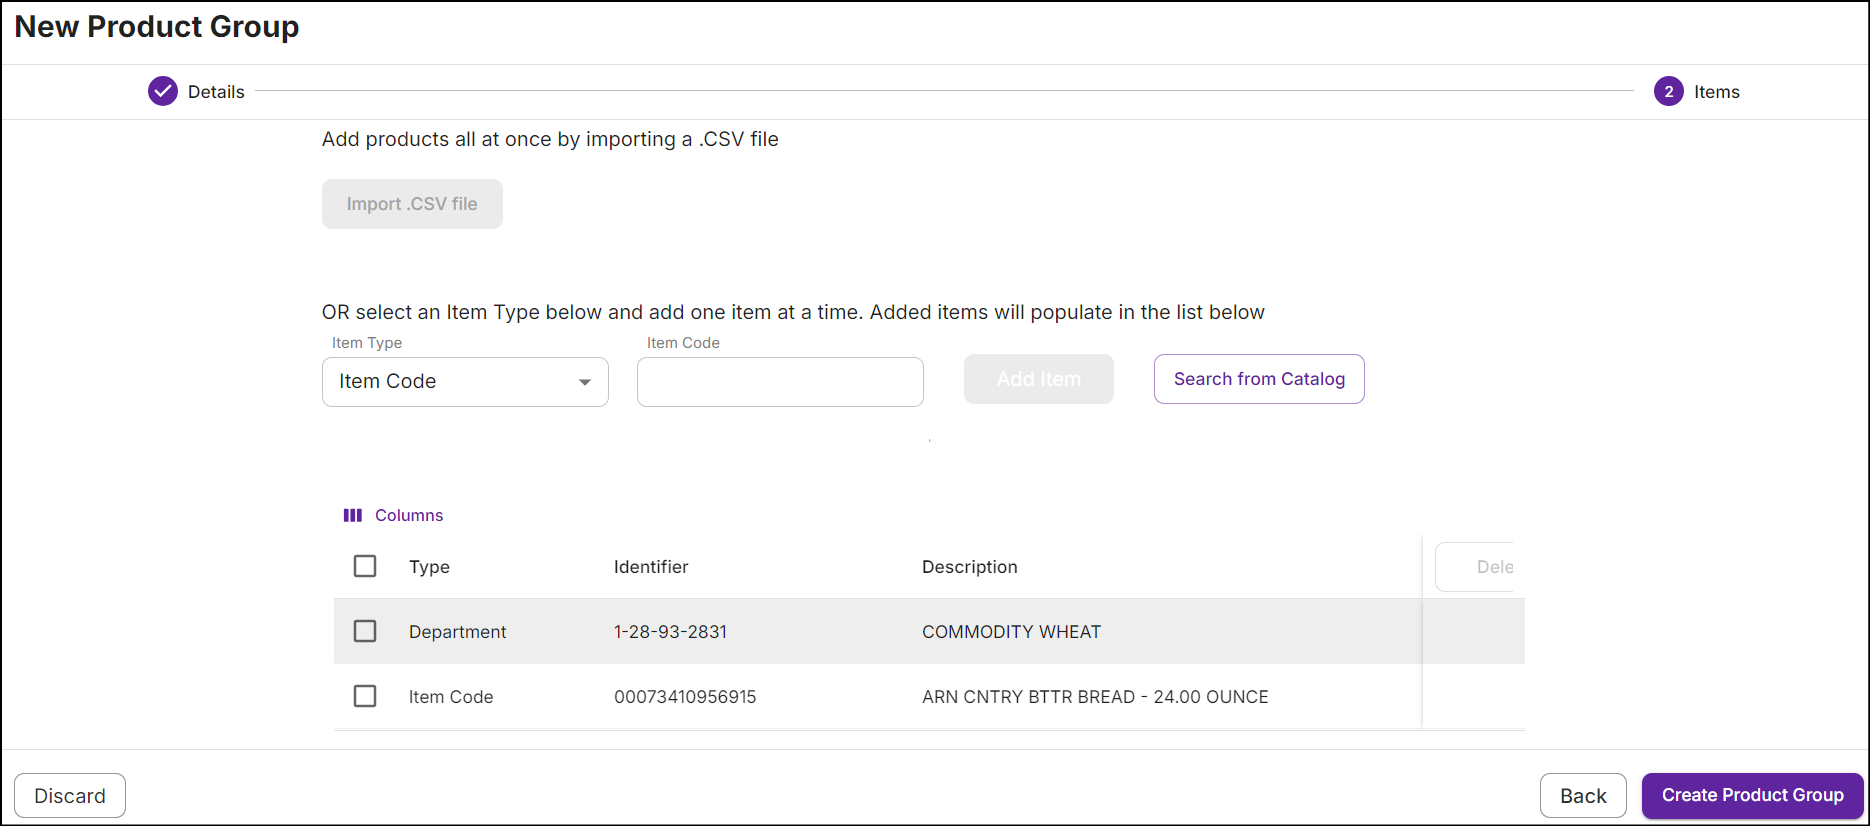
Items
Add items to the group using the following methods:
- Import items using a CSV file.
- Add items, department, or merchandising category one by one.
- Search for and select items from the catalog.
Note: When items are added using any single method (CSV file, individually, or from the catalog), the other methods will be disabled.
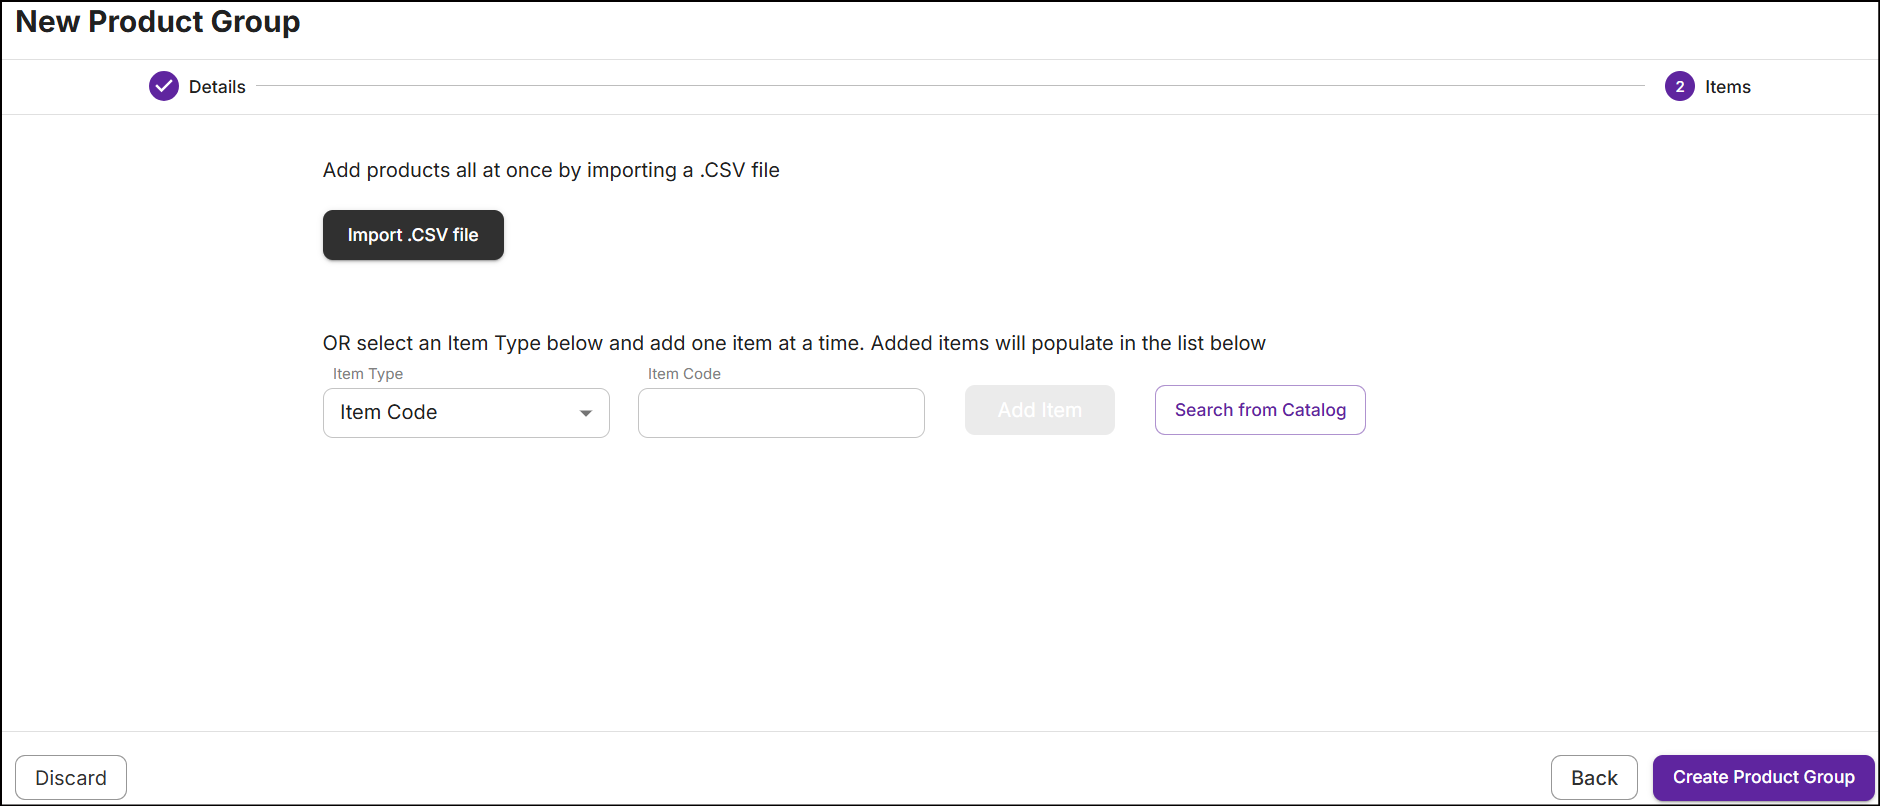
Add items using CSV
-
Click on Import.CSV file and select the file from your local directory. Ensure the CSV file follows the required format.
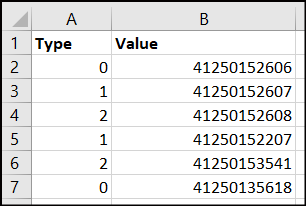
From the above screenshot, the values in the Type field correspond to specific designations: 0 indicates the item code, 1 represents the department, and 2 signifies the merchandising category.
-
During the import, the system automatically removes duplicate items identified in the CSV file.

-
After the import, the total number of items imported from the CSV file is displayed as follows:

Note: To view the entities imported from the CSV file, you need to create the product group first and then access the product group summary.
Add items individually
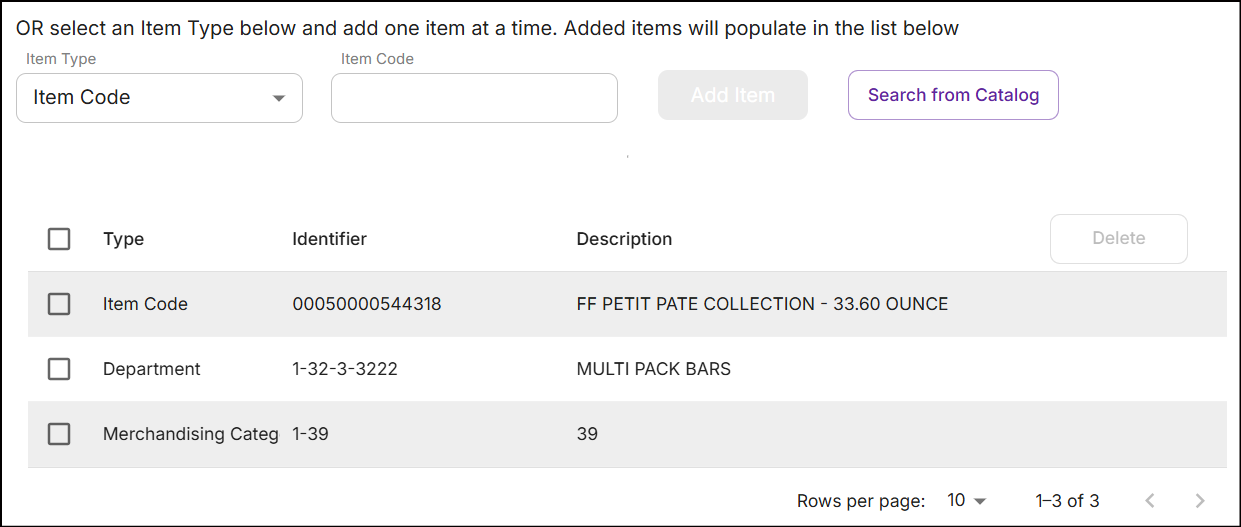
Add items individually using the Item Code, Department ID, or Merchandising Category ID.
-
In the drop-down list below Item Type, select the classification.
-
Enter the code or ID for the selected classification and then click Add Item.
Add items from the catalog
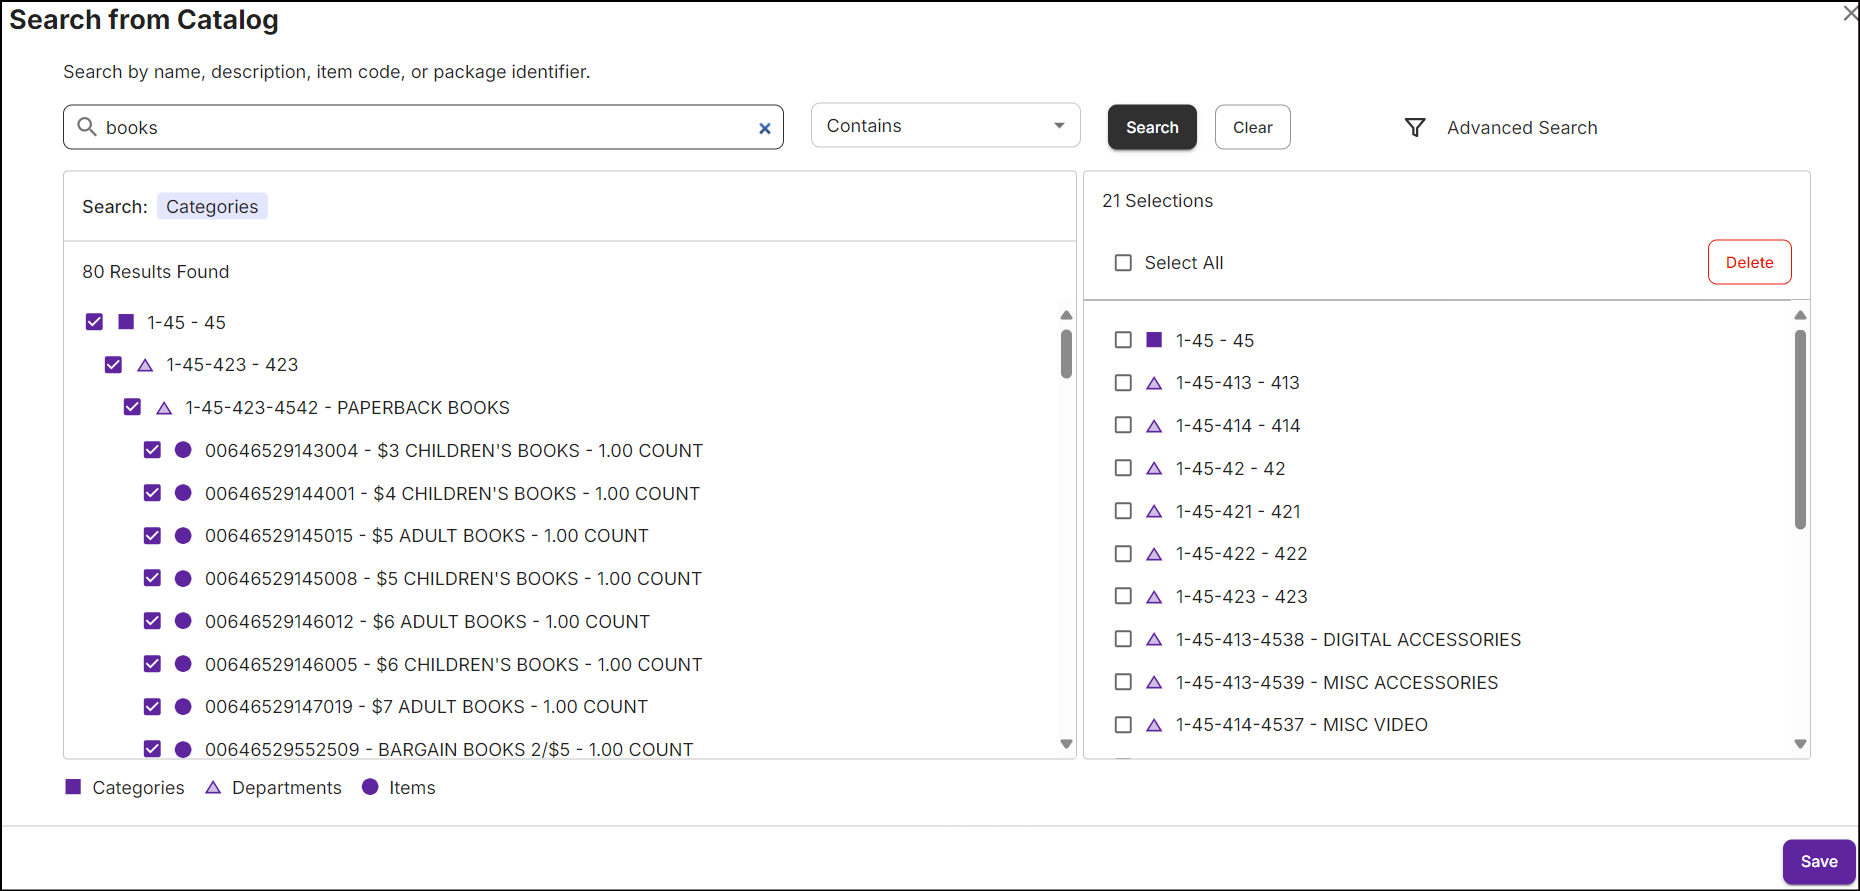
Catalog is a structured collection of products organized into categories. Search for an item by name, description, item code, or package identifier in the catalog.
-
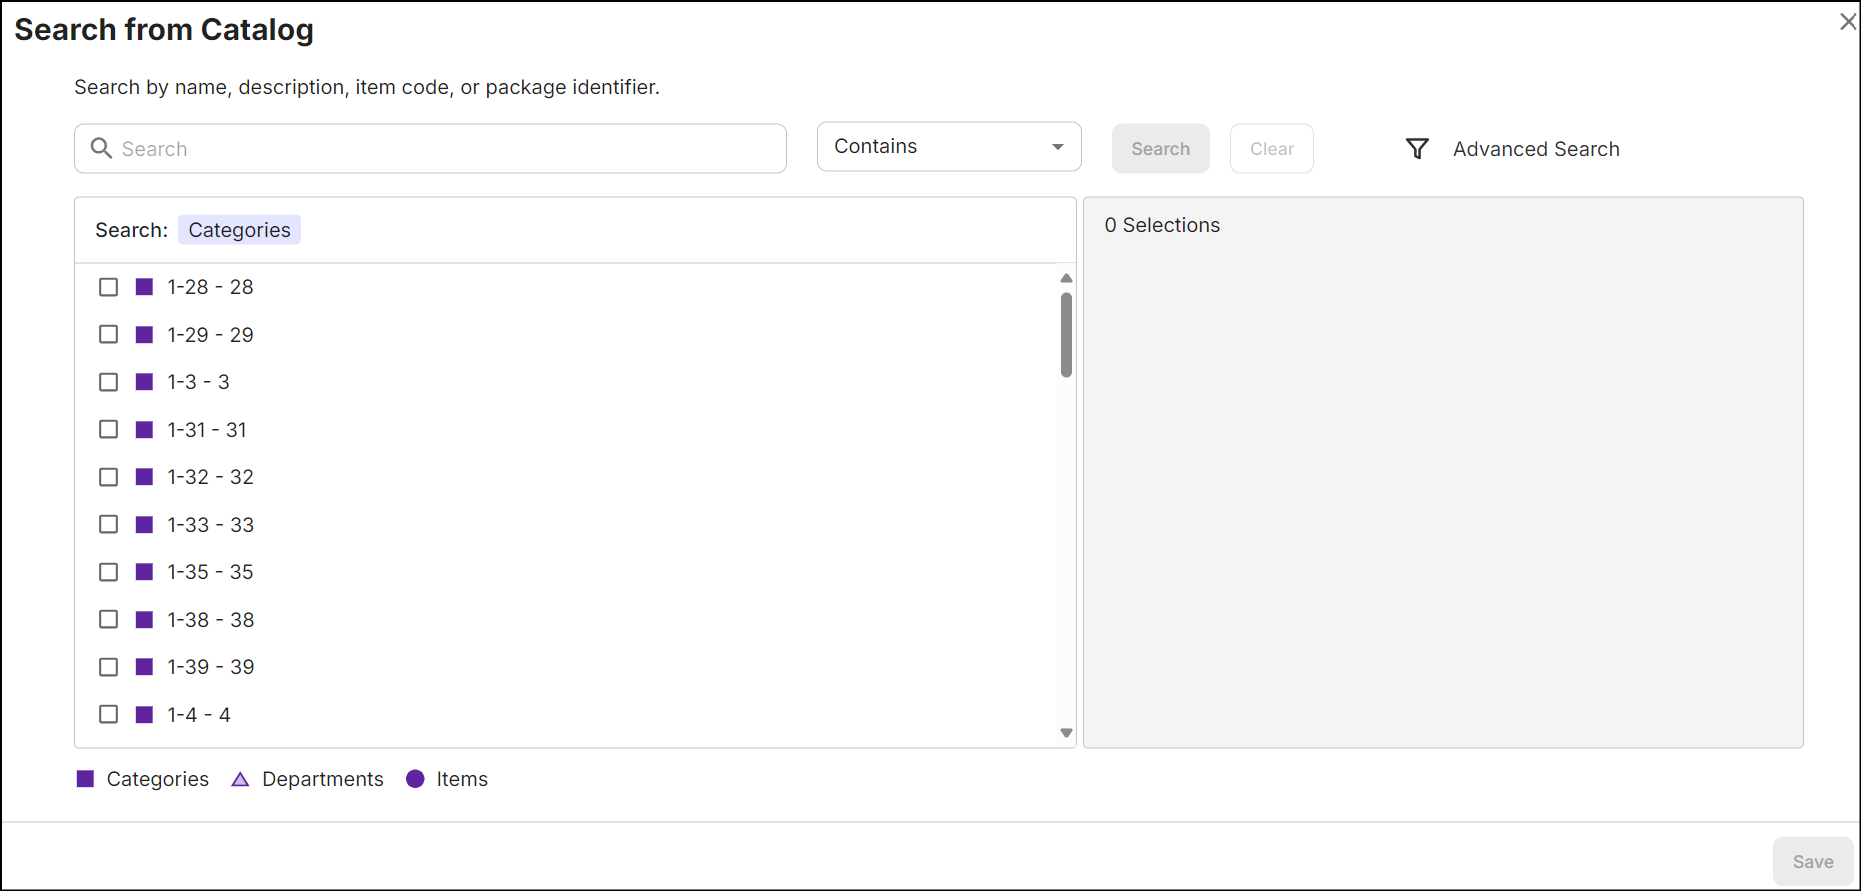
Click on Search From Catalog. The following screen appears:
-
Enter the relevant search criteria in the search bar, select the parameter, and then click Search.
-
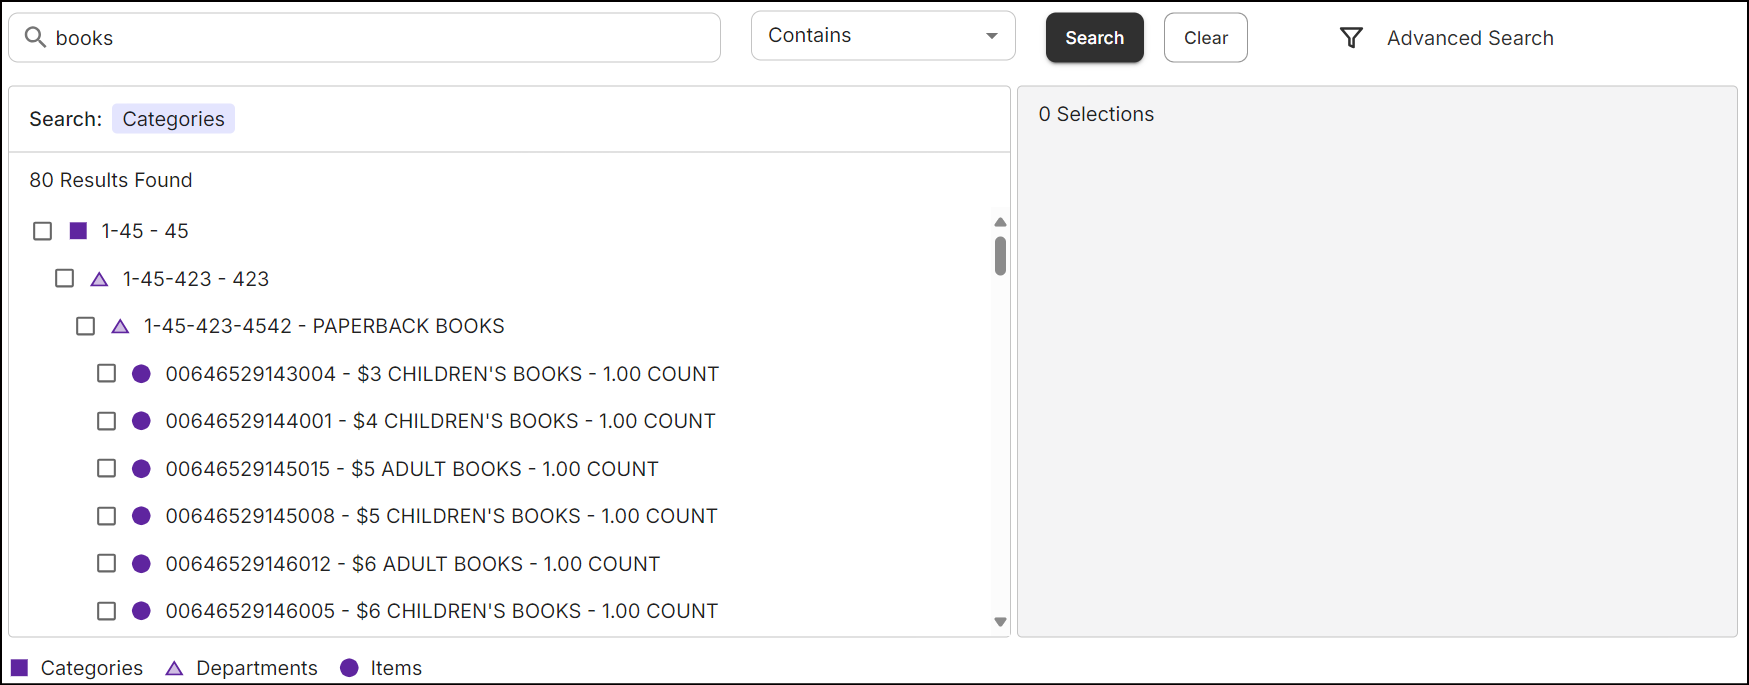
The catalog is structured in a hierarchy to display items according to their respective departments or merchandising categories, as shown below:
-
Check the box on the left panel to add an item, department, or category. Your selections will then appear on the right panel.
-
When you select a department or merchandising category, all items associated with it are included.
-
To delete items from the right panel, select the checkbox for the respective item and then click Delete.
-
Once you add items to the right panel, click Save. The items added from the catalog will appear in the Items section.
Note: To ensure that the correct items are added, verify the description.
Advanced search in catalog
Search for items using an advanced search option.

-
Select the category, choose the parameter, enter the search criteria, and click Apply Filter.
-
Click Clear to remove the filters.

Click the + Add button next to the search bar to apply more filters.
Once you add items to the product group using any method, click on Create Product Group. A message 'Successfully created product group' will appear on the Product Management screen.
Button navigations
When you are in the Details or Items section, the buttons at the bottom of the screen perform the following functions:
-
Click Discard to discard any changes made to the product group. Any details entered in the group will not be saved.
-
Click Next to proceed to the Items section.
-
Click Back to go to the Details section.
Edit product group
Update the existing product group to modify its details in the following ways:
-
Navigate to Product Management screen, tap on Ellipsis, and select Edit Product Group.
or
-
Click on the Group Name to view the Product Group Summary, then click the Edit button available for any specific section.
Delete product group
Delete the product group that is not associated to the promotion.
-
Navigate to the Product Management screen, tap on Ellipsis, and select Delete Group.

The Delete Group option is disabled when a product group is associated with a promotion. To delete the group, ensure that all associations from drafts, templates, and promotions are removed first.

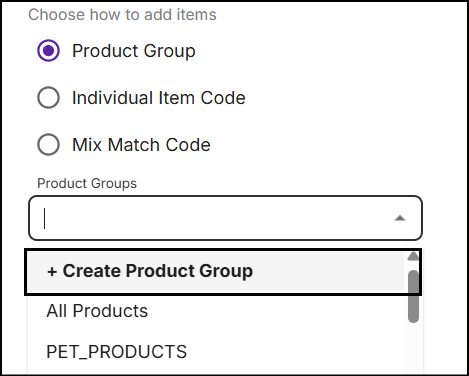
Create a product group on the fly
Create a product group on the fly while configuring any product action during the promotion creation process.
-
In the drop-down list below Product Groups, click + Create Product Group.
-
In the dailog box under Details section, enter the Group Name.

-
Optionally enter a Description for the "Group" and click Next.
-
In the Items section, add items individually or search and add them from the catalog.
-
Click Save Group.